上一篇文章简单的介绍了一下metric的相关知识 :
ganglia gmond实际上是将metric collection模块化来处理的, 包括自带的metric, 也是模块化来加载的, 所以非常适合扩展.
例如 :
在gmond的配置文件中加载模块 :
主机名和IP如下 :
首先要启动gmond, (当然, 不启动也可以, 启动gmond除了可以发心跳包, 还可以将location等基础信息发过去)
例如在172.16.3.150模拟发送172.16.3.151的metric信息 :

[参考]
[root@db-172-16-3-221 cpu]# cd /opt/ganglia-core-3.6.0/
[root@db-172-16-3-221 ganglia-core-3.6.0]# ll
total 24
drwxr-xr-x 2 root root 4096 Sep  9 11:03 bin
drwxr-xr-x 3 root root 4096 Sep 15 09:31 etc
drwxr-xr-x 2 root root 4096 Sep  9 11:03 include
drwxr-xr-x 3 root root 4096 Sep  9 11:03 lib64
drwxr-xr-x 2 root root 4096 Sep  9 11:03 sbin
drwxr-xr-x 3 root root 4096 Sep  9 11:03 share
[root@db-172-16-3-221 ganglia-core-3.6.0]# cd lib64/
[root@db-172-16-3-221 lib64]# ll
total 660
drwxr-xr-x 2 root root   4096 Sep  9 11:03 ganglia
lrwxrwxrwx 1 root root     25 Sep  9 11:03 libganglia-3.6.0.so.0 -> libganglia-3.6.0.so.0.0.0
-rwxr-xr-x 1 root root 257554 Sep  9 11:03 libganglia-3.6.0.so.0.0.0
-rw-r--r-- 1 root root 408276 Sep  9 11:03 libganglia.a
-rwxr-xr-x 1 root root   1270 Sep  9 11:03 libganglia.la
lrwxrwxrwx 1 root root     25 Sep  9 11:03 libganglia.so -> libganglia-3.6.0.so.0.0.0
[root@db-172-16-3-221 lib64]# cd ganglia/
[root@db-172-16-3-221 ganglia]# ll
total 700
-rwxr-xr-x 1 root root 86896 Sep  9 11:03 modcpu.so
-rwxr-xr-x 1 root root 84118 Sep  9 11:03 moddisk.so
-rwxr-xr-x 1 root root 17896 Sep  9 11:03 modgstatus.so
-rwxr-xr-x 1 root root 84078 Sep  9 11:03 modload.so
-rwxr-xr-x 1 root root 85832 Sep  9 11:03 modmem.so
-rwxr-xr-x 1 root root 31655 Sep  9 11:03 modmulticpu.so
-rwxr-xr-x 1 root root 84480 Sep  9 11:03 modnet.so
-rwxr-xr-x 1 root root 83862 Sep  9 11:03 modproc.so
-rwxr-xr-x 1 root root 53954 Sep  9 11:03 modpython.so
-rwxr-xr-x 1 root root 85136 Sep  9 11:03 modsys.so
在gmond的配置文件中加载模块 :
# less /opt/ganglia-core-3.6.0/etc/gmond.conf
/* Each metrics module that is referenced by gmond must be specified and
   loaded. If the module has been statically linked with gmond, it does
   not require a load path. However all dynamically loadable modules must
   include a load path. */
modules {
  module {
    name = "core_metrics"
  }
  module {
    name = "cpu_module"
    path = "modcpu.so"
  }
  module {
    name = "disk_module"
    path = "moddisk.so"
  }
  module {
    name = "load_module"
    path = "modload.so"
  }
  module {
    name = "mem_module"
    path = "modmem.so"
  }
  module {
    name = "net_module"
    path = "modnet.so"
  }
  module {
    name = "proc_module"
    path = "modproc.so"
  }
  module {
    name = "sys_module"
    path = "modsys.so"
  }
}
当gmond自带的metric模块不能满足你的监控需求时, 你需要扩展metric collection.
扩展方法比较多, 例如直接修改gmond, 添加模块并重新编译gmond.
然后在gmond.conf中添加新增的模块, 并配置metric采集项.
或者使用c/c++, python , php, perl遵循gmond的标准来写扩展模块.
然后在gmond.conf中添加新增的模块, 并配置metric采集项.
(编译时需要开启php, perl的功能, 具体见源码里的 configure --help)
最后, 还可以使用gmetric命令直接向集群中的多播地址或单播地址发送metric信息.
显然使用gmetric来得最快, 但是使用gmetric有一个弊端, 必须用户自己调度gmetric的执行,
而如果使用模块的话, 可以统一在gmond.conf中配置, gmond handler会根据gmond的配置来调用模块来完成metric的采集, 不需要用户去调度.
接下来要使用gmetric来测试一下自定义metric收集.
[root@db-172-16-3-221 ganglia-3.6.0]# gmetric --help
gmetric 3.6.0

The Ganglia Metric Client (gmetric) announces a metric
on the list of defined send channels defined in a configuration file

Usage: gmetric [OPTIONS]...

  -h, --help            Print help and exit
  -V, --version         Print version and exit
  -c, --conf=STRING     The configuration file to use for finding send channels
                           (default=`/opt/ganglia-core-3.6.0/etc/gmond.conf')
  -n, --name=STRING     Name of the metric
  -v, --value=STRING    Value of the metric
  -t, --type=STRING     Either
                          string|int8|uint8|int16|uint16|int32|uint32|float|double
  -u, --units=STRING    Unit of measure for the value e.g. Kilobytes, Celcius
                          (default=`')
  -s, --slope=STRING    Either zero|positive|negative|both  (default=`both')
  -x, --tmax=INT        The maximum time in seconds between gmetric calls
                          (default=`60')
  -d, --dmax=INT        The lifetime in seconds of this metric  (default=`0')
  -g, --group=STRING    Group(s) of the metric (comma-separated)
  -C, --cluster=STRING  Cluster of the metric
  -D, --desc=STRING     Description of the metric
  -T, --title=STRING    Title of the metric
  -S, --spoof=STRING    IP address and name of host/device (colon separated) we
                          are spoofing  (default=`')
  -H, --heartbeat       spoof a heartbeat message (use with spoof option)
首先在集群中要有gmond监听来自网络中的metric消息.
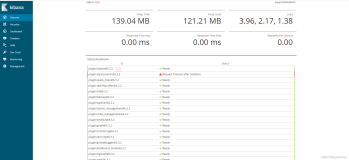
例如我们网络中只有一个gmond服务, 并在多播地址上起了一个监听来接收网络中发送过来的metric信息.
[root@db-172-16-3-221 ganglia-3.6.0]# ps -ewf|grep gmond
nobody    4271     1  0 15:51 ?        00:00:00 gmond
root      4930 26259  0 16:54 pts/2    00:00:00 grep gmond
[root@db-172-16-3-221 ganglia-3.6.0]# netstat -anp|grep gmon
tcp        0      0 0.0.0.0:8649                0.0.0.0:*                   LISTEN      4271/gmond
udp        0      0 172.16.3.221:63894          239.2.11.71:8649            ESTABLISHED 4271/gmond
udp        0      0 239.2.11.71:8649            0.0.0.0:*                               4271/gmond
接下来我在多播域中的另一台机器上配置一下gmond.conf
主要配置如下, 务必配置正确的udp发送通道.
[root@150 etc]# vi /opt/ganglia-core-3.6.0/etc/gmond.conf
/* This configuration is as close to 2.5.x default behavior as possible
   The values closely match ./gmond/metric.h definitions in 2.5.x */
globals {
  daemonize = yes
  setuid = yes
  user = nobody
  debug_level = 0
  max_udp_msg_len = 1472
  mute = no
  deaf = no
  allow_extra_data = yes
  host_dmax = 86400 /*secs. Expires (removes from web interface) hosts in 1 day */
  host_tmax = 20 /*secs */
  cleanup_threshold = 300 /*secs */
  gexec = no
  # By default gmond will use reverse DNS resolution when displaying your hostname
  # Uncommeting following value will override that value.
  # override_hostname = "mywebserver.domain.com"
  # If you are not using multicast this value should be set to something other than 0.
  # Otherwise if you restart aggregator gmond you will get empty graphs. 60 seconds is reasonable
  send_metadata_interval = 0 /*secs */

}

/*
 * The cluster attributes specified will be used as part of the <CLUSTER>
 * tag that will wrap all hosts collected by this instance.
 */
cluster {
  name = "test"
  owner = "digoal"
  latlong = "111 122"
  url = "http://dba.sky-mobi.com"
}

/* The host section describes attributes of the host, like the location */
host {
  location = "1,2,4"
}

/* Feel free to specify as many udp_send_channels as you like.  Gmond
   used to only support having a single channel */
udp_send_channel {
  #bind_hostname = yes # Highly recommended, soon to be default.
                       # This option tells gmond to use a source address
                       # that resolves to the machine's hostname.  Without
                       # this, the metrics may appear to come from any
                       # interface and the DNS names associated with
                       # those IPs will be used to create the RRDs.
  mcast_join = 239.2.11.71
  port = 8649
  ttl = 10
}
主机名和IP如下 :
[root@150 etc]# hostname
150.sky-mobi.com
[root@150 etc]# ifconfig
em1       Link encap:Ethernet  HWaddr 00:22:19:60:77:8F
          inet6 addr: fe80::222:19ff:fe60:778f/64 Scope:Link
          UP BROADCAST RUNNING MULTICAST  MTU:1500  Metric:1
          RX packets:599238829 errors:0 dropped:0 overruns:0 frame:0
          TX packets:67014382 errors:0 dropped:0 overruns:0 carrier:0
          collisions:0 txqueuelen:1000
          RX bytes:882536084904 (821.9 GiB)  TX bytes:8841108757 (8.2 GiB)

lo        Link encap:Local Loopback
          inet addr:127.0.0.1  Mask:255.0.0.0
          inet6 addr: ::1/128 Scope:Host
          UP LOOPBACK RUNNING  MTU:16436  Metric:1
          RX packets:81579301 errors:0 dropped:0 overruns:0 frame:0
          TX packets:81579301 errors:0 dropped:0 overruns:0 carrier:0
          collisions:0 txqueuelen:0
          RX bytes:15164677095 (14.1 GiB)  TX bytes:15164677095 (14.1 GiB)

ovirtmgmt Link encap:Ethernet  HWaddr 00:22:19:60:77:8F
          inet addr:172.16.3.150  Bcast:172.16.3.255  Mask:255.255.255.0
          inet6 addr: fe80::222:19ff:fe60:778f/64 Scope:Link
          UP BROADCAST RUNNING MULTICAST  MTU:1500  Metric:1
          RX packets:93718326 errors:0 dropped:0 overruns:0 frame:0
          TX packets:86213477 errors:0 dropped:0 overruns:0 carrier:0
          collisions:0 txqueuelen:0
          RX bytes:1098952054073 (1023.4 GiB)  TX bytes:11330242206 (10.5 GiB)

ovirtmgmt:1 Link encap:Ethernet  HWaddr 00:22:19:60:77:8F
          inet addr:172.16.13.150  Bcast:172.16.13.255  Mask:255.255.255.0
          UP BROADCAST RUNNING MULTICAST  MTU:1500  Metric:1
首先要启动gmond, (当然, 不启动也可以, 启动gmond除了可以发心跳包, 还可以将location等基础信息发过去)
Usage: gmetric [OPTIONS]...

  -h, --help            Print help and exit
  -V, --version         Print version and exit
  -c, --conf=STRING     The configuration file to use for finding send channels
                           (default=`/opt/ganglia-core-3.6.0/etc/gmond.conf')
  -n, --name=STRING     Name of the metric
  -v, --value=STRING    Value of the metric
  -t, --type=STRING     Either
                          string|int8|uint8|int16|uint16|int32|uint32|float|double
  -u, --units=STRING    Unit of measure for the value e.g. Kilobytes, Celcius
                          (default=`')
  -s, --slope=STRING    Either zero|positive|negative|both  (default=`both')
  -x, --tmax=INT        The maximum time in seconds between gmetric calls
                          (default=`60')
  -d, --dmax=INT        The lifetime in seconds of this metric  (default=`0')
  -g, --group=STRING    Group(s) of the metric (comma-separated)
  -C, --cluster=STRING  Cluster of the metric
  -D, --desc=STRING     Description of the metric
  -T, --title=STRING    Title of the metric
  -S, --spoof=STRING    IP address and name of host/device (colon separated) we
                          are spoofing  (default=`')
  -H, --heartbeat       spoof a heartbeat message (use with spoof option)
[root@150 etc]# gmetric -c /opt/ganglia-core-3.6.0/etc/gmond.conf -n load_one -v 1.0 -t float -s both -x 20 -g load -C test -D "load per min" -T "load one"
例如在172.16.3.150模拟发送172.16.3.151的metric信息 :
[root@150 etc]# gmetric -c /opt/ganglia-core-3.6.0/etc/gmond.conf -n load_one -v 1.0 -t float -s both -x 20 -g load -C test -D "load per min" -T "load one" -S "172.16.3.151:digoal_host"
不指定
-S "172.16.3.151:digoal_host"的话, 就是以当前主机的metric来发送.
如果不启动gmond的话, 那么需要发心跳包过去.
[root@150 etc]# gmetric -c /opt/ganglia-core-3.6.0/etc/gmond.conf -n load_one -v 1.0 -t float -s both -x 20 -g load -C test -D "load per min" -T "load one" -S "172.16.3.151:digoal_host" -H
发完心跳包后 :
[注意]
1. gmond 负责监听的节点, 必须开放防火墙的访问, 例如 :
[root@db-172-16-3-221 kernel-doc-2.6.32]# netstat -anp|grep gmond
tcp        0      0 0.0.0.0:8649                0.0.0.0:*                   LISTEN      4271/gmond
udp        0      0 172.16.3.221:63894          239.2.11.71:8649            ESTABLISHED 4271/gmond
udp        0      0 239.2.11.71:8649            0.0.0.0:*                               4271/gmond
务必允许其他主机访问这个多播地址.