Retrofit是一个不错的网络请求库,官方的介绍就是“Type-safe HTTP client for Android and Java by Square, Inc.”
1、通过配置gradle将Retrofit框架引入项目:
注意:Retrofit 要求的最低环境是Java 7和Android 2.3.
当你尝试调用第二次的时候,就会出现失败的错误。实际上,可以直接克隆一个实例,代价非常低。当你想要多次请求一个接口的时候,直接用 clone 的方法来生产一个新的,相同的可用对象吧。
动态的url访问@PATH
我们再写一个简单的方法
访问的代码,也就很简单了
当然相同的方式也适用于POST,只需要把注解修改为
POST请求体的方式向服务器传入json字符串@Body
俗话说,光说不练假把势,写个简单的例子吧
源代码
参考:
compile 'com.squareup.retrofit2:(insert latest version)'
2、编写API服务代码
首先定义请求接口,即程序中都需要什么请求操作,Retrofit会将你的HTTP API变成一个Java接口,下面是一个如何请求 GitHub API 的例子:
public interface GitHub {
@GET("/repos/{owner}/{repo}/contributors")
Call<List<Contributor>> contributors(
@Path("owner") String owner, @Path("repo") String repo);
}
public interface GitHub {
@GET("/repos/{owner}/{repo}/contributors")
Call<List<Contributor>> contributors(
@Path("owner") String owner, @Path("repo") String repo);
}
通过
@GET注解标识为get请求,@GET中所填写的value和API_URLAPI_URL在构造retrofit对象时给出。
下面看如何通过
retrofit完成上述的请求:
// 创建一个简单的适配器
Retrofit retrofit = new Retrofit.Builder()
.baseUrl(API_URL)
.addConverterFactory(GsonConverterFactory.create())
.build();
// 创建一个接口实例
GitHub github = retrofit.create(GitHub.class);
Call<List<Contributor>> call = github.contributors("square", "retrofit");
我们通过
我们通过
Retrofit.create就可以拿到我们定义的GitHub 的实例,调用其方法即可拿到一个Call对象
3、调用接口
这个 Call 对象是从你的 API 接口返回的参数化后的对象。调用跟接口名相同的函数名,你就会得到一个实例出来。我们可以直接调用它的同步方法 execute(),但是得留意一下,这个方法只能调用一次。
response=call.execute();
// This will throw IllegalStateException:
 response=call.execute();
Call<List<Contributor>>call2=call.clone();
// This will not throw:
response=call2.execute();想要实现异步,需要调用 enqueue 方法。
call.enqueue(newCallback<List<Contributor>>(){
@Override
void onResponse(Call<List<Contributor>> call, Response<List<Contributor>> response){
// ...
}
@Override
void onFailure(Call<List<Contributor>> call,Throwablet){
// ...
}});
这里需要指出的是:
- 接口中的方法必须有返回值,比如是
Call<T>类型 - 注意
addConverterFactory(GsonConverterFactory.create())方法,在之前的1的版本中默认有Gson做为json的转换器,在2的版本中没有默认的转换器,你需要自己定义转换器,如果你想使用Gson,就必须要在gradle添加Gson的依赖项:
compile 'com.squareup.retrofit2:converter-gson:2.0.2'
当然除了gson以外,还提供了以下的选择:
Gson: com.squareup.retrofit2:converter-gson
Jackson: com.squareup.retrofit2:converter-jackson
Moshi: com.squareup.retrofit2:converter-moshi
Protobuf: com.squareup.retrofit2:converter-protobuf
Wire: com.squareup.retrofit2:converter-wire
Simple XML: com.squareup.retrofit2:converter-simplexml
Scalars (primitives, boxed, and String): com.squareup.retrofit2:converter-scalars
当然也支持自定义,你可以选择自己写转化器完成数据的转化
Rxjava 集成
Retrofit 1中集成了三中请求执行机制:同步,异步和Rxjava;在Retrofit 2中默认的只有同步和异步的请求,但是Retrofit提供了一个添加其他请求执行机制进Retrofit中的方法,你可以添加更多的机制在你的app中,比如说Rxjava
Gradle 依赖
compile 'com.squareup.retrofit2:adapter-rxjava:2.0.2'
compile 'io.reactivex:rxandroid:1.0.1'
接下来需要在创建service实例之前添加一个CallAdapter进Retrofit对象
Retrofit retrofit = new Retrofit.Builder()
    .baseUrl(baseUrl);
    .addCallAdapterFactory(RxJavaCallAdapterFactory.create())
    .addConverterFactory(GsonConverterFactory.create())
    .build();
@GET("/repos/contributors")
Call<List<Contributor>> contributors();
对比之前的方法,该方法只会访问特定的url,调用的时候直接调用即可:
Call<List<Contributor>>call=gitHub.contributors();
而之前的方法相比:
@GET("/repos/{owner}/{repo}/contributors")
Call<List<Contributor>> contributors(@Path("owner") String owner,@Path("repo") String repo);
Call<List<Contributor>> contributors(@Path("owner") String owner,@Path("repo") String repo);
通过retrofit提供的@PATH注解,我们可以通过传入不同的参数值组合成不同的url路径来获得不同的数据。我们的@GET注解中使用{owner}和{repo}声明了访问路径, 这里你可以把{owner}和{repo}当做占位符,而实际运行中会通过@PATH("owner")和@Path("repo")所标注的参数进行替换。
查询参数的设置@Query
对于下面的url
http://baseurl/repos/contributors?type=1
http://baseurl/repos/contributors?type=2
即一般的传参,我们可以通过@Query注解方便的完成,我们在接口中添加一个方法:
@GET("/repos/contributors")
Call<List<Contributor>> contributors(@Query("type") int type );
Call<List<Contributor>> call=github.contributors(1);
//call执行相关代码就不再写了
@POST即可我们app很多时候跟服务器通信,会选择直接使用POST方式将json字符串作为请求体发送到服务器,那么我们看看这个需求使用retrofit该如何实现。
再次添加一个方法
@GET("/repos/contributors/add") Call<List<Contributor>> contributors(
@Body Contributor contributor);
提交的代码其实基本都是一致的:
//省略retrofit的构建代码
Call<List<Contributor>> call = github.contributors(newContributor ());
//省略call执行相关代码
其实就是使用@Body这个注解标识我们的参数对象即可
下面看一下单文件上传
多文件上传@PartMap
这里使用了一个新的注解@PartMap,这个注解用于标识一个Map,Map的key为String类型,代表上传的键值对的key(与服务器接受的key对应),value即为RequestBody,有点类似@Part的封装版本。
执行的代码:
调用:
Call<List<Contributor>> call = gitHub.download();
call.enqueue(new Callback<List<Contributor>>(){
@Override
public void onResponse(Call<List<Contributor>> call, Response<List<Contributor>> response){
InputStream is = response.body().byteStream();
//save file
}
4.配置OkHttpClient
下面对应okhttp,还有两种requestBody,一个是
表单的方式传递键值对@FormUrlEncoded
FormBody,一个是MultipartBody,前者以表单的方式传递简单的键值对,后者以POST表单的方式上传文件可以携带参数,retrofit也二者也有对应的注解
我们模拟一个登录的方法,添加一个方法:
访问的代码:
@POST("/login")
@FormUrlEncoded
Call<List<Contributor>> login(@Field("username") String username, @Field("password") String password);
//省略retrofit的构建代码
Call<List<Contributor>> call = github.login("xmr", "123");
//省略call执行相关代码
单文件上传@Multipart
@Multipart
@POST("/upload")
Call<List<Contributor>> uploadFile(@Part MultipartBody.Part file, @Part("name") RequestBody name);
这里@MultiPart的意思表示允许多个@Part,我们这里使用了2个@Part,第一个我们准备上传个文件,使用了MultipartBody.Part
类型,第二个为简单的键值对。
简单的使用:
File file = new File(Environment.getExternalStorageDirectory(), "icon.png");
RequestBody photoRequestBody = RequestBody.create(MediaType.parse("image/png"), file);
MultipartBody.Part photo = MultipartBody.Part.createFormData("photos", "icon.png", photoRequestBody);
Call<List<Contributor>> call = gitHub.uploadFile(photo, RequestBody.create(null, "abc"))
也很清楚,多个@Part,每个Part对应一个RequestBody@Multipart
@POST("/multipleUpload")
Call<List<Contributor>> upload(@PartMap Map<String, RequestBody> params, @Part("name") RequestBody name);File file = new File(Environment.getExternalStorageDirectory(), "pic.png");
RequestBody photo = RequestBody.create(MediaType.parse("image/png"),file);
Map<String,RequestBody> photos = new HashMap<>();
photos.put("photos\"; filename=\"icon.png", photo);
photos.put("name", RequestBody.create(null, "abc"));
Call<List<Contributor>> call = gitHub.upload(photos, RequestBody.create(null, "123"));@Part,这里又看到设置文件时相对应的key很奇怪,例如上例"photos\"; filename=\"icon.png",前面的photos就是与服务器对应的key,后面filename是服务器得到的文件名,参数虽然奇怪,但是也可以动态的设置文件名,不太影响使用
下载文件
写个方法
@GET("download")
@GET("download")
Call<List<Contributor>> download();
call.enqueue(new Callback<List<Contributor>>(){
@Override
public void onResponse(Call<List<Contributor>> call, Response<List<Contributor>> response){
InputStream is = response.body().byteStream();
//save file
}
    @Override
public void onFailure(Call<List<Contributor>> call, Throwable t){
}
});
多时候,比如你使用retrofit需要统一的log管理,给每个请求添加统一的header等,这些都应该通过okhttpclient去操作,比如
addInterceptor例如:
OkHttpClient client = new OkHttpClient.Builder().addInterceptor(new Interceptor(){
//log,统一的header等
    @Override
    public okhttp3.Response intercept(Chain chain) throws IOException{
    return null;
}}).build();
或许你需要更多的配置,你可以单独写一个OkhttpClient的单例生成类,在这个里面完成你所需的所有的配置,然后将OkhttpClient实例通过方法公布出来,设置给retrofit。
设置方式:
Retrofit retrofit = new Retrofit.Builder()
    .callFactory(OkHttpUtils.getClient())
    .build();
目录结构如下:
接口类如下:
public interface ApiService {我们写一个单例来实现我们的接口
@GET("/api/teacher")
Call<NewsModel> getJsonData(@Query("type") int type, @Query("num") int num);
}
public class ApiImp {MainActivity.java类如下:
public static final String BASE_URL = "http://www.imooc.com";
private ApiService mApiService;
private static ApiImp sInstance = new ApiImp();
public ApiImp() {
//2.0以后版本用法
Retrofit.Builder builder = new Retrofit.Builder();
builder.baseUrl(BASE_URL)
.addCallAdapterFactory(RxJavaCallAdapterFactory.create())
.addConverterFactory(GsonConverterFactory.create());
Retrofit retrofit = builder.build();
mApiService = retrofit.create(ApiService.class);
}
public static ApiImp getInstance() {
if (sInstance == null) {
sInstance = new ApiImp();
}
return sInstance;
}
public Call<NewsModel> getJsonData(int type, int num) {
return mApiService.getJsonData(type, num);
}
}
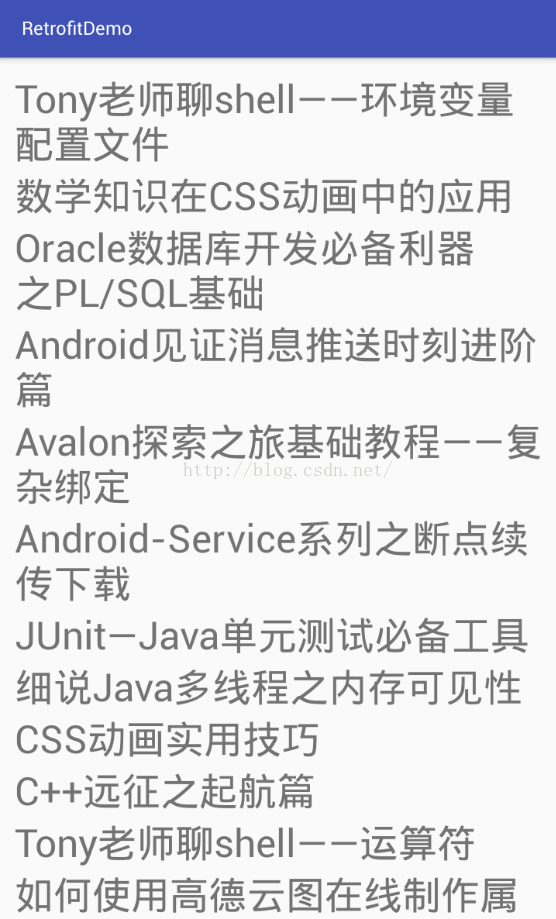
public class MainActivity extends AppCompatActivity {

    private RecyclerView mRecyclerView;
    private RecyclerAdapter mAdapter;
    private List<NewsModel.DataEntity> mDataList;

    @Override
    protected void onCreate(Bundle savedInstanceState) {
        super.onCreate(savedInstanceState);
        setContentView(R.layout.activity_main);
        mRecyclerView = (RecyclerView) findViewById(R.id.rv_main);
        LinearLayoutManager linearLayoutManager = new LinearLayoutManager(this);
        linearLayoutManager.setOrientation(LinearLayoutManager.VERTICAL);
        mRecyclerView.setLayoutManager(linearLayoutManager);
        mDataList = new ArrayList<>();
        mAdapter = new RecyclerAdapter(this, mDataList);
        mRecyclerView.setAdapter(mAdapter);

        /**
         *同步调用方法
         */
//        new Thread(new Runnable() {
//            @Override
//            public void run() {
//                Call<NewsModel> call = ApiImp.getInstance().getJsonData(4, 20);
//                Response<NewsModel> response;
//                try {
//                    response = call.execute();
//                    Log.e(">>>", ">>>" + response.body().getStatus());
//                    mDataList.addAll(response.body().getData());
//                    mAdapter.notifyDataSetChanged();
//                } catch (IOException e) {
//                    e.printStackTrace();
//                }
//            }
//        }).start();


        /**
         * 异步调用方法
         */
        ApiImp.getInstance().getJsonData(4, 20).enqueue(new Callback<NewsModel>() {
            @Override
            public void onResponse(Call<NewsModel> call, Response<NewsModel> response) {
                Log.e(">>>", ">>>" + response.body().getData().size());
                mDataList.addAll(response.body().getData());
                mAdapter.notifyDataSetChanged();
            }

            @Override
            public void onFailure(Call<NewsModel> call, Throwable t) {
                Log.e(">>>", ">>>>error");
            }
        });
    }
}
最后效果:
源代码
参考:

