Kubernetes是一个基于Docker的集群管理系统,现在也可以在ARM集群上运行。这 里介绍基于HypriotOS操作系统的Kubernetes安装和使用过程(基于树莓派)。也可以在多种基于ARMbian操作系统 (https://www.armbian.com/)的ARM板上运行(参见 https://www.armbian.com/download/)。
1、烧录操作系统固件 HypriotOS 到 SD cards
硬件上, 至少两个Raspberry Pis 能够相互连接,并且连接到Internet。
首先, 我们需要一个操作系统,下载和烧写 HypriotOS。最快速的方式是使用 flash tool,如下:
flash --hostname node01 https://github.com/hypriot/image-builder-rpi/releases/download/v1.4.0/hypriotos-rpi-v1.4.0.img.zip
对所有的树莓派执行上面的操作,然后启动。
然后, SSH进入Raspberry Pis:
ssh pirate@node01.local
首次启动密码为 hypriot 。
2、安装 Kubernetes
需要root 权限,以root账户进入系统,如下:
sudo su -
为了安装Kubernetes和依赖软件, 需要执行一些命令。首先, 安装kubernetes APT 仓库的key,添加软件安装源:
$ curl -s https://packages.cloud.google.com/apt/doc/apt-key.gpg | apt-key add - $ echo "deb http://apt.kubernetes.io/ kubernetes-xenial main" > /etc/apt/sources.list.d/kubernetes.list … 安装 kubeadm 到所有节点:
$ apt-get update && apt-get install -y kubeadm
上面的操作结束后, 初始化 Kubernetes ,在master node 使用:
$ kubeadm init --pod-network-cidr 10.244.0.0/16 这里的命令,添加 --pod-network-cidr 很重要!因为我们将使用 flannel 虚拟网络,关于 flannel 的注意事项如下,使用之前务必了解:
Some notes about flannel: We picked flannel here because that’s the only available solution for ARM at the moment (this is subject to change in the future though).
flannel can use and is using in this example the Kubernetes API to store metadata about the Pod CIDR allocations, and therefore we need to tell Kubernetes first which subnet we want to use. The subnet we chose here is somehow fixed, because the flannel configuration file that we’ll use later in this guide predefines the equivalent subnet. Of course, you can adapt both.
如果通过 WIFI连接而非有线, 添加 --apiserver-advertise-address=<wifi-ip-address> 作为参数来执行 kubeadm init ,以通过WiFi公布Kubernetes’ API。 还有一些其他的 kubeadm init参数,你可以去尝试。
当 Kubernetes 初始化后, 终端窗口显示如下:
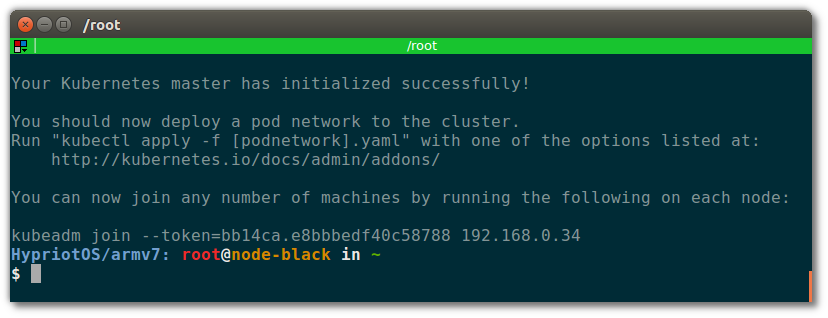
为了启动集群, 需要运行 (as a regular user):
$ sudo cp /etc/kubernetes/admin.conf $HOME/ $ sudo chown $(id -u):$(id -g) $HOME/admin.conf $ export KUBECONFIG=$HOME/admin.conf 下一步, 如上面的输出所说明, 通过 kubeadm join 命令添加集群的节点。如(在节点机上执行):
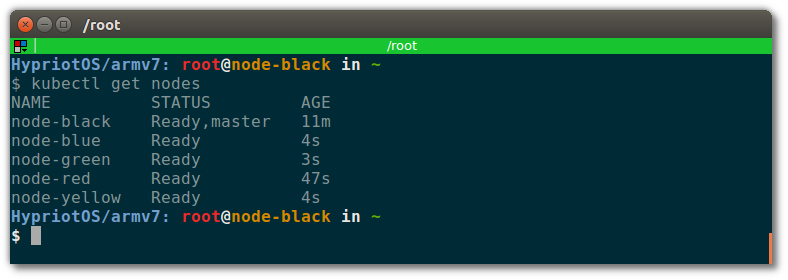
$ kubeadm join --token=bb14ca.e8bbbedf40c58788 192.168.0.34 几秒钟后,你将在 master node上看得见所有的节点,通过执行下面的命令:
$ kubectl get nodes 终端显示的信息如下:
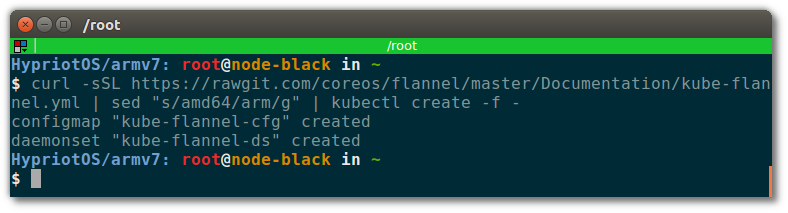
最后, 我们需要设置flannel v0.7.1 ,作为Pod network driver. 不要使用 v0.8.0 ,因为有一个已知的 bug ,将会引起 CrashLoopBackOff 错误。在 master node 执行:
$ curl -sSL https://rawgit.com/coreos/flannel/v0.7.1/Documentation/kube-flannel-rbac.yml | kubectl create -f - $ curl -sSL https://rawgit.com/coreos/flannel/v0.7.1/Documentation/kube-flannel.yml | sed "s/amd64/arm/g" | kubectl create -f - 终端显示的信息如下:
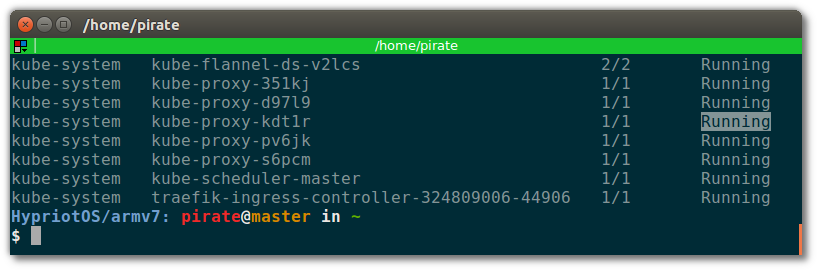
然后等待 flannel 和其他 cluster-internal Pods 的运行 Running ,查看运行情况:
$ kubectl get po --all-namespaces 很好,看起来都在 Running:
现在Kubernetes已经设置成功! 下一步, 我们在集群上来实际启动一个服务。
3、测试安装是否成功
启动一个简单的服务,验证下集群是否运行正常,如下:
$ kubectl run hypriot --image=hypriot/rpi-busybox-httpd --replicas=3 --port=80 该命令启动名为 hypriot的服务,镜像来自于 hypriot/rpi-busybox-httpd ,端口为 80。该服务的副本设为3,将启动3个容器实例。
下一步,暴露创建的部署后的Pods为稳定的name 和 IP的服务:
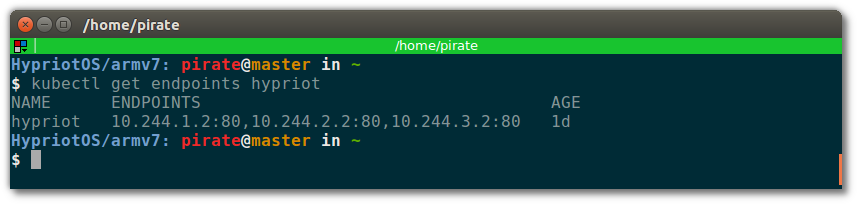
$ kubectl expose deployment hypriot --port 80 好了! 现在检查想要的容器是否启动和运行:
$ kubectl get endpoints hypriot 将看到三个endpoints (= containers) like this:
使用curl 检查服务service是否已经起来:
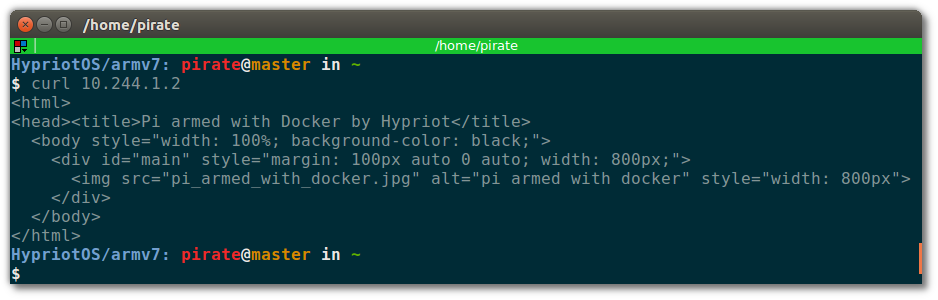
服务响应返回的HTML如上,很好!下一步,我们将从集群外部来访问这个服务。
4、从外面访问服务
我们将使用 Ingress Controller示范例程,来管理外部的输入请求,实现服务的访问。以及,使用 Traefik 来进行负载均衡。如果希望俩节 Ingress 和 Traefik的更多内容,建议阅读下面的内容:
In contrast to Docker Swarm, Kubernetes itself does not provide an option to define a specific port that you can use to access a service. According to Lucas this is an important design decision; routing of incoming requests should be handled by a third party, such as a load balancer or a webserver, but not by the core product. The core Kubernetes should be lean and extensible, and encourage others to build tools on top of it for their specific needs.
Regarding load balancers in front of a cluster, there is the Ingress API object and some sample Ingress Controllers. Ingress is a built-in way of exposing Services to the outside world via an Ingress Controller that anyone can build. An Ingress rule defines how traffic should flow from the node the Ingress controller runs on to services inside of the cluster.
首先,部署traefik作为负载均衡器:
$ kubectl apply -f https://raw.githubusercontent.com/hypriot/rpi-traefik/master/traefik-k8s-example.yaml Label the node you want to be the load balancer. Then the Traefik Ingress Controller will land on the node you specified. Run:
$ kubectl label node <load balancer-node> nginx-controller=traefik Lastly, create an Ingress object that makes Traefik load balance traffic on port 80 to the hypriot service:
$ cat > hypriot-ingress.yaml <<EOF
apiVersion: extensions/v1beta1
kind: Ingress
metadata:
 name: hypriot
spec:
 rules:
 - http:
 paths:
 - path: /
 backend:
 serviceName: hypriot
 servicePort: 80
EOF
$ kubectl apply -f hypriot-ingress.yaml
Visit the loadbalancing node’s IP address in your browser and you should see a nice web page:
If you don’t see a website there yet, run:
$ kubectl get pods … and make sure all hypriot Pods are in the Running state.
Wait until you see that all Pods are running, and a nice Hypriot website should appear!
5、重置 cluster
If you wanna reset the whole cluster to the state after a fresh install, just run this on each node:
$ kubeadm reset In addition, it is recommended to delete some additional files as it is mentioned here.
6、可选: 部署Kubernetes信息面板
The dashboard is a wonderful interface to visualize the state of the cluster. Start it with:
$ kubectl apply -f https://raw.githubusercontent.com/kubernetes/dashboard/master/src/deploy/recommended/kubernetes-dashboard-arm.yaml
Edit the kubernetes-dashboard service to use type: ClusterIP to type: NodePort, see Accessing Kubernetes Dashboard for more details.
$ kubectl -n kube-system edit service kubernetes-dashboard The following command provides the port that the dashboard is exposed at on every node with the NodePort function of Services, which is another way to expose your Services to the outside of your cluster:
$ kubectl -n kube-system get service kubernetes-dashboard -o template --template="{{ (index .spec.ports 0).nodePort }}" | xargs echo Then you can checkout the dashboard on any node’s IP address on that port! Make sure to use https when accessing the dashboard, for example if running on port 31657 access it at https://node:31657.
Newer versions of the Kubernetes Dashboard require either a Kubeconfig or Token to view information on the dashboard. Bearer tokens are recommended to setup proper permissions for a user, but to test the replicaset-controller-token Token may be used to test.
kubectl -n kube-system describe secret `kubectl -n kube-system get secret | grep replicaset-controller-token | awk '{print $1}'` | grep token: | awk '{print $2}' 7、继续 follow-up?
It was our goal to show that Kubernetes indeed works well on ARM (and ARM 64-bit!). For more examples including the AMD64 platform, check out the official kubeadm documentation.
We might follow-up this blog post with a more in-depth post about the current and planned state of Kubernetes officially on ARM and more, so stay tuned and tell Lucas if that’s something you’re interested in reading.
As always, use the comments below to give us feedback and share this post on Twitter, Google or Facebook.
本文转自开源中国-Kubernetes on ARM,基于HypriotOS