1:服务器信息以及节点介绍
系统信息:centos1708 minimal 只修改IP地址
| 主机名称 | IP | 备注 |
|---|---|---|
| node01 | 192.168.150.181 | master and etcd |
| rode02 | 192.168.150.182 | master and etcd |
| node03 | 192.168.150.183 | master and etcd |
| node04 | 192.168.150.184 | node |
| VIP | 192.168.150.186 |
软件版本:
docker17.03.2-ce
socat-1.7.3.2-2.el7.x86_64
kubelet-1.10.0-0.x86_64
kubernetes-cni-0.6.0-0.x86_64
kubectl-1.10.0-0.x86_64
kubeadm-1.10.0-0.x86_64
1:环境初始化
1:分别在4台主机设置主机名称
hostnamectl set-hostname node01
hostnamectl set-hostname node02
hostnamectl set-hostname node03
hostnamectl set-hostname node04
2:配置主机映射
cat <<EOF > /etc/hosts
127.0.0.1 localhost localhost.localdomain localhost4 localhost4.localdomain4
::1 localhost localhost.localdomain localhost6 localhost6.localdomain6
192.168.150.181 node01
192.168.150.182 node02
192.168.150.183 node03
192.168.150.184 node04
EOF
3:node01上执行ssh免密码登陆配置
ssh-keygen #一路回车即可
ssh-copy-id node02
ssh-copy-id node03
ssh-copy-id node04
4:四台主机配置、停防火墙、关闭Swap、关闭Selinux、设置内核、K8S的yum源、安装依赖包、配置ntp(配置完后建议重启一次)
systemctl stop firewalld
systemctl disable firewalld

swapoff -a
sed -i 's/.*swap.*/#&/' /etc/fstab

setenforce 0
sed -i "s/^SELINUX=enforcing/SELINUX=disabled/g" /etc/sysconfig/selinux
sed -i "s/^SELINUX=enforcing/SELINUX=disabled/g" /etc/selinux/config
sed -i "s/^SELINUX=permissive/SELINUX=disabled/g" /etc/sysconfig/selinux
sed -i "s/^SELINUX=permissive/SELINUX=disabled/g" /etc/selinux/config

modprobe br_netfilter
cat <<EOF > /etc/sysctl.d/k8s.conf
net.bridge.bridge-nf-call-ip6tables = 1
net.bridge.bridge-nf-call-iptables = 1
EOF
sysctl -p /etc/sysctl.d/k8s.conf
ls /proc/sys/net/bridge

cat <<EOF > /etc/yum.repos.d/kubernetes.repo
[kubernetes]
name=Kubernetes
baseurl=https://mirrors.aliyun.com/kubernetes/yum/repos/kubernetes-el7-x86_64/
enabled=1
gpgcheck=1
repo_gpgcheck=1
gpgkey=https://mirrors.aliyun.com/kubernetes/yum/doc/yum-key.gpg https://mirrors.aliyun.com/kubernetes/yum/doc/rpm-package-key.gpg
EOF

yum install -y epel-release
yum install -y yum-utils device-mapper-persistent-data lvm2 net-tools conntrack-tools wget vim ntpdate libseccomp libtool-ltdl

systemctl enable ntpdate.service
echo '*/30 * * * * /usr/sbin/ntpdate time7.aliyun.com >/dev/null 2>&1' > /tmp/crontab2.tmp
crontab /tmp/crontab2.tmp
systemctl start ntpdate.service

echo "* soft nofile 65536" >> /etc/security/limits.conf
echo "* hard nofile 65536" >> /etc/security/limits.conf
echo "* soft nproc 65536" >> /etc/security/limits.conf
echo "* hard nproc 65536" >> /etc/security/limits.conf
echo "* soft memlock unlimited" >> /etc/security/limits.conf
echo "* hard memlock unlimited" >> /etc/security/limits.conf
2:安装、配置keepalived(主节点)
1:安装keepalived
yum install -y keepalived
systemctl enable keepalived
node01的keepalived.conf
cat <<EOF > /etc/keepalived/keepalived.conf
global_defs {
 router_id LVS_k8s
}

vrrp_script CheckK8sMaster {
 script "curl -k https://192.168.150.186:6443"
 interval 3
 timeout 9
 fall 2
 rise 2 }

vrrp_instance VI_1 {
 state MASTER
 interface ens160
 virtual_router_id 61
 priority 100
 advert_int 1
 mcast_src_ip 192.168.150.181
 nopreempt
 authentication {
 auth_type PASS
 auth_pass sqP05dQgMSlzrxHj
 }
 unicast_peer { 192.168.150.182 192.168.150.183 }
 virtual_ipaddress { 192.168.150.186/24 }
 track_script { CheckK8sMaster } }
EOF
node02的keepalived.conf
cat <<EOF > /etc/keepalived/keepalived.conf
global_defs {
 router_id LVS_k8s
}

global_defs {
 router_id LVS_k8s
}

vrrp_script CheckK8sMaster {
 script "curl -k https://192.168.150.186:6443"
 interval 3
 timeout 9
 fall 2
 rise 2 }

vrrp_instance VI_1 {
 state BACKUP
 interface ens160
 virtual_router_id 61
 priority 90
 advert_int 1
 mcast_src_ip 192.168.150.182
 nopreempt
 authentication {
 auth_type PASS
 auth_pass sqP05dQgMSlzrxHj
 }
 unicast_peer { 192.168.150.181 192.168.150.183 }
 virtual_ipaddress { 192.168.150.186/24 }
 track_script { CheckK8sMaster } }
EOF
node03的keepalived.conf
cat <<EOF > /etc/keepalived/keepalived.conf
global_defs {
 router_id LVS_k8s
}

global_defs {
 router_id LVS_k8s
}

vrrp_script CheckK8sMaster {
 script "curl -k https://192.168.150.186:6443"
 interval 3
 timeout 9
 fall 2
 rise 2 }

vrrp_instance VI_1 {
 state BACKUP
 interface ens160
 virtual_router_id 61
 priority 80
 advert_int 1
 mcast_src_ip 192.168.150.183
 nopreempt
 authentication {
 auth_type PASS
 auth_pass sqP05dQgMSlzrxHj
 }
 unicast_peer { 192.168.150.181 192.168.150.182 }
 virtual_ipaddress { 192.168.150.186/24 }
 track_script { CheckK8sMaster } }
EOF
2:启动keepalived
systemctl restart keepalived
可以看到VIP已经绑定到node01上面了
ens160: <BROADCAST,MULTICAST,UP,LOWER_UP> mtu 1500 qdisc mq state UP qlen 1000
 link/ether 00:50:56:b2:09:6a brd ff:ff:ff:ff:ff:ff
 inet 192.168.150.181/24 brd 192.168.150.255 scope global ens160
 valid_lft forever preferred_lft forever
 inet 192.168.150.186/24 scope global secondary ens160
 valid_lft forever preferred_lft forever
 inet6 fe80::e3d1:55df:2f64:8571/64 scope link
 valid_lft forever preferred_lft forever
3:创建etcd证书(node01上执行即可)
1:设置cfssl环境
wget https://pkg.cfssl.org/R1.2/cfssl_linux-amd64
wget https://pkg.cfssl.org/R1.2/cfssljson_linux-amd64
wget https://pkg.cfssl.org/R1.2/cfssl-certinfo_linux-amd64
chmod +x cfssl_linux-amd64
mv cfssl_linux-amd64 /usr/local/bin/cfssl
chmod +x cfssljson_linux-amd64
mv cfssljson_linux-amd64 /usr/local/bin/cfssljson
chmod +x cfssl-certinfo_linux-amd64
mv cfssl-certinfo_linux-amd64 /usr/local/bin/cfssl-certinfo
export PATH=/usr/local/bin:$PATH
2:创建 CA 配置文件(下面配置的IP为etc节点的IP)
mkdir /root/ssl
cd /root/ssl
cat > ca-config.json <<EOF
{ "signing": { "default": { "expiry": "8760h" }, "profiles": { "kubernetes-Soulmate": { "usages": [ "signing", "key encipherment", "server auth", "client auth" ], "expiry": "8760h" } } } }
EOF

cat > ca-csr.json <<EOF
{ "CN": "kubernetes-Soulmate", "key": { "algo": "rsa", "size": 2048 }, "names": [ { "C": "CN", "ST": "shanghai", "L": "shanghai", "O": "k8s", "OU": "System" } ] }
EOF

cfssl gencert -initca ca-csr.json | cfssljson -bare ca

cat > etcd-csr.json <<EOF
{ "CN": "etcd", "hosts": [ "127.0.0.1", "192.168.150.181", "192.168.150.182", "192.168.150.183" ], "key": { "algo": "rsa", "size": 2048 }, "names": [ { "C": "CN", "ST": "shanghai", "L": "shanghai", "O": "k8s", "OU": "System" } ] }
EOF

cfssl gencert -ca=ca.pem \
 -ca-key=ca-key.pem \
 -config=ca-config.json \
 -profile=kubernetes-Soulmate etcd-csr.json | cfssljson -bare etcd
3:node01分发etcd证书到node02、node03上面
mkdir -p /etc/etcd/ssl
cp etcd.pem etcd-key.pem ca.pem /etc/etcd/ssl/
ssh -n node02 "mkdir -p /etc/etcd/ssl && exit"
ssh -n node03 "mkdir -p /etc/etcd/ssl && exit"
scp -r /etc/etcd/ssl/*.pem node02:/etc/etcd/ssl/
scp -r /etc/etcd/ssl/*.pem node03:/etc/etcd/ssl/
4:安装配置etcd (三主节点)
1:安装etcd
yum install etcd -y
mkdir -p /var/lib/etcd
node01的etcd.service
cat <<EOF >/etc/systemd/system/etcd.service
[Unit] Description=Etcd Server After=network.target
After=network-online.target
Wants=network-online.target
Documentation=https://github.com/coreos [Service] Type=notify
WorkingDirectory=/var/lib/etcd/ ExecStart=/usr/bin/etcd \
 --name node01 \
 --cert-file=/etc/etcd/ssl/etcd.pem \
 --key-file=/etc/etcd/ssl/etcd-key.pem \
 --peer-cert-file=/etc/etcd/ssl/etcd.pem \
 --peer-key-file=/etc/etcd/ssl/etcd-key.pem \
 --trusted-ca-file=/etc/etcd/ssl/ca.pem \
 --peer-trusted-ca-file=/etc/etcd/ssl/ca.pem \
 --initial-advertise-peer-urls https://192.168.150.181:2380 \ --listen-peer-urls https://192.168.150.181:2380 \ --listen-client-urls https://192.168.150.181:2379,http://127.0.0.1:2379 \ --advertise-client-urls https://192.168.150.181:2379 \ --initial-cluster-token etcd-cluster-0 \
 --initial-cluster node01=https://192.168.150.181:2380,node02=https://192.168.150.182:2380,node03=https://192.168.150.183:2380 \ --initial-cluster-state new \
 --data-dir=/var/lib/etcd
Restart=on-failure
RestartSec=5 LimitNOFILE=65536 [Install] WantedBy=multi-user.target
EOF
node02的etcd.service
cat <<EOF >/etc/systemd/system/etcd.service
[Unit] Description=Etcd Server After=network.target
After=network-online.target
Wants=network-online.target
Documentation=https://github.com/coreos [Service] Type=notify
WorkingDirectory=/var/lib/etcd/ ExecStart=/usr/bin/etcd \
 --name node02 \
 --cert-file=/etc/etcd/ssl/etcd.pem \
 --key-file=/etc/etcd/ssl/etcd-key.pem \
 --peer-cert-file=/etc/etcd/ssl/etcd.pem \
 --peer-key-file=/etc/etcd/ssl/etcd-key.pem \
 --trusted-ca-file=/etc/etcd/ssl/ca.pem \
 --peer-trusted-ca-file=/etc/etcd/ssl/ca.pem \
 --initial-advertise-peer-urls https://192.168.150.182:2380 \ --listen-peer-urls https://192.168.150.182:2380 \ --listen-client-urls https://192.168.150.182:2379,http://127.0.0.1:2379 \ --advertise-client-urls https://192.168.150.182:2379 \ --initial-cluster-token etcd-cluster-0 \
 --initial-cluster node01=https://192.168.150.181:2380,node02=https://192.168.150.182:2380,node03=https://192.168.150.183:2380 \ --initial-cluster-state new \
 --data-dir=/var/lib/etcd
Restart=on-failure
RestartSec=5 LimitNOFILE=65536 [Install] WantedBy=multi-user.target
EOF
node03的etcd.service
cat <<EOF >/etc/systemd/system/etcd.service
[Unit] Description=Etcd Server After=network.target
After=network-online.target
Wants=network-online.target
Documentation=https://github.com/coreos [Service] Type=notify
WorkingDirectory=/var/lib/etcd/ ExecStart=/usr/bin/etcd \
 --name node03 \
 --cert-file=/etc/etcd/ssl/etcd.pem \
 --key-file=/etc/etcd/ssl/etcd-key.pem \
 --peer-cert-file=/etc/etcd/ssl/etcd.pem \
 --peer-key-file=/etc/etcd/ssl/etcd-key.pem \
 --trusted-ca-file=/etc/etcd/ssl/ca.pem \
 --peer-trusted-ca-file=/etc/etcd/ssl/ca.pem \
 --initial-advertise-peer-urls https://192.168.150.183:2380 \ --listen-peer-urls https://192.168.150.183:2380 \ --listen-client-urls https://192.168.150.183:2379,http://127.0.0.1:2379 \ --advertise-client-urls https://192.168.150.183:2379 \ --initial-cluster-token etcd-cluster-0 \
--initial-cluster node01=https://192.168.150.181:2380,node02=https://192.168.150.182:2380,node03=https://192.168.150.183:2380 \ --initial-cluster-state new \
 --data-dir=/var/lib/etcd
Restart=on-failure
RestartSec=5 LimitNOFILE=65536 [Install] WantedBy=multi-user.target
EOF
2:添加自启动(etc集群最少2个节点才能启动,启动报错看mesages日志)
 mv etcd.service /usr/lib/systemd/system/
 systemctl daemon-reload
 systemctl enable etcd
 systemctl start etcd
 systemctl status etcd
3:在三个etcd节点执行一下命令检查
etcdctl --endpoints=https://192.168.150.181:2379,https://192.168.150.182:2379,https://192.168.150.183:2379 \ --ca-file=/etc/etcd/ssl/ca.pem \
 --cert-file=/etc/etcd/ssl/etcd.pem \
 --key-file=/etc/etcd/ssl/etcd-key.pem cluster-health
5:所有节点安装配置docker
1:安装docker(kubeadm目前支持docker最高版本是17.03.x)
yum install https://mirrors.aliyun.com/docker-ce/linux/centos/7/x86_64/stable/Packages/docker-ce-selinux-17.03.2.ce-1.el7.centos.noarch.rpm -y
yum install https://mirrors.aliyun.com/docker-ce/linux/centos/7/x86_64/stable/Packages/docker-ce-17.03.2.ce-1.el7.centos.x86_64.rpm -y
修改配置文件 vim /usr/lib/systemd/system/docker.service
ExecStart=/usr/bin/dockerd -H tcp://0.0.0.0:2375 -H unix:///var/run/docker.sock --registry-mirror=https://ms3cfraz.mirror.aliyuncs.com
启动docker
systemctl daemon-reload
systemctl restart docker
systemctl enable docker
systemctl status docker
6: 安装、配置kubeadm
1:所有节点安装kubelet kubeadm kubectl
yum install -y kubelet kubeadm kubectl
systemctl enable kubelet
2: 所有节点修改kubelet配置文件
/etc/systemd/system/kubelet.service.d/10-kubeadm.conf
#修改这一行 Environment="KUBELET_CGROUP_ARGS=--cgroup-driver=cgroupfs" #添加这一行 Environment="KUBELET_EXTRA_ARGS=--v=2 --fail-swap-on=false --pod-infra-container-image=registry.cn-hangzhou.aliyuncs.com/k8sth/pause-amd64:3.0"
3:所有节点修改完配置文件一定要重新加载配置
systemctl daemon-reload
systemctl enable kubelet
4: 命令补全
yum install -y bash-completion
source /usr/share/bash-completion/bash_completion
source <(kubectl completion bash)
echo "source <(kubectl completion bash)" >> ~/.bashrc
7:初始化集群
1:node01、node02、node03添加集群初始配置文件(集群配置文件一样)
cat <<EOF > config.yaml
apiVersion: kubeadm.k8s.io/v1alpha1
kind: MasterConfiguration
etcd:
 endpoints: - https://192.168.150.181:2379 - https://192.168.150.182:2379 - https://192.168.150.183:2379
 caFile: /etc/etcd/ssl/ca.pem
 certFile: /etc/etcd/ssl/etcd.pem
 keyFile: /etc/etcd/ssl/etcd-key.pem
 dataDir: /var/lib/etcd
networking:
 podSubnet: 10.244.0.0/16
kubernetesVersion: 1.10.0
api:
 advertiseAddress: "192.168.150.186"
token: "b99a00.a144ef80536d4344"
tokenTTL: "0s"
apiServerCertSANs: - node01
- node02
- node03
- 192.168.150.181 - 192.168.150.182 - 192.168.150.183 - 192.168.150.184 - 192.168.150.186
featureGates: CoreDNS: true
imageRepository: "registry.cn-hangzhou.aliyuncs.com/k8sth"
EOF
2:首先node01初始化集群
配置文件定义podnetwork是10.244.0.0/16
kubeadmin init –hlep可以看出,service默认网段是10.96.0.0/12
/etc/systemd/system/kubelet.service.d/10-kubeadm.conf默认dns地址cluster-dns=10.96.0.10
kubeadm init --config config.yaml
初始化失败后处理办法
kubeadm reset
#或
rm -rf /etc/kubernetes/*.conf
rm -rf /etc/kubernetes/manifests/*.yaml
docker ps -a |awk '{print $1}' |xargs docker rm -f
systemctl stop kubelet
初始化正常的结果如下
Your Kubernetes master has initialized successfully! To start using your cluster, you need to run the following as a regular user:

 mkdir -p $HOME/.kube
 sudo cp -i /etc/kubernetes/admin.conf $HOME/.kube/config
 sudo chown $(id -u):$(id -g) $HOME/.kube/config

You should now deploy a pod network to the cluster. Run "kubectl apply -f [podnetwork].yaml" with one of the options listed at:
 https://kubernetes.io/docs/concepts/cluster-administration/addons/ You can now join any number of machines by running the following on each node
as root:

kubeadm join 192.168.150.186:6443 --token b99a00.a144ef80536d4344 --discovery-token-ca-cert-hash sha256:f79b68fb698c92b9336474eb3bf184e847f967dc58a6296911892662b98b1315
3:node01上面执行如下命令
 mkdir -p $HOME/.kube
 sudo cp -i /etc/kubernetes/admin.conf $HOME/.kube/config
 sudo chown $(id -u):$(id -g) $HOME/.kube/config
4:kubeadm生成证书密码文件分发到node02和node03上面去
scp -r /etc/kubernetes/pki node03:/etc/kubernetes/
scp -r /etc/kubernetes/pki node02:/etc/kubernetes/
5:部署flannel网络,只需要在node01执行就行
wget https://raw.githubusercontent.com/coreos/flannel/master/Documentation/kube-flannel.yml #版本信息:quay.io/coreos/flannel:v0.10.0-amd64

kubectl create -f kube-flannel.yml
执行命令
[root@node01 ~]# kubectl get node
NAME STATUS ROLES AGE VERSION
node01 Ready master 31m v1.10.0
[root@node01 ~]# kubectl get pods --all-namespaces
NAMESPACE NAME READY STATUS RESTARTS AGE
kube-system coredns-7997f8864c-4x7mg 1/1 Running 0 29m
kube-system coredns-7997f8864c-zfcck 1/1 Running 0 29m
kube-system kube-apiserver-node01 1/1 Running 0 29m
kube-system kube-controller-manager-node01 1/1 Running 0 30m
kube-system kube-flannel-ds-hw2xb 1/1 Running 0 1m
kube-system kube-proxy-s265b 1/1 Running 0 29m
kube-system kube-scheduler-node01 1/1 Running 0 30m
6:部署dashboard
kubectl create -f kubernetes-dashboard.yaml
获取token,通过令牌登陆
kubectl -n kube-system describe secret $(kubectl -n kube-system get secret | grep admin-user | awk '{print $1}')
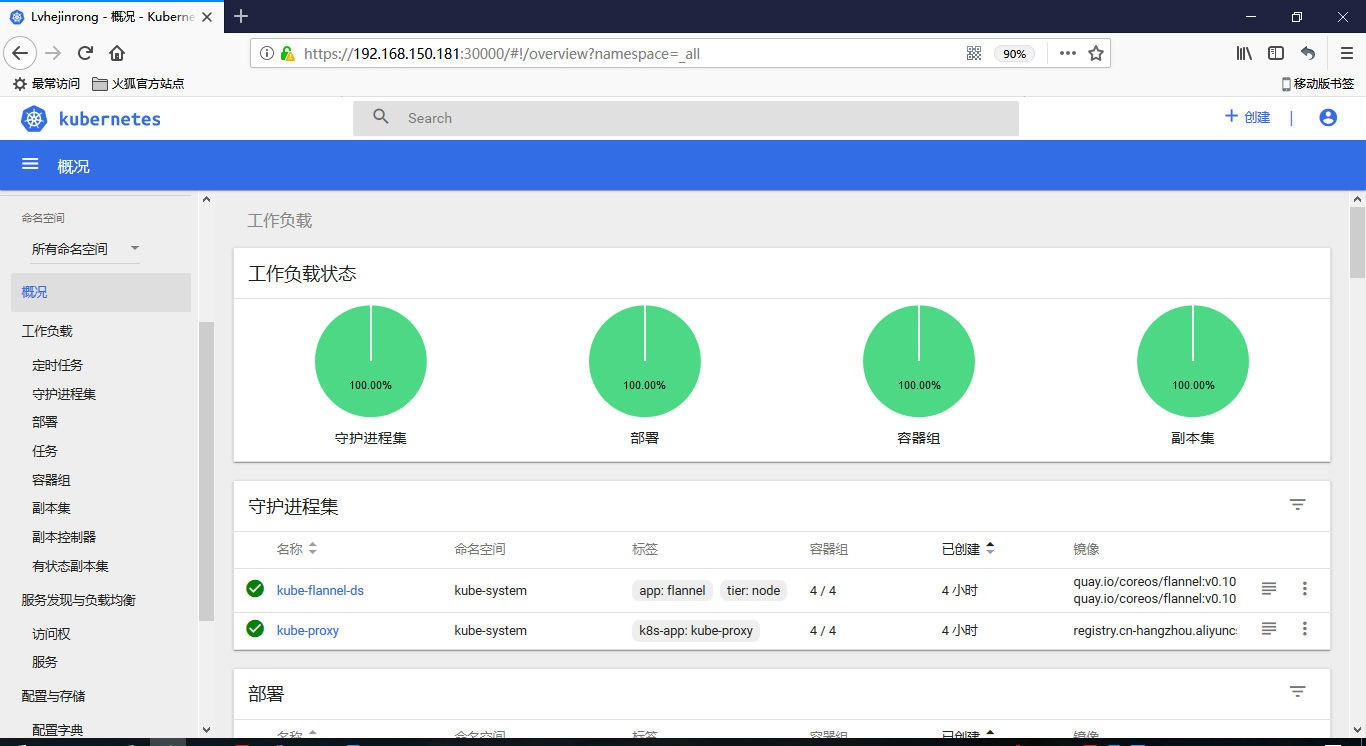
通过firefox访问dashboard,输入token,即可登陆
https://192.168.150.181:30000/#!/login
kubernetes-dashboard.yaml文件内容如下
# Copyright 2017 The Kubernetes Authors. # # Licensed under the Apache License, Version 2.0 (the "License"); # you may not use this file except in compliance with the License. # You may obtain a copy of the License at # # http://www.apache.org/licenses/LICENSE-2.0 # # Unless required by applicable law or agreed to in writing, software # distributed under the License is distributed on an "AS IS" BASIS, # WITHOUT WARRANTIES OR CONDITIONS OF ANY KIND, either express or implied. # See the License for the specific language governing permissions and # limitations under the License. # Configuration to deploy release version of the Dashboard UI compatible with # Kubernetes 1.8. # # Example usage: kubectl create -f <this_file> # ------------------- Dashboard Secret ------------------- #

apiVersion: v1
kind: Secret
metadata:
 labels:
 k8s-app: kubernetes-dashboard
 name: kubernetes-dashboard-certs
 namespace: kube-system
type: Opaque --- # ------------------- Dashboard Service Account ------------------- #

apiVersion: v1
kind: ServiceAccount
metadata:
 labels:
 k8s-app: kubernetes-dashboard
 name: kubernetes-dashboard
 namespace: kube-system

--- # ------------------- Dashboard Role & Role Binding ------------------- #

kind: Role
apiVersion: rbac.authorization.k8s.io/v1
metadata:
 name: kubernetes-dashboard-minimal
 namespace: kube-system
rules: # Allow Dashboard to create 'kubernetes-dashboard-key-holder' secret. - apiGroups: [""]
 resources: ["secrets"]
 verbs: ["create"] # Allow Dashboard to create 'kubernetes-dashboard-settings' config map. - apiGroups: [""]
 resources: ["configmaps"]
 verbs: ["create"] # Allow Dashboard to get, update and delete Dashboard exclusive secrets. - apiGroups: [""]
 resources: ["secrets"]
 resourceNames: ["kubernetes-dashboard-key-holder", "kubernetes-dashboard-certs"]
 verbs: ["get", "update", "delete"] # Allow Dashboard to get and update 'kubernetes-dashboard-settings' config map. - apiGroups: [""]
 resources: ["configmaps"]
 resourceNames: ["kubernetes-dashboard-settings"]
 verbs: ["get", "update"] # Allow Dashboard to get metrics from heapster. - apiGroups: [""]
 resources: ["services"]
 resourceNames: ["heapster"]
 verbs: ["proxy"] - apiGroups: [""]
 resources: ["services/proxy"]
 resourceNames: ["heapster", "http:heapster:", "https:heapster:"]
 verbs: ["get"] ---
apiVersion: rbac.authorization.k8s.io/v1
kind: RoleBinding
metadata:
 name: kubernetes-dashboard-minimal
 namespace: kube-system
roleRef:
 apiGroup: rbac.authorization.k8s.io
 kind: Role
 name: kubernetes-dashboard-minimal
subjects: - kind: ServiceAccount
 name: kubernetes-dashboard
 namespace: kube-system

--- # ------------------- Dashboard Deployment ------------------- #

kind: Deployment
apiVersion: apps/v1beta2
metadata:
 labels:
 k8s-app: kubernetes-dashboard
 name: kubernetes-dashboard
 namespace: kube-system
spec:
 replicas: 1
 revisionHistoryLimit: 10
 selector:
 matchLabels:
 k8s-app: kubernetes-dashboard
 template:
 metadata:
 labels:
 k8s-app: kubernetes-dashboard
 spec:
 nodeSelector:
 node-role.kubernetes.io/master: ""
 containers: - name: kubernetes-dashboard
 image: registry.cn-hangzhou.aliyuncs.com/k8sth/kubernetes-dashboard-amd64:v1.8.3
 ports: - containerPort: 8443
 protocol: TCP
 args: - --auto-generate-certificates
 # Uncomment the following line to manually specify Kubernetes API server Host # If not specified, Dashboard will attempt to auto discover the API server and connect # to it. Uncomment only if the default does not work. # - --apiserver-host=http://my-address:port
 volumeMounts: - name: kubernetes-dashboard-certs
 mountPath: /certs
 # Create on-disk volume to store exec logs
 - mountPath: /tmp
 name: tmp-volume
 livenessProbe:
 httpGet:
 scheme: HTTPS
 path: /
 port: 8443
 initialDelaySeconds: 30
 timeoutSeconds: 30
 volumes:
 - name: kubernetes-dashboard-certs
 secret:
 secretName: kubernetes-dashboard-certs
 - name: tmp-volume
 emptyDir: {}
 serviceAccountName: kubernetes-dashboard
 # Comment the following tolerations if Dashboard must not be deployed on master
 tolerations:
 - key: node-role.kubernetes.io/master
 effect: NoSchedule --- # ------------------- Dashboard Service ------------------- #

kind: Service
apiVersion: v1
metadata:
 labels:
 k8s-app: kubernetes-dashboard
 name: kubernetes-dashboard
 namespace: kube-system
spec:
 type: NodePort
 ports: - port: 443
 targetPort: 8443
 nodePort: 30000
 selector:
 k8s-app: kubernetes-dashboard

---
apiVersion: v1
kind: ServiceAccount
metadata:
 name: admin-user
 namespace: kube-system

---
apiVersion: rbac.authorization.k8s.io/v1beta1
kind: ClusterRoleBinding
metadata:
 name: admin-user
roleRef:
 apiGroup: rbac.authorization.k8s.io
 kind: ClusterRole
 name: cluster-admin
subjects: - kind: ServiceAccount
 name: admin-user
 namespace: kube-system
7:安装heapster
[root@node01 ~]# kubectl create -f kube-heapster/influxdb/
deployment.extensions "monitoring-grafana" created
service "monitoring-grafana" created
serviceaccount "heapster" created
deployment.extensions "heapster" created
service "heapster" created
deployment.extensions "monitoring-influxdb" created
service "monitoring-influxdb" created
[root@node01 ~]# kubectl create -f kube-heapster/rbac/
clusterrolebinding.rbac.authorization.k8s.io "heapster" created
[root@node01 ~]# kubectl get pods --all-namespaces
NAMESPACE NAME READY STATUS RESTARTS AGE
kube-system coredns-7997f8864c-4x7mg 1/1 Running 0 1h
kube-system coredns-7997f8864c-zfcck 1/1 Running 0 1h
kube-system heapster-647b89cd4b-wmvmw 1/1 Running 0 39s
kube-system kube-apiserver-node01 1/1 Running 0 1h
kube-system kube-controller-manager-node01 1/1 Running 0 1h
kube-system kube-flannel-ds-hw2xb 1/1 Running 0 49m
kube-system kube-proxy-s265b 1/1 Running 0 1h
kube-system kube-scheduler-node01 1/1 Running 0 1h
kube-system kubernetes-dashboard-7b44ff9b77-26fkj 1/1 Running 0 44m
kube-system monitoring-grafana-74bdd98b7d-szvqg 1/1 Running 0 40s
kube-system monitoring-influxdb-55bbd4b96-95tw7 1/1 Running 0 40s
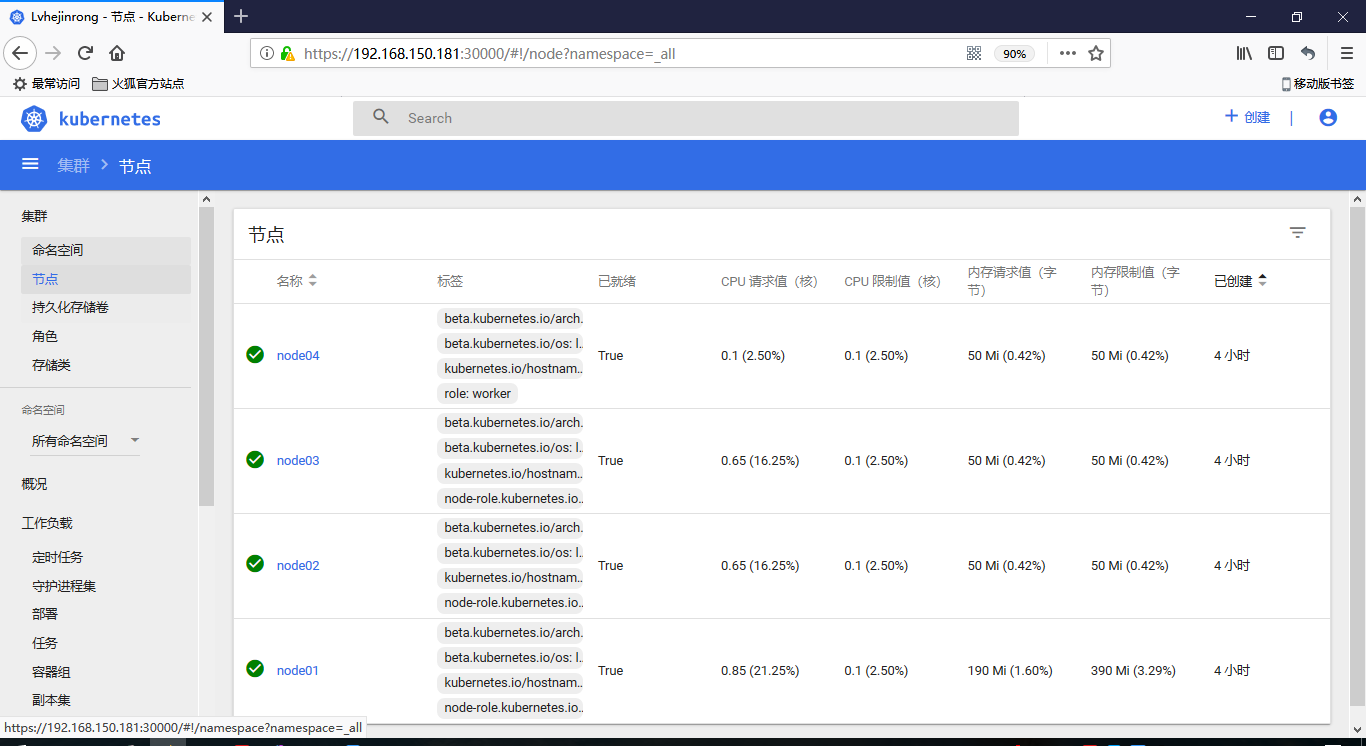
访问https://192.168.150.181:30000/#!/login即可看到监控信息
heapster文件信息
[root@node01 ~]# tree kube-heapster/
kube-heapster/ ├── influxdb
│ ├── grafana.yaml
│ ├── heapster.yaml
│ └── influxdb.yaml
└── rbac
 └── heapster-rbac.yaml
grafana.yaml
apiVersion: extensions/v1beta1
kind: Deployment
metadata:
 name: monitoring-grafana
 namespace: kube-system
spec:
 replicas: 1 template:
 metadata:
 labels:
 task: monitoring
 k8s-app: grafana
 spec:
 nodeSelector:
 node-role.kubernetes.io/master: ""
 containers: - name: grafana
 image: registry.cn-hangzhou.aliyuncs.com/k8sth/heapster-grafana-amd64:v4.4.3
 imagePullPolicy: IfNotPresent
 ports: - containerPort: 3000
 protocol: TCP
 volumeMounts: - mountPath: /etc/ssl/certs
 name: ca-certificates
 readOnly: true - mountPath: /var
 name: grafana-storage
 env:
 - name: INFLUXDB_HOST
 value: monitoring-influxdb
 - name: GF_SERVER_HTTP_PORT
 value: "3000"
 # The following env variables are required to make Grafana accessible via
 # the kubernetes api-server proxy. On production clusters, we recommend
 # removing these env variables, setup auth for grafana, and expose the grafana
 # service using a LoadBalancer or a public IP.
 - name: GF_AUTH_BASIC_ENABLED
 value: "false"
 - name: GF_AUTH_ANONYMOUS_ENABLED
 value: "true"
 - name: GF_AUTH_ANONYMOUS_ORG_ROLE
 value: Admin
 - name: GF_SERVER_ROOT_URL
 # If you're only using the API Server proxy, set this value instead:
 # value: /api/v1/namespaces/kube-system/services/monitoring-grafana/proxy
 value: /
 volumes:
 - name: ca-certificates
 hostPath:
 path: /etc/ssl/certs
 - name: grafana-storage
 emptyDir: {} ---
apiVersion: v1
kind: Service
metadata:
 labels: # For use as a Cluster add-on (https://github.com/kubernetes/kubernetes/tree/master/cluster/addons) # If you are NOT using this as an addon, you should comment out this line.
 kubernetes.io/cluster-service: 'true'
 kubernetes.io/name: monitoring-grafana
 name: monitoring-grafana
 namespace: kube-system
spec: # In a production setup, we recommend accessing Grafana through an external Loadbalancer # or through a public IP. # type: LoadBalancer # You could also use NodePort to expose the service at a randomly-generated port # type: NodePort
 ports: - port: 80
 targetPort: 3000
 selector:
 k8s-app: grafana
heapster.yaml
apiVersion: v1
kind: ServiceAccount
metadata:
 name: heapster
 namespace: kube-system
---
apiVersion: extensions/v1beta1
kind: Deployment
metadata:
 name: heapster
 namespace: kube-system
spec:
 replicas: 1 template:
 metadata:
 labels:
 task: monitoring
 k8s-app: heapster
 spec:
 serviceAccountName: heapster
 nodeSelector:
 node-role.kubernetes.io/master: ""
 containers: - name: heapster
 image: registry.cn-hangzhou.aliyuncs.com/k8sth/heapster-amd64:v1.4.2
 imagePullPolicy: IfNotPresent
 command: - /heapster
 - --source=kubernetes:https://kubernetes.default - --sink=influxdb:http://monitoring-influxdb.kube-system.svc:8086 ---
apiVersion: v1
kind: Service
metadata:
 labels:
 task: monitoring
 # For use as a Cluster add-on (https://github.com/kubernetes/kubernetes/tree/master/cluster/addons) # If you are NOT using this as an addon, you should comment out this line.
 kubernetes.io/cluster-service: 'true'
 kubernetes.io/name: Heapster
 name: heapster
 namespace: kube-system
spec:
 ports: - port: 80
 targetPort: 8082
 selector:
 k8s-app: heapster
influxdb.yaml
apiVersion: extensions/v1beta1
kind: Deployment
metadata:
 name: monitoring-influxdb
 namespace: kube-system
spec:
 replicas: 1 template:
 metadata:
 labels:
 task: monitoring
 k8s-app: influxdb
 spec:
 nodeSelector:
 node-role.kubernetes.io/master: ""
 containers: - name: influxdb
 image: registry.cn-hangzhou.aliyuncs.com/k8sth/heapster-influxdb-amd64:v1.3.3
 imagePullPolicy: IfNotPresent
 volumeMounts: - mountPath: /data
 name: influxdb-storage
 volumes:
 - name: influxdb-storage
 emptyDir: {}
---
apiVersion: v1
kind: Service
metadata:
 labels:
 task: monitoring
 # For use as a Cluster add-on (https://github.com/kubernetes/kubernetes/tree/master/cluster/addons) # If you are NOT using this as an addon, you should comment out this line.
 kubernetes.io/cluster-service: 'true'
 kubernetes.io/name: monitoring-influxdb
 name: monitoring-influxdb
 namespace: kube-system
spec:
 ports: - port: 8086
 targetPort: 8086
 selector:
 k8s-app: influxdb
heapster-rbac.yaml
kind: ClusterRoleBinding
apiVersion: rbac.authorization.k8s.io/v1beta1
metadata:
 name: heapster
roleRef:
 apiGroup: rbac.authorization.k8s.io
 kind: ClusterRole
 name: system:heapster
subjects: - kind: ServiceAccount
 name: heapster
 namespace: kube-system
9:在node02和node03上面分别执行初始化
kubeadm init --config config.yaml
#初始化的结果和node01的结果完全一样
mkdir -p $HOME/.kube
sudo cp -i /etc/kubernetes/admin.conf $HOME/.kube/config
sudo chown $(id -u):$(id -g) $HOME/.kube/config
10:查看节点信息
[root@node01 ~]# kubectl get nodes
NAME STATUS ROLES AGE VERSION
node01 Ready master 1h v1.10.0
node02 Ready master 1h v1.10.0
node03 Ready master 1h v1.10.0
[root@node01 ~]# kubectl get pods --all-namespaces -o wide
NAMESPACE NAME READY STATUS RESTARTS AGE IP NODE
kube-system coredns-7997f8864c-lwtfl 1/1 Running 0 1h 10.244.2.2 node03
kube-system coredns-7997f8864c-q2z9d 1/1 Running 0 1h 10.244.2.3 node03
kube-system kube-apiserver-node01 1/1 Running 0 36m 192.168.150.181 node01
kube-system kube-apiserver-node02 1/1 Running 0 36m 192.168.150.182 node02
kube-system kube-apiserver-node03 1/1 Running 0 1h 192.168.150.183 node03
kube-system kube-controller-manager-node01 1/1 Running 0 36m 192.168.150.181 node01
kube-system kube-controller-manager-node02 1/1 Running 0 36m 192.168.150.182 node02
kube-system kube-controller-manager-node03 1/1 Running 0 1h 192.168.150.183 node03
kube-system kube-flannel-ds-2xrbm 1/1 Running 0 40m 192.168.150.181 node01
kube-system kube-flannel-ds-7gf89 1/1 Running 0 40m 192.168.150.182 node02
kube-system kube-flannel-ds-fmk5z 1/1 Running 0 40m 192.168.150.183 node03
kube-system kube-proxy-dj4c7 1/1 Running 0 1h 192.168.150.181 node01
kube-system kube-proxy-lsg47 1/1 Running 0 1h 192.168.150.183 node03
kube-system kube-proxy-s5wrf 1/1 Running 0 1h 192.168.150.182 node02
kube-system kube-scheduler-node01 1/1 Running 0 36m 192.168.150.181 node01
kube-system kube-scheduler-node02 1/1 Running 0 36m 192.168.150.182 node02
kube-system kube-scheduler-node03 1/1 Running 0 1h 192.168.150.183 node03
11:让master也运行pod(默认master不运行pod)
kubectl taint nodes --all node-role.kubernetes.io/master-
八:添加node04节点到集群
在node04节点执行如下命令,即可将节点添加进集群
kubeadm join 192.168.150.186:6443 --token b99a00.a144ef80536d4344 --discovery-token-ca-cert-hash sha256:f79b68fb698c92b9336474eb3bf184e847f967dc58a6296911892662b98b1315
[root@node01 ~]# kubectl get node
NAME STATUS ROLES AGE VERSION
node01 Ready master 45m v1.10.0
node02 Ready master 15m v1.10.0
node03 Ready master 14m v1.10.0
node04 Ready <none> 13m v1.10.0
参考文档:https://github.com/cookeem/kubeadm-ha/blob/master/README_CN.md