原文:
.net core2.1 三层中使用Autofac代替原来Ioc
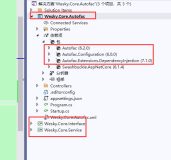
首先,现有的三层项目的结构

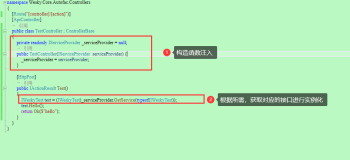
其中 Repository
 public interface IPersonRepository
    {
         string Eat();
    }
public class PersonRepository : IPersonRepository
    {
        public string Eat()
        {
            return "吃饭";
        }
    }
Service
public interface IPersonService
    {
        string Eat();
    }
 public class PersonService : IPersonService
    {
       private  IPersonRepository _personRespository;
        //通过构造函数注入 repository
        public  PersonService(IPersonRepository personRespository)
        {
          _personRespository = personRespository;
        }
        public string Eat()
        {
            return  _personRespository.Eat();
        }
    }
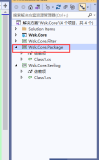
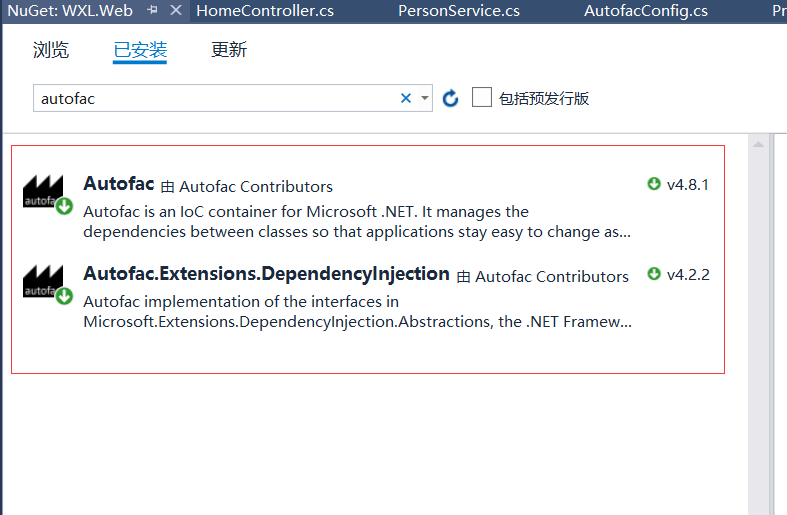
一、安装Autofac
nuget上安装Autofac
二、替换内置的DI框架
将Startup.cs中的ConfigureServices返回类型改为IServiceProvider,然后新起一个方法RegisterAutofac把创建容器的代码放到其中,然后建一个AutofacConfig 类来存放具体的注入代码,避免
Startup.cs文件代码过多混乱。
 public IServiceProvider ConfigureServices(IServiceCollection services)
        {
            services.Configure<CookiePolicyOptions>(options =>
            {
                // This lambda determines whether user consent for non-essential cookies is needed for a given request.
                options.CheckConsentNeeded = context => true;
                options.MinimumSameSitePolicy = SameSiteMode.None;
            });
            services.AddMvc().SetCompatibilityVersion(CompatibilityVersion.Version_2_1);
            return RegisterAutofac(services);//注册Autofac
        }
        private IServiceProvider RegisterAutofac(IServiceCollection services)
        {
            //实例化Autofac容器
            var builder = new ContainerBuilder();
            builder.Populate(services);
            //Autofac注册对象
             AutofacConfig.RegisterObj(builder);
            var Container = builder.Build();
            //第三方IOC接管 core内置DI容器
            return new AutofacServiceProvider(Container);
        }
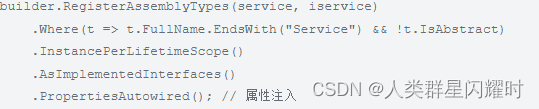
 public class AutofacConfig
    {
        public static void RegisterObj(ContainerBuilder builder)
        {
            //注册Service中的组件,Service中的类要以Service结尾,否则注册失败
            builder.RegisterAssemblyTypes(GetAssemblyByName("WXL.Service")).Where(a => a.Name.EndsWith("Service")).AsImplementedInterfaces();
            //注册Repository中的组件,Repository中的类要以Repository结尾,否则注册失败
            builder.RegisterAssemblyTypes(GetAssemblyByName("WXL.Repository")).Where(a => a.Name.EndsWith("Repository")).AsImplementedInterfaces();
        }
        /// <summary>
        /// 根据程序集名称获取程序集
        /// </summary>
        /// <param name="AssemblyName">程序集名称</param>
        /// <returns></returns>
        public static Assembly GetAssemblyByName(String AssemblyName)
        {
            return Assembly.Load(AssemblyName);
        }
    }
此时Autofac基本使用已经配好了。
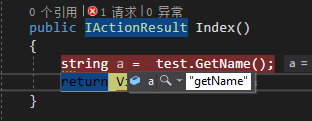
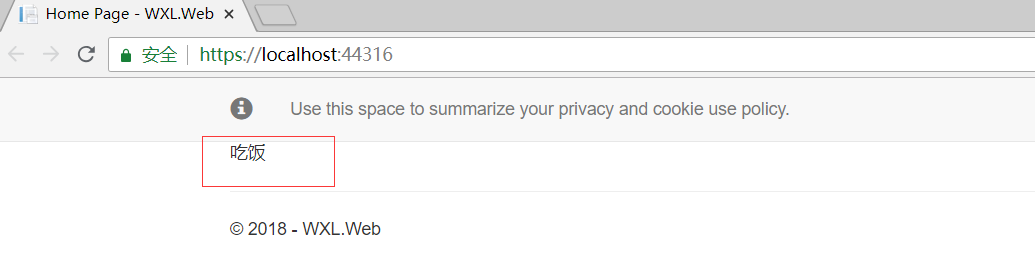
三、测试效果
修改HomeController 实现注入Service
 public class HomeController : Controller
    {
        private IPersonService _personService;

        //通过构造函数注入Service
        public HomeController(IPersonService personService)
        {
            _personService = personService;
        }
        public IActionResult Index()
        {
            ViewBag.eat = _personService.Eat();
            return View();
        }
}
页面结果:
四、一个接口多个实现的情况
比喻我现在在Service 中建三个类,IPayService, WxPayService,AliPayService,其中WxPayService,AliPayService都实现接口IPayService。
 public interface IPayService
    {
        string Pay();
    }
public class AliPayService : IPayService
    {
        public string Pay()
        {
            return "支付宝支付";
        }
    }
 public class WxPayService : IPayService
    {
        public string Pay()
        {
            return "微信支付";
        }
    }
先试一下结果,修改HomeController
 public class HomeController : Controller
    {
        private IPersonService _personService;
        private IPayService _payService;

        //通过构造函数注入Service
        public HomeController(IPersonService personService,IPayService payService)
        {
            _personService = personService;
            _payService = payService;
        }
        public IActionResult Index()
        {
            ViewBag.eat = _personService.Eat();
            ViewBag.pay = _payService.Pay();
            return View();
        }
    }
View
@{
    ViewData["Title"] = "Home Page";
}
@ViewBag.eat <br />
@ViewBag.pay
输出页面:
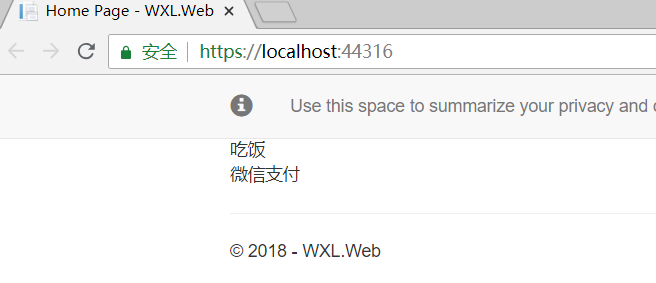
最后得到的是微信支付,因为两个对象实现一个接口的时候,注册时后面注册的会覆盖前面注册的。如果我想得到支付宝支付要怎么做呢?
我们可以用另外一种注册方式RegisterType,修改注册方式AutofacConfig.cs。
public static void RegisterObj(ContainerBuilder builder)
        {
            //注册Service中的组件,Service中的类要以Service结尾,否则注册失败
            builder.RegisterAssemblyTypes(GetAssemblyByName("WXL.Service")).Where(a => a.Name.EndsWith("Service")).AsImplementedInterfaces();
            //注册Repository中的组件,Repository中的类要以Repository结尾,否则注册失败
            builder.RegisterAssemblyTypes(GetAssemblyByName("WXL.Repository")).Where(a => a.Name.EndsWith("Repository")).AsImplementedInterfaces();
            //单独注册
            builder.RegisterType<WxPayService>().Named<IPayService>(typeof(WxPayService).Name);
            builder.RegisterType<AliPayService>().Named<IPayService>(typeof(AliPayService).Name);
        }
        /// <summary>
        /// 根据程序集名称获取程序集
        /// </summary>
        /// <param name="AssemblyName">程序集名称</param>
        /// <returns></returns>
        public static Assembly GetAssemblyByName(String AssemblyName)
        {
            return Assembly.Load(AssemblyName);
        }
用Named区分两个组件的不同,后面的typeof(WxPayService).Name 是任意字符串,这里直接用这个类名作标识,方便取出来时也是用这个名字,不易忘记。
然后就是取出对应的组件了,取的时候用Autofac的 上下文(IComponentContext) ,修改HomeController
 public class HomeController : Controller
    {
        private IPersonService _personService;
        private IPayService _wxPayService;
        private IPayService _aliPayService;
        private IComponentContext _componentContext;//Autofac上下文
        //通过构造函数注入Service
        public HomeController(IPersonService personService, IComponentContext componentContext)
        {
            _personService = personService;
            _componentContext = componentContext;
            //解释组件
            _wxPayService = componentContext.ResolveNamed<IPayService>(typeof(WxPayService).Name);
            _aliPayService =componentContext.ResolveNamed<IPayService>(typeof(AliPayService).Name);
        }
        public IActionResult Index()
        {
            ViewBag.eat = _personService.Eat();
            ViewBag.wxPay = _wxPayService.Pay();
            ViewBag.aliPay = _aliPayService.Pay();
            return View();
        }
    }
Index View:
@{
    ViewData["Title"] = "Home Page";
}
@ViewBag.eat <br />
@ViewBag.wxPay <br />
@ViewBag.aliPay
结果:

完成。