1.部署环境:
2台虚拟机,Ubuntu16.04系统。设定A虚拟机的IP 为A-IP,B虚拟机的IP为B-IP,并A虚拟机作为master。
2. A、B两台虚拟机都需要做的部署操作:
建议以root用户执行下列操作。
a. 跟新系统apt包:
     apt-get update -y

apt-get upgrade -y Swapoff -a 上述命令,可以临时关闭,机器重启之后需要重新设置。
具体的swap扩展信息,可参考http://www.runoob.com/linux/linux-comm-swapoff.html
c. 安装Docker,kubernetes需要机遇Docker环境运行:
     apt-get install apt-transport-https -y

     curl -fsSL https://download.docker.com/linux/ubuntu/gpg | apt-key add -

apt-get install docker.io -ydocker version
######
Client:
Version: 17.03.2-ce
API version: 1.27
Go version: go1.6.2
Git commit: f5ec1e2
Built: Thu Jul 5 23:07:48 2018
OS/Arch: linux/amd64
Server:
Version: 17.03.2-ce
API version: 1.27 (minimum version 1.12)
Go version: go1.6.2
Git commit: f5ec1e2
Built: Thu Jul 5 23:07:48 2018
OS/Arch: linux/amd64
Experimental: false
######
systemctl enable docker
systemctl start docker
systemctl status docker
######
docker.service - Docker Application Container Engine
Loaded: loaded (/lib/systemd/system/docker.service; enabled; vendor preset: enabled)
Active: active (running) since Sat 2018-11-24 06:58:36 EST; 3min 57s ago
Docs: https://docs.docker.com
Main PID: 14473 (dockerd)
CGroup: /system.slice/docker.service
├─14473 /usr/bin/dockerd -H fd://
└─14483 docker-containerd -l unix:///var/r.............
###### 如果docker service的状态为active(running),则说明docker 安装并启动成功。
d. 安装kubernetes:
sudo curl -s https://packages.cloud.google.com/apt/doc/apt-key.gpg | sudo apt-key add -

echo 'deb http://apt.kubernetes.io/ kubernetes-xenial main' | sudo tee /etc/apt/sources.list.d/kubernetes.list

apt-get update

apt-get install -y kubelet kubeadm kubectl kubernetes-cnisudo kubeadm init --pod-network-cidr 10.244.0.0/16 --pod-network-cidr是指配置节点中的pod的可用IP地址,此为内部IP
初始化kubeadm成功之后,会输出如下信息:
Your Kubernetes master has initialized successfully!

To start using your cluster, you need to run the following as a regular user:

  mkdir -p $HOME/.kube
  sudo cp -i /etc/kubernetes/admin.conf $HOME/.kube/config
  sudo chown $(id -u):$(id -g) $HOME/.kube/config

You should now deploy a pod network to the cluster.
Run "kubectl apply -f [podnetwork].yaml" with one of the options listed at:
  https://kubernetes.io/docs/concepts/cluster-administration/addons/

You can now join any number of machines by running the following on each node
as root:

kubeadm join A-IP:6443 --token y89hw4.jahkc29856dc6pi6 --discovery-token-ca-cert-hash sha256:3cddcf79c0d2ffa338167589080976876978f3ede9a2014f5aa4f5104asudo kubectl apply -f https://raw.githubusercontent.com/coreos/flannel/master/Documentation/kube-flannel.yml
sudo kubectl apply -f https://raw.githubusercontent.com/coreos/flannel/master/Documentation/k8s-manifests/kube-flannel-rbac.ymlkubeadm join A-IP:6443 --token y89hw4.jahkc29856dc6pi6 --discovery-token-ca-cert-hash sha256:3cddcf79c0d2ffa338167589080976876978f3ede9a2014f5aa4f5104amkdir -p $HOME/.kube
cp -i /etc/kubernetes/admin.conf $HOME/.kube/config
chown $(id -u):$(id -g) $HOME/.kube/configkubectl get nodes
NAME STATUS ROLES AGE VERSION
kubernetes-master NotReady master 14m v1.12.2kubeadm join A-IP:6443 --token y89hw4.jahkc29856dc6pi6 --discovery-token-ca-cert-hash sha256:3cddcf79c0d2ffa338167589080976876978f3ede9a2014f5aa4f5104a
######
[discovery] Trying to connect to API Server "A-IP:6443"
[discovery] Created cluster-info discovery client, requesting info from "https://B-IP:6443"
[discovery] Requesting info from "https://B-IP:6443" again to validate TLS against the pinned public key
[discovery] Cluster info signature and contents are valid and TLS certificate validates against pinned roots, will use API Server "B-IP:6443"
[discovery] Successfully established connection with API Server "A-IP:6443"
This node has joined the cluster:
* Certificate signing request was sent to master and a response
was received.
* The Kubelet was informed of the new secure connection details.
Run 'kubectl get nodes' on the master to see this node join the cluster.
###### 在master节点执行 kubectl get nodes,可以检查是否成功加入。
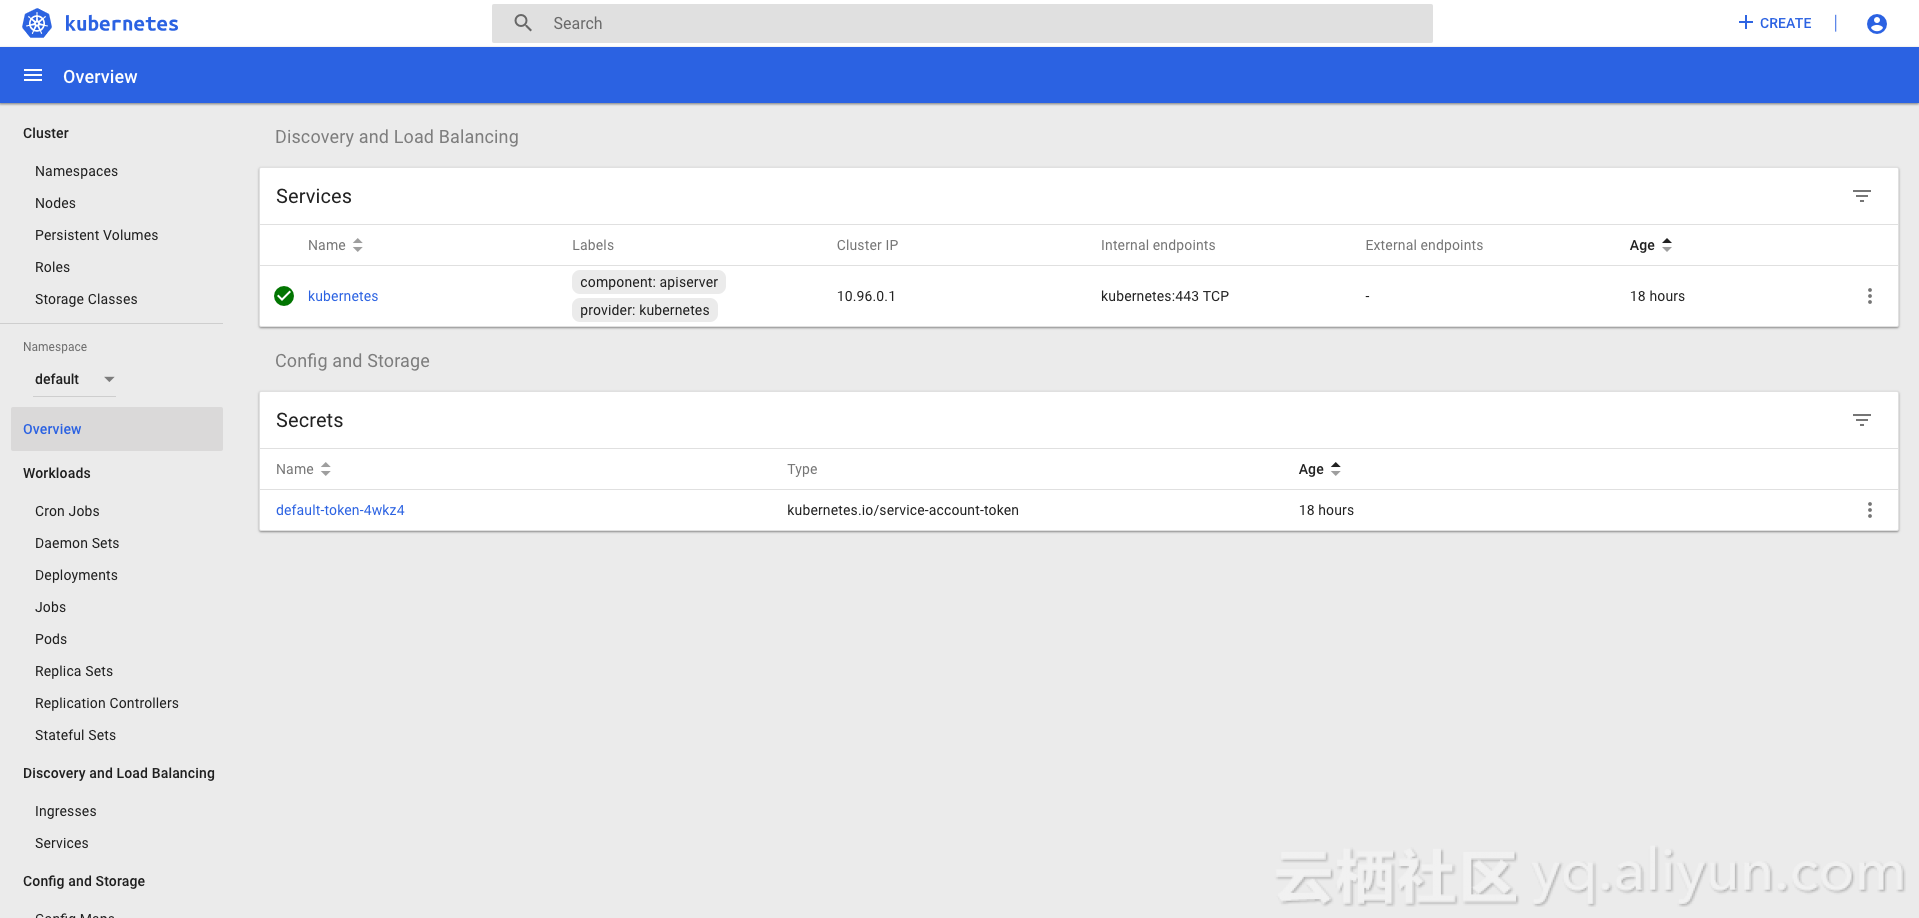
5. 配置kubernetes-dashboard:
本次测试是安装kubernetes-dashboard,并使得能够远程访问。
执行如下信息,安装kubernetes-dashboard:
apiVersion: v1
kind: List
items:
- apiVersion: v1
  kind: Secret
  metadata:
    labels:
      k8s-app: kubernetes-dashboard
    name: kubernetes-dashboard-certs
    namespace: kube-system
  type: Opaque
- apiVersion: v1
  kind: ServiceAccount
  metadata:
    labels:
      k8s-app: kubernetes-dashboard
    name: kubernetes-dashboard
    namespace: kube-system
- kind: ClusterRole
  apiVersion: rbac.authorization.k8s.io/v1
  metadata:
    name: kubernetes-dashboard-minimal
    namespace: kube-system
  rules:
    # Allow Dashboard to create 'kubernetes-dashboard-key-holder' secret.
  - apiGroups: [""]
    resources: ["secrets"]
    verbs: ["create"]
    # Allow Dashboard to create 'kubernetes-dashboard-settings' config map.
  - apiGroups: [""]
    resources: ["configmaps"]
    verbs: ["create"]
    # Allow Dashboard to get, update and delete Dashboard exclusive secrets.
  - apiGroups: [""]
    resources: ["secrets"]
    resourceNames: ["kubernetes-dashboard-key-holder", "kubernetes-dashboard-certs"]
    verbs: ["get", "update", "delete"]
    # Allow Dashboard to get and update 'kubernetes-dashboard-settings' config map.
  - apiGroups: [""]
    resources: ["configmaps"]
    resourceNames: ["kubernetes-dashboard-settings"]
    verbs: ["get", "update"]
    # Allow Dashboard to get metrics from heapster.
  - apiGroups: [""]
    resources: ["services"]
    resourceNames: ["heapster"]
    verbs: ["proxy"]
  - apiGroups: [""]
    resources: ["services/proxy"]
    resourceNames: ["heapster", "http:heapster:", "https:heapster:"]
    verbs: ["get"]
- apiVersion: rbac.authorization.k8s.io/v1
  kind: ClusterRoleBinding
  metadata:
    name: kubernetes-dashboard-minimal
    namespace: kube-system
  roleRef:
    apiGroup: rbac.authorization.k8s.io
    kind: ClusterRole
    name: kubernetes-dashboard-minimal
  subjects:
  - kind: ServiceAccount
    name: kubernetes-dashboard
    namespace: kube-system
- kind: Deployment
  apiVersion: apps/v1beta2
  metadata:
    labels:
      k8s-app: kubernetes-dashboard
    name: kubernetes-dashboard
    namespace: kube-system
  spec:
    replicas: 1
    revisionHistoryLimit: 10
    selector:
      matchLabels:
        k8s-app: kubernetes-dashboard
    template:
      metadata:
        labels:
          k8s-app: kubernetes-dashboard
      spec:
        containers:
        - name: kubernetes-dashboard
          image: k8s.gcr.io/kubernetes-dashboard-amd64:v1.10.0
          ports:
          - containerPort: 8443
            protocol: TCP
          args:
            - --auto-generate-certificates
            # Uncomment the following line to manually specify Kubernetes API server Host
            # If not specified, Dashboard will attempt to auto discover the API server and connect
            # to it. Uncomment only if the default does not work.
            # - --apiserver-host=http://my-address:port
          volumeMounts:
          - name: kubernetes-dashboard-certs
            mountPath: /certs
            # Create on-disk volume to store exec logs
          - mountPath: /tmp
            name: tmp-volume
          livenessProbe:
            httpGet:
              scheme: HTTPS
              path: /
              port: 8443
            initialDelaySeconds: 30
            timeoutSeconds: 30
        volumes:
        - name: kubernetes-dashboard-certs
          secret:
            secretName: kubernetes-dashboard-certs
        - name: tmp-volume
          emptyDir: {}
        serviceAccountName: kubernetes-dashboard
        # Comment the following tolerations if Dashboard must not be deployed on master
        tolerations:
        - key: node-role.kubernetes.io/master
          effect: NoSchedule
- kind: Service
  apiVersion: v1
  metadata:
    labels:
      k8s-app: kubernetes-dashboard
    name: kubernetes-dashboard
    namespace: kube-system
  spec:
    type: NodePort
    ports:
    - port: 443
      targetPort: 8443
      nodePort: 30000
    selector:
      k8s-app: kubernetes-dashboard
上述配置文件,service中开启nodeport,以便于远程能够直接访问。
文件执行完成后,可以通过https://A-IP:30000 来访问。
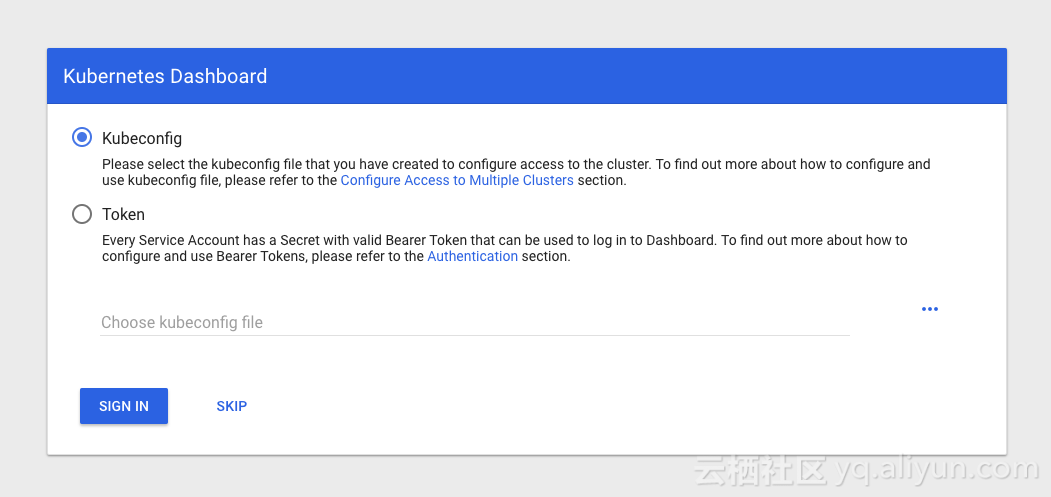
在kubernetes 1.7之后建议使用token去登录:
执行如下命令获取token:
kubectl -n kube-system get secret

#######
attachdetach-controller-token-pqtcp              kubernetes.io/service-account-token   3      3h18m
bootstrap-signer-token-qnx4s                     kubernetes.io/service-account-token   3      3h18m
bootstrap-token-y89hw4                           bootstrap.kubernetes.io/token         7      3h18m
certificate-controller-token-r6wl6               kubernetes.io/service-account-token   3      3h18m
clusterrole-aggregation-controller-token-6mrrv   kubernetes.io/service-account-token   3      3h18m
coredns-token-f4nfd                              kubernetes.io/service-account-token   3      3h18m
cronjob-controller-token-thn79                   kubernetes.io/service-account-token   3      3h18m
daemon-set-controller-token-mwszv                kubernetes.io/service-account-token   3      3h18m
default-token-xbxx9                              kubernetes.io/service-account-token   3      3h18m
deployment-controller-token-dkj7n                kubernetes.io/service-account-token   3      3h18m
disruption-controller-token-nnq57                kubernetes.io/service-account-token   3      3h18m
endpoint-controller-token-6l95q                  kubernetes.io/service-account-token   3      3h18m
expand-controller-token-qxb7h                    kubernetes.io/service-account-token   3      3h18m
flannel-token-ttkmd                              kubernetes.io/service-account-token   3      3h2m
generic-garbage-collector-token-bjndg            kubernetes.io/service-account-token   3      3h18m
horizontal-pod-autoscaler-token-kpds7            kubernetes.io/service-account-token   3      3h18m
job-controller-token-9hh7b                       kubernetes.io/service-account-token   3      3h18m
kube-proxy-token-wdv62                           kubernetes.io/service-account-token   3      3h18m
kubernetes-dashboard-certs                       Opaque                                0      171m
kubernetes-dashboard-key-holder                  Opaque                                2      171m
kubernetes-dashboard-token-m97pg                 kubernetes.io/service-account-token   3      171m
namespace-controller-token-cqmtt                 kubernetes.io/service-account-token   3      3h18m
node-controller-token-nx6cv                      kubernetes.io/service-account-token   3      3h18m
persistent-volume-binder-token-55gtw             kubernetes.io/service-account-token   3      3h18m
pod-garbage-collector-token-d26sh                kubernetes.io/service-account-token   3      3h18m
pv-protection-controller-token-dj6mt             kubernetes.io/service-account-token   3      3h18m
pvc-protection-controller-token-98wbx            kubernetes.io/service-account-token   3      3h18m
replicaset-controller-token-kfnq4                kubernetes.io/service-account-token   3      3h18m
replication-controller-token-wqpph               kubernetes.io/service-account-token   3      3h18m
resourcequota-controller-token-rzwsc             kubernetes.io/service-account-token   3      3h18m
service-account-controller-token-kmsfr           kubernetes.io/service-account-token   3      3h18m
service-controller-token-k9ps4                   kubernetes.io/service-account-token   3      3h18m
statefulset-controller-token-j4t45               kubernetes.io/service-account-token   3      3h18m
token-cleaner-token-qcbnj                        kubernetes.io/service-account-token   3      3h18m
ttl-controller-token-l9bqk                       kubernetes.io/service-account-token   3      3h18m
#######

kubectl -n kube-system describe secret clusterrole-aggregation-controller-token-6mrrv

#######
Name:         clusterrole-aggregation-controller-token-6fzrv
Namespace:    kube-system
Labels:       <none>
Annotations:  kubernetes.io/service-account.name: clusterrole-aggregation-controller
              kubernetes.io/service-account.uid: e132b88c-efe2-11e8-b652-005056a0b094

Type:  kubernetes.io/service-account-token

Data
====
ca.crt:     1025 bytes
namespace:  11 bytes
token:      eyJhbGciOiJSUzI1NiIsImtpZCI6IiJ9.eyJpc3MiOiJrdWJlcm5ldGVzL3NlcnZpY2VhY2NvdW50Iiwia3ViZXJuZXRlcy5pby9zZXJ2aWNlYWNjb3VudC9uYW1lc3BhY2UiOiJrdWJlLXN5c3RlbSIsImt1YmVybmV0ZXMuaW8vc2VydmljZWFjY291bnQvc2VjcmV0Lm5hbWUiOiJjbHVzdGVycm9sZS1hZ2dyZWdhdGlvbi1jb250cm9sbGVyLXRva2VuLTZmenJ2Iiwia3ViZXJuZXRlcy5pby9zZXJ2aWNlYWNjb3VudC9zZXJ2aWNlLWFjY291bnQubmFtZSI6ImNsdXN0ZXJyb2xlLsdnfksdnfksdnfkjfieekjfskdjfsdxsZXIiLCJrdWJlcm5ldGVzLmlvL3NlcnZpY2VhY2NvdW50L3NlcnZpY2UtYWNjb3VudC51aWQiOiJlMTMyYjg4Yy1lZmUyLTExZTgtYjY1Mi0wMDUwNTZhMGIwOTQiLCJzdWIiOiJzeXN0ZW06c2VydmljZWFjY291bnQ6a3ViZS1zeXN0ZW06Y2x1c3RlcnJvbGUtYWdncmVnYXRpb24tY29udHJvbGxlciJ9.cLhchbNMkyPTLVqk0MuWP6_7yC1zjJ_MW3R0Tv_uyEtFuYNGcYXKVwXilO2TtMzp5aeqcHq1D-tT21_a0RzJZzd4OktIANed1Ix5PRAHVRX8o7O2jK2Dj9_neqZOogPblKz7jR6g82DQf8R_Vphq4MP3CetEeUIUxbY897r1xKpb7oizZg_ca-Ai7qnQgeCw6ii7O2s1UA8ugYldaXwv7lUKze3bCCSFX9o8dUlvy8WtgF3wVvb7WW3mId1t4nGg9oXlzxhSG9z5z-BtvWNXIp1dVhrFNQgEY9hiipxgpoagLw45FxaOvtfbWd7Mhlrxotf3iED60P6e7FbS4Z_Dgw
#######