GitLab 是一个用于仓库管理系统的开源项目,使用Git作为代码管理工具,并在此基础上搭建起来的web服务。
系统环境准备
建议:内存4G以上不然带不动
[root@V1 ~]# cat /etc/redhat-release
CentOS Linux release 7.4.1708 (Core)
[root@V1 ~]# uname -r
3.10.0-693.el7.x86_64
#关闭firewalld和NetWorkManager
[root@V1 ~]# systemctl stop firewalld
[root@V1 ~]# systemctl stop NetWorkManager
#永久关闭
[root@V1 ~]# systemctl disable firewalld
[root@V1 ~]# systemctl disable NetWorkManager
#关闭selinux
[root@V1 ~]# sed -i 's/SELINUX=enforcing/SELINUX=disabled/g' /etc/selinux/config
[root@V1 ~]# setenforce 0
#更换阿里源和下载epel源
[root@V1 ~]#mv /etc/yum.repos.d/CentOS-Base.repo /etc/yum.repos.d/CentOS-Base.repo.backup
[root@V1 ~]#wget -O /etc/yum.repos.d/CentOS-Base.repo http://mirrors.aliyun.com/repo/Centos-7.repo
[root@V1 ~]#wget -O /etc/yum.repos.d/epel.repo http://mirrors.aliyun.com/repo/epel-7.repo
#yum源更新,重启系统
[root@V1s ~]# yum update && reboot#安装相应工具
[root@V1 ~]yum install curl policycoreutils openssh-server openssh-clients postfix -y
[root@V1 ~]systemctl start postfix
#新建GitLab源
[root@V1 ~]# vim /etc/yum.repos.d/gitlab-ce.repo
[gitlab-ce]
name=gitlab-ce
baseurl=http://mirrors.tuna.tsinghua.edu.cn/gitlab-ce/yum/el7
repo_gpgcheck=0
gpgcheck=0
enabled=1
gpgkey=https://packages.gitlab.com/gpg.key
[root@V1 ~]# yum makecache
[root@V1 ~]# yum install -y gitlab-ce
#安装git工具
[root@V1 ~]# yum install git -y通常我们在部署的时候会发现80和8080端口均被占用,那么我们就需要修改gitlab的默认端口。
#gitlab配置文件路径,用于gitlab如何调用80和8080的服务等。
/etc/gitlab/gitlab.rb编辑配置文件并找到 unicorn 配置,将端口修改成想要的端口
修改/etc/gitlab/gitlab.rb
vim /etc/gitlab/gitlab.rb

#unicorn['port'] = 8080 修改 8070  默认是注释的去掉前面的#
unicorn['port'] = 8070
#nginx['listen_port'] = nil 修改 8090  默认是注释的去掉前面的#
nginx['listen_port'] = 8090
修改/var/opt/gitlab/gitlab-rails/etc/unicorn.rb
vim /var/opt/gitlab/gitlab-rails/etc/unicorn.rb

#listen "127.0.0.1:8080", :tcp_nopush => true
listen "127.0.0.1:8070", :tcp_nopush => true
修改默认的gitlab nginx的web服务80端 /var/opt/gitlab/nginx/conf/gitlab-http.conf
vim /var/opt/gitlab/nginx/conf/gitlab-http.conf

#listen *:80;
listen *:8090;
#加载配置文件并启动,时间稍长
[root@V1 ~]# gitlab-ctl reconfigure#gitlab-ctl其他命令
启动:gitlib-ctl start
关闭:gitlab-ctl stop
重启:gitlab-ctl restart
重载配置:gitlab-ctl reconfigure
查看状态:gitlab-ctl status
#查看端口保证80端口不被占用
[root@V1 ~]# lsof -i:80
COMMAND PID       USER   FD   TYPE DEVICE SIZE/OFF NODE NAME
nginx   700       root    7u  IPv4  16903      0t0  TCP *:http (LISTEN)
nginx 804 gitlab-www 7u IPv4 16903 0t0 TCP *:http (LISTEN)浏览器登录gitlab,输入http://服务器ip:配置的nginx端口,进入下图: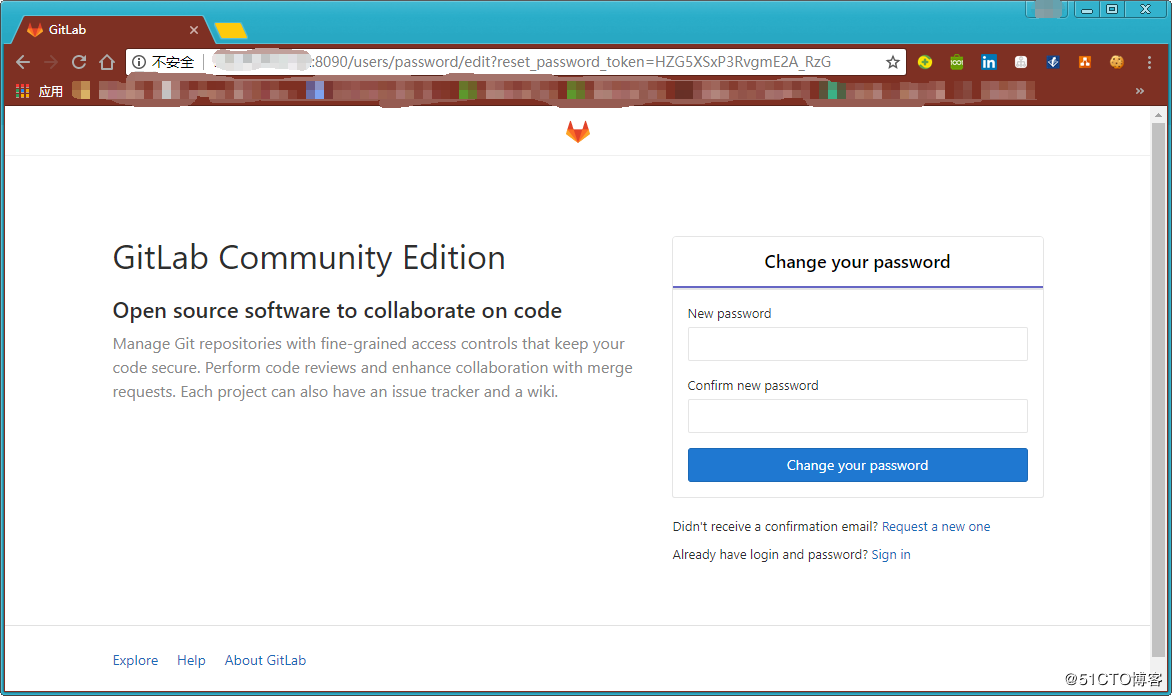
设置一个密码后,使用 root 用户进行登录。
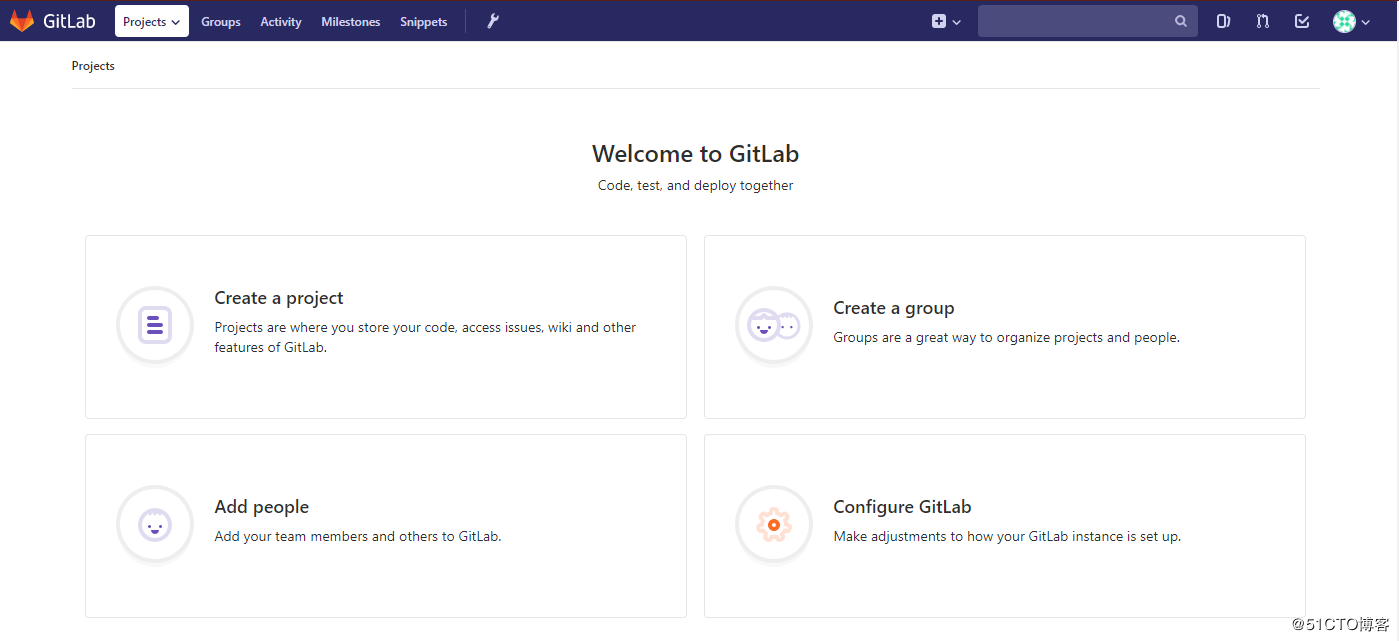
新建一个项目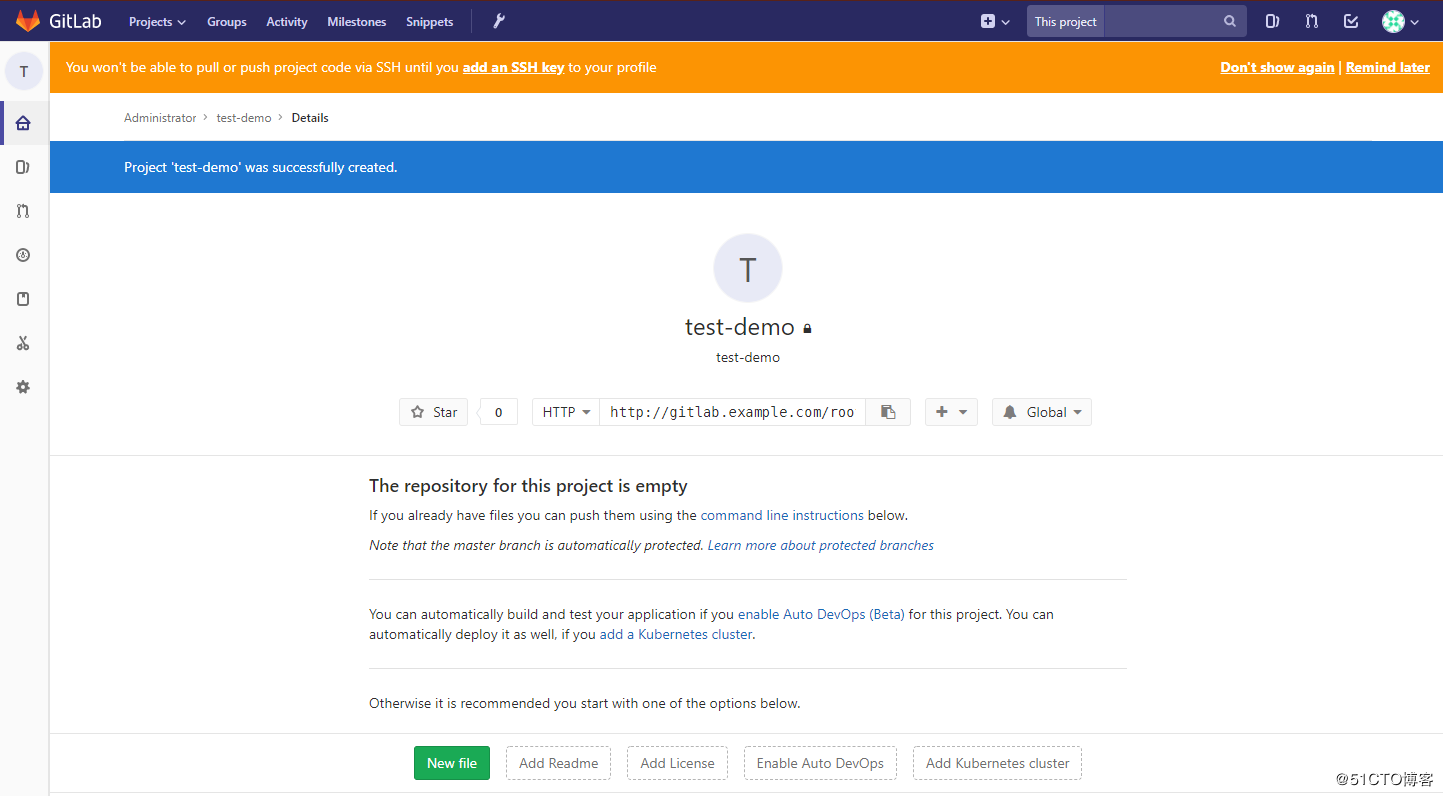
那么我们怎样为 GitLab 的账号添加 SSH keys 呢
1).首先打开 linux 服务器,输入命令:ls -al ~/.ssh,检查是否显示有 id_rsa.pub 或者 id_dsa.pub 存在,如果存在请直接跳至第3步。
2).在 bash 中输入 ssh-keygen -t rsa -C ”yourEmail@example.com” ,注意这个地方的邮箱地址地址替换成你自己的邮箱地址即可,在显示如下的输出后一直按回车即可:
[root@V1 ~]# useradd web-gitlab
[root@V1 ~]# su !$
su web-gitlab
[web-gitlab@V1 root]$
[web-gitlab@V1 root]$
[web-gitlab@V1 root]$ ssh-keygen -t rsa -C ”yourEmail@example.com”
Generating public/private rsa key pair.
Enter file in which to save the key (/home/web-gitlab/.ssh/id_rsa):
Created directory '/home/web-gitlab/.ssh'.
Enter passphrase (empty for no passphrase):
Enter same passphrase again:
Your identification has been saved in /home/web-gitlab/.ssh/id_rsa.
Your public key has been saved in /home/web-gitlab/.ssh/id_rsa.pub.
The key fingerprint is:
SHA256:hwumGaUbZy7pD/R1LmaRC4NV42NToJZIuqsv1CMyhuo ”yourEmail@example.com”
The key's randomart image is:
+---[RSA 2048]----+
|    .   +..      |
|   o . = o       |
|  . . * =        |
|   . * . =       |
|. o * B S o      |
|++ = & = B       |
|=.o O o * .      |
|o. . o o .       |
|oE. ...          |
+----[SHA256]-----+
[web-gitlab@V1 root]$
在这里可以看到 id_rsa 和 id_rsa.pub 已经生成,并且生成的路径为 /home/web-gitlab/.ssh/。
[web-gitlab@V1 root]$ cd /home/web-gitlab/
[web-gitlab@V1 ~]$
[web-gitlab@V1 ~]$
[web-gitlab@V1 ~]$ ll
total 0
[web-gitlab@V1 ~]$
[web-gitlab@V1 ~]$ ll .ssh/
total 8
-rw------- 1 web-gitlab web-gitlab 1679 Apr 28 10:42 id_rsa
-rw-r--r-- 1 web-gitlab web-gitlab  402 Apr 28 10:42 id_rsa.pub
3).打开 id_rsa.pub 文件,并且复制全部内容。
[web-gitlab@PaulV1 ~]$ cat .ssh/id_rsa.pub 4).打开 GitLab 账户,添加 SSH Keys: 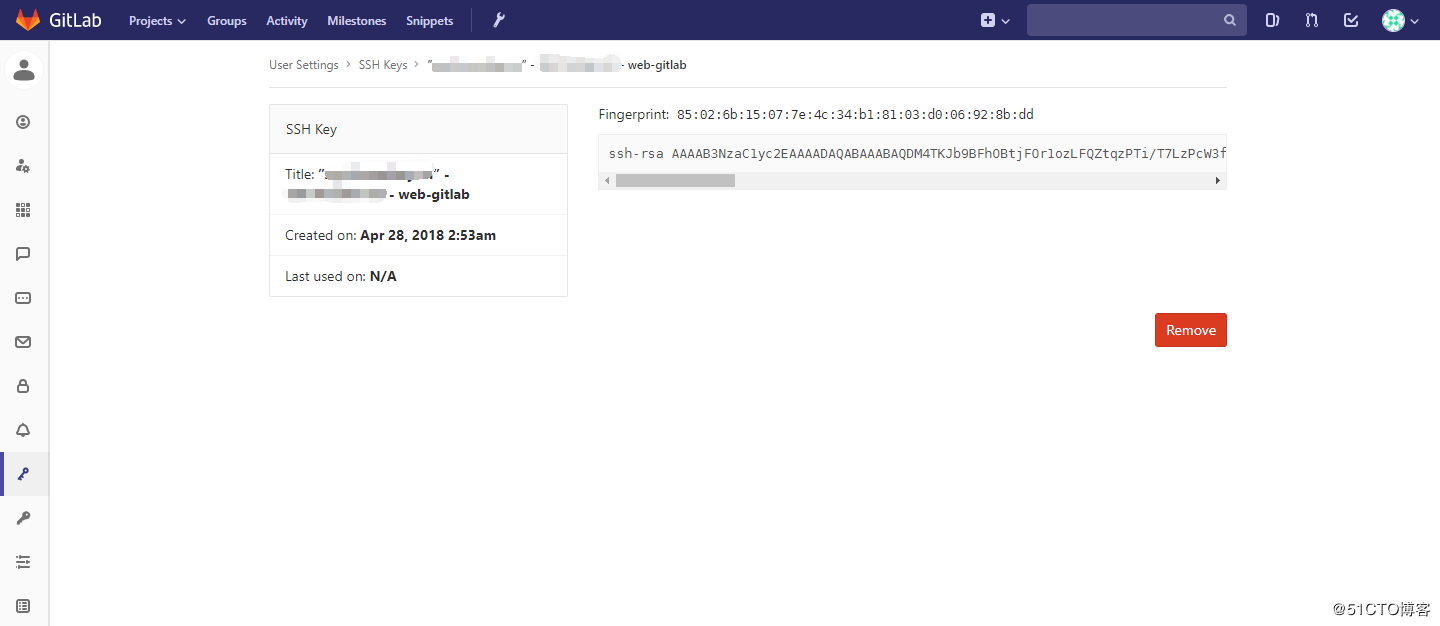
这样就添加了一个SSH key。
5).完成上面的步骤之后就可以使用ssh来连接GitLab,并进行相应的操作了。
我们可以通过 ssh 来 clone 项目
[root@V1 ~]# su web-gitlab
[web-gitlab@V1 root]$
[web-gitlab@V1 root]$ cd /home/web-gitlab/
[web-gitlab@V1 ~]$ git clone git@服务器IP:root/test-demo.git
Cloning into 'test-demo'...
The authenticity of host '服务器IP (服务器IP)' can't be established.
ECDSA key fingerprint is SHA256:+CWe+3ROJVtuClFaH425BsTSYf+c9vTuhHF/6jTr4TI.
ECDSA key fingerprint is MD5:63:c6:8a:1a:59:fa:b8:ec:22:cb:29:dd:68:57:d4:3d.
Are you sure you want to continue connecting (yes/no)? yes
Warning: Permanently added '服务器IP' (ECDSA) to the list of known hosts.
warning: You appear to have cloned an empty repository.
[web-gitlab@V1 ~]$
[web-gitlab@V1 ~]$ ll
total 4
drwxrwxr-x 3 web-gitlab web-gitlab 4096 Apr 28 11:03 test-demo
这就是我们通过 ssh 克隆下来的项目。
参考资料: