lnmp 安装
32.lnmp 安装(Linux+Apache+MySQL+PHP)
32.1 apache 安装
wget http://mirrors.hust.edu.cn/apache//apr/apr-1.5.2.tar.gz
wget http://mirrors.hust.edu.cn/apache//apr/apr-util-1.5.4.tar.gz
wget http://mirrors.hust.edu.cn/apache//httpd/httpd-2.2.32.tar.gz
yum -y install pcre-devel
【No recognized SSL/TLS toolkit detected】
yum install openssl openssl-devel
./configure --prefix=/usr/local/apr
make && make install
./configure --prefix=/usr/local/apr-util --with-apr=/usr/local/apr
make && make install
./configure --prefix=/usr/local/apache --sysconfdir=/etc/httpd --enable-so --enable-rewirte --enable-ssl --enable-cgi --enable-cgid --enable-modules=most --enable-mods-shared=most --enable-mpms-shared=all --with-apr=/usr/local/apr --with-apr-util=/usr/local/apr-util
make && make install
vim /etc/httpd/httpd.conf
在ServerRoot下面添加一行
PidFile "/var/run/httpd.pid"
vim /etc/init.d/httpd
#!/bin/bash
#
# httpd Startup script for the Apache HTTP Server
#
# chkconfig: - 85 15
# description: Apache is a World Wide Web server. It is used to serve \
# HTML files and CGI.
# processname: httpd
# config: /etc/httpd/conf/httpd.conf
# config: /etc/sysconfig/httpd
# pidfile: /var/run/httpd.pid
# Source function library.
. /etc/rc.d/init.d/functions
if [ -f /etc/sysconfig/httpd ]; then
. /etc/sysconfig/httpd
fi
# Start httpd in the C locale by default.
HTTPD_LANG=${HTTPD_LANG-"C"}
# This will prevent initlog from swallowing up a pass-phrase prompt if
# mod_ssl needs a pass-phrase from the user.
INITLOG_ARGS=""
# Set HTTPD=/usr/sbin/httpd.worker in /etc/sysconfig/httpd to use a server
# with the thread-based "worker" MPM; BE WARNED that some modules may not
# work correctly with a thread-based MPM; notably PHP will refuse to start.
# Path to the apachectl script, server binary, and short-form for messages.
apachectl=/usr/local/apache/bin/apachectl
httpd=${HTTPD-/usr/local/apache/bin/httpd}
prog=httpd
pidfile=${PIDFILE-/var/run/httpd.pid}
lockfile=${LOCKFILE-/var/lock/subsys/httpd}
RETVAL=0
start() {
echo -n $"Starting $prog: "
LANG=$HTTPD_LANG daemon --pidfile=${pidfile} $httpd $OPTIONS
RETVAL=$?
echo
[ $RETVAL = 0 ] && touch ${lockfile}
return $RETVAL
}
stop() {
echo -n $"Stopping $prog: "
killproc -p ${pidfile} -d 10 $httpd
RETVAL=$?
echo
[ $RETVAL = 0 ] && rm -f ${lockfile} ${pidfile}
}
reload() {
echo -n $"Reloading $prog: "
if ! LANG=$HTTPD_LANG $httpd $OPTIONS -t >&/dev/null; then
RETVAL=$?
echo $"not reloading due to configuration syntax error"
failure $"not reloading $httpd due to configuration syntax error"
else
killproc -p ${pidfile} $httpd -HUP
RETVAL=$?
fi
echo
}
# See how we were called.
case "$1" in
start)
start
;;
stop)
stop
;;
status)
status -p ${pidfile} $httpd
RETVAL=$?
;;
restart)
stop
start
;;
condrestart)
if [ -f ${pidfile} ] ; then
stop
start
fi
;;
reload)
reload
;;
graceful|help|configtest|fullstatus)
$apachectl $@
RETVAL=$?
;;
*)
echo $"Usage: $prog {start|stop|restart|condrestart|reload|status|fullstatus|graceful|help|configtest}"
exit 1
esac
exit $RETVAL
为此脚本赋予执行权限: chmod +x /etc/rc.d/init.d/httpd
加入服务列表: chkconfig --add httpd
给3,5启动 chkconfig --level 3 httpd on chkconfig --level 5 httpd on
最后加路径 export PATH=$PATH:/usr/local/apache/bin
vim /etc/profile.d/httpd.sh完成后重新登录就可以了
httpd -k start
httpd -k stop
/usr/local/apache/bin/apachectl start
32.2 mysql 安装 centos7 yum安装mysql
32.2.2 mysql 源码安装
wget https://dev.mysql.com/get/Downloads/MySQL-5.7/mysql-5.7.18.tar.gz
tar xf mysql-5.7.18.tar.gz
mv mysql-5.7.18 mysql
wget https://jaist.dl.sourceforge.net/project/boost/boost/1.59.0/boost_1_59_0.tar.gz
cmake . -DCMAKE_INSTALL_PREFIX=/usr/local/mysql \
-DMYSQL_UNIX_ADDR=/usr/local/mysql/mysql.sock \
-DDEFAULT_CHARSET=utf8 \
-DDEFAULT_COLLATION=utf8_general_ci \
-DWITH_INNOBASE_STORAGE_engine=1 \
-DWITH_ARCHIVE_STORAGE_ENGINE=1 \
-DWITH_BLACKHOLE_STORAGE_ENGINE=1 \
-DMYSQL_DATADIR=/usr/local/mysql/data \
-DMYSQL_TCP_PORT=3306 \
-DWITH_BOOST=/usr/local/boost_1_59_0 \
-DENABLE_DOWNLOADS=1 \
-DCURSES_INCLUDE_PATH=/usr/include \
-DCURSES_LIBRARY=/usr/lib64/libncurses.so
cd /usr/local/mysql/bin
./mysqld --initialize --user=mysql --datadir=/usr/local/mysql/data/ --basedir=/usr/local/mysql --socket=/usr/local/mysql/mysql.sock
cp -a support-files/mysql.server /etc/init.d/mysql
cp -a mysql.server /etc/init.d/mysql
vim /etc/my.cnf
[mysqld]
sql_mode=NO_ENGINE_SUBSTITUTION,STRICT_TRANS_TABLES
service mysql start
SET PASSWORD = PASSWORD('66666666');
use mysql
update user set host='%' where user='root' and host='localhost';
flush privileges;
exit
32.3 php 安装
tar xf php-5.6.30.gz
mv php-5.6.30 ../soft/
cd ../soft/php-5.6.30/
yum install libxml2-devel
./configure --prefix=/usr/local/php --with-apxs2=/usr/local/apache/bin/apxs --with-mysql=/usr/local/mysql --with-pdo-mysql=/usr/local/mysql
make && make install
修改 apache2让支持php
vim /etc/httpd/httpd.conf
添加
LoadModule php5_module modules/libphp5.so
添加
AddType application/x-httpd-php .php
AddType application/x-httpd-php-source .phps
添加 DirectoryIndex
<IfModule dir_module>
DirectoryIndex index.html index.php
</IfModule>
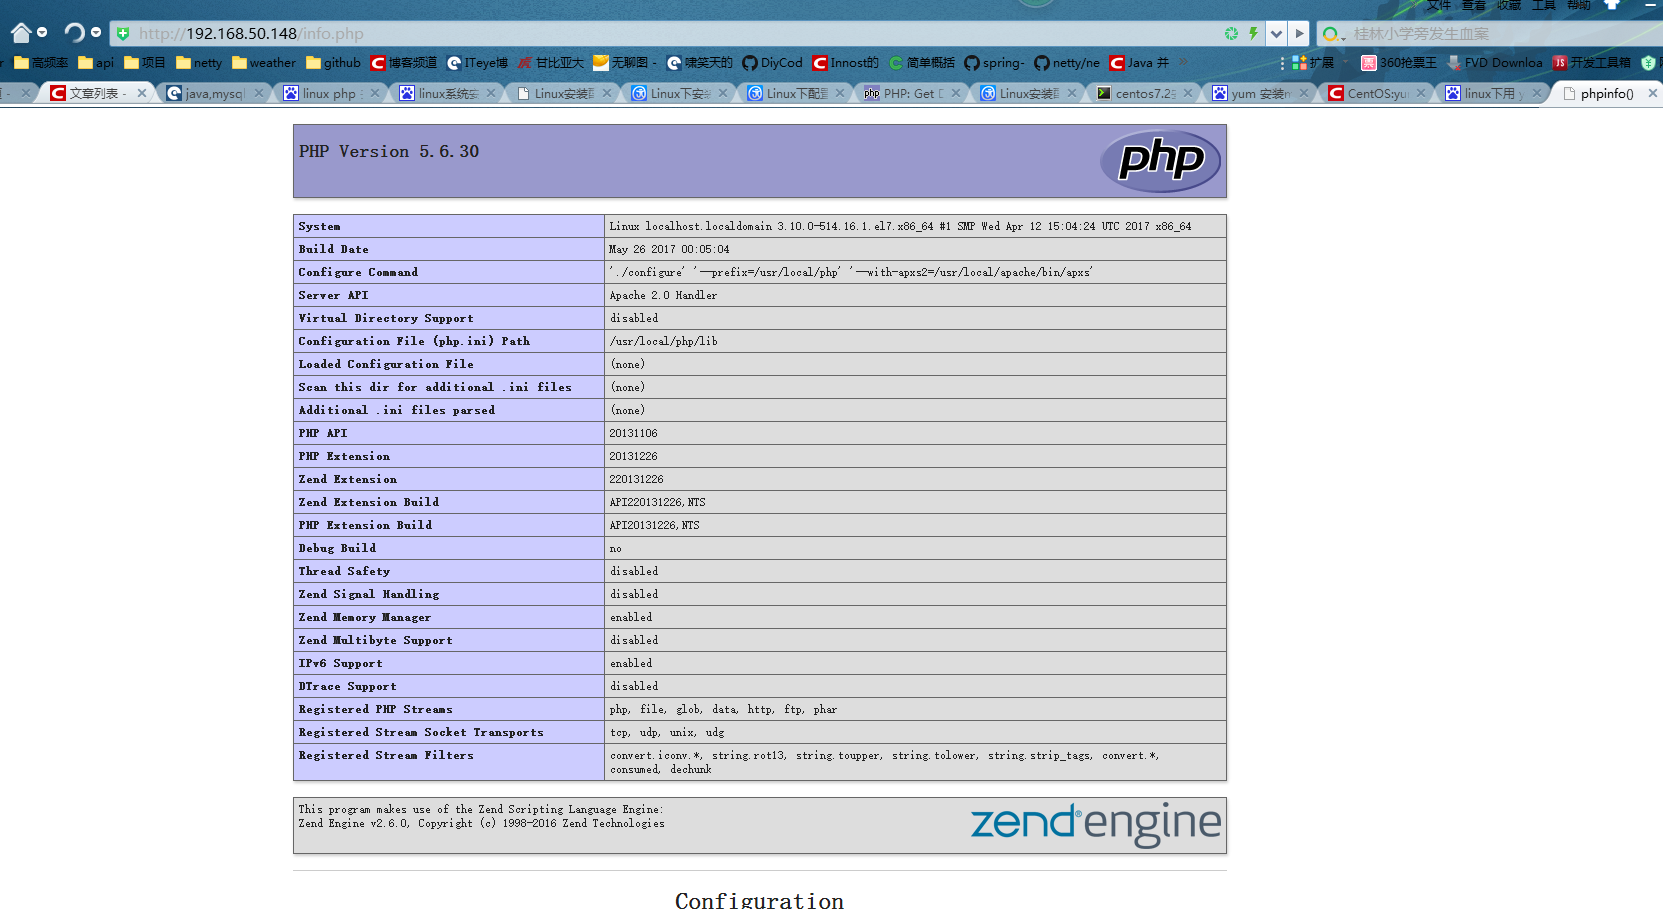
测试
在/usr/local/apache/htdocs/info.php 创建
<?php
phpinfo();
?>
http://172.23.24.180/info.php
捐助开发者
在兴趣的驱动下,写一个免费的东西,有欣喜,也还有汗水,希望你喜欢我的作品,同时也能支持一下。 当然,有钱捧个钱场(支持支付宝和微信 以及扣扣群),没钱捧个人场,谢谢各位。
个人主页:http://knight-black-bob.iteye.com/


谢谢您的赞助,我会做的更好!