前言
上一个周没有写博客,是我太懒,无法坚持。在上一个周,除去工作的任务(迭代版本,修复BUG)之外,我一直在模仿一个UI效果。我呢,算是一个米粉,我前面的博客,有一些效果就是来自MIUI。在MIUI中,很多的列表都具有弹性和粘性,个人觉得这个效果不错,于是就模仿了一下。
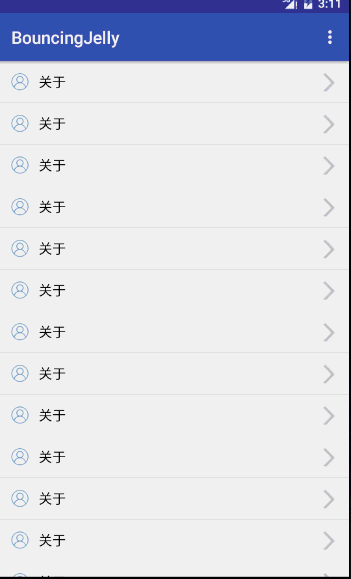
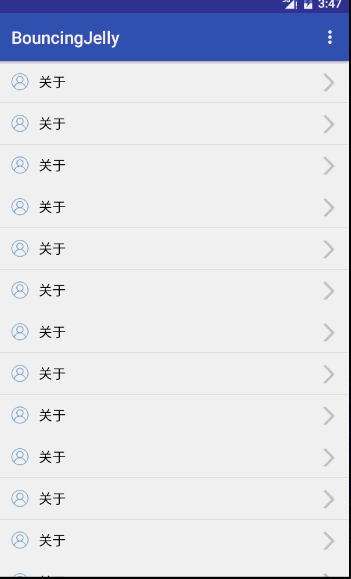
本来开始之初是为了将这个效果封装成为一个单独的UI控件,结果写着写着就发现这样是不合理的,于是就放在一旁等待解决方案,先看看实际的效果吧。(前面两个是我项目中的实际效果)

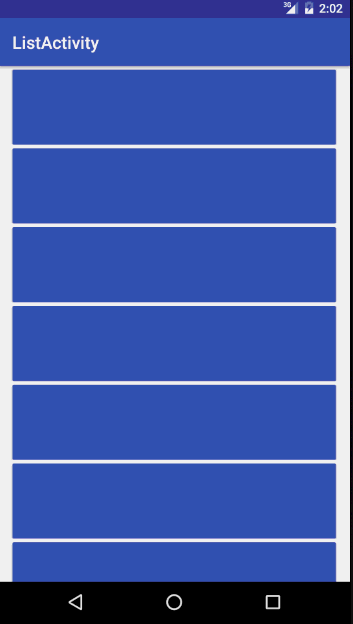
怎么样,看上去效果还是挺可以的吧,不得不说,MIUI在一些小细节上面做得非常不错,很多效果都值得我们深入的进行学习。
注意
- 本博客最主要的是为了向大家展示一种解决思路,文章中的类表效果用到实际项目中还是有些许问题。
- 为了方便起见,本文中使用的动画效果来自于JakeWharton大神的NineOldAndroids的支持库,个人非常不建议新手直接就来使用开源库,最起码应该熟悉一些基础。
分析
刚开始的时候,我一直在网上找类似的效果,一直是没有找到。直到我学习完属性动画之后才发现,其实这个效果实现起来是非常的简单。
-
整个效果看上去分为上拉和下来,上拉和下拉的时候进行缩放。
 1. 下拉:
     将View的中心点移到(width/2,0)中进行Scale缩放
 2. 上拉
     将View的中心点移到(width/2,height)中进行Scale缩放
松手之后会有一个回弹效果,使用ValueAnimator来进行散发scale值,采用OvershootInterpolator差值器就能达到这样的效果。
编码
1. 选择继承
自定义View又几种方式:
- 继承自View实现效果。
- 继承原生控件进行拓展。
- 组合控件。
很明显,效果图中都是包含了子控件的,可以选择继承ViewGroup来实现,但是我根本不关心子控件的一些测量和layout,所以需要继承已经实现的ViewGroup。最后我选定的是使用ScrollView,原因是为了兼容滚动,并且需要监听是否已经滚动到了底部。
2.准备工作
- 创建项目
- 引用开源库 compile 'com.nineoldandroids:library:2.4.0'
- 创建自定义控件类继承ScrollView,实现三个构造方法,并且在xml中引用
3. 自定义属性
首先思考我们需要哪一些属性,比方说手指抬起后回弹的速度,回弹的效果方式(其实就是不同的差值器),能够进行果冻缩放的方式,只能是顶部、底部或者不限制。
在value文件夹中创建attr.xml
    <attr name="BouncingDuration" format="integer" />
    <attr name="BouncingInterpolator" format="enum">
        <enum name="OvershootInterpolator" value="1" />
        <enum name="BounceInterpolator" value="2" />
        <enum name="LinearInterpolator" value="3" />
        <enum name="AccelerateDecelerateInterpolator" value="4" />
    </attr>
    <attr name="BouncingType" format="enum">
        <enum name="none" value="0" />
        <enum name="top" value="1" />
        <enum name="bottom" value="2" />
        <enum name="both" value="3" />
    </attr>

    <declare-styleable name="BouncingJellyScrollView">
        <attr name="BouncingDuration" />
        <attr name="BouncingInterpolator" />
        <attr name="BouncingType" />
    </declare-styleable>
将attr独立出来的原因是我还有几个控件需要使用相同的一些属性。
5. 初始化
在构造方法中初始化一些常量值和属性。
其它的一些工具类方法
    public class BouncingType {
        public static final int NONE = 0;
        public static final int TOP = 1;
        public static final int BOTTOM = 2;
        public static final int BOTH = 3;
    }

    public class BouncingInterpolatorType {

        public static final int OVERSHOOT_INTERPOLATOR = 1;
        public static final int BOUNCE_INTERPOLATOR = 2;
        public static final int LINEAR_INTERPOLATOR = 3;
        public static final int ACCELERATE_DECELERATE_INTERPOLATOR = 4;

        /**
         * 获取弹跳类型
         *
         * @return
         */
        public static TimeInterpolator getTimeInterpolator(int type) {
            TimeInterpolator mTimeInterpolator = null;
            switch (type) {
                case OVERSHOOT_INTERPOLATOR:
                    mTimeInterpolator = new OvershootInterpolator();
                    break;
                case BOUNCE_INTERPOLATOR:
                    mTimeInterpolator = new BounceInterpolator();
                    break;
                case LINEAR_INTERPOLATOR:
                    mTimeInterpolator = new LinearInterpolator();
                    break;
                case ACCELERATE_DECELERATE_INTERPOLATOR:
                    mTimeInterpolator = new AccelerateDecelerateInterpolator();
                    break;
            }
            return mTimeInterpolator;
        }
    }
初始化属性
    /**
     * @param attrs
     */
    private void initAttr(AttributeSet attrs) {
        if (attrs != null) {
            TypedArray typedArray = getContext().obtainStyledAttributes(attrs, R.styleable.BouncingJellyScrollView);
            //差值器
            mTimeInterpolator = BouncingInterpolatorType.getTimeInterpolator(typedArray.getInteger(
                    R.styleable.BouncingJellyScrollView_BouncingInterpolator
                    , BouncingInterpolatorType.OVERSHOOT_INTERPOLATOR));
            //回弹速度
            mBouncingDuration = typedArray.getInteger(R.styleable.BouncingJellyScrollView_BouncingDuration, mBouncingDuration);
            //果冻类型
            mBouncingType = typedArray.getInt(R.styleable.BouncingJellyScrollView_BouncingType, BouncingType.BOTH);
            typedArray.recycle();
            //获取是差值  整个屏幕的三倍大小
            bouncingOffset=ScreenUtils.getScreenHeight(getContext()) * 3;
        }
    }
onSizeChanged中验证模式
@Override
protected void onSizeChanged(int w, int h, int oldw, int oldh) {
    super.onSizeChanged(w, h, oldw, oldh);
    //判断可滚动的内容是不是小于整个屏幕的高度,以防底部进行所动
    int contentHeight = getChildAt(0).getHeight();
    if (contentHeight > 0 && contentHeight <= ScreenUtils.getScreenHeight(getContext())) {
        mBouncingType = BouncingType.TOP;
    }
}
4. 开始编码
因为我们继承的是ViewGroup,子View还需要拦截事件,所以我们需要重写dispatchTouchEvent方法,并且在其中拦截事件分发和做缩放效果。
先实现在顶部进行滑动的时候随着手指移动而进行缩放
    /**
     * 从顶部开始滑动
     */
    public void bouncingTo() {
        //设置X坐标点
        ViewHelper.setPivotX(this, getWidth() / 2);
        //设置Y坐标点
        ViewHelper.setPivotY(this, 0);
        //进行缩放
        ViewHelper.setScaleY(this, 1.0f + offsetScale);
    }

     /**
     * 从顶部开始滑动
     */
    public void bouncingBottom() {
        //设置X坐标点
        ViewHelper.setPivotX(this, getWidth() / 2);
        //设置Y坐标点
        ViewHelper.setPivotY(this, getHeight());
        ViewHelper.setScaleY(this, 1.0f + offsetScale);
    }
在ACTION_DOWN记录按下的坐标,用于计算缩放值和进行回弹。因为ACTION_DOWN事件必定会传递到子view的,所以不能直接返回true。
//移动坐标
dowY = (int) event.getRawY();
//按下坐标 用于计算缩放值
dowY2 = (int) event.getRawY();
在ACTION_MOVE中进行事件分发和缩放。
-
实现顶部滑动缩放,主要原理是判断当前是不是滚动到了顶部,获取手指移动的方向和距离。
moveX = (int) event.getRawX();
moveY = (int) event.getRawY();
//dy值 判断方向
int dy = moveY - dowY;
dowY = moveY;
//顶部
if (dy > 0 && getScrollY() == 0) {
//判断果冻的类型
if (mBouncingType == BouncingType.TOP || mBouncingType == BouncingType.BOTH) {
//获取现在坐标与按下坐标的差值
int abs = moveY - dowY2;
//计算缩放值
offsetScale = (Math.abs(abs) / bouncingOffset);
if (offsetScale > 0.3f) {
offsetScale = 0.3f;
}
isTop = true;
bouncingTo();
return true;
}
}
实现第一步效果如下:

- 回拉恢复
效果是出来了,从顶部下拉的时候慢慢的缩放了,但是如果在下拉一定距离后上拉会是怎么样的呢?应该是慢慢的缩回去,然后再进行滚动。 需要在顶部if后面再加上判断
 if (getScrollY() == 0 && dy < 0 && offsetScale > 0) {//为顶部 并且dy为下拉 并且缩放值大于0
    if (mBouncingType == BouncingType.TOP || mBouncingType == BouncingType.BOTH) {
        //获取现在坐标与按下坐标的差值
        int abs = moveY - dowY2;
        //计算缩放值
        offsetScale = (Math.abs(abs) / bouncingOffset);
        if (offsetScale > 0.3f) {
            offsetScale = 0.3f;
        }
        if (abs <= 0) {
            offsetScale = 0;
            dowY2 = moveY;
        }
        isTop = true;
        bouncingTo();
        return true;
    }
}
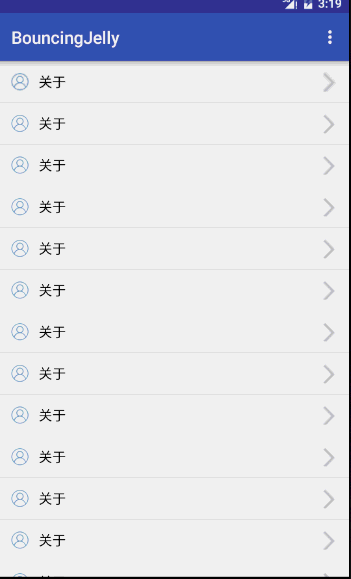
效果如下:
- 手指抬起进行回弹
前面两步完成了整个拉取的过程,现在只要加上手机抬起的时候进行回弹就可以了。整个回弹过程是有一个时间段,并且还有一个效果。采用ValueAnimator来散发offsetScale值来不断的改变缩放值就能达到效果。
ACTION_UP代码
 if (mBouncingType != BouncingType.NONE) {
        if (offsetScale > 0) {
            backBouncing(offsetScale, 0);
            return true;
        }
    }

/**
 * 进行回弹
 *
 * @param from
 * @param to
 */
private void backBouncing(final float from, final float to) {
    //初始化
    if (animator != null && animator.isRunning()) {
        animator.cancel();
        animator = null;
        offsetScale = 0;
        bouncingTo();
    }
    if (mTimeInterpolator == null) {
        mTimeInterpolator = new OvershootInterpolator();
    }
    //散发值
    animator = ValueAnimator.ofFloat(from, to).setDuration(mBouncingDuration);
    animator.setInterpolator(mTimeInterpolator);//差值器
    animator.addUpdateListener(new ValueAnimator.AnimatorUpdateListener() {
        @Override
        public void onAnimationUpdate(ValueAnimator animation) {
            //获取动画阶段的值
            offsetScale = (float) animation.getAnimatedValue();
            if (isTop) {//回弹到顶部
                bouncingTo();
            } else {//回弹到底部
                bouncingBottom();
            }
        }
    });
    animator.start();
}
效果如下:
其实到这里,整个果冻视图就已经算是完成了,至于底部滑动,缩放都是一样的,只是方向,值相反而已。判断是否已经滚动到了底部,判断方向等。以下附上dispatchTouchEvent的代码,代码量有些冗余,只是为了每个部分的清晰而已。
@Override
public boolean dispatchTouchEvent(MotionEvent event) {
    switch (event.getAction()) {
        case MotionEvent.ACTION_DOWN:
            //移动坐标
            dowY = (int) event.getRawY();
            //按下坐标 用于计算缩放值
            dowY2 = (int) event.getRawY();
            break;
        case MotionEvent.ACTION_MOVE:
            if (mBouncingType != BouncingType.NONE) {
                moveX = (int) event.getRawX();
                moveY = (int) event.getRawY();
                //dy值 判断方向
                int dy = moveY - dowY;
                dowY = moveY;
                //顶部
                if (dy > 0 && getScrollY() == 0) {
                    //判断果冻的类型
                    if (mBouncingType == BouncingType.TOP || mBouncingType == BouncingType.BOTH) {
                        //获取现在坐标与按下坐标的差值
                        int abs = moveY - dowY2;
                        //计算缩放值
                        offsetScale = (Math.abs(abs) / bouncingOffset);
                        if (offsetScale > 0.3f) {
                            offsetScale = 0.3f;
                        }
                        isTop = true;
                        bouncingTo();
                        return true;
                    }
                } else if (getScrollY() == 0 && dy < 0 && offsetScale > 0) {//为顶部 并且dy为下拉 并且缩放值大于0
                    if (mBouncingType == BouncingType.TOP || mBouncingType == BouncingType.BOTH) {
                        //获取现在坐标与按下坐标的差值
                        int abs = moveY - dowY2;
                        //计算缩放值
                        offsetScale = (Math.abs(abs) / bouncingOffset);
                        if (offsetScale > 0.3f) {
                            offsetScale = 0.3f;
                        }
                        if (abs <= 0) {
                            offsetScale = 0;
                            dowY2 = moveY;
                        }
                        isTop = true;
                        bouncingTo();
                        return true;
                    }
                }

                //底部
                if (dy < 0 && getScrollY() + getHeight() >= computeVerticalScrollRange()) {//滚动到底部
                    if (mBouncingType == BouncingType.BOTTOM || mBouncingType == BouncingType.BOTH) {
                        int abs = moveY - dowY2;
                        offsetScale = (Math.abs(abs) / bouncingOffset);
                        if (offsetScale > 0.3f) {
                            offsetScale = 0.3f;
                        }
                        isTop = false;
                        bouncingBottom();
                    }
                } else if (dy > 0 && getScrollY() + getHeight() >= computeVerticalScrollRange() && offsetScale > 0) {
                    if (mBouncingType == BouncingType.BOTTOM || mBouncingType == BouncingType.BOTH) {
                        int abs = moveY - dowY2;
                        offsetScale = (Math.abs(abs) / bouncingOffset);
                        if (offsetScale > 0.3f) {
                            offsetScale = 0.3f;
                        }
                        if (abs >= 0) {
                            offsetScale = 0;
                            dowY2 = moveY;
                        }
                        isTop = false;
                        bouncingBottom();
                        return true;
                    }
                }
            }
            break;
        case MotionEvent.ACTION_UP:
            if (mBouncingType != BouncingType.NONE) {
                if (offsetScale > 0) {
                    backBouncing(offsetScale, 0);
                    return true;
                }
            }
            break;
    }
    return super.dispatchTouchEvent(event);
}
来一个整体完成的效果图:
其它View
- RecyclerView,ListVIew实现的原理都是一样的,判断是否在顶部,滑动方向等,再进行缩放即可。另外我实现了一个RecycerView的demo,代码和上面的基本上一致。
最后
最后,这暂时是一个最基本的,等有时间我会继续完成这个自定义View的。如果可能,希望大家能够给我一个star。
