前言
本章主要用原生的方式实现一个菜单页面,主要用到的知识点为位移动画,我们可以先看看效果。
分析
高斯模糊背景
我们的菜单背景是一个高斯模糊的背景,虽然看上去高大上,但是不要被吓到了,实现原理非常的简单:截取当前屏幕转换为bitmap,将bitmap进行高斯模糊,然后设置为菜单的背景。
当然,还有另外一种实现方式就是让UI设计师切一张高斯模糊模糊的透明背景图,看看UI设计师会不会打死你。

菜单跳动
这个效果看上去虽然是复杂,但是不要被吓到了。其实也就是先用一个RelativeLayout作为根布局,将里面的每个menu逐个的布局,排列好。
-
打开菜单的时候,使用translationY动画逐个逐个的将menu从屏幕外移动到原来的位置,而从第0个menu开始,后面的每个menu根据下标延迟启动动画。
- 第1个比第0个延迟开始动画160毫秒*
- 第2个比第1个延迟开始动画260毫秒*
- 第3个比第2个延迟开始动画360毫秒*
-
关闭菜单,从第0个进行translationY动画将menu逐个移出到屏幕外。从下标递增,不断的延迟动画的开始。
- 第0个延迟开始动画430毫秒,并且在动画结束关闭弹出*
- 第1个比第0个延迟开始动画330毫秒*
- 第2个比第1个延迟开始动画230毫秒*
- 第3个比第2个延迟开始动画130毫秒*
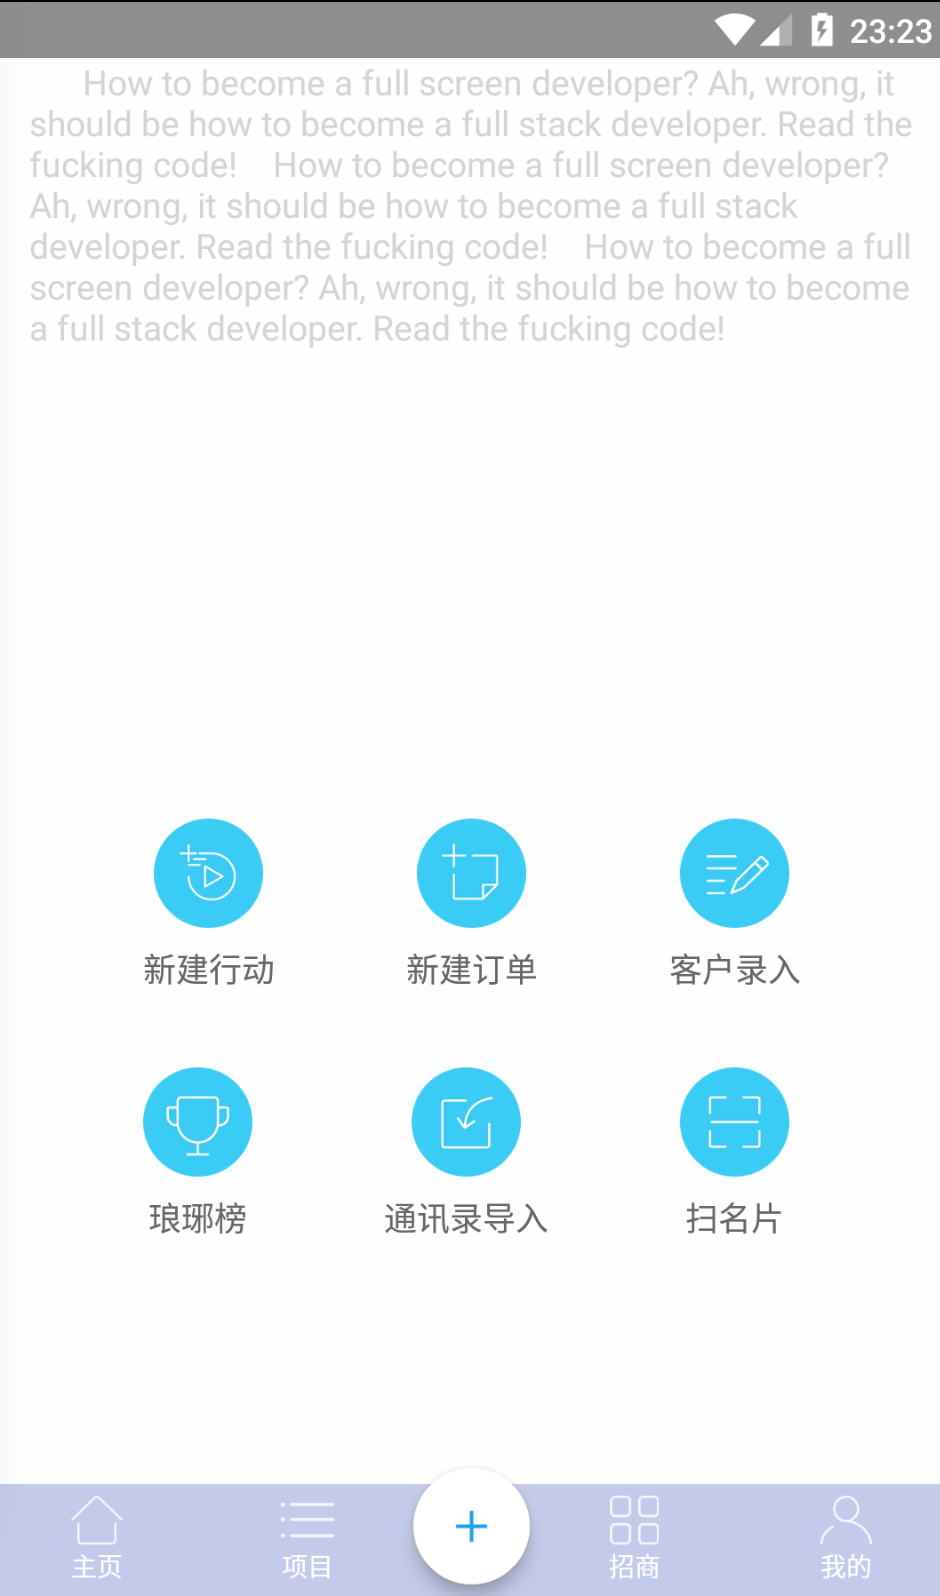
底部圆形菜单
动画
也就是这个东西

如何实现突出
ViewGroup有个属性是clipChildren,设置为false则代表当前ViewGroup对超出高度的子view不进行裁切
实现
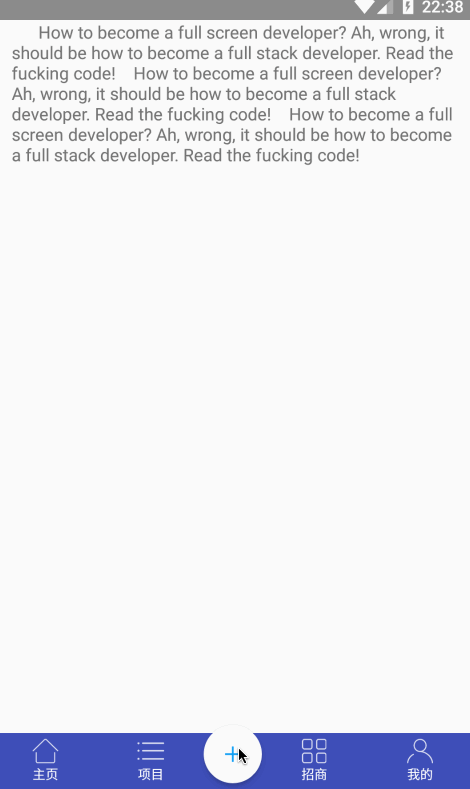
底部Tab栏
首先是底部的tab栏实现,没什么好讲的。根布局使用FrameLayout,然后又LineaLayout排列图标。
<?xml version="1.0" encoding="utf-8"?>
<FrameLayout xmlns:android="http://schemas.android.com/apk/res/android"
    android:layout_width="match_parent"
    android:layout_height="wrap_content"
    android:layout_gravity="bottom|end"
    android:background="#00000000"
    android:clipChildren="false">

    <LinearLayout
        android:layout_width="match_parent"
        android:layout_height="48dip"
        android:layout_alignParentBottom="true"
        android:background="@color/colorPrimary"
        android:orientation="horizontal">

        <RelativeLayout
            android:id="@+id/rl_menu_home"
            style="@style/MainMenuLinearStyle">

            <ImageView
                android:id="@+id/iv_menu_home"
                style="@style/MainMenuImageStyle"
                android:src="@drawable/menu_home_select" />

            <TextView
                android:id="@+id/tv_menu_home"
                style="@style/MainMenuTextStyle"
                android:layout_below="@id/iv_menu_home"
                android:text="首页" />
        </RelativeLayout>

        <RelativeLayout
            android:id="@+id/rl_menu_project"
            style="@style/MainMenuLinearStyle">

            <ImageView
                android:id="@+id/iv_menu_project"
                style="@style/MainMenuImageStyle"
                android:src="@drawable/menu_project_select" />

            <TextView
                android:id="@+id/tv_menu_project"
                style="@style/MainMenuTextStyle"
                android:layout_below="@id/iv_menu_project"
                android:text="项目" />
        </RelativeLayout>

        <android.support.design.widget.FloatingActionButton
            android:id="@+id/fab_all_menu"
            android:layout_width="50dp"
            android:layout_height="50dp"
            android:layout_gravity="bottom"
            android:layout_marginBottom="-15dp"
            android:rotation="45"
            android:src="@drawable/ic_clear" />

        <RelativeLayout
            android:id="@+id/rl_menu_client"
            style="@style/MainMenuLinearStyle">

            <ImageView
                android:id="@+id/iv_menu_client"
                style="@style/MainMenuImageStyle"
                android:src="@drawable/menu_client_select" />

            <TextView
                android:id="@+id/tv_menu_client"
                style="@style/MainMenuTextStyle"
                android:layout_below="@id/iv_menu_client"
                android:text="招商" />
        </RelativeLayout>

        <RelativeLayout
            android:id="@+id/rl_menu_my"
            style="@style/MainMenuLinearStyle">

            <ImageView
                android:id="@+id/iv_menu_my"
                style="@style/MainMenuImageStyle"
                android:src="@drawable/menu_my_select" />

            <TextView
                android:id="@+id/tv_main_home"
                style="@style/MainMenuTextStyle"
                android:layout_below="@id/iv_menu_my"
                android:text="我的" />
        </RelativeLayout>
    </LinearLayout>
</FrameLayout>
看看效果吧:

布局整个菜单
这一步也没什么大的难度,就是在布局每个menu的时候确定位置是比较繁琐的,选择RelativeLayout的原因是因为层级,所有的menu都处于同一个层级中,进行位移动画的时候才不会被裁切。
另外需要的是在底部再增加一个和TAB栏一样的圆形按钮,用于占位和关闭菜单。
来看布局吧:
<RelativeLayout xmlns:android="http://schemas.android.com/apk/res/android"
                xmlns:tools="http://schemas.android.com/tools"
                android:id="@+id/rl_more_menu_root"
                android:layout_width="match_parent"
                android:layout_height="match_parent"
                android:background="#90FFFFFF"
                android:clickable="true"
                android:focusable="true"
                android:gravity="center_horizontal"
                android:orientation="vertical">
    <!--背景占位-->
    <FrameLayout
        android:id="@+id/rl_bg"
        android:layout_width="match_parent"
        android:layout_height="match_parent"
        android:alpha="0.3"
        android:background="@color/white"
        />
    <RelativeLayout
        android:id="@+id/rl_menu_warp"
        android:layout_width="match_parent"
        android:layout_height="match_parent"
        android:layout_alignParentBottom="true"
        android:layout_centerHorizontal="true"
        android:gravity="bottom|center_horizontal">


        <TextView
            android:id="@+id/tv_new_action"
            android:layout_width="wrap_content"
            android:layout_height="wrap_content"
            android:layout_marginRight="28dp"
            android:clickable="true"
            android:drawablePadding="@dimen/dp_8"
            android:drawableTop="@mipmap/new_action_icon"
            android:gravity="center_horizontal"
            android:paddingBottom="@dimen/more_window_item_margin"
            android:text="新建行动"
            android:textColor="#666"/>

        <TextView
            android:id="@+id/tv_new_order"
            android:layout_width="wrap_content"
            android:layout_height="wrap_content"
            android:layout_marginLeft="28dp"
            android:layout_marginRight="28dp"
            android:layout_toRightOf="@+id/tv_new_action"
            android:clickable="true"
            android:drawablePadding="@dimen/dp_8"
            android:drawableTop="@mipmap/new_order_icon"
            android:gravity="center_horizontal"
            android:paddingBottom="@dimen/more_window_item_margin"
            android:text="新建订单"
            android:textColor="#666"/>

        <TextView
            android:id="@+id/tv_client_input"
            android:layout_width="wrap_content"
            android:layout_height="wrap_content"
            android:layout_marginLeft="28dp"
            android:layout_toRightOf="@+id/tv_new_order"
            android:clickable="true"
            android:drawablePadding="@dimen/dp_8"
            android:drawableTop="@mipmap/client_input_icon"
            android:gravity="center_horizontal"
            android:paddingBottom="@dimen/more_window_item_margin"
            android:text="客户录入"
            android:textColor="#666"/>

        <TextView
            android:id="@+id/tv_ranking_listcon"
            android:layout_width="wrap_content"
            android:layout_height="wrap_content"
            android:layout_below="@+id/tv_new_action"
            android:layout_marginRight="28dp"
            android:layout_marginTop="20dp"
            android:clickable="true"
            android:drawablePadding="@dimen/dp_8"
            android:drawableTop="@mipmap/ranking_listcon"
            android:gravity="center_horizontal"
            android:paddingBottom="@dimen/more_window_item_margin"
            android:text="琅琊榜"
            android:textColor="#666"/>

        <TextView
            android:id="@+id/tv_import_mail_icon"
            android:layout_width="wrap_content"
            android:layout_height="wrap_content"
            android:layout_below="@+id/tv_new_order"
            android:layout_marginLeft="28dp"
            android:layout_marginRight="28dp"
            android:layout_marginTop="20dp"
            android:layout_toRightOf="@+id/tv_ranking_listcon"
            android:clickable="true"
            android:drawablePadding="@dimen/dp_8"
            android:drawableTop="@mipmap/import_mail_icon"
            android:gravity="center_horizontal"
            android:paddingBottom="@dimen/more_window_item_margin"
            android:text="通讯录导入"
            android:textColor="#666"/>

        <TextView
            android:id="@+id/tv_scan_card_icon"
            android:layout_width="wrap_content"
            android:layout_height="wrap_content"
            android:layout_below="@+id/tv_client_input"
            android:layout_marginBottom="140dp"
            android:layout_marginLeft="28dp"
            android:layout_marginTop="20dp"
            android:layout_toRightOf="@+id/tv_import_mail_icon"
            android:clickable="true"
            android:drawablePadding="@dimen/dp_8"
            android:drawableTop="@mipmap/scan_card_icon"
            android:gravity="center_horizontal"
            android:paddingBottom="@dimen/more_window_item_margin"
            android:text="扫名片"
            android:textColor="#666"/>
    </RelativeLayout>


    <!--打开与关闭的菜单-->
    <android.support.design.widget.FloatingActionButton
        android:id="@+id/fab_close_more_menu"
        android:layout_width="50dp"
        android:layout_height="50dp"
        android:layout_alignParentBottom="true"
        android:layout_centerHorizontal="true"
        style="@style/DialogTextStyle"
        android:layout_marginBottom="-15dp"
        android:background="@color/white"
        android:rotation="45"
        android:src="@drawable/ic_clear"/>
</RelativeLayout>
运行起来看看效果吧:
行了,初步完成,接下来就是为tab的快捷菜单增加点击时间,然后进行动画部分的编写了。
编写打开动画
将menu布局gone起来,再做下一步。虽然有点水字数的嫌疑,但是我还是要放出来:
使用translationY动画逐个逐个的将menu从屏幕外移动到原来的位置,而从第0个menu开始,后面的每个menu根据下标延迟启动动画。
- 第1个比第0个延迟开始动画160毫秒*
- 第2个比第1个延迟开始动画260毫秒*
- 第3个比第2个延迟开始动画360毫秒*

来看代码部分的编写吧:
/**
 * 打开动画
 */
private void showAnimation() {
    // 获取子view的个数,进行遍历
    for (int i = 0; i < rlMenuWrap.getChildCount(); i++) {
        // 获取到相应的子view
        final View child = rlMenuWrap.getChildAt(i);
        // 关闭按钮和背景进行跳过
        if (child.getId() == R.id.fab_close_more_menu || child.getId() == R.id.rl_bg) {
            continue;
        }
        // 先暂时隐藏
        child.setVisibility(View.INVISIBLE);
        mHandler.postDelayed(new Runnable() {

            @Override
            public void run() {
                //显示菜单
                child.setVisibility(View.VISIBLE);
                // Y轴位移动画 从800移动到当前位置
                ValueAnimator fadeAnim = ObjectAnimator.ofFloat(child, "translationY", 600, 0);
                //动画时长
                fadeAnim.setDuration(200);
                // 自定义差值器
                KickBackAnimator kickAnimator = new KickBackAnimator();
                //设置速度
                kickAnimator.setDuration(100);
                // 设置差值器
                fadeAnim.setEvaluator(kickAnimator);
                //开始动画
                fadeAnim.start();
            }
        }, i * 60);// 根据下标延迟执行动画
    }
}
代码里面用到了一个自定义差值器,内容如下:
public class KickBackAnimator implements TypeEvaluator<Float> {
    private final float s = 1.70158f;
    float mDuration = 0f;

    public void setDuration(float duration) {
        mDuration = duration;
    }

    public Float evaluate(float fraction, Float startValue, Float endValue) {
        float t = mDuration * fraction;
        float b = startValue.floatValue();
        float c = endValue.floatValue() - startValue.floatValue();
        float d = mDuration;
        float result = calculate(t, b, c, d);
        return result;
    }

    public Float calculate(float t, float b, float c, float d) {
        return c * ((t = t / d - 1) * t * ((s + 1) * t + s) + 1) + b;
    }
}
接下来就是调用showAnimation方法了,在调用之前先setVisibility,来看看效果吧:

为了能够更好的显示效果,故意增加了动画的时长,好了关于打开动画就这样完成,接下来就是关闭动画的编写了。
编写关闭动画
这里不水了,关闭动画与打开动画基本上是一致的,其他就两点区别:
- 延迟动画的时间是相反的
- 第0个动画完成需要关闭菜单
/**
 * 关闭动画
 *
 */
private void closeAnimation() {
    // 获取所有的子view
    for (int i = 0; i < rlMenuWrap.getChildCount(); i++) {
        final View child = rlMenuWrap.getChildAt(i);
        // 判断  关闭按钮和背景不进入动画
        if (child.getId() == R.id.fab_close_more_menu || child.getId() == R.id.rl_bg) {
            continue;
        }
        mHandler.postDelayed(new Runnable() {

            @Override
            public void run() {
                // 显示
                child.setVisibility(View.VISIBLE);
                // Y轴位移动画 从当前位置到600
                ValueAnimator fadeAnim = ObjectAnimator.ofFloat(child, "translationY", 0, 600);
                fadeAnim.setDuration(200);
                KickBackAnimator kickAnimator = new KickBackAnimator();
                kickAnimator.setDuration(100);
                fadeAnim.setEvaluator(kickAnimator);
                fadeAnim.start();
                fadeAnim.addListener(new BaseAnimatorListener() {
                    @Override
                    public void onAnimationEnd(Animator animation) {
                        // 动画完成后隐藏menu
                        child.setVisibility(View.INVISIBLE);
                    }
                });
            }
        }, (rlMenuWrap.getChildCount() - i - 1) * 30);// 设置和打开相反的延迟时长

        //第0个
        if (i == 0) {
            mHandler.postDelayed(new Runnable() {

                @Override
                public void run() {
                    // 隐藏menu
                    rlMoreMenuRoot.setVisibility(View.GONE);
                }
            }, (rlMenuWrap.getChildCount() - i) * 30 + 80);
        }
    }

}
看看效果吧:

此致,菜单相关的效果也就完成了,剩下的就是高斯模糊和底部圆形菜单的旋转了。
高斯模糊和旋转
高斯模糊
高斯模糊就是一个工具方法而已,没什么其它出彩的地方,拿到截图后用高斯模糊算法工具方法进行模糊算法,这部分就不放出来了,以免有水字数的嫌疑。可以直接在底部点击源码进行查看。
旋转
其实就是一个简单的方法,先放出来吧:
/**
 * 旋转菜单按钮
 */
private void rotationActionMenu(int from, int to) {
    ValueAnimator fadeAnim = ObjectAnimator.ofFloat(fabCloseMoreMenu, "rotation", from, to);
    fadeAnim.setDuration(300);
    KickBackAnimator kickAnimator = new KickBackAnimator();
    kickAnimator.setDuration(150);
    fadeAnim.setEvaluator(kickAnimator);
    fadeAnim.start();
}
在打开和关闭的时候传入不同的值即可。
效果
最后,来看看相关的效果图,再放一次。
才能够本章可以看出,任何复杂的效果,都能通过拆分成小功能来实现。
未完待续、敬请期待!
我的博客地址

