前言
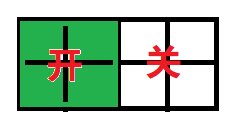
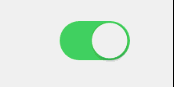
实现一个简单的滑动开发,效果图如下:
switchView完整版本
分析
- 平分整个View为两份
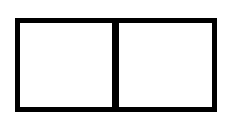
平分VIew
- 测量字体的高度和宽度,确定左右View的文字的位置并进行绘制
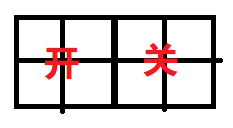
确定字体的位置和绘制
绘制背景颜色,如果有圆角,绘制==圆角 #f44336==
在文字下层绘制一个==背景View(矩形) #ff5722==,有圆角的情况下会绘制圆角
绘制背景View
- 设置点击事件,在点击事件中开启一个 ==ValueAnimator.ofFloa(1) #f44336== 动画, 在==onDraw() #f44336==不断的通过动画的执行==百分比 #f44336== 计算背景View的X轴坐标进行绘制。
6 动画完成保存状态和设置文字的颜色。
编码
确定属性
首先确定需要哪一些属性,然后在慢慢的对属性进行实现。
<declare-styleable name="SwitchView">
    <!--关闭文字-->
    <attr name="off_text" format="string" />
    <!--打开文字-->
    <attr name="on_text" format="string" />
    <!--打开文字颜色-->
    <attr name="on_text_color" format="color" />
    <!--关闭文字颜色-->
    <attr name="off_text_color" format="color" />
    <!--无状态下的背景颜色-->
    <attr name="background_color" format="color" />
    <!--打开的背景颜色-->
    <attr name="on_background_color" format="color" />
    <!--关闭的背景颜色-->
    <attr name="off_background_color" format="color" />
    <!--字体大小-->
    <attr name="text_size" format="dimension" />
    <!--圆角-->
    <attr name="radius" format="dimension" />
</declare-styleable>
创建SwitchView
==SwitchView #f44336== 使用的完全接手 ==onDraw #f44336== ,自行进行相关绘制的自定义方式,所以我们需要继承至 ==View #f44336==
public class SwitchView extends View{
    public SwitchView(Context context) {
        this(context, null);
    }

    public SwitchView(Context context, AttributeSet attrs) {
        this(context, attrs, 0);
    }

    public SwitchView(Context context, AttributeSet attrs, int defStyleAttr) {
        super(context, attrs, defStyleAttr);
        initAttr(context, attrs);
    }

    private void initAttr(Context context, AttributeSet attrs) {

    }
}
初始化相关属性
/**
 * 初始化属性
 *
 * @param context 上下午
 * @param attrs 属性
 */
private void initAttr(Context context, AttributeSet attrs) {
    TypedArray typedArray = context.obtainStyledAttributes(attrs, R.styleable.SwitchView);
    //关闭文字
    offText = typedArray.getString(R.styleable.SwitchView_off_text);
    offText = TextUtils.isEmpty(offText) ? "关闭" : offText;
    //打开文字
    onText = typedArray.getString(R.styleable.SwitchView_on_text);
    onText = TextUtils.isEmpty(onText) ? "打开" : onText;
    //关闭文字颜色
    offTextColor = typedArray.getColor(R.styleable.SwitchView_off_text_color, offTextColor);
    //打开文字颜色
    onTextColor = typedArray.getColor(R.styleable.SwitchView_on_text_color, onTextColor);
    //背景颜色
    mBackgroundColor = typedArray.getColor(R.styleable.SwitchView_background_color, mBackgroundColor);
    //打开背景颜色
    mOnBackgroundColor = typedArray.getColor(R.styleable.SwitchView_on_background_color, mOnBackgroundColor);
    //关闭背景颜色
    mOffBackgroundColor = typedArray.getColor(R.styleable.SwitchView_off_background_color, mOnBackgroundColor);
    //文字大小
    textSize = typedArray.getDimension(R.styleable.SwitchView_text_size, 16);
    //圆角
    mRadius = typedArray.getDimension(R.styleable.SwitchView_radius, mRadius);
    //前面那个按钮的长度
    mFrontGroundWidth = typedArray.getDimension(R.styleable.SwitchView_front_ground_width, 0);

    typedArray.recycle();
    //初始化画笔
    mPaint = new Paint();
    mPaint.setStrokeWidth(5);
    mPaint.setAntiAlias(true);
}
测量和计算
测量整个View的宽高,确定左右两部分的长度和文字的位置
protected void onSizeChanged(int w, int h, int oldw, int oldh) {
    super.onSizeChanged(w, h, oldw, oldh);
    //View的宽度
    mWidth = w;
    //View的高度
    mHeight = h;
    //高度的中间
    mCenterHeight = h / 2;
    //宽度的中间
    mCenterWidth = w / 2;
    //创建背景矩形
    mBackgroundRectf = new RectF(0, 0, mWidth, mHeight);
    //打开的矩形
    mOnRectf = new RectF(0, 0, mCenterWidth, mHeight);
    //文字的中间高度
    Rect mRect = new Rect();
    mPaint.setTextSize(textSize);
    // 测量打开文字
    mPaint.getTextBounds(onText, 0, onText.length(), mRect);
    onTextCenterHeight = mRect.height() * 0.4f;
    //测量关闭文字
    mPaint.getTextBounds(offText, 0, offText.length(), mRect);
    offTextCenterHeight = mRect.height() * 0.4f;
}
绘制文字和背景
@Override
protected void onDraw(Canvas canvas) {
    super.onDraw(canvas);
    // 设置颜色
    mPaint.setColor(mBackgroundColor);
    ////绘制背景矩形
    canvas.drawRoundRect(mOnRectf, mRadius, mRadius, mPaint);

    //绘制打开文字
    mPaint.setColor(onTextColor);
    mPaint.setTextSize(textSize);
    canvas.drawText(onText, mCenterWidth / 2 - mPaint.measureText(onText) / 2, mCenterHeight + onTextCenterHeight, mPaint);


    //绘制关闭文字
    mPaint.setColor(offTextColor);
    mPaint.setTextSize(textSize);
    canvas.drawText(offText, (mCenterWidth + mCenterWidth / 2) - mPaint.measureText(offText) / 2, mCenterHeight + offTextCenterHeight, mPaint);

}
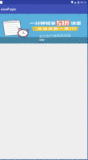
查看效果:
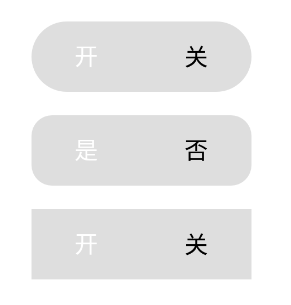
背景效果
绘制打开背景
绘制开关颜色
mOnRectf = new RectF(0 , 0, width , mHeight);
mPaint.setColor(mOnBackgroundColor);
canvas.drawRoundRect(mOnRectf, mRadius, mRadius, mPaint);
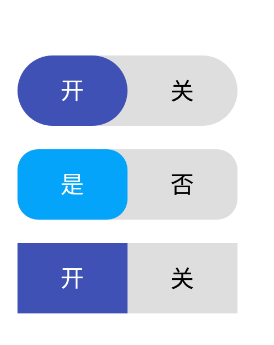
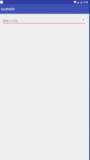
打开预览
完善细节
基本上到这一步骤就已经是差不多了,现在需要做的是:
- 响应点击事件,启动动画
- 根据动画的执行值更改RectF的left的值,如果处于打开,那么left增加,关闭则left减少
- 定义一个接口,动画完成回调结果。
点击事件和动画
 @Override
public void onClick(View v) {
    startAnim();
}

private void startAnim() {
    if (valueAnimator == null || !valueAnimator.isRunning()) {
        //发散一个宽度的值
        valueAnimator = ValueAnimator.ofFloat(1).setDuration(300);
        valueAnimator.setInterpolator(new AccelerateDecelerateInterpolator());
        valueAnimator.addUpdateListener(new ValueAnimator.AnimatorUpdateListener() {
            @Override
            public void onAnimationUpdate(ValueAnimator animation) {
                aminValueHundred = (float) animation.getAnimatedValue();
                invalidate();
            }

        });
        isExchangeColor = false;
        valueAnimator.start();
    }
}
onDraw代码
protected void onDraw(Canvas canvas) {
    super.onDraw(canvas);
    // 更改颜色
    mPaint.setColor(mBackgroundColor);
    // 绘制背景矩形
    canvas.drawRoundRect(mBackgroundRectf, mRadius, mRadius, mPaint);


    //当前百分比的宽度
    int valueWidth = (int) (mCenterWidth * aminValueHundred);
    if (isOn) {
        //打开
        mOnRectf = new RectF(0 + valueWidth, 0, mCenterWidth + valueWidth, mHeight);
        mPaint.setColor(mOnBackgroundColor);
        if (aminValueHundred >= 0.5 && !isExchangeColor) {
            ////置换两种颜色
            mTempTextColor = offTextColor;
            offTextColor = onTextColor;
            onTextColor = mTempTextColor;
            isExchangeColor = true;
        }
        if (aminValueHundred >= 0.5) {
            mPaint.setColor(mOffBackgroundColor);
        }
    } else {
        //关闭
        mOnRectf = new RectF(mCenterWidth - valueWidth, 0, mWidth - valueWidth, mHeight);
        mPaint.setColor(mOffBackgroundColor);
        if (aminValueHundred >= 0.5 && !isExchangeColor) {
            //置换两种颜色
            mTempTextColor = onTextColor;
            onTextColor = offTextColor;
            offTextColor = mTempTextColor;
            isExchangeColor = true;
        }
        if (aminValueHundred >= 0.5) {
            mPaint.setColor(mOnBackgroundColor);
        }
    }
    if (!isOn && aminValueHundred == 1 && valueAnimator == null) {
        mOnRectf = new RectF(valueWidth, 0, mWidth, mHeight);
        mPaint.setColor(mOffBackgroundColor);
    }

    canvas.drawRoundRect(mOnRectf, mRadius, mRadius, mPaint);

    //绘制打开文字
    mPaint.setColor(onTextColor);
    mPaint.setTextSize(textSize);
    canvas.drawText(onText, mCenterWidth / 2 - mPaint.measureText(onText) / 2, mCenterHeight + onTextCenterHeight, mPaint);


    //绘制关闭文字
    mPaint.setColor(offTextColor);
    mPaint.setTextSize(textSize);
    canvas.drawText(offText, (mCenterWidth + mCenterWidth / 2) - mPaint.measureText(offText) / 2, mCenterHeight + offTextCenterHeight, mPaint);
    // 动画结束
    if (aminValueHundred == 1 && valueAnimator != null) {
        valueAnimator = null;
        isOn = !isOn;
        if (onSwitchListener != null) {
            onSwitchListener.onSwitchListener(isOn, isOn ? onText : offText);
        }

    }
}
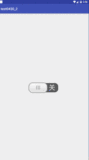
查看效果:
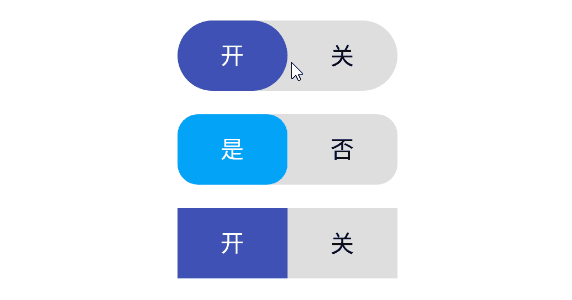
完成预览
最后
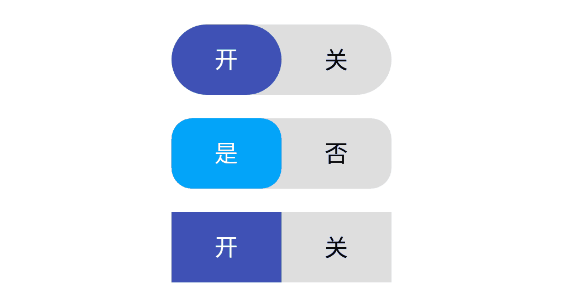
当前只是实现了一个简单的切换,更多背景的颜色切换并没有完成,还有一些细节,现在还是比较生硬,希望下一步能实现更细腻的动画,就像下面这个这样:
switch button

FullScreenDeveloper