写在前面:
关于shiro介绍以及shiro整合spring,我在另一篇文章中已详细介绍,此处不作说明,请参考spring整合shiro。点我下载源码。
开发环境:
1、mysql - 5.7.21
2、navicat(mysql客户端管理工具)
3、idea 2017
4、jdk9
5、tomcat 8.5
6、springboot
7、mybatis 3
8、shiro
9、maven
项目开始:
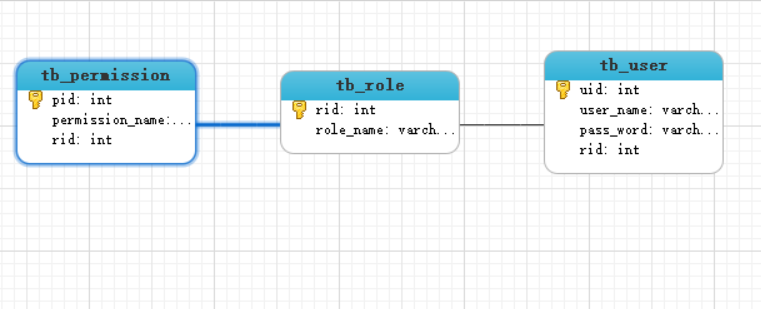
一、数据库设计:
注:数据库三张表和spring整合shiro中的一模一样,在那边已经详细说明,这里直接大家看下三张表的ER图。
二、添加依赖,配置mybatis
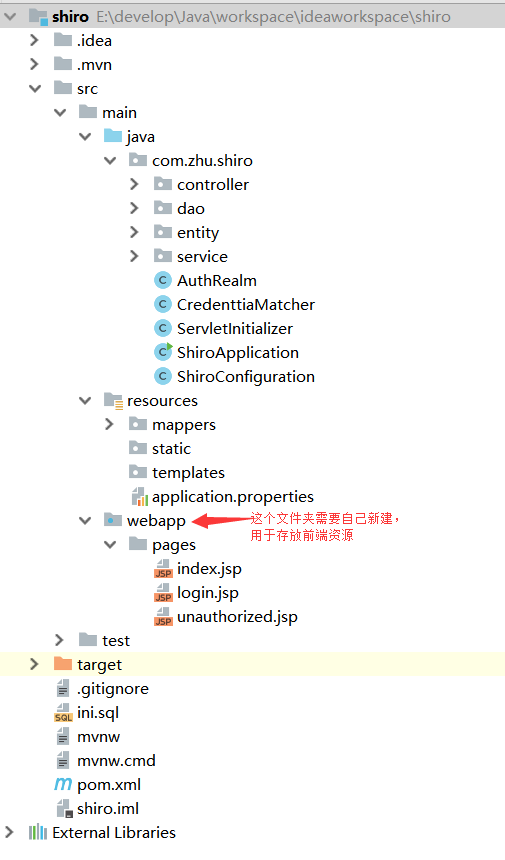
1、用idea新建Spring Initializr项目,项目结构如下:
2、添加依赖:
<dependencies>
        <dependency>
            <groupId>org.springframework.boot</groupId>
            <artifactId>spring-boot-starter-web</artifactId>
        </dependency>
        <dependency>
            <groupId>org.mybatis.spring.boot</groupId>
            <artifactId>mybatis-spring-boot-starter</artifactId>
            <version>1.3.2</version>
        </dependency>

        <dependency>
            <groupId>mysql</groupId>
            <artifactId>mysql-connector-java</artifactId>
            <scope>runtime</scope>
        </dependency>
        <dependency>
            <groupId>org.springframework.boot</groupId>
            <artifactId>spring-boot-starter-tomcat</artifactId>
            <scope>provided</scope>
        </dependency>
        <dependency>
            <groupId>org.springframework.boot</groupId>
            <artifactId>spring-boot-starter-test</artifactId>
            <scope>test</scope>
        </dependency>
        <dependency>
            <groupId>org.apache.shiro</groupId>
            <artifactId>shiro-core</artifactId>
            <version>1.2.3</version>
        </dependency>
        <dependency>
            <groupId>org.apache.shiro</groupId>
            <artifactId>shiro-spring</artifactId>
            <version>1.2.3</version>
        </dependency>
        <dependency>
            <groupId>com.alibaba</groupId>
            <artifactId>druid</artifactId>
            <version>1.0.20</version>
        </dependency>
        <!--常用的工具包-->
        <dependency>
            <groupId>org.apache.commons</groupId>
            <artifactId>commons-lang3</artifactId>
            <version>3.4</version>
        </dependency>
        <!--spring的上下文工具包-->
        <dependency>
            <groupId>org.springframework</groupId>
            <artifactId>spring-context-support</artifactId>
            <version>4.1.7.RELEASE</version>
        </dependency>
        <!--对jsp的处理-->
        <dependency>
            <groupId>org.apache.tomcat.embed</groupId>
            <artifactId>tomcat-embed-jasper</artifactId>
        </dependency>
        <dependency>
            <groupId>javax.servlet</groupId>
            <artifactId>jstl</artifactId>
        </dependency>
        <dependency>
            <groupId>javax.servlet</groupId>
            <artifactId>javax.servlet-api</artifactId>
        </dependency>
    </dependencies>
3、application.properties
spring.datasource.type=com.alibaba.druid.pool.DruidDataSource
spring.datasource.driver-class-name=com.mysql.jdbc.Driver
spring.datasource.url=jdbc:mysql:///#
spring.datasource.username=#
spring.datasource.password=#
## mybatis ##
mybatis.mapper-locations=mappers/*.xml
mybatis.type-aliases-package=com.zhu.shiro.entity
## 视图解析器 ##
spring.mvc.view.prefix=/pages/
spring.mvc.view.suffix=.jsp
三、项目设计
注:spring整合shiro中是只有User实体类,在UserDao中定义了三个方法,通过表的关键关系查询Role和Permission;这里将采用另一种方式,三个实体类,设置实体类的关联关系。
1、entity层
User.java
public class User {

    private  Integer uid;
    private  String username;
    private  String password;
    private  Set<Role> roles = new HashSet<>();
}
Role.java
public class Role {

    private  Integer rid;
    private  String name;
    private  Set<Permission> permissions = new HashSet<>();
}
Permission.java
public class Permission {
    private  Integer pid;
    private  String  name;
}
2、dao层
UserDao.java
public interface UserDao {
    User findByUsername(String username);
}
UserDao.xml
<?xml version="1.0" encoding="UTF-8" ?>
<!DOCTYPE mapper
        PUBLIC "-//mybatis.org//DTD Mapper 3.0//EN"
        "http://mybatis.org/dtd/mybatis-3-mapper.dtd">
<mapper namespace="com.zhu.shiro.dao.UserDao">

    <resultMap id="userMap" type="com.zhu.shiro.entity.User">
        <id property="uid" column="uid"/>
        <result property="username" column="user_name"/>
        <result property="password" column="pass_word"/>
        <collection property="roles" ofType="com.zhu.shiro.entity.Role">
            <id property="rid" column="rid"/>
            <result property="name" column="role_name"/>
            <collection property="permissions" ofType="com.zhu.shiro.entity.Permission">
                <id property="pid" column="pid"/>
                <result property="name" column="permission_name"/>
            </collection>
        </collection>
    </resultMap>

    <select id="findByUsername" parameterType="string" resultMap="userMap">
           SELECT *
           FROM tb_user u,tb_role r,tb_permission p
           WHERE u.rid=r.rid
           AND p.rid=r.rid
           AND u.user_name=#{username}
    </select>

</mapper>
3、service层
@Service
public class UserServiceImpl implements UserService {
    @Autowired
    private UserDao userDao;
    @Override
    public User findByUsername(String username) {
        return userDao.findByUsername(username);
    }
}
4、junit测试
@RunWith(SpringRunner.class)
@SpringBootTest
public class UserServiceImplTest {
    @Autowired
    private UserService userService;
    @Test
    public void findByUsername() {
        User u = userService.findByUsername("tom");
        Set<Role> roleSet = u.getRoles();
        for (Role role : roleSet){
            Set<Permission> permissionSet = role.getPermissions();
            for (Permission permission : permissionSet){
                System.out.println(permission.getName());
            }
            System.out.println(role.getName());
        }
    }
}
运行结果:
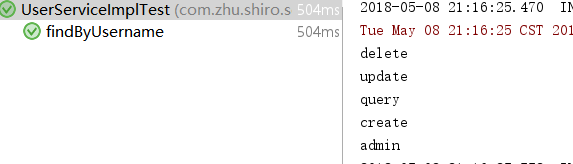
数据库中tom是admin角色,有增删改查权限,符合预期,测试通过。
5、controller层
TestController.java
@Controller
public class TestController {
//用户登录
@RequestMapping("/loginUser")
public String loginUser(@RequestParam("username") String username,
@RequestParam("password") String password,
HttpSession session) {
//把前端输入的username和password封装为token
UsernamePasswordToken token = new UsernamePasswordToken(username, password);
Subject subject = SecurityUtils.getSubject();
try {
subject.login(token);
session.setAttribute("user", subject.getPrincipal());
return "index";
} catch (Exception e) {
return "login";
}
}
//退出登录
@RequestMapping("/logout")
public String logout() {
Subject subject = SecurityUtils.getSubject();
if (subject != null) {
subject.logout();
}
return "login";
}
//访问login时跳到login.jsp
@RequestMapping("/login")
public String login() {
return "login";
}
//admin角色才能访问
@RequestMapping("/admin")
@ResponseBody
public String admin() {
return "admin success";
}
//有delete权限才能访问
@RequestMapping("/edit")
@ResponseBody
public String edit() {
return "edit success";
}
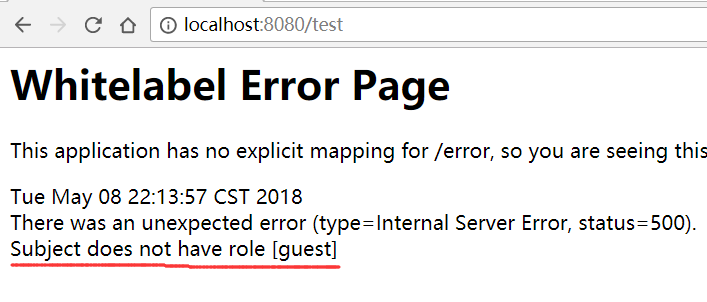
@RequestMapping("/test")
@ResponseBody
@RequiresRoles("guest")
public String test(){
return "test success";
}
}
说明:这里用户登录方法用到了shiro,但是这里还没配置shiro,所以暂时不能使用,先搭起整个骨架,然后再加入shiro。
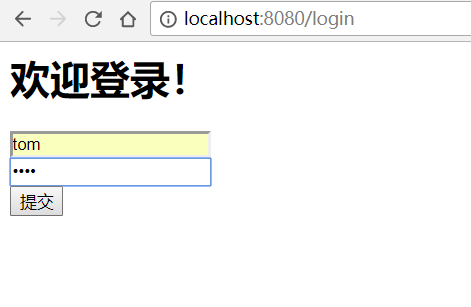
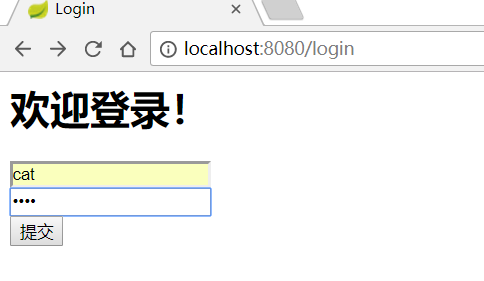
6、jsp页面
login.jsp
(登录页面)
%@ page contentType="text/html;charset=UTF-8" language="java" %>
<html>
<head>
    <title>Login</title>
</head>
<body>
   <h1>欢迎登录!</h1>
   <form action="/loginUser" method="post">
       <input type="text" name="username"><br>
       <input type="password" name="password"><br>
       <input type="submit" value="提交">
   </form>

</body>
</html>
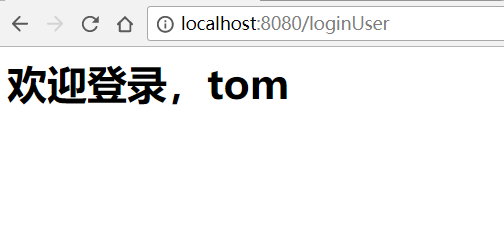
index.jsp
(登录成功跳转的页面)
<%@ page contentType="text/html;charset=UTF-8" language="java" %>
<html>
<head>
    <title>Title</title>
</head>
<body>
   <h1>欢迎登录,${user.username}</h1>
</body>
</html>
unauthorized.jsp
(无权访问跳转的页面)
<%@ page contentType="text/html;charset=UTF-8" language="java" %>
<html>
<head>
    <title>unauthorized</title>
</head>
<body>

unauthorized!
</body>
</html>
现在说一下要求:
admin路由要求只有具有admin角色的用户才能访问,edit路由需要有delete权限的用户才能访问,test路由要guest角色才能访问,login、loginUser都不做拦截,本文讲解两种拦截方式,对test的拦截是在controller对应的方法上加注解,其他是拦截是写在shiro的配置类中。
预期分析:
tom是有admin角色和所有权限,所以用tom登录后,可以访问edit和admin,但是不能访问guest;而cat是guest角色,只有create和query权限,所以不能访问admin和edit,但是可以访问guest。
四、配置shiro
由于springboot还没有集成shiro,所以不能直接在application.properties中配置,需要通过类的方式配置。
核心配置类:
ShiroConfiguration.java
@Configuration
public class ShiroConfiguration {
    /**
     * 密码校验规则HashedCredentialsMatcher
     * 这个类是为了对密码进行编码的 ,
     * 防止密码在数据库里明码保存 , 当然在登陆认证的时候 ,
     * 这个类也负责对form里输入的密码进行编码
     * 处理认证匹配处理器:如果自定义需要实现继承HashedCredentialsMatcher
     */
    @Bean("hashedCredentialsMatcher")
    public HashedCredentialsMatcher hashedCredentialsMatcher() {
        HashedCredentialsMatcher credentialsMatcher = new HashedCredentialsMatcher();
        //指定加密方式为MD5
        credentialsMatcher.setHashAlgorithmName("MD5");
        //加密次数
        credentialsMatcher.setHashIterations(1024);
        credentialsMatcher.setStoredCredentialsHexEncoded(true);
        return credentialsMatcher;
    }


    @Bean("authRealm")
    @DependsOn("lifecycleBeanPostProcessor")//可选
    public AuthRealm authRealm(@Qualifier("hashedCredentialsMatcher") HashedCredentialsMatcher matcher) {
        AuthRealm authRealm = new AuthRealm();
        authRealm.setAuthorizationCachingEnabled(false);
        authRealm.setCredentialsMatcher(matcher);
        return authRealm;
    }


    /**
     * 定义安全管理器securityManager,注入自定义的realm
     * @param authRealm
     * @return
     */
    @Bean("securityManager")
    public SecurityManager securityManager(@Qualifier("authRealm") AuthRealm authRealm) {
        DefaultWebSecurityManager manager = new DefaultWebSecurityManager();
        manager.setRealm(authRealm);
        return manager;
    }


    /**
     * 定义shiroFilter过滤器并注入securityManager
     * @param manager
     * @return
     */
    @Bean("shiroFilter")
    public ShiroFilterFactoryBean shiroFilter(@Qualifier("securityManager") SecurityManager manager) {
        ShiroFilterFactoryBean bean = new ShiroFilterFactoryBean();
        //设置securityManager
        bean.setSecurityManager(manager);
        //设置登录页面
        //可以写路由也可以写jsp页面的访问路径
        bean.setLoginUrl("/login");
        //设置登录成功跳转的页面
        bean.setSuccessUrl("/pages/index.jsp");
        //设置未授权跳转的页面
        bean.setUnauthorizedUrl("/pages/unauthorized.jsp");
        //定义过滤器
        LinkedHashMap<String, String> filterChainDefinitionMap = new LinkedHashMap<>();
        filterChainDefinitionMap.put("/index", "authc");
        filterChainDefinitionMap.put("/login", "anon");
        filterChainDefinitionMap.put("/loginUser", "anon");
        filterChainDefinitionMap.put("/admin", "roles[admin]");
        filterChainDefinitionMap.put("/edit", "perms[delete]");
        filterChainDefinitionMap.put("/druid/**", "anon");
        //需要登录访问的资源 , 一般将/**放在最下边
        filterChainDefinitionMap.put("/**", "authc");
        bean.setFilterChainDefinitionMap(filterChainDefinitionMap);
        return bean;
    }

    /**
     * Spring的一个bean , 由Advisor决定对哪些类的方法进行AOP代理 .
     * @return
     */
    @Bean
    public DefaultAdvisorAutoProxyCreator defaultAdvisorAutoProxyCreator() {
        DefaultAdvisorAutoProxyCreator creator = new DefaultAdvisorAutoProxyCreator();
        creator.setProxyTargetClass(true);
        return creator;
    }

    /**
     * 配置shiro跟spring的关联
     * @param securityManager
     * @return
     */
    @Bean
    public AuthorizationAttributeSourceAdvisor authorizationAttributeSourceAdvisor(@Qualifier("securityManager") SecurityManager securityManager) {
        AuthorizationAttributeSourceAdvisor advisor = new AuthorizationAttributeSourceAdvisor();
        advisor.setSecurityManager(securityManager);
        return advisor;
    }

    /**
     * lifecycleBeanPostProcessor是负责生命周期的 , 初始化和销毁的类
     * (可选)
     */
    @Bean("lifecycleBeanPostProcessor")
    public LifecycleBeanPostProcessor lifecycleBeanPostProcessor() {
        return new LifecycleBeanPostProcessor();
    }

}
注:这个类每个bean的作用都已在代码中注释说明,这个类就相当于spring整合shiro的spring-shiro.xml中对shiro的配置。
自定义realm:
AutuRealm.java
public class AuthRealm extends AuthorizingRealm{
    @Autowired
    private UserService userService;
    /**
     * 为用户授权
     * @param principals
     * @return
     */
    @Override
    protected AuthorizationInfo doGetAuthorizationInfo(PrincipalCollection principals) {
        //获取前端输入的用户信息,封装为User对象
        User userweb = (User) principals.getPrimaryPrincipal();
        //获取前端输入的用户名
        String username = userweb.getUsername();
        //根据前端输入的用户名查询数据库中对应的记录
        User user = userService.findByUsername(username);
        //如果数据库中有该用户名对应的记录,就进行授权操作
        if (user != null){
            SimpleAuthorizationInfo info = new SimpleAuthorizationInfo();
            //因为addRoles和addStringPermissions方法需要的参数类型是Collection
            //所以先创建两个collection集合
            Collection<String> rolesCollection = new HashSet<String>();
            Collection<String> perStringCollection = new HashSet<String>();
            //获取user的Role的set集合
            Set<Role> roles = user.getRoles();
            //遍历集合
            for (Role role : roles){
                //将每一个role的name装进collection集合
                rolesCollection.add(role.getName());
                //获取每一个Role的permission的set集合
                Set<Permission> permissionSet =  role.getPermissions();
                //遍历集合
                for (Permission permission : permissionSet){
                    //将每一个permission的name装进collection集合
                    perStringCollection.add(permission.getName());
                }
                //为用户授权
                info.addStringPermissions(perStringCollection);
            }
            //为用户授予角色
            info.addRoles(rolesCollection);
            return info;
        }else{
            return null;
        }

    }


    /**
     * 认证登录
     * @param token
     * @return
     * @throws AuthenticationException
     */
    @Override
    protected AuthenticationInfo doGetAuthenticationInfo(AuthenticationToken token) throws AuthenticationException {
        //token携带了用户信息
        UsernamePasswordToken usernamePasswordToken = (UsernamePasswordToken) token;
        //获取前端输入的用户名
        String userName  = usernamePasswordToken.getUsername();
        //根据用户名查询数据库中对应的记录
        User user = userService.findByUsername(userName);
        //当前realm对象的name
        String realmName = getName();
        //盐值
        ByteSource credentialsSalt = ByteSource.Util.bytes(user.getUsername());
        //封装用户信息,构建AuthenticationInfo对象并返回
        AuthenticationInfo authcInfo = new SimpleAuthenticationInfo(user, user.getPassword(),
                credentialsSalt, realmName);
        return authcInfo;
    }
}
注:这个类也有详细的注释说明。
这样就完成了springboot对shiro的整合,接下来就可以进行测试了!
五、测试
tom登录
tom访问admin

tom访问test
cat登录
cat访问admin
cat访问test
测试结果与预期相符,测试通过,springboot整合shiro成功!
特别说明:
由于设置了MD5加密,所以数据库中存储的用户密码应该是加密后的密文,否则在登录页面输入明文会验证不通过。假如1234的密文为asdfghjkl,数据库中存储的应该是asdfghjkl,在登录时输入1234就能验证通过。
附上明文转密文的代码:
public static void main(String[] args) {
        String hashAlgorithName = "MD5";
        String password = "登录时输入的密码";
        int hashIterations = 1024;//加密次数
        ByteSource credentialsSalt = ByteSource.Util.bytes("登录时输入的用户名");
        Object obj = new SimpleHash(hashAlgorithName, password, credentialsSalt, hashIterations);
        System.out.println(obj);
    }
若不使用MD5加密
1、添加一个类
public class CredenttiaMatcher extends SimpleCredentialsMatcher{
    @Override
    public boolean doCredentialsMatch(AuthenticationToken token, AuthenticationInfo info) {
        UsernamePasswordToken usernamePasswordToken = (UsernamePasswordToken) token;
        String password = new String(usernamePasswordToken.getPassword());
        String dbPassword = (String) info.getCredentials();
        return this.equals(password,dbPassword);
    }
}
2、将ShiroConfiguration.java中名为"hashedCredentialsMatcher"的bean替换成:
*@Bean("credenttiaMatcher")
    public CredenttiaMatcher credenttiaMatcher() {
        return new CredenttiaMatcher();
    }
将名为"authRealm"的bean替换成:
@Bean("authRealm")
    @DependsOn("lifecycleBeanPostProcessor")//可选
    public AuthRealm authRealm(@Qualifier("credenttiaMatcher") CredenttiaMatcher matcher) {
        AuthRealm authRealm = new AuthRealm();
        authRealm.setCredentialsMatcher(matcher);
        return authRealm;
    }
3、AuthRealm.java中的doGetAuthenticationInfo方法里面的内容替换成:
//=========================未加密版==========================
        //token携带了用户登录的信息
         UsernamePasswordToken usernamePasswordToken = (UsernamePasswordToken) token;
        //获取前端输入的用户名
        String username  = usernamePasswordToken.getUsername();
        //根据前端输入的用户名查询数据库中的记录
         User user = userService.findByUsername(username);
        //校验密码,验证登录
         return new SimpleAuthenticationInfo(user,user.getPassword(),this.getClass().getName());
完成以上3步就去掉了MD5加密。
以上内容属于个人学习笔记整理,如有错误,欢迎批评指正!
我的博客即将搬运同步至腾讯云+社区,邀请大家一同入驻:https://cloud.tencent.com/developer/support-plan?invite_code=enfrqdpybh7v