前言
在《Tomcat7.0源码分析——Session管理分析(上)》一文中我介绍了Session、Session管理器,还以StandardManager为例介绍了Session管理器的初始化与启动,本文将接着介绍Session管理的其它内容。
Session分配
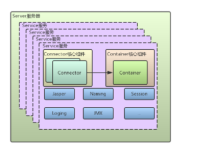
在《Tomcat7.0源码分析——请求原理分析(下)》一文的最后我们介绍了Filter的职责链,Tomcat接收到的请求会经过Filter职责链,最后交给具体的Servlet处理。以访问http://localhost:8080/host-manager这个路径为例,可以清楚的看到整个调用栈(如图1所示,由于原图本人没有妥善保存,只剩下了这张打过水印的)中的Filter的职责链及之后的JspServlet,最后到达org.apache.catalina.connector.Request的getSession方法。

图1 请求调用栈
Request的getSession方法(见代码清单1)用于获取当前请求对应的会话信息,如果没有则创建一个新的Session。
代码清单1
    public HttpSession getSession(boolean create) {
        Session session = doGetSession(create);
        if (session == null) {
            return null;
        }

        return session.getSession();
    }
doGetSession方法的实现见代码清单2。
代码清单2
    protected Session doGetSession(boolean create) {

        // There cannot be a session if no context has been assigned yet
        if (context == null)
            return (null);

        // Return the current session if it exists and is valid
        if ((session != null) && !session.isValid())
            session = null;
        if (session != null)
            return (session);

        // Return the requested session if it exists and is valid
        Manager manager = null;
        if (context != null)
            manager = context.getManager();
        if (manager == null)
            return (null);      // Sessions are not supported
        if (requestedSessionId != null) {
            try {
                session = manager.findSession(requestedSessionId);
            } catch (IOException e) {
                session = null;
            }
            if ((session != null) && !session.isValid())
                session = null;
            if (session != null) {
                session.access();
                return (session);
            }
        }

        // Create a new session if requested and the response is not committed
        if (!create)
            return (null);
        if ((context != null) && (response != null) &&
            context.getServletContext().getEffectiveSessionTrackingModes().
                    contains(SessionTrackingMode.COOKIE) &&
            response.getResponse().isCommitted()) {
            throw new IllegalStateException
              (sm.getString("coyoteRequest.sessionCreateCommitted"));
        }

        // Attempt to reuse session id if one was submitted in a cookie
        // Do not reuse the session id if it is from a URL, to prevent possible
        // phishing attacks
        // Use the SSL session ID if one is present.
        if (("/".equals(context.getSessionCookiePath())
                && isRequestedSessionIdFromCookie()) || requestedSessionSSL ) {
            session = manager.createSession(getRequestedSessionId());
        } else {
            session = manager.createSession(null);
        }

        // Creating a new session cookie based on that session
        if ((session != null) && (getContext() != null)
               && getContext().getServletContext().
                       getEffectiveSessionTrackingModes().contains(
                               SessionTrackingMode.COOKIE)) {
            Cookie cookie =
                ApplicationSessionCookieConfig.createSessionCookie(
                        context, session.getIdInternal(), isSecure());

            response.addSessionCookieInternal(cookie);
        }

        if (session == null) {
            return null;
        }

        session.access();
        return session;
    }
依据代码清单2,整个获取Session的步骤如下:
- 判断当前Request对象是否已经存在有效的Session信息,如果存在则返回此Session,否则进入下一步;
- 获取Session管理器,比如StandardManager;
- 从StandardManager的Session缓存中获取Session,如果有则返回此Session,否则进入下一步;
- 创建Session;
- 创建保存Session ID的Cookie;
- 通过调用Session的access方法更新Session的访问时间以及访问次数。
代码清单3
    public Session createSession(String sessionId) {

        // Recycle or create a Session instance
        Session session = createEmptySession();

        // Initialize the properties of the new session and return it
        session.setNew(true);
        session.setValid(true);
        session.setCreationTime(System.currentTimeMillis());
        session.setMaxInactiveInterval(this.maxInactiveInterval);
        if (sessionId == null) {
            sessionId = generateSessionId();
        }
        session.setId(sessionId);
        sessionCounter++;

        return (session);

    }
至此,Session的创建与分配就介绍这些。
Session追踪
HTTP是一种无状态的协议,如果一个客户端只是单纯地请求一个文件,服务器端并不需要知道一连串的请求是否来自于相同的客户端,而且也不需要担心客户端是否处在连接状态。但是这样的通信协议使得服务器端难以判断所连接的客户端是否是同一个人。当进行Web程序开发时,我们必须想办法将相关的请求结合一起,并且努力维持用户的状态在服务器上,这就引出了会话追踪(session tracking)。
Tomcat追踪Session主要借助其ID,因此在接收到请求后应该需要拿到此请求对应的会话ID,这样才能够和StandardManager的缓存中维护的Session相匹配,达到Session追踪的效果。还记得《Tomcat7.0源码分析——请求原理分析(中)》一文中介绍CoyoteAdapter的service方法时调用的postParseRequest方法吗?其中有这么一段代码,见代码清单4。
代码清单4
    if (request.getServletContext().getEffectiveSessionTrackingModes()
                .contains(SessionTrackingMode.URL)) {

            // Get the session ID if there was one
            String sessionID = request.getPathParameter(
                    ApplicationSessionCookieConfig.getSessionUriParamName(
                            request.getContext()));
            if (sessionID != null) {
                request.setRequestedSessionId(sessionID);
                request.setRequestedSessionURL(true);
            }
        }

        // 省去中间无关代码// Finally look for session ID in cookies and SSL session
        parseSessionCookiesId(req, request);
        parseSessionSslId(request);
        return true;
    }
根据代码清单4可以看出postParseRequest方法的执行步骤如下:
- 如果开启了会话跟踪(session tracking),则需要从缓存中获取维护的Session ID;
- 从请求所带的Cookie中获取Session ID;
- 如果Cookie没有携带Session ID,但是开启了会话跟踪(session tracking),则可以从SSL中获取Session ID;
从缓存中获取维护的Session ID
代码清单4中首先调用getSessionUriParamName方法(见代码清单5)获取Session的参数名称。
代码清单5
    public static String getSessionUriParamName(Context context) {

        String result = getConfiguredSessionCookieName(context);

        if (result == null) {
            result = DEFAULT_SESSION_PARAMETER_NAME;
        }

        return result;
    }
从代码清单2看出,getSessionUriParamName方法首先调用getConfiguredSessionCookieName方法获取Session的Cookie名称,如果没有则默认为jsessionid(常量DEFAULT_SESSION_PARAMETER_NAME的值)。回头看代码清单4中会以getSessionUriParamName方法返回的值作为request.getPathParameter(见代码清单6)的参数查询Session ID。
代码清单6
    protected String getPathParameter(String name) {
        return pathParameters.get(name);
    }
从请求所带的Cookie中获取Session ID
代码清单4中调用的parseSessionCookiesId方法(见代码清单7)用来从Cookie中获取Session ID。
代码清单7
    protected void parseSessionCookiesId(org.apache.coyote.Request req, Request request) {

        // If session tracking via cookies has been disabled for the current
        // context, don't go looking for a session ID in a cookie as a cookie
        // from a parent context with a session ID may be present which would
        // overwrite the valid session ID encoded in the URL
        Context context = (Context) request.getMappingData().context;
        if (context != null && !context.getServletContext()
                .getEffectiveSessionTrackingModes().contains(
                        SessionTrackingMode.COOKIE))
            return;

        // Parse session id from cookies
        Cookies serverCookies = req.getCookies();
        int count = serverCookies.getCookieCount();
        if (count <= 0)
            return;

        String sessionCookieName =
            ApplicationSessionCookieConfig.getSessionCookieName(context);

        for (int i = 0; i < count; i++) {
            ServerCookie scookie = serverCookies.getCookie(i);
            if (scookie.getName().equals(sessionCookieName)) {
                // Override anything requested in the URL
                if (!request.isRequestedSessionIdFromCookie()) {
                    // Accept only the first session id cookie
                    convertMB(scookie.getValue());
                    request.setRequestedSessionId
                        (scookie.getValue().toString());
                    request.setRequestedSessionCookie(true);
                    request.setRequestedSessionURL(false);
                    if (log.isDebugEnabled())
                        log.debug(" Requested cookie session id is " +
                            request.getRequestedSessionId());
                } else {
                    if (!request.isRequestedSessionIdValid()) {
                        // Replace the session id until one is valid
                        convertMB(scookie.getValue());
                        request.setRequestedSessionId
                            (scookie.getValue().toString());
                    }
                }
            }
        }

    }
从SSL中获取Session ID
代码清单4中调用的parseSessionSslId方法(见代码清单8)用来从SSL中获取Session ID。
代码清单8
    protected void parseSessionSslId(Request request) {
        if (request.getRequestedSessionId() == null &&
                SSL_ONLY.equals(request.getServletContext()
                        .getEffectiveSessionTrackingModes()) &&
                        request.connector.secure) {
            // TODO Is there a better way to map SSL sessions to our sesison ID?
            // TODO The request.getAttribute() will cause a number of other SSL
            //      attribute to be populated. Is this a performance concern?
            request.setRequestedSessionId(
                    request.getAttribute(SSLSupport.SESSION_ID_KEY).toString());
            request.setRequestedSessionSSL(true);
        }
    }
Session销毁
在《Tomcat7.0源码分析——生命周期管理》一文中我们介绍了容器的生命周期管理相关的内容,StandardEngine作为容器,其启动过程中也会调用startInternal方法(见代码清单9)。
代码清单9
    @Override
    protected synchronized void startInternal() throws LifecycleException {

        // Log our server identification information
        if(log.isInfoEnabled())
            log.info( "Starting Servlet Engine: " + ServerInfo.getServerInfo());

        // Standard container startup
        super.startInternal();
    }
StandardEngine的startInternal方法实际代理了父类ContainerBase的startInternal方法(见代码清单10)。
代码清单10
    @Override
    protected synchronized void startInternal() throws LifecycleException {

        // Start our subordinate components, if any
        if ((loader != null) && (loader instanceof Lifecycle))
            ((Lifecycle) loader).start();
        logger = null;
        getLogger();
        if ((logger != null) && (logger instanceof Lifecycle))
            ((Lifecycle) logger).start();
        if ((manager != null) && (manager instanceof Lifecycle))
            ((Lifecycle) manager).start();
        if ((cluster != null) && (cluster instanceof Lifecycle))
            ((Lifecycle) cluster).start();
        if ((realm != null) && (realm instanceof Lifecycle))
            ((Lifecycle) realm).start();
        if ((resources != null) && (resources instanceof Lifecycle))
            ((Lifecycle) resources).start();

        // Start our child containers, if any
        Container children[] = findChildren();
        for (int i = 0; i < children.length; i++) {
            children[i].start();
        }

        // Start the Valves in our pipeline (including the basic), if any
        if (pipeline instanceof Lifecycle)
            ((Lifecycle) pipeline).start();


        setState(LifecycleState.STARTING);

        // Start our thread
        threadStart();

    }
代码清单10一开始对各种子容器进行了启动(由于与本文内容关系不大,所以不多作介绍),最后会调用threadStart方法。threadStart的实现见代码清单11。
代码清单11
    protected void threadStart() {

        if (thread != null)
            return;
        if (backgroundProcessorDelay <= 0)
            return;

        threadDone = false;
        String threadName = "ContainerBackgroundProcessor[" + toString() + "]";
        thread = new Thread(new ContainerBackgroundProcessor(), threadName);
        thread.setDaemon(true);
        thread.start();

    }
threadStart方法启动了一个后台线程,任务为ContainerBackgroundProcessor。ContainerBackgroundProcessor的run方法中主要调用了processChildren方法,见代码清单12。
代码清单12
    protected class ContainerBackgroundProcessor implements Runnable {

        public void run() {
            while (!threadDone) {
                try {
                    Thread.sleep(backgroundProcessorDelay * 1000L);
                } catch (InterruptedException e) {
                    // Ignore
                }
                if (!threadDone) {
                    Container parent = (Container) getMappingObject();
                    ClassLoader cl =
                        Thread.currentThread().getContextClassLoader();
                    if (parent.getLoader() != null) {
                        cl = parent.getLoader().getClassLoader();
                    }
                    processChildren(parent, cl);
                }
            }
        }

        protected void processChildren(Container container, ClassLoader cl) {
            try {
                if (container.getLoader() != null) {
                    Thread.currentThread().setContextClassLoader
                        (container.getLoader().getClassLoader());
                }
                container.backgroundProcess();
            } catch (Throwable t) {
                log.error("Exception invoking periodic operation: ", t);
            } finally {
                Thread.currentThread().setContextClassLoader(cl);
            }
            Container[] children = container.findChildren();
            for (int i = 0; i < children.length; i++) {
                if (children[i].getBackgroundProcessorDelay() <= 0) {
                    processChildren(children[i], cl);
                }
            }
        }

    }
processChildren方法会不断迭代StandardEngine的子容器并调用这些子容器的backgroundProcess方法。这里我们直接来看StandardEngine的孙子容器StandardManager的backgroundProcess实现,即ManagerBase的backgroundProcess方法,见代码清单13。
代码清单13
    public void backgroundProcess() {
        count = (count + 1) % processExpiresFrequency;
        if (count == 0)
            processExpires();
    }
backgroundProcess里实现了一个简单的算法:
- count:计数器,起始为0;
- processExpiresFrequency:执行processExpires方法的频率,默认为6。
每执行一次backgroundProcess方法,count会增加1,每当count+1与processExpiresFrequency求模等于0,则调用processExpires。简而言之,每执行processExpiresFrequency指定次数的backgroundProcess方法,执行一次processExpires方法。processExpires的实现见代码清单14所示。
代码清单14
    public void processExpires() {

        long timeNow = System.currentTimeMillis();
        Session sessions[] = findSessions();
        int expireHere = 0 ;

        if(log.isDebugEnabled())
            log.debug("Start expire sessions " + getName() + " at " + timeNow + " sessioncount " + sessions.length);
        for (int i = 0; i < sessions.length; i++) {
            if (sessions[i]!=null && !sessions[i].isValid()) {
                expireHere++;
            }
        }
        long timeEnd = System.currentTimeMillis();
        if(log.isDebugEnabled())
             log.debug("End expire sessions " + getName() + " processingTime " + (timeEnd - timeNow) + " expired sessions: " + expireHere);
        processingTime += ( timeEnd - timeNow );

    }
代码清单14中processExpires方法的执行步骤如下:
- 从缓存取出所有的Session;
- 逐个校验每个Session是否过期,对于已经过期的Session,则expireHere自增。
( (当前时间 - Session的最后访问时间)/1000) >= 最大访问间隔
代码清单15
    public boolean isValid() {

        if (this.expiring) {
            return true;
        }

        if (!this.isValid) {
            return false;
        }

        if (ACTIVITY_CHECK && accessCount.get() > 0) {
            return true;
        }

        if (maxInactiveInterval >= 0) {
            long timeNow = System.currentTimeMillis();
            int timeIdle;
            if (LAST_ACCESS_AT_START) {
                timeIdle = (int) ((timeNow - lastAccessedTime) / 1000L);
            } else {
                timeIdle = (int) ((timeNow - thisAccessedTime) / 1000L);
            }
            if (timeIdle >= maxInactiveInterval) {
                expire(true);
            }
        }

        return (this.isValid);
    }
总结
Tomcat对于Session的管理过程包括创建、分配、维护和跟踪、销毁等。
后记:个人总结整理的《深入理解Spark:核心思想与源码分析》一书现在已经正式出版上市,目前京东、当当、天猫等网站均有销售,欢迎感兴趣的同学购买。
京东:http://item.jd.com/11846120.html
当当:http://product.dangdang.com/23838168.html