
版权声明:本文为博主原创文章,未经博主允许不得转载。 https://blog.csdn.net/SunnyYoona/article/details/50640678
使用MyBatis的前提条件是你电脑上已经安装了JDK与MySQL,在这我们不赘述这些东西,重点还是怎么利用MyBatis创建一个简单的演示项目。
1. 数据库准备工作
使用一下SQL脚本往MySQL test 数据库中创建Student表,并插入样本数据:
/*
Navicat MySQL Data Transfer
Source Server : MySQL
Source Server Version : 50624
Source Host : localhost:3306
Source Database : test
Target Server Type : MYSQL
Target Server Version : 50624
File Encoding : 65001
Date: 2016-02-06 11:22:28
*/
SET FOREIGN_KEY_CHECKS=0;
-- ----------------------------
-- Table structure for `student`
-- ----------------------------
DROP TABLE IF EXISTS `student`;
CREATE TABLE `student` (
`ID` int(11) NOT NULL,
`name` varchar(20) NOT NULL,
`age` int(11) DEFAULT NULL,
`school` varchar(20) DEFAULT NULL,
PRIMARY KEY (`ID`)
) ENGINE=InnoDB DEFAULT CHARSET=utf8;
-- ----------------------------
-- Records of student
-- ----------------------------
INSERT INTO `student` VALUES ('1', 'yoona', '24', '西安电子科技大学');
执行SQL语句生成的Student表如下:

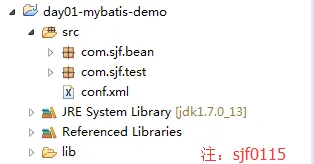
2. 创建Java项目
在这我们创建Java Project项目即可:
如果你没有使用过Maven或者Gradle之类的依赖管理工具,我们需要自己手动下载这些依赖的Jar包,手动添加到classpath中。话说如果对Maven等不了解的话,建议你赶紧补充一些这方面的知识,可以参考我的学习日记:
http://blog.csdn.net/sunnyyoona/article/details/50562045
一共需要两个Jar包,我们可以从Maven中央仓库下载Jar包:
http://mvnrepository.com/ 输入你想要的Jar搜索即可。
(1)mybatis目前是3.3.0版本
http://mvnrepository.com/artifact/org.mybatis/mybatis/3.3.0

(2)mysql-connector-java目前是5.1.38版本
http://mvnrepository.com/artifact/mysql/mysql-connector-java/5.1.38

3. MyBatis配置文件
创建MyBatis主要配置文件mybatis-conf.xml,其中包括数据库连接信息,数据库账号与密码等等,添加到classpath下即可,例如src目录下。
mybatis-conf.xml:
<?xml version="1.0" encoding="UTF-8"?>
<!DOCTYPE configuration PUBLIC "-//mybatis.org//DTD Config 3.0//EN" "http://mybatis.org/dtd/mybatis-3-config.dtd">
<configuration>
<environments default="development">
<environment id="development">
<transactionManager type="JDBC"/>
<dataSource type="POOLED">
<property name="driver" value="com.mysql.jdbc.Driver"/>
<property name="url" value="jdbc:mysql://localhost:3306/test"/>
<property name="username" value="root"/>
<property name="password" value="root"/>
</dataSource>
</environment>
</environments>
</configuration>
3. 创建Java Bean
根据数据库表Student,创建Student Bean,包含4个属性:ID,name,age,school。
package com.sjf.bean;
public class Student {
private int ID;
private String name;
private int age;
private String school;
public int getID() {
return ID;
}
public void setID(int iD) {
ID = iD;
}
public String getName() {
return name;
}
public void setName(String name) {
this.name = name;
}
public int getAge() {
return age;
}
public void setAge(int age) {
this.age = age;
}
public String getSchool() {
return school;
}
public void setSchool(String school) {
this.school = school;
}
@Override
public String toString() {
return "name:" + name + " age:" + age + " school:" + school;
}
}
4. 创建SQL映射器配置文件
创建SQL映射器配置文件studentMapper.xml,并把它放在com.sjf.bean包下:
<?xml version="1.0" encoding="UTF-8"?>
<!DOCTYPE mapper PUBLIC "-//mybatis.org//DTD Mapper 3.0//EN" "http://mybatis.org/dtd/mybatis-3-mapper.dtd">
<mapper namespace="com.sjf.bean.studentMapper">
<select id="getStudent" parameterType="int" resultType="com.sjf.bean.Student">
select * from Student where ID = #{ID}
</select>
</mapper>
XML文件包含的映射的SQL语句可以通过ID加上命名空间调用。创建映射器配置文件之后需要注册到MyBatis配置文件中:
<?xml version="1.0" encoding="UTF-8"?>
<!DOCTYPE configuration PUBLIC "-//mybatis.org//DTD Config 3.0//EN" "http://mybatis.org/dtd/mybatis-3-config.dtd">
<configuration>
<environments default="development">
<environment id="development">
<transactionManager type="JDBC"/>
<dataSource type="POOLED">
<property name="driver" value="com.mysql.jdbc.Driver"/>
<property name="url" value="jdbc:mysql://localhost:3306/test"/>
<property name="username" value="root"/>
<property name="password" value="root"/>
</dataSource>
</environment>
</environments>
<mappers>
<mapper resource="com/sjf/bean/studentMapper.xml"/>
</mappers>
</configuration>
观察一下,和刚开始的配置文件有啥区别?添加了<mapper>元素。
5. SqlSessionFactory单例类
下述代码中,我们创建了一个SqlSessionFactory对象,我们将使用它来获得SqlSession对象和执行映射的SQL语句。
package com.sjf.bean;
import java.io.IOException;
import java.io.Reader;
import org.apache.ibatis.io.Resources;
import org.apache.ibatis.session.SqlSession;
import org.apache.ibatis.session.SqlSessionFactory;
import org.apache.ibatis.session.SqlSessionFactoryBuilder;
/**
* SqlSessionFactory单例类
* @author sjf0115
*
*/
public class MyBatisSqlSessionFactory {
private static SqlSessionFactory factory;
/**
* 获取SqlSessionFactory
* @return
* @throws IOException
*/
public static SqlSessionFactory getSqlSessionFactory(){
if(factory == null){
String resource = "mybatis-conf.xml";
try {
Reader reader = Resources.getResourceAsReader(resource);
factory = new SqlSessionFactoryBuilder().build(reader);
} catch (IOException e) {
e.printStackTrace();
}
}//if
return factory;
}
/**
* 获取SqlSession
* @return
* @throws IOException
*/
public static SqlSession getSqlSession(){
return getSqlSessionFactory().openSession();
}
}
6. 实现对数据库表的操作
package com.sjf.service;
import org.apache.ibatis.session.SqlSession;
import com.sjf.bean.MyBatisSqlSessionFactory;
import com.sjf.bean.Student;
/**
* Student服务类
* @author sjf0115
*
*/
public class StudentService {
/**
* 根据ID获取学生信息
* @return
*/
public Student getStudentByID(int ID){
SqlSession session = MyBatisSqlSessionFactory.getSqlSession();
String statement = "com.sjf.bean.studentMapper.getStudent";
Student stu = session.selectOne(statement, ID);
if(session != null){
session.close();
}//if
return stu;
}
}
7. 测试
package com.sjf.test;
import com.sjf.bean.Student;
import com.sjf.service.StudentService;
public class Test {
public static void main(String[] args) {
StudentService service = new StudentService();
Student stu = service.getStudentByID(1);
System.out.println(stu.toString());
}
}
运行结果:
name:yoona age:24 school:西安电子科技大学
8. 它是如何工作的?
首先,我们配置了 MyBatis 最主要的
配置文件-mybatis-config.xml,里面包含了 JDBC 连接参数;配置了
映射器
Mapper XML 配置文件文件,里面包含了 SQL 语句的映射。
我们使用 mybatis-config.xml 内的信息创建了SqlSessionFactory 对象。每个数据库环境应该就一个
SqlSessionFactory 对象实例,所以我们使用了单例模式只创建一个 SqlSessionFactory 实例。
在 StudentService.java 中,我们在每一个方法中创建了一个新的 SqlSession ,并在方法功能完成后关闭
SqlSession。在studentMapper.xml映射器配置文件中配置自定义SQL查询语句。通过namespace 和 id 使用SqlSession来调用返回数据。
程序地址:点击打开链接
参考:《Java Persistence with MyBatis 3》
下载:
点击打开链接


