项目介绍
在前两篇博客: Spring Boot入门(2)使用MySQL数据库和Spring Boot入门(3)处理网页表单中,我们已经掌握了如何在Spring Boot中操作MySQL数据库以及网页中的表单。本次分享讲结合以上两篇博客,实现的功能为:在网页中提交表单,并且将表单中的数据存入MySQL中。
网页表单的内容如下图:
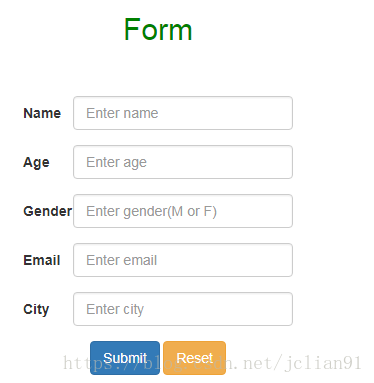
提交表单数据后,后台会将数据插入到MySQL中的表格,并且可以通过页面来展示插入的所有记录。整个处理流程和代码不会很复杂,所以,下一步,我们就直接进入项目!
程序
新建formIntoMySQL项目,配置其起步依赖为Web, Thymeleaf, JPA, MySQL, 该项目的具体结构如下图所示:
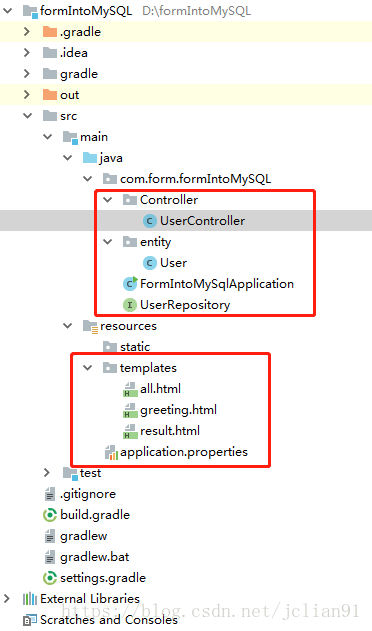
其中划红线的部分为需要修改或者新建的文件。
builg.gradle代码如下:
buildscript {
    ext {
        springBootVersion = '2.0.1.RELEASE'
    }
    repositories {
        mavenCentral()
    }
    dependencies {
        classpath("org.springframework.boot:spring-boot-gradle-plugin:${springBootVersion}")
    }
}

apply plugin: 'java'
apply plugin: 'eclipse'
apply plugin: 'org.springframework.boot'
apply plugin: 'io.spring.dependency-management'

group = 'com.form'
version = '0.0.1-SNAPSHOT'
sourceCompatibility = 1.8

repositories {
    mavenCentral()
}


dependencies {
    // https://mvnrepository.com/artifact/org.springframework.boot/spring-boot-starter-web
    compile group: 'org.springframework.boot', name: 'spring-boot-starter-web', version: '2.0.0.RELEASE'

    // https://mvnrepository.com/artifact/org.springframework.boot/spring-boot-starter-thymeleaf
    compile group: 'org.springframework.boot', name: 'spring-boot-starter-thymeleaf', version: '2.0.1.RELEASE'

    // JPA Data (We are going to use Repositories, Entities, Hibernate, etc...)
    compile 'org.springframework.boot:spring-boot-starter-data-jpa'

    // Use MySQL Connector-J
    compile 'mysql:mysql-connector-java'

    // https://mvnrepository.com/artifact/junit/junit
    testCompile group: 'junit', name: 'junit', version: '4.12'
}
请注意Web和Thymeleaf的版本,这与后面网页显示和操作的实现有关。
在com.form.formIntoMySQL下新建package entity,其中的User.java为表单中的条目的具体实现的Entity实体类,其代码如下:
package com.form.formIntoMySQL.entity;

import javax.persistence.Entity;
import javax.persistence.GeneratedValue;
import javax.persistence.GenerationType;
import javax.persistence.Id;

@Entity // This tells Hibernate to make a table out of this class
public class User {

    @Id
    @GeneratedValue(strategy=GenerationType.AUTO)
    private Integer id;
    private String name;
    private Integer age;
    private String gender;
    private String email;
    private String city;

    public Integer getId() {
        return id;
    }

    public void setId(Integer id) {
        this.id = id;
    }

    public String getName() {
        return name;
    }

    public void setName(String name) {
        this.name = name;
    }

    public Integer getAge() {
        return age;
    }

    public void setAge(Integer age) {
        this.age = age;
    }

    public String getGender() {
        return gender;
    }

    public void setGender(String gender) {
        this.gender = gender;
    }

    public String getEmail() {
        return email;
    }

    public void setEmail(String email) {
        this.email = email;
    }

    public String getCity() {
        return city;
    }

    public void setCity(String city) {
        this.city = city;
    }

}
在com.form.formIntoMySQL下新建package Controller,这是存放控制器代码的地方,我们的控制器为UserController.java,其代码如下:
package com.form.formIntoMySQL.Controller;

import com.form.formIntoMySQL.entity.User;
import com.form.formIntoMySQL.UserRepository;

import org.springframework.stereotype.Controller;
import org.springframework.ui.Model;
import org.springframework.web.bind.annotation.*;

import org.springframework.beans.factory.annotation.Autowired;

@Controller
public class UserController {
    @Autowired // This means to get the bean called userRepository
    // Which is auto-generated by Spring, we will use it to handle the data
    private UserRepository userRepository;

    @GetMapping("/greeting")
    public String greetingForm(Model model) {
        model.addAttribute("user", new User());
        return "greeting";
    }

    @PostMapping("/greeting")
    public String greetingSubmit(@ModelAttribute User user) {

        User newUser = new User();

        newUser.setName(user.getName());
        newUser.setAge(user.getAge());
        newUser.setGender(user.getGender());
        newUser.setEmail(user.getEmail());
        newUser.setCity(user.getCity());
        userRepository.save(user);

        return "result";

    }

    @GetMapping("/all")
    public String getMessage(Model model) {

        Iterable<User> users = userRepository.findAll();

        model.addAttribute("users", users);
        return "all";
    }

}
接着在com.form.formIntoMySQL下新建UserReposittory.java,来实现CrudRepositoty接口,其代码如下:
package com.form.formIntoMySQL;

import org.springframework.data.repository.CrudRepository;
import com.form.formIntoMySQL.entity.User;

// This will be AUTO IMPLEMENTED by Spring into a Bean called userRepository
// CRUD refers Create, Read, Update, Delete
public interface UserRepository extends CrudRepository<User, Long> {

}
FormIntoMySQLApplication.java代码保持不变,如下所示:
package com.form.formIntoMySQL;

import org.springframework.boot.SpringApplication;
import org.springframework.boot.autoconfigure.SpringBootApplication;

@SpringBootApplication
public class FormIntoMySqlApplication {

    public static void main(String[] args) {
        SpringApplication.run(FormIntoMySqlApplication.class, args);
    }
}
接着需要配置静态资源,即相关的网页,我们项目中的网页采用Thymeleaf视图来实现,其中greeting.html为初始进去的网页,其代码如下:
<!DOCTYPE HTML>

<html xmlns:th="http://www.thymeleaf.org">

<head>
    <title>Form Submission</title>
    <meta http-equiv="Content-Type" content="text/html; charset=UTF-8" />
    <link href="https://cdn.bootcss.com/bootstrap/3.3.7/css/bootstrap.min.css" rel="stylesheet">
</head>

<body>
    <center>
        <br><br>
    <h2 style="color:green">Form</h2>
        <br><br>

        <form class="form-horizontal" role="form" action="#" th:action="@{/greeting}" th:object="${user}" method="post">

            <div class="form-group" style="width:300px">
                <label for="name" class="col-sm-2 control-label">Name</label>
                <div class="col-sm-10">
                    <input type="text"  th:field="*{name}" class="form-control" id="name" placeholder="Enter name">
                </div>
            </div>

            <div class="form-group" style="width:300px">
                <label for="age" class="col-sm-2 control-label">Age</label>
                <div class="col-sm-10">
                    <input type="text" th:field="*{age}" class="form-control" id="age" placeholder="Enter age">
                </div>
            </div>

            <div class="form-group" style="width:300px">
                <label for="gender" class="col-sm-2 control-label">Gender</label>
                <div class="col-sm-10">
                    <input type="text" th:field="*{gender}" class="form-control" id="gender" placeholder="Enter gender(M or F)">
                </div>
            </div>

            <div class="form-group" style="width:300px">
                <label for="email" class="col-sm-2 control-label">Email</label>
                <div class="col-sm-10">
                    <input type="text" th:field="*{email}" class="form-control" id="email" placeholder="Enter email">
                </div>
            </div>

            <div class="form-group" style="width:300px">
                <label for="city" class="col-sm-2 control-label">City</label>
                <div class="col-sm-10">
                    <input type="text" th:field="*{city}" class="form-control" id="city" placeholder="Enter city">
                </div>
            </div>

            <div class="form-group">
                <div>
                    <button type="submit" class="btn btn-primary" id="btn">Submit</button>
                    <input type="reset" class="btn btn-warning" value="Reset" />
                </div>
            </div>
        </form>

    </center>

</body>

</html>
result.html为提交表单后跳转后的页面,其代码如下:
<!DOCTYPE HTML>

<html xmlns:th="http://www.thymeleaf.org">

<head>
    <title>Handling Form Submission</title>
    <meta http-equiv="Content-Type" content="text/html; charset=UTF-8" />
    <link href="https://cdn.bootcss.com/bootstrap/3.3.7/css/bootstrap.min.css" rel="stylesheet">
</head>

<body>
<center>
    <br><br>
    <h2 style="color:green">Result</h2>
    <br><br>

    <ul class="list-group" style="width:300px">
        <li class="list-group-item" th:text="'Name: ' + ${user.name}"></li>
        <li class="list-group-item" th:text="'Age: ' + ${user.age}"></li>
        <li class="list-group-item" th:text="'Gender: ' + ${user.gender}"></li>
        <li class="list-group-item" th:text="'Email: ' + ${user.email}"></li>
        <li class="list-group-item" th:text="'City: ' + ${user.city}"></li>
    </ul>

    <h4>
        <span class="glyphicon glyphicon-saved"></span>
        Insert into MySQL successfully!
    </h4>

    <a href="/greeting"><button type="button" class="btn btn-primary">Return to home</button></a>
    <a href="/all"><button type="button" class="btn btn-warning">See Records</button></a>

</body>

</html>
all.html为显示MySQL数据库表格user中的所有记录的网页,其具体代码如下:
<!DOCTYPE html>

<html xmlns:th="http://www.thymeleaf.org">

<head>
    <title>User list</title>
    <meta http-equiv="Content-Type" content="text/html; charset=UTF-8" />
    <link href="https://cdn.bootcss.com/bootstrap/4.0.0/css/bootstrap.css" rel="stylesheet">
</head>

<body>

<center>
    <br><br>
<h2 style="color:green">All Records in Table user</h2>
    <br><br>

<table class="table table-bordered table table-hover" style="width:800px">
    <tr style="color:red">
        <th>NAME</th>
        <th>Age</th>
        <th>Gender</th>
        <th>Email</th>
        <th>City</th>
    </tr>
    <tr th:each="user : ${users}">
        <td th:text="${user.name}">Jack</td>
        <td th:text="${user.age}">24</td>
        <td th:text="${user.gender}">M</td>
        <td th:text="${user.email}">jack@gmail.com</td>
        <td th:text="${user.city}">New York</td>
    </tr>
</table>

<p>
    <a href="/greeting"><button type="button" class="btn btn-primary">Return to home</button></a>
</p>

</center>
</body>

</html>
静态资源也配置好了,最后一步就是配置文件application.properties,其代码如下:
spring.jpa.hibernate.ddl-auto=create
spring.datasource.url=jdbc:mysql://localhost:33061/test
spring.datasource.username=root
spring.datasource.password=147369

server.port=8000
在这里,我们的数据库表格为新建(create),因为事先不存在user表格,存在后你可以将create操作改为update,这样做能够确保user表格的数据不会被覆盖,而是追加。网页运行端口为8000,MySQL运行端口为33061,这是笔者自己设置过的。
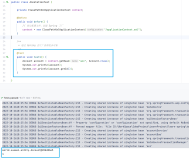
运行
好不容易写完了程序,下一步当然是愉快地运行以及测试。
在浏览器端输入http://localhost:8000/greeting ,这是我们程序的入口,提交如下表单:
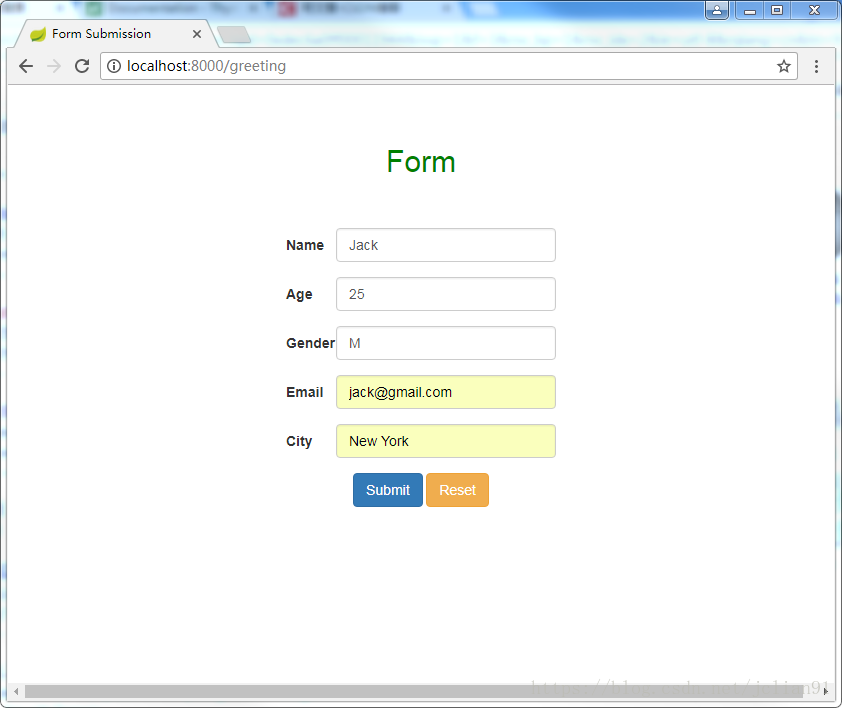
点击Submit按钮,将会跳转到结果显示页面,如下图:
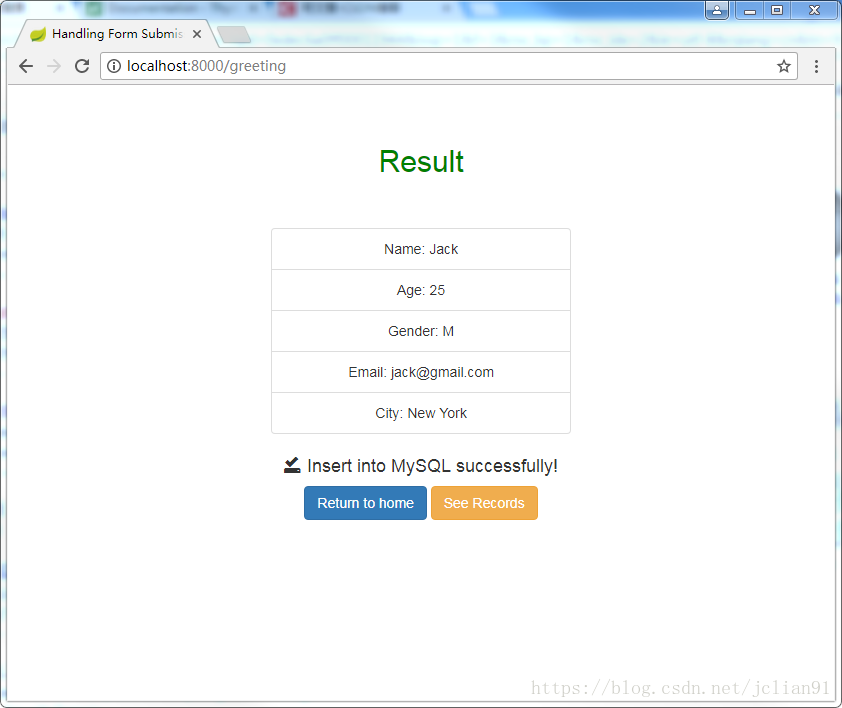
重复以上操作,将以下5条数据用表单提交:
Name: Alex, Age: 24, Gender: F, Email: alex@baidu.com City:Beijing
Name: Cook, Age: 45, Gender: M, Email: cook@apple.com City:New York
Name: Fork, Age: 31, Gender: F, Email: fork@linux.com City:London
Name: Dan, Age: 17, Gender: M, Email: dan@aliyun.com City:Paris
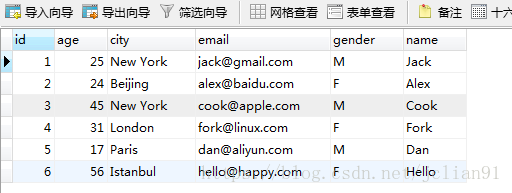
Name: Hello, Age: 56, Gender: F, Email: hello@happy.com City:Istanbul在浏览器中输入localhost:8000/all或在greeting页面中点击“See Records”按钮就能够看到刚才我们插入到MySQL数据库test中表格user的六条数据,如下图:

最后我们去MySQL数据库中查看,里面就有我们刚才提交的表单数据,如下图:
结束语
对于初次接触Spring Boot的读者来说,以上程序显得有些复杂、难懂,但是,熟能生巧,只要多加练习,一定会慢慢熟悉Spring Boot的开发流程的。当然,这也是笔者告诉自己的,因为,笔者也是一个新手!
本次项目的Github地址为https://github.com/percent4/formIntoMySQL: 欢迎大家访问~~
本次分享终于结束了,接下来还会继续更新Spring Boot方面的内容,欢迎大家交流~~
注意:本人现已开通两个微信公众号: 用Python做数学(微信号为:python_math)以及轻松学会Python爬虫(微信号为:easy_web_scrape), 欢迎大家关注哦~~