

我的移动端media
html{font-size:10px}
@media screen and (min-width:321px) and (max-width:375px){html{font-size:11px}}
@media screen and (min-width:376px) and (max-width:414px){html{font-size:12px}}
@media screen and (min-width:415px) and (max-width:639px){html{font-size:15px}}
@media screen and (min-width:640px) and (max-width:719px){html{font-size:20px}}
@media screen and (min-width:720px) and (max-width:749px){html{font-size:22.5px}}
@media screen and (min-width:750px) and (max-width:799px){html{font-size:23.5px}}
@media screen and (min-width:800px){html{font-size:25px}}
forEach()与map()方法
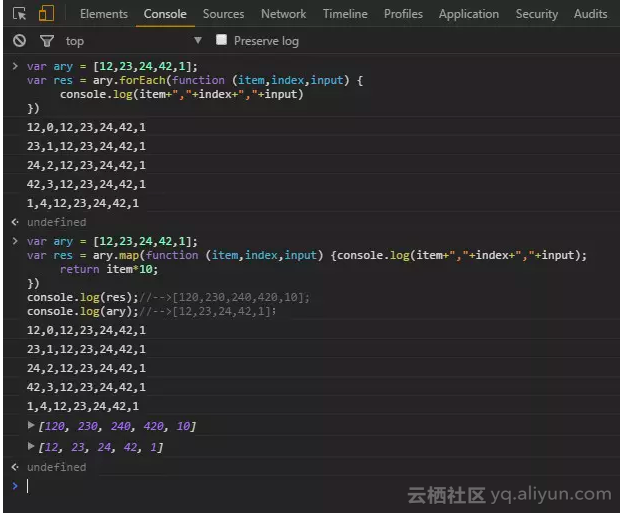
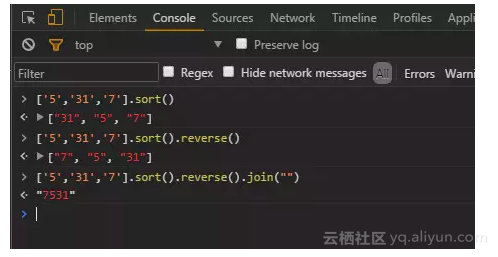
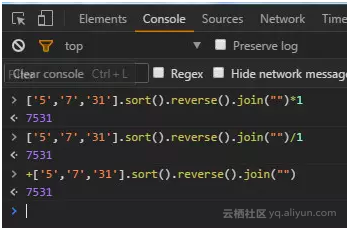
一个数组组成最大的数:
对localStorage的封装,使用更简单
//在get时,如果是JSON格式,那么将其转换为JSON,而不是字符串。以下是基础代码:
var Store = {
    get: function(key) {
        var value = localStorage.getItem(key);
        if (value) {
            try {
                var value_json = JSON.parse(value);
                if (typeof value_json === 'object') {
                    return value_json;
                } else if (typeof value_json === 'number') {
                    return value_json;
                }
            } catch(e) {
                return value;
            }
        } else {
            return false;
        }
    },
    set: function(key, value) {
        localStorage.setItem(key, value);
    },
    remove: function(key) {
        localStorage.removeItem(key);
    },
    clear: function() {
        localStorage.clear();
    }
};
在此基础之上,可以扩展很多方法,比如批量保存或删除一些数据:
// 批量保存,data是一个字典
Store.setList = function(data) {
    for (var i in data) {
        localStorage.setItem(i, data[i]);
    }
};

// 批量删除,list是一个数组
Store.removeList = function(list) {
    for (var i = 0, len = list.length; i < len; i++) {
        localStorage.removeItem(list[i]);
    }
};
js判断滚动条是否到底部:
<!DOCTYPE html>
<html>

	<head>
		<meta charset="UTF-8">
		<meta name="viewport" content="width=device-width,initial-scale=1,minimum-scale=1,maximum-scale=1,user-scalable=no" />
		<title></title>
		<script src=""></script>
		<style type="text/css">
			* {
				padding: 0px;
				margin: 0px;
			}
			#main {
				width: 100%;
				height: 2000px;
				background: pink;
			}
		</style>
		<script type="text/javascript">
			$(window).scroll(function() {
				var scrollTop = $(this).scrollTop();
				var docHeight = $(document).height();
				var windowHeight = $(this).height();
				var scrollHeight=document.body.scrollHeight;
				console.log("scrollTop:"+scrollTop);
				console.log("scrollbottom:"+(docHeight-scrollTop-windowHeight));
				if(scrollTop + windowHeight == docHeight) {
					alert("已经到最底部了!");
				}
			});
		</script>
	</head>

	<body>
		<div id="main"></div>
	</body>

</html>
js操作cookie
JS设置cookie:

假设在A页面中要保存变量username的值("jack")到cookie中,key值为name,则相应的JS代码为:

document.cookie="name="+username;

JS读取cookie:

假设cookie中存储的内容为:name=jack;password=123

则在B页面中获取变量username的值的JS代码如下:

var username=document.cookie.split(";")[0].split("=")[1];

//JS操作cookies方法!

//写cookies

function setCookie(name,value)
{
    var Days = 30;
    var exp = new Date();
    exp.setTime(exp.getTime() + Days*24*60*60*1000);
    document.cookie = name + "="+ escape (value) + ";expires=" + exp.toGMTString();
}

//读取cookies
function getCookie(name)
{
    var arr,reg=new RegExp("(^| )"+name+"=([^;]*)(;|$)");

    if(arr=document.cookie.match(reg))

        return unescape(arr[2]);
    else
        return null;
}

//删除cookies
function delCookie(name)
{
    var exp = new Date();
    exp.setTime(exp.getTime() - 1);
    var cval=getCookie(name);
    if(cval!=null)
        document.cookie= name + "="+cval+";expires="+exp.toGMTString();
}
//使用示例
setCookie("name","hayden");
alert(getCookie("name"));

//如果需要设定自定义过期时间
//那么把上面的setCookie 函数换成下面两个函数就ok;


//程序代码
function setCookie(name,value,time)
{
    var strsec = getsec(time);
    var exp = new Date();
    exp.setTime(exp.getTime() + strsec*1);
    document.cookie = name + "="+ escape (value) + ";expires=" + exp.toGMTString();
}
function getsec(str)
{
   alert(str);
   var str1=str.substring(1,str.length)*1;
   var str2=str.substring(0,1);
   if (str2=="s")
   {
        return str1*1000;
   }
   else if (str2=="h")
   {
       return str1*60*60*1000;
   }
   else if (str2=="d")
   {
       return str1*24*60*60*1000;
   }
}
//这是有设定过期时间的使用示例:
//s20是代表20秒
//h是指小时,如12小时则是:h12
//d是天数,30天则:d30

setCookie("name","hayden","s20");


/***************************************/
function getCookie(name){
        if(name){
            var arr,reg=new RegExp("(^| )"+name+"=([^;]*)(;|$)");
            if(arr=document.cookie.match(reg))
                return (decodeURIComponent(arr[2]));
            else
                return null;
        }
        return null;
    };

function setCookie(name,value,Days){
        if(!Days)Days=3000;
        var exp = new Date();
        exp.setTime(exp.getTime() + Days*24*60*60*1000000);
        document.cookie = name + "="+ encodeURIComponent(value) + ";domain=weshare.com.cn;expires=" + exp.toGMTString() + ";path=/";
    };
获取URL参数:
 function GetURLlist(name) {
                var reg = new RegExp("(^|&)" + name + "=([^&]*)(&|$)");
                var r = window.location.search.substr(1).match(reg);
                if(r != null) return unescape(r[2]);
                return null;
            };
IOS和安卓判断:
var u = navigator.userAgent, app = navigator.appVersion;
var isAndroid = u.indexOf('Android') > -1 || u.indexOf('Linux') > -1; //android终端或者uc浏览器
var isiOS = !!u.match(/\(i[^;]+;( U;)? CPU.+Mac OS X/); //ios终端
    if(isAndroid){
        $(".down0").css('display','none')
    }else if(isiOS){
        $(".down").css('display','none')
    }
    else{
        return false;
    }
判断微信:
function isWeiXin(){
                var ua = window.navigator.userAgent.toLowerCase();
                if(ua.match(/MicroMessenger/i) == 'micromessenger'){
                    return true;
                }else{
                    return false;
                }
            }
var u = navigator.userAgent;
var isAndroid = u.indexOf('Android') > -1 || u.indexOf('Linux') > -1|| u.indexOf('MI') > -1|| <br>u.indexOf('XiaoMi') > -1; //android终端或者uc,小米等奇葩浏览器
    if(!isAndroid) {}
    if(isAndroid)  {}
判断页面滚动方向:
<script type="text/javascript">
            $(function() {
                function scroll(fn) {
                    var beforeScrollTop = document.body.scrollTop,
                        fn = fn || function() {};
                    window.addEventListener("scroll", function() {
                        var afterScrollTop = document.body.scrollTop,
                            delta = afterScrollTop - beforeScrollTop;
                        if(delta === 0) return false;
                        fn(delta > 0 ? "down" : "up");
                        beforeScrollTop = afterScrollTop;
                    }, false);
                }
                scroll(function(direction) {
                    if(direction == "down") {
                        console.log("向下滚");
                    } else {
                        console.log("向上滚");
                    }
                });
            });
        </script>
 <script type="text/javascript">
        var windowHeight = $(window).height();
        $("body").css("height", windowHeight);
        var startX, startY, moveEndX, moveEndY, X, Y;
        $("body").on("touchstart", function(e) {
            e.preventDefault();
            startX = e.originalEvent.changedTouches[0].pageX, startY = e.originalEvent.changedTouches[0].pageY;
        });
        $("body").on("touchmove", function(e) {
            e.preventDefault();
            moveEndX = e.originalEvent.changedTouches[0].pageX, moveEndY = e.originalEvent.changedTouches[0].pageY, X = moveEndX - startX, Y = moveEndY - startY;
            if (Math.abs(X) > Math.abs(Y) && X > 0) {
                alert("left to right");
            } else if (Math.abs(X) > Math.abs(Y) && X < 0) {
                alert("right to left");
            } else if (Math.abs(Y) > Math.abs(X) && Y > 0) {
                alert("top to bottom");
            } else if (Math.abs(Y) > Math.abs(X) && Y < 0) {
                alert("bottom to top");
            } else {
                alert("just touch");
            }
        });
    </script>
排序
<script type="text/javascript">
            var a = [1, 18, 23, 9, 16, 10, 29, 17];
            var t = 0;
            for(var i = 0; i < a.length; i++) {
                for(var j = i + 1; j < a.length; j++) {
                    if(a[i] > a[j]) {
                        t = a[i];
                        a[i] = a[j];
                        a[j] = t;
                    }
                }
            }
            console.log(a);  //[1, 9, 10, 16, 17, 18, 23, 29]
        </script>
倒计时:
 <!Doctype html>
<html>
    <head>
        <meta charset="utf-8">
        <title>下班倒计时</title>
        <style>
            * {
                margin: 0;
                padding: 0;
            }

            body {
                font-size: 16px;
                text-align: center;
                font-family: arial;
            }

            .time {
                margin-top: 10px;
                border: 1px solid red;
                height: 30px;
                padding: 2px;
                line-height: 30px;
            }
        </style>
    </head>

    <body>
        <div class="time">
            <span id="t_d">00天</span>
            <span id="t_h">00时</span>
            <span id="t_m">00分</span>
            <span id="t_s">00秒</span>
        </div>
        <script>
            setInterval(function() {
                var EndTime = new Date('2016/06/13 00:00:00');
                var NowTime = new Date();
                var t = EndTime.getTime() - NowTime.getTime();
                var d = 0;
                var h = 0;
                var m = 0;
                var s = 0;
                if (t >= 0) {
                    d = Math.floor(t / 1000 / 60 / 60 / 24);
                    h = Math.floor(t / 1000 / 60 / 60 % 24);
                    m = Math.floor(t / 1000 / 60 % 60);
                    s = Math.floor(t / 1000 % 60);
                }
                document.getElementById("t_d").innerHTML = d + "天";
                document.getElementById("t_h").innerHTML = h + "时";
                document.getElementById("t_m").innerHTML = m + "分";
                document.getElementById("t_s").innerHTML = s + "秒";
            }, 10);
        </script>

    </body>

</html>
类型判断:
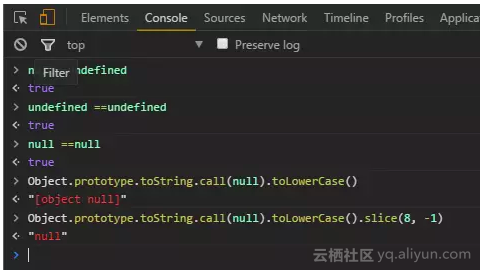
function _typeOf(obj) {
		return Object.prototype.toString.call(obj).toLowerCase().slice(8, -1);  //
	}

判断undefined:
<span style="font-size: small;">
var tmp = undefined;
if (typeof(tmp) == "undefined"){
alert("undefined");
}
</span>


判断null:
<span style="font-size: small;">
var tmp = null;
if (!tmp && typeof(tmp)!="undefined" && tmp!=0){
alert("null");
}
</span>

判断NaN:
var tmp = 0/0;
if(isNaN(tmp)){
alert("NaN");
}


判断undefined和null:
<span style="font-size: small;">
var tmp = undefined;
if (tmp== undefined)
{
alert("null or undefined");
}
 </span>


<span style="font-size: small;">
var tmp = undefined;
if (tmp== null)
{
alert("null or undefined");
}
</span>


判断undefined、null与NaN:
<span style="font-size: small;">
var tmp = null;
if (!tmp)
{
alert("null or undefined or NaN");
}
</span>
Ajax
jquery ajax函数
我自己封装了一个ajax的函数,代码如下:
var Ajax = function(url, type success, error) {
    $.ajax({
        url: url,
        type: type,
        dataType: 'json',
        timeout: 10000,
        success: function(d) {
            var data = d.data;
            success && success(data);
        },
        error: function(e) {
            error && error(e);
        }
    });
};
// 使用方法:
Ajax('/data.json', 'get', function(data) {
    console.log(data);
});
jsonp方式
有时候我们为了跨域,要使用jsonp的方法,我也封装了一个函数:
function jsonp(config) {
    var options = config || {};   // 需要配置url, success, time, fail四个属性
    var callbackName = ('jsonp_' + Math.random()).replace(".", "");
    var oHead = document.getElementsByTagName('head')[0];
    var oScript = document.createElement('script');
    oHead.appendChild(oScript);
    window[callbackName] = function(json) {  //创建jsonp回调函数
        oHead.removeChild(oScript);
        clearTimeout(oScript.timer);
        window[callbackName] = null;
        options.success && options.success(json);   //先删除script标签,实际上执行的是success函数
    };
    oScript.src = options.url + '?' + callbackName;    //发送请求
    if (options.time) {  //设置超时处理
        oScript.timer = setTimeout(function () {
            window[callbackName] = null;
            oHead.removeChild(oScript);
            options.fail && options.fail({ message: "超时" });
        }, options.time);
    }
};
// 使用方法:
jsonp({
    url: '/b.com/b.json',
    success: function(d){
        //数据处理
    },
    time: 5000,
    fail: function(){
        //错误处理
    }
});
JS生成随机字符串的最佳实践
var random_str = function() {
    var len = 32;
    var chars = 'abcdefghijklmnopqrstuvwxyzABCDEFGHIJKLMNOPQRSTUVWXYZ1234567890';
    var max = chars.length;
    var str = '';
    for (var i = 0; i < len; i++) {
    str += chars.charAt(Math.floor(Math.random() * max));
    }

    return str;
};
//这样生成一个32位的随机字符串,相同的概率低到不可能。
常用正则表达式
JavaScript过滤Emoji的最佳实践
name = name.replace(/\uD83C[\uDF00-\uDFFF]|\uD83D[\uDC00-\uDE4F]/g, "");
手机号验证:
var validate = function(num) {
    var reg = /^1[3-9]\d{9}$/;
    return reg.test(num);
};
ip验证:
var reg = /^(\d{1,2}|1\d\d|2[0-4]\d|25[0-5])(\.(\d{1,2}|1\d\d|2[0-4]\d|25[0-5])){3}$/
常用js函数
返回顶部:
$(window).scroll(function() {
    var a = $(window).scrollTop();
    if(a > 100) {
        $('.go-top').fadeIn();
    }else {
        $('.go-top').fadeOut();
    }
});
$(".go-top").click(function(){
    $("html,body").animate({scrollTop:"0px"},'600');
});
阻止冒泡:
function stopBubble(e){
    e = e || window.event;
    if(e.stopPropagation){
        e.stopPropagation();  //W3C阻止冒泡方法
    }else {
        e.cancelBubble = true; //IE阻止冒泡方法
    }
}
全部替换replaceAll:
var replaceAll = function(bigStr, str1, str2) {  //把bigStr中的所有str1替换为str2
    var reg = new RegExp(str1, 'gm');
    return bigStr.replace(reg, str2);
}
获取浏览器url中的参数值:
var getURLParam = function(name) {
    return decodeURIComponent((new RegExp('[?|&]' + name + '=' + '([^&;]+?)(&|#|;|$)', "ig").exec(location.search) || [, ""])[1].replace(/\+/g, '%20')) || null;
};
深度拷贝对象:
function cloneObj(obj) {
    var o = obj.constructor == Object ? new obj.constructor() : new obj.constructor(obj.valueOf());
    for(var key in obj){
        if(o[key] != obj[key] ){
            if(typeof(obj[key]) == 'object' ){
                o[key] = mods.cloneObj(obj[key]);
            }else{
                o[key] = obj[key];
            }
        }
    }
    return o;
}
数组去重:
var unique = function(arr) {
    var result = [], json = {};
    for (var i = 0, len = arr.length; i < len; i++){
        if (!json[arr[i]]) {
            json[arr[i]] = 1;
            result.push(arr[i]);  //返回没被删除的元素
        }
    }
    return result;
};
判断数组元素是否重复:
var isRepeat = function(arr) {  //arr是否有重复元素
    var hash = {};
    for (var i in arr) {
        if (hash[arr[i]]) return true;
        hash[arr[i]] = true;
    }
    return false;
};
生成随机数:
function randombetween(min, max){
    return min + (Math.random() * (max-min +1));
}
操作cookie:
own.setCookie = function(cname, cvalue, exdays){
    var d = new Date();
    d.setTime(d.getTime() + (exdays*24*60*60*1000));
    var expires = 'expires='+d.toUTCString();
    document.cookie = cname + '=' + cvalue + '; ' + expires;
};
own.getCookie = function(cname) {
    var name = cname + '=';
    var ca = document.cookie.split(';');
    for(var i=0; i< ca.length; i++) {
        var c = ca[i];
        while (c.charAt(0) == ' ') c = c.substring(1);
        if (c.indexOf(name) != -1) return c.substring(name.length, c.length);
    }
    return '';
};
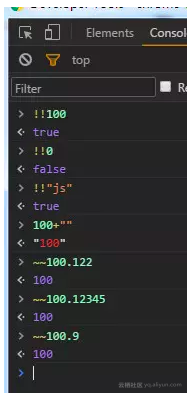
数据类型: underfined、null、0、false、NaN、空字符串。他们的逻辑非结果均为true。
闭包格式: 好处:避免命名冲突(全局变量污染)。
(function(a, b) {
    console.log(a+b);  //30
})(10, 20);
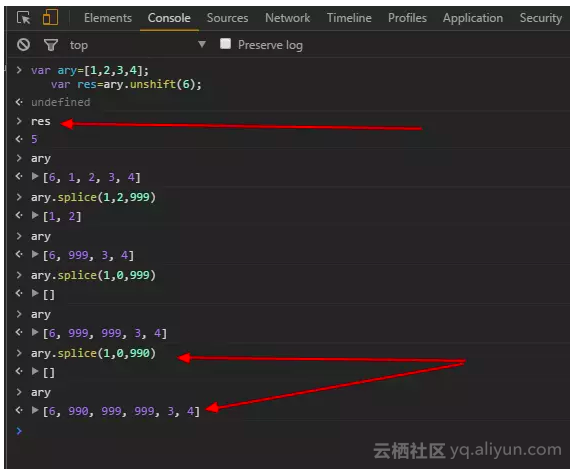
var arr = [12, 222, 44, 88];
arr.length = 2;   //截取,arr = [12, 222];
arr.length = 0;   //清空,arr will be equal to [].
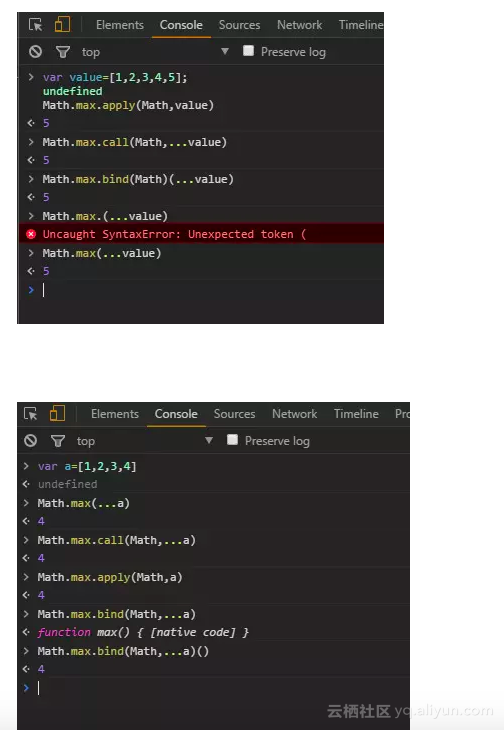
获取数组的最大最小值:
var numbers = [5, 45822, 120, -215];
var maxInNumbers = Math.max.apply(Math, numbers);   //45822
var minInNumbers = Math.min.apply(Math, numbers);   //-215
0.1 + 0.2 == 0.3 //false
为什么呢?因为0.1+0.2等于0.30000000000000004。JavaScript的数字都遵循IEEE 754标准构建,在内部都是64位浮点小数表示。可以通过使用toFixed()来解决这个问题。
数组排序sort函数:
var arr = [1, 5, 6, 3];    //数字数组
arr.sort(function(a, b) {
    return a - b;   //从小到大排
    return b - a;   //从大到小排
    return Math.random() - 0.5;   //数组洗牌
});
var arr = [{   //对象数组
    num: 1,
    text: 'num1'
}, {
    num: 5,
    text: 'num2'
}, {
    num: 6,
    text: 'num3'
}, {
    num: 3,
    text: 'num4'
}];
arr.sort(function(a, b) {
    return a.num - b.num;   //从小到大排
    return b.num - a.num;   //从大到小排
});
对象和字符串的转换:
var obj = {a: 'aaa', b: 'bbb'};
var objStr = JSON.stringify(obj);    // "{"a":"aaa","b":"bbb"}"
var newObj = JSON.parse(objStr);     // {a: "aaa", b: "bbb"}
对象拷贝与赋值
var obj = {
    name: 'xiaoming',
    age: 23
};

var newObj = obj;

newObj.name = 'xiaohua';

console.log(obj.name); // 'xiaohua'
console.log(newObj.name); // 'xiaohua'
上方我们将obj对象赋值给了newObj对象,从而改变newObj的name属性,但是obj对象的name属性也被篡改,这是因为实际上newObj对象获得的只是一个内存地址,而不是真正 的拷贝,所以obj对象被篡改。
var obj2 = {
    name: 'xiaoming',
    age: 23
};

var newObj2 = Object.assign({}, obj2, {color: 'blue'});

newObj2.name = 'xiaohua';

console.log(obj2.name); // 'xiaoming'
console.log(newObj2.name); // 'xiaohua'
console.log(newObj2.color); // 'blue'
上方利用Object.assign()方法进行对象的深拷贝可以避免源对象被篡改的可能。因为Object.assign() 方法可以把任意多个的源对象自身的可枚举属性拷贝给目标对象,然后返回目标对象。
var obj3 = {
    name: 'xiaoming',
    age: 23
};

var newObj3 = Object.create(obj3);

newObj3.name = 'xiaohua';

console.log(obj3.name); // 'xiaoming'
console.log(newObj3.name); // 'xiaohua'
我们也可以使用Object.create()方法进行对象的拷贝,Object.create()方法可以创建一个具有指定原型对象和属性的新对象。
git笔记
git使用之前的配置:
1.git config --global user.email xxx@163.com
2.git config --global user.name xxx
3.ssh-keygen -t rsa -C xxx@163.com(邮箱地址)      // 生成ssh
4.找到.ssh文件夹打开,使用cat id_rsa.pub    //打开公钥ssh串
5.登陆github,settings - SSH keys  - add ssh keys (把上面的内容全部添加进去即可)
说明:然后这个邮箱(xxxxx@gmail.com)对应的账号在github上就有权限对仓库进行操作了。可以尽情的进行下面的git命令了。
git常用命令:
1、git config user.name  /  user.email     //查看当前git的用户名称、邮箱
2、git clone https://github.com/jarson7426/javascript.git  project  //clone仓库到本地。
3、修改本地代码,提交到分支:  git add file   /   git commit -m “新增文件”
4、把本地库推送到远程库:  git push origin master
5、查看提交日志:git log -5
6、返回某一个版本:git reset --hard 123
7、分支:git branch / git checkout name  / git checkout -b dev
8、合并name分支到当前分支:git merge name   /   git pull origin
9、删除本地分支:git branch -D name
10、删除远程分支: git push origin  :daily/x.x.x
11、git checkout -b mydev origin/daily/1.0.0    //把远程daily分支映射到本地mydev分支进行开发
12、合并远程分支到当前分支 git pull origin daily/1.1.1
13、发布到线上:
    git tag publish/0.1.5
    git push origin publish/0.1.5:publish/0.1.5
14、线上代码覆盖到本地:
    git checkout --theirs build/scripts/ddos
    git checkout --theirs src/app/ddos
var reg = /.*[\u4e00-\u9fa5]+.*$/;
reg.test('123792739测试')  //true
判断是对象还是数组:
function isArray = function(o) {
    return toString.apply(o) === '[object Array]';
}
function isObject = function(o) {
    return toString.apply(o) === '[object Object]';
}
CSS修改滚动条样式:
::-webkit-scrollbar {
	width: 10px;
	background-color: #ccc;
}
::-webkit-scrollbar-track {
	background-color: #ccc;
	border-radius: 10px;
}
::-webkit-scrollbar-thumb {
	background-color: rgb(255, 255, 255);
	background-image: -webkit-gradient(linear, 40% 0%, 75% 84%, from(rgb(77, 156, 65)), color-stop(0.6, rgb(84, 222, 93)), to(rgb(25, 145, 29)));
	border-radius: 10px;
}
单行多行省略号:
       <style type="text/css">
            .inaline {
                overflow: hidden;
                white-space: nowrap;
                text-overflow: ellipsis;
                /*clip  修剪文本。*/
            }

            .intwoline {
                display: -webkit-box !important;
                overflow: hidden;
                text-overflow: ellipsis;
                word-break: break-all;
                -webkit-box-orient: vertical;
                -webkit-line-clamp: 3;
            }
        </style>
遮罩:
<!doctype html>
<html lang="en">

	<head>
		<meta charset="UTF-8" />
		<title>RGBA 遮罩</title>
		<style type="text/css">
			* {
				padding: 0px;
				margin: 0px;
			}

			html,
			body {
				width: 100%;
				min-height: 100%;
				background: white;
			}

			div.mask {
				display: none;
				position: fixed;
				top: 0px;
				left: 0px;
				width: 100%;
				height: 100%;
				background: rgba(0, 0, 0, 0.7);
			}

			div.masks-body {
				width: 300px;
				height: 300px;
				position: absolute;
				top: 0px;
				left: 0px;
				bottom: 0px;
				right: 0px;
				background: green;
				margin: auto;
			}

			p {
				position: absolute;
				width: 30px;
				height: 30px;
				background: red;
				right: 0px;
				top: -30px;
			}
		</style>
		<script type="text/javascript">
			window.onload = function() {
				document.querySelector("#main").onclick = function() {
					document.querySelector(".mask").style.display = "block";
				}
				document.querySelector("p#close").onclick=function(){
					document.querySelector(".mask").style.display = "none";
				}
			}
		</script>
	</head>

	<body>
		<button id="main">点我</button>
		<div class="mask">
			<div class="masks-body">
				<p id="close"></p>
			</div>
		</div>
	</body>

</html>
常见页面flex布局:
<!doctype html>
<html lang="en">

	<head>
		<meta charset="UTF-8" />
		<title></title>
		<style type="text/css">
			* {
				padding: 0px;
				margin: 0px;
			}

			html,
			body {
				width: 100%;
				min-height: 100%;
				min-width: 1200px;
				overflow-x: hidden;
			}

			h1 {
				color: red;
				text-align: center;
			}

			#main0 {
				height: 400px;
				background: black;
				display: flex;
				flex-flow: row wrap;
				justify-content: flex-start;
				align-items: flex-start;
			}

			#main0 div:nth-child(2n) {
				flex: 1;
				height: 200px;
				font-size: 100px;
				line-height: 200px;
				text-align: center;
				background: red;
			}

			#main0 div:nth-child(2n+1) {
				flex: 1;
				height: 200px;
				line-height: 200px;
				font-size: 100px;
				text-align: center;
				background: blue;
			}

			#main1 {
				height: 400px;
				background: pink;
				display: flex;
				flex-flow: row nowrap;
				justify-content: flex-start;
				align-items: flex-start;
			}

			#main1 div:nth-child(2n) {
				flex: 1;
				height: 200px;
				font-size: 100px;
				line-height: 200px;
				text-align: center;
				background: red;
			}

			#main1 div:nth-child(2n+1) {
				width: 300px;
				height: 200px;
				font-size: 100px;
				line-height: 200px;
				text-align: center;
				background: blue;
			}

			#main2 {
				height: 400px;
				background: yellow;
				display: flex;
				flex-flow: row nowrap;
				justify-content: flex-start;
				align-items: flex-start;
			}

			#main2 div:nth-child(2n) {
				flex: 1;
				height: 200px;
				font-size: 100px;
				line-height: 200px;
				text-align: center;
				background: red;
			}

			#main2 div:nth-child(2n+1) {
				width: 300px;
				height: 200px;
				font-size: 100px;
				line-height: 200px;
				text-align: center;
				background: blue;
			}

			#main3 {
				height: 400px;
				background: fuchsia;
				display: flex;
				flex-flow: row nowrap;
				justify-content: flex-start;
				align-items: flex-start;
			}

			#main3 div.div1 {
				flex: 1;
				height: 200px;
				font-size: 100px;
				line-height: 200px;
				text-align: center;
				background: blue;
			}

			#main3 div.div2 {
				flex: 2;
				height: 200px;
				font-size: 100px;
				line-height: 200px;
				text-align: center;
				background: red;
			}

			#main3 div.div3 {
				flex: 3;
				height: 200px;
				font-size: 100px;
				line-height: 200px;
				text-align: center;
				background: orange;
			}
		</style>
	</head>

	<body>
		<h1>等分布局</h1>
		<div id="main0">
			<div>1</div>
			<div>2</div>
			<div>3</div>
			<div>4</div>
			<div>5</div>
		</div>
		<h1>左边固定右边自适应布局</h1>
		<div id="main1">
			<div>1</div>
			<div>2</div>
		</div>
		<h1>左右固定中间自适应布局</h1>
		<div id="main2">
			<div>1</div>
			<div>2</div>
			<div>3</div>
		</div>
		<h1>宽度等差布局</h1>
		<div id="main3">
			<div class="div1">1</div>
			<div class="div2">2</div>
			<div class="div3">3</div>
		</div>
	</body>

</html>
flex: 1的使用:
<!doctype html>
<html lang="en">

	<head>
		<meta charset="UTF-8" />
		<title>Document</title>
		<style type="text/css">
			* {
				padding: 0px;
				margin: 0px;
			}

			#main {
				display: flex;
				align-items: center;
			}

			h1 {
				background: red;
				flex: 1;
				text-align: center;
			}
		</style>
	</head>

	<body>
		<div id="main">
			<p>哈哈哈</p>
			<h1>啊啊啊</h1>
			<div>呜呜呜</div>
		</div>
	</body>

</html>
单行超出省略字
 .div{
  overflow: hidden;
  text-overflow: ellipsis;
  white-space: nowrap;
}
placeholder颜色
input::-webkit-input-placeholder{
  color: #666;
}
禁止文本选择
.div{
  -moz-user-select:none;
  -webkit-user-select:none;
  -ms-user-select:none;
  -khtml-user-select:none;
  user-select:none;
}
iOS惯性滚动
.div{
  -webkit-overflow-scrolling:touch !important;
}
表单100%宽,但是有padding
input{
  -webkit-box-sizing: border-box;
  -moz-box-sizing: border-box;
  box-sizing: border-box;
}
字体细长
.div{
  -webkit-font-smoothing: antialiased;
  -moz-osx-font-smoothing: grayscale;
}
横向滚动
.div{
  white-space: nowrap;
  overflow-x: auto;
  overflow-y: hidden;
}
IOS开关:
<!DOCTYPE html>
<html>

	<head>
		<meta charset="UTF-8">
		<title></title>
		<style type="text/css">
			div#main {
				width: 208px;
				height: 108px;
				border-radius: 60px;
				background: pink;
				overflow: hidden;
				transition: all 300ms linear 0s;
			}

			div#main.bk {
				background: red;
			}

			div.ios {
				width: 100px;
				height: 100px;
				border-radius: 50px;
				background: blue;
				margin-left: 4px;
				margin-top: 4px;
				transition: all 300ms linear 0s;
			}

			div.ios.sb {
				margin-left: 104px;
			}
		</style>
		<script type="text/javascript">
			window.onload = function() {
				document.getElementById("main").onclick = function() {
					if(document.querySelector("div.ios").classList.contains("sb")) {
						document.querySelector("div.ios").classList.remove("sb");
						this.classList.remove("bk");
						return false;
					}
					document.querySelector("div.ios").classList.add("sb");
					this.classList.add("bk");
				}
			}
		</script>
	</head>

	<body>
		<div id="main">
			<div class="ios"></div>
		</div>
	</body>

</html>
一个高度自适应的DIV
<!DOCTYPE html>
<html>

	<head>
		<meta charset="UTF-8">
		<title>一个高度自适应的DIV</title>
		<style type="text/css">
			* {
				padding: 0px;
				margin: 0px;
			}

			div {
				width: 100%;
				position: absolute; /*relative 不可以*/
				top: 100px;
				bottom: 100px;
				left: 0px;
				right: 0px;
				background: red;
			}
		</style>
	</head>

	<body>
		<div></div>
	</body>

</html>
浅拷贝与深拷贝
-------------
    浅拷贝
  -------------
  var obj = {
    name: 'name'
  }
  var a = obj;
  a.name = 'new name';
  console.log(a.name); // 'new name'
  console.log(obj.name); // 'new name'

  这里就是一个浅拷贝的例子。a只是通过赋值符号得到了obj的引用。

  ---------------
    深拷贝
  ---------------
  function object(parent, child) {
    var i,
        tostring = Object.prototype.toString,
        aStr = "[object Array]";
    child = child || {};
    for(i in parent) {
      if(parent.hasOwnProperty(i)) {
        //这时候还要判断它的值是不是对象
        if(typeof parent[i] === 'object') {
          child[i] = tostring.call(parent[i]) === aStr ? [] : {};
          object(parent[i], child[i]);
        }
        else {
          child[i] = parent[i];
        }
      }
    }
    return child;
  }
  var obj = {
    tags: ['js','css'],
    s1: {
      name: 'dai',
      age: 21
    },
    flag: true
  }
  var some = object(obj);
  some.tags = [1,2];
  console.log(some.tags); //[1, 2]
  console.log(obj.tags); //['js', 'css']
placeholder是H5的一个新属性,但是在IE9以下是不支持的,为此我们会封装一个函数进行能力检测。
$(function() {
    // 如果不支持placeholder,用jQuery来完成
    if(!isSupportPlaceholder()) {
        // 遍历所有input对象, 除了密码框
        $('input').not("input[type='password']").each(
            function() {
                var self = $(this);
                var val = self.attr("placeholder");
                input(self, val);
            }
        );

        /**
         *  对password框的特殊处理
         * 1.创建一个text框
         * 2.获取焦点和失去焦点的时候切换
         */
        $('input[type="password"]').each(
            function() {
                var pwdField    = $(this);
                var pwdVal      = pwdField.attr('placeholder');
                var pwdId       = pwdField.attr('id');
                // 重命名该input的id为原id后跟1
                pwdField.after('<input id="' + pwdId +'1" type="text" value='+pwdVal+' autocomplete="off" />');
                var pwdPlaceholder = $('#' + pwdId + '1');
                pwdPlaceholder.show();
                pwdField.hide();

                pwdPlaceholder.focus(function(){
                    pwdPlaceholder.hide();
                    pwdField.show();
                    pwdField.focus();
                });

                pwdField.blur(function(){
                    if(pwdField.val() == '') {
                        pwdPlaceholder.show();
                        pwdField.hide();
                    }
                });
            }
        );
    }
});

// 判断浏览器是否支持placeholder属性
function isSupportPlaceholder() {
    var input = document.createElement('input');
    return 'placeholder' in input;
}

// jQuery替换placeholder的处理
function input(obj, val) {
    var $input = obj;
    var val = val;
    $input.attr({value:val});
    $input.focus(function() {
        if ($input.val() == val) {
            $(this).attr({value:""});
        }
    }).blur(function() {
        if ($input.val() == "") {
            $(this).attr({value:val});
        }
    });
}
苹果浏览器和uc浏览器在移动端的坑(日常积累,随时更新)
1 . 移动端uc浏览器不兼容css3 calc()
2 . ie8下a标签没有内容给宽高也不能触发点击跳转
3 . safari输入框加上readOnly="ture"属性仍然可以触发获取焦点,可再加上onfocus="this.blur()“解决
日期格式化:
// 对Date的扩展,将 Date 转化为指定格式的String
// 月(M)、日(d)、小时(h)、分(m)、秒(s)、季度(q) 可以用 1-2 个占位符,
// 年(y)可以用 1-4 个占位符,毫秒(S)只能用 1 个占位符(是 1-3 位的数字)
// 例子:
// (new Date()).Format("yyyy-MM-dd hh:mm:ss.S") ==> 2006-07-02 08:09:04.423
// (new Date()).Format("yyyy-M-d h:m:s.S")      ==> 2006-7-2 8:9:4.18 Date.prototype.Format = function (fmt) { //author: meizz     var o = {
        "M+": this.getMonth() + 1, //月份         "d+": this.getDate(), //日         "h+": this.getHours(), //小时         "m+": this.getMinutes(), //分         "s+": this.getSeconds(), //秒         "q+": Math.floor((this.getMonth() + 3) / 3), //季度         "S": this.getMilliseconds() //毫秒     };
    if (/(y+)/.test(fmt)) fmt = fmt.replace(RegExp.$1, (this.getFullYear() + "").substr(4 - RegExp.$1.length));
    for (var k in o)
    if (new RegExp("(" + k + ")").test(fmt)) fmt = fmt.replace(RegExp.$1, (RegExp.$1.length == 1) ? (o[k]) : (("00" + o[k]).substr(("" + o[k]).length)));
    return fmt;
}
调用:
var time1 = new Date().Format("yyyy-MM-dd");
var time2 = new Date().Format("yyyy-MM-dd HH:mm:ss"); 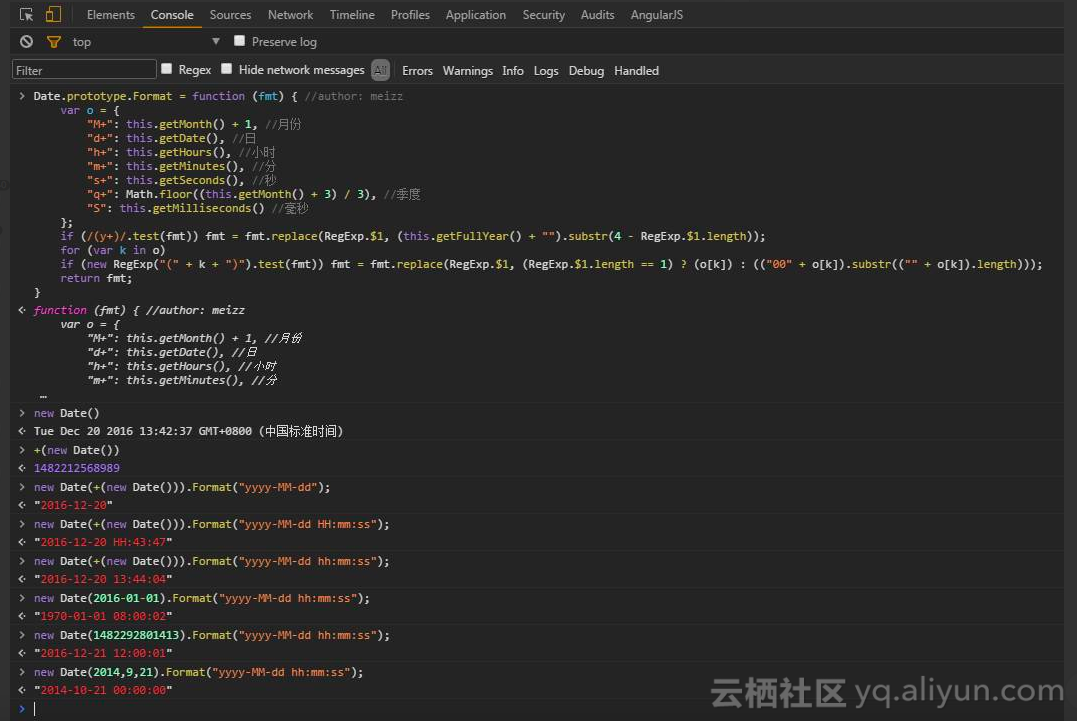
js中不存在自带的sleep方法,要想休眠要自己定义个方法:
function sleep(numberMillis) {
var now = new Date();
var exitTime = now.getTime() + numberMillis;
while (true) {
now = new Date();
if (now.getTime() > exitTime)
return;
}
}
将 Date 转化为指定格式的String
// 对Date的扩展,将 Date 转化为指定格式的String
// 月(M)、日(d)、小时(h)、分(m)、秒(s)、季度(q) 可以用 1-2 个占位符,
// 年(y)可以用 1-4 个占位符,毫秒(S)只能用 1 个占位符(是 1-3 位的数字)
// 例子:
// (new Date()).Format("yyyy-MM-dd hh:mm:ss.S") ==> 2006-07-02 08:09:04.423
// (new Date()).Format("yyyy-M-d h:m:s.S")      ==> 2006-7-2 8:9:4.18
Date.prototype.Format = function (fmt) { //author: zouqj
    var o = {
        "M+": this.getMonth() + 1, //月份
        "d+": this.getDate(), //日
        "h+": this.getHours(), //小时
        "m+": this.getMinutes(), //分
        "s+": this.getSeconds(), //秒
        "q+": Math.floor((this.getMonth() + 3) / 3), //季度
        "S": this.getMilliseconds() //毫秒
    };
    if (/(y+)/.test(fmt)) fmt = fmt.replace(RegExp.$1, (this.getFullYear() + "").substr(4 - RegExp.$1.length));
    for (var k in o)
        if (new RegExp("(" + k + ")").test(fmt)) fmt = fmt.replace(RegExp.$1, (RegExp.$1.length == 1) ? (o[k]) : (("00" + o[k]).substr(("" + o[k]).length)));
    return fmt;
}
获取当前时间,格式:yyyy-MM-dd hh:mm:ss
//获取当前时间,格式:yyyy-MM-dd hh:mm:ss
function getNowFormatDate() {
    var date = new Date();
    var seperator1 = "-";
    var seperator2 = ":";
    var month = date.getMonth() + 1;
    var strDate = date.getDate();
    if (month >= 1 && month <= 9) {
        month = "0" + month;
    }
    if (strDate >= 0 && strDate <= 9) {
        strDate = "0" + strDate;
    }
    var currentdate = date.getFullYear() + seperator1 + month + seperator1 + strDate
            + " " + date.getHours() + seperator2 + date.getMinutes()
            + seperator2 + date.getSeconds();
    return currentdate;
}
生成一个由随机数组成的伪Guid(32位Guid字符串)
//方式一
function newPseudoGuid () {
            var guid = "";
            for (var i = 1; i <= 32; i++) {
                var n = Math.floor(Math.random() * 16.0).toString(16);
                guid += n;
                if ((i == 8) || (i == 12) || (i == 16) || (i == 20))
                    guid += "-";
            }
            return guid;
        }
//方式二
function S4() {
    return (((1 + Math.random()) * 0x10000) | 0).toString(16).substring(1);
}
//生成guid
function guid() {
    return (S4() + S4() + "-" + S4() + "-" + S4() + "-" + S4() + "-" + S4() + S4() + S4());
}
判断js是否加载完毕:
在正常的加载过程中,js文件的加载是同步的,也就是说在js加载的过程中,浏览器会阻塞接下来的内容的解析。这时候,动态加载便显得尤为重要了,由于它是异步加载,因此,它可以在后台自动下载,并不会妨碍其它内容的正常解析,由此,便可以提高页面首次加载的速度。
在IE或一些基于IE内核的浏览器中(如Maxthon),它是通过script节点的readystatechange方法来判断的,而其它的一些浏览器中,往往是通过load事件来决定的。
function dynamicLoad()
{
   var _doc=document.getElementsByTagName('head')[0];
   var script=document.createElement('script');
   script.setAttribute('type','text/javascript');
   script.setAttribute('src','jquery-1.4.4.js');
   _doc.appendChild(script);
   script.onload=script.onreadystatechange=function(){
       if(!this.readyState||this.readyState=='loaded'||this.readyState=='complete'){
       alert('done');
    }
   script.onload=script.onreadystatechange=null;
  }
}
<!DOCTYPE html>
<html>

	<head>
		<meta charset="utf-8" />
		<title></title>
		<script type="text/javascript">
			function dynamicLoad() {
				var _doc = document.getElementsByTagName('head')[0];
				var script = document.createElement('script');
				script.setAttribute('type', 'text/javascript');
				script.setAttribute('src', 'js/a.js');
				_doc.appendChild(script);
				script.onload = script.onreadystatechange = function() {
					if(!this.readyState || this.readyState == 'loaded' || this.readyState == 'complete') {
						alert('下载完成!');
					}
					script.onload = script.onreadystatechange = null;
				}
			}
			dynamicLoad();
		</script>
	</head>
	<body>
	</body>
</html>
递归排列组合:
<!DOCTYPE html>
<html>

	<head>
		<title>demo</title>
		<script type="text/javascript">
			var str = [1, 2, 3, 4, 5];
			var count = 0;

			function arrange(s) {
				for(var i = 0, length = str.length; i < length; i++) {
					if(s.length == length - 1) {
						if(s.indexOf(str[i]) < 0) {
							count++;
							document.writeln("组合" + count + ":" + s + str[i] + '<br />');
						}
						continue;
					}
					if(s.indexOf(str[i]) < 0) {
						arrange(s + str[i]);
					}
				}
			}
			arrange("");
		</script>
	</head>

	<body>
	</body>

</html>
js获取页面url:
设置或获取对象指定的文件名或路径。
window.location.pathname
例:http://localhost:8086/topic/index?topicId=361
alert(window.location.pathname); 则输出:/topic/index

设置或获取整个 URL 为字符串。
window.location.href
例:http://localhost:8086/topic/index?topicId=361
alert(window.location.href); 则输出:http://localhost:8086/topic/index?topicId=361

设置或获取与 URL 关联的端口号码。
window.location.port
例:http://localhost:8086/topic/index?topicId=361
alert(window.location.port); 则输出:8086

设置或获取 URL 的协议部分。
window.location.protocol
例:http://localhost:8086/topic/index?topicId=361
alert(window.location.protocol); 则输出:http:

设置或获取 href 属性中在井号“#”后面的分段。
window.location.hash

设置或获取 location 或 URL 的 hostname 和 port 号码。
window.location.host
例:http://localhost:8086/topic/index?topicId=361
alert(window.location.host); 则输出:http:localhost:8086

设置或获取 href 属性中跟在问号后面的部分。
window.location.search
例:http://localhost:8086/topic/index?topicId=361
alert(window.location.search); 则输出:?topicId=361
window.location

属性                  描述
hash                设置或获取 href 属性中在井号“#”后面的分段。
host                 设置或获取 location 或 URL 的 hostname 和 port 号码。
hostname      设置或获取 location 或 URL 的主机名称部分。
href                  设置或获取整个 URL 为字符串。
pathname      设置或获取对象指定的文件名或路径。
port                  设置或获取与 URL 关联的端口号码。
protocol          设置或获取 URL 的协议部分。
search            设置或获取 href 属性中跟在问号后面的部分。
css不常用选择器
ele:nth-of-type为什么要叫:nth-of-type?因为它是以"type"来区分的。
也就是说:ele:nth-of-type(n)是指父元素下第n个ele元素,
而ele:nth-child(n)是指父元素下第n个元素且这个元素为ele,若不是,则选择失败。
h4~p   h4后面的p标签
h4+p   h4相邻的p标签
p[id]   包含id属性的p标签
p[class~="b"]  class类名为b且b前面有空格的p标签
p[class|="b"]  class类名为b且b后面有横杠的p标签
a[href^="http"] a标签下的href以http开头
a[href$="rar"] a标签下的href以rar结尾
a[href*="o"] a标签下的href有o
p::first-line  选择p标签下第一行
a:before(a::before),a:after(a::after) 伪元素
p::selection  选择被选中的文字
p::first-letter 选择p标签下第一个字
div:not(#container) 选择除id为container之外的所有div标签

p:first-child  找到P,然后找P的父级 再找父级下第一个元素是P(匹配的是某父元素的第一个子元素,可以说是结构上的第一个子元素。)
p:first-of-type 找到P,然后找P的父级 再找父级下第一个元素是P(匹配的是该类型的第一个,这里不再限制是第一个子元素了,只要是该类型元素的第一个就行了,当然这些元素的范围都是属于同一级的,也就是同辈的。)
p:last-child  找到P 然后找P的父级 再找父级下最后一个元素是P
p:last-of-type 找到P 然后找P的父级 再找父级下最后一个元素是P
li:nth-child(2)  找到li 然后找li的父级 再找父级下第二个元素是li
li:nth-of-type(2)
li:nth-last-child(2)  找到li 然后找li的父级 再找父级下倒数第二元素个是li
li:nth-last-of-type(2)
li:nth-child(even)  找到li的所有偶数位(2N)
li:nth-last-child(even)
li:nth-last-child(odd) 找到li的所有奇数位(2N-1 或 2n+1)
li:nth-last-child(odd)
li:only-child 找到li是父级的唯一子元素(选择器选择的是父元素中只有一个子元素,而且只有唯一的一个子元素)
li:only-of-type 表示一个元素他有很多个子元素,而其中只有一种类型的子元素是唯一的,使用“:only-of-type”选择器就可以选中这个元素中的唯一一个类型子元素。
对 Select 的各种操作(JQuery)
<select id="relationship" name="relationship" required="true">
    <option value="1">父母</option>
    <option value="2">夫妻</option>
    <option value="3">子女</option>
    <option value="4">朋友</option>
    <option value="5">其他</option>
</select>
$(document).ready(function() {
    //获取下拉框选中项的index属性值
    var selectIndex = $("#relationship").get(0).selectedIndex;
    alert(selectIndex);

    //绑定下拉框change事件,当下来框改变时调用 SelectChange()方法
    $("#relationship").change(function() {
        //todo
    });

    //获取下拉框选中项的value属性值
    var selectValue = $("#relationship").val();
    alert(selectValue);

    //获取下拉框选中项的text属性值
    var selectText = $("#relationship").find("option:selected").text();
    alert(selectText);

    //设置下拉框index属性为5的选项 选中
    $("#relationship").get(0).selectedIndex = 5;

    //设置下拉框value属性为4的选项 选中
    $("#relationship").val(4);

    //设置下拉框text属性为5的选项 选中
    $("#relationship option[text=5]").attr("selected", "selected");
    $("#yyt option:contains('5')").attr("selected", true);

    ////获取下拉框最大的index属性值
    var selectMaxIndex = $("#relationship option:last").attr("index");
    alert(selectMaxIndex);

    //在下拉框最前添加一个选项
    $("#relationship").prepend("<option value='0'>领导</option>");

    //在下拉框最后添加一个选项
    $("#relationship").append("<option value='6'>同事</option>");

    //移除下拉框最后一个选项
    $("#relationship option:last").remove();

    //移除下拉框 index属性为1的选项
    $("#relationship option[index=1]").remove();

    //移除下拉框 value属性为4的选项
    $("#relationship option[value=4]").remove();

    //移除下拉框 text属性为5的选项
    $("#relationship option[text=5]").remove();

});
JavaScript利用闭包实现模块化
var foo = (function CoolModule() {
    var something = "cool";
    var another = [1, 2, 3];

    function doSomething() {
        alert( something );
    }
    function doAnother() {
        alert( another.join( " ! " ) );
    }
    return {
        doSomething: doSomething,
        doAnother: doAnother
    };
})();
foo.doSomething(); // cool
foo.doAnother(); // 1 ! 2 ! 3
javascript中如何把一个数组的内容全部赋值给另外一个数组:
一、 错误实现
var array1 = new Array("1","2","3"); var array2;
array2 = array1;
array1.length = 0;
alert(array2); //返回为空
这种做法是错的,因为javascript分原始类型与引用类型(与java、c#类似)。Array是引用类
型。array2得到的是引用,所以对array1的修改会影响到array2。

二、 使用slice()
可使用slice()进行复制,因为slice()返回也是数组。
var array1 = new Array("1","2","3"); var array2;
array2 = array1.slice(0);
array1.length = 0;
alert(array2); //返回1、2、3

三、 使用concat()
注意concat()返回的并不是调用函数的Array,而是一个新的Array,所以可以利用这一点进行复制。
var array1 = new Array("1","2","3"); var array2;
array2 = array1.concat();
array1.length = 0;
alert(array2); //返回1、2、3
var b = [].concat(a);
事件委派:
//利用事件委派可以写出更加优雅的
    (function(){
        var resources = document.getElementById('resources');
        resources.addEventListener('click',handler,false);

        function handler(e){
            var x = e.target; // get the link tha
            if(x.nodeName.toLowerCase() === 'a'){
                alert(x);
                e.preventDefault();
            }
        };
    })();
把字符串的首字母大写返回一个新的字符串
1.1简单写法,把一个单词的首字母大写
    String.prototype.firstUpperCase = function(){
        return this[0].toUpperCase()+this.slice(1);
    }
1.2字符串中所有单词首字母大写,非首字母小写
    String.prototype.firstUpperCase = function(){
    return this.replace( /\b(\w)(\w*)/g, function($0, $1, $2) {// \b代表定界符
        // 第一个形参$0代表所有子字符串(所有单词)
        // 第二个形参$1代表第一个括号内匹配到的字符串(首字母)
        // 第三个形参$2代表第二个括号内匹配到的字符串(除首字母外的字母)
        return $1.toUpperCase() + $2.toLowerCase()});
}
    另一种写法
    String.prototype.firstUpperCase = function(){
        return this.toLowerCase().replace(/( |^)[a-z]/g, function(U){return U.toUpperCase()});
}
随机数:
由js生成一切随机数的基础都是Math.random(),这个方法比较特别,生成的随机数落在的区间是[0,1);

全闭区间[n,m]
这种的最常见,大家都知道的那一长串公式:Math.floor(Math.random()*(m-n+1))+n; 就是生成这个全闭区间的方法。说到这个公式很多人都知道,但真正想明白的人估计很少。先生成一个[0,m-n+1)这样左闭右开的区间,然后用Math.floor()取到[0,m-n]之间内的任意整数(看明白这一步很关键),之后加上区间左端点变成[n,m]内的任意整数,达到目的。
说到这个地方,有一点必须提一下,随便搜一下js生成随机数,有很多文章都会用Math.ceil()或Math.round()这两个方法,比如生成全闭的[n,m]区间内的任意整数,Math.ceil(Math.random()*(m-n))+n;或者Math.round(Math.random()*(m-n))+n;我感觉随机数,最重要的就是随机两个字,每个值取到的概率一定要相等,这一点对于一些特定的场合非常重要,比如抽奖(年会都有抽奖的吧)。Math.ceil()的毛病是n<<m≈x,x为除端点之外的数,区间足够大的话n几乎取不到,m和x的概率几乎相等,因为m这个点取不到所以概率相对来说小了一点。Math.round()的毛病是n≈m=x/2,原因和前面的差不多,不明白的可以自己画个坐标轴,很明了。

全开区间(x,y)
其实只要记住上面的全闭区间,其它所有区间的开闭,都可以由其推到,过程如下:
(x,y) ==[x+1,y-1];也就是说n=x+1; m=y-1;将其代入上面的公式就可以得到:Math.floor(Math.random()*(y-x-1))+x+1;

左闭右开[x,y)
同理,[x,y) == [x,y-1];代入得到:Math.floor(Math.random()*(y-x))+x;

左开右闭(x,y]
(x,y]==[x+1,y];代入得到:Math.floor(Math.random()*(y-x))+x+1;
js 小数取整,js 小数向上取整,js小数向下取整
/**
 * 数字,数字(包括正整数、0、浮点数),也可以判断是否金额
 * @param z_check_value 要检查的值
 * @return 符合返回true,否false
 * @author lqy
 * @since 2017-01-07
*/
function isFloat(z_check_value){
    var z_reg = /^((([0-9])|([1-9][0-9]+))(\.([0-9]+))?)$/;//.是特殊字符,需要转义
    return z_reg.test($.trim(z_check_value));
};

/**
 * js小数向下取整:浮点数转换成整数,小数点后去掉
 * @param floatNumber
 */
function floatToInteger(floatNumber){
    if(!isFloat(floatNumber)){
        error("请输入正确的数字");
        return;
    }
    return parseInt(floatNumber);
};

/**
 * js 小数向上取整:浮点数转换成整数,如果有小数(1.00不算有小数),整数加1
 * @param floatNumber
 */
function floatToIntegerUp(floatNumber){
    var integerNumber = floatToInteger(floatNumber);
    if(floatNumber > integerNumber){
        integerNumber += 1;
    }
    return integerNumber;
};
CSS多行文本溢出省略显示
文本溢出我们经常用到的应该就是text-overflow:ellipsis了,相信大家也很熟悉,但是对于多行文本的溢出处理确接触的不是很多,最近在公司群里面有同事问到,并且自己也遇到过这个问题,所以专门研究过这个问题。
首先我们回顾一下以前实现单行缩略是可以通过下面的代码实现的(部分浏览器需要设置宽度):
overflow: hidden;
text-overflow: ellipsis;
white-space: nowrap;
WebKit内核浏览器解决办法
首先,WebKit内核的浏览器实现起来比较简单,可以通过添加一个-webkit-line-clamp的私有属性来实现,-webkit-line-clamp是用来限制在一个块元素显示的文本的行数。 为了实现这个效果,它需要组合其他的WebKit属性:
- display: -webkit-box 将对象作为弹性伸缩盒子模型显示;
- -webkit-box-orient 设置或检索伸缩盒对象的子元素的排列方式;
- text-overflow: ellipsis 用省略号“…”隐藏超出范围的文本。
具体代码参考如下:
overflow : hidden;
text-overflow: ellipsis;
display: -webkit-box;
-webkit-line-clamp: 2;
-webkit-box-orient: vertical;
这个方法合适WebKit浏览器或移动端(绝大部分是WebKit内核的)浏览器,效果可以查看:
其他浏览器的解决方案
目前没有什么CSS的属性可以直接控制多行文本的省略显示,比较靠谱的办法应该就是利用相对定位在最后面加上一个省略号了,代码可以参考下面:
p {
    position:relative;
    line-height:1.5em;
    /* 高度为需要显示的行数*行高,比如这里我们显示两行,则为3 */
    height:3em;
    overflow:hidden;
}
p:after {
    content:"...";
    position:absolute;
    bottom:0;
    right:0;
    padding: 0 5px;
    background-color: #fff;
}
效果如下:
不过这样会有一点问题:
- 需要知道显示的行数并设置行高才行;
- IE6/7不支持
after和content,需要添加一个标签来代替; - 省略号的背景颜色跟文本背景颜色一样,并且可能会遮住部分文字,建议可以使用渐变的png背景图片代替。
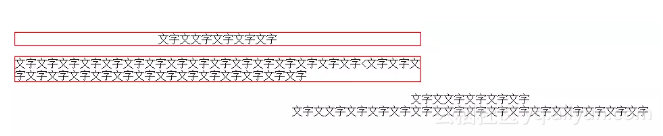
一行居中多行居左:
<!DOCTYPE html>
<html>

	<head>
		<meta charset="UTF-8">
		<title></title>
		<style type="text/css">
			.ps {
				width: 600px;
				border: 1px solid red;
				text-align: center;
			}

			.ps span {
				display: inline-block;
				text-align: left;
			}

			.tab-cell {
				display: table;
				margin: 0 auto;
				text-align: left;
			}
		</style>
	</head>

	<body>
		<p class="ps"><span>文字文文字文字文字文字</span></p>
		<p class="ps"><span>文字文字文字文字文字文字文字文字文字文字文字文字文字文字文字文字<文字文字文字文字文字文字文字文字文字文字文字文字文字文字文字文字</span></p>

		<p class="tab-cell">文字文文字文字文字文字</p>
		<p class="tab-cell">文字文文字文字文字文字文字文文字文字文字文字文字文文字文字文字文字</p>
	</body>

</html>
判断返回js数据类型
function judgeType(arg){//判断返回js数据类型
   return Object.prototype.toString.call(arg).slice(8,-1);
}
clone
 function deepCloneNick(obj){//深克隆
    var result;
    //确定result的类型
    if(judgeType(obj)==="Object"){
        result={};
    }else if(judgeType(obj)==="Array"){
        result=[];
    }else{
        return obj;
    }
    for(var key in obj){
        var copy=obj[key];
        if(judgeType(copy)==="Object"||"Array"){
            //result[key]=deepCloneNick(copy);//递归调用 避免函数名改变 改成下面一句
            result[key]=arguments.callee(copy);
        }else{
            result[key]=obj[key];
        }
    }
    return result;
}


var obj={a:[1,2],b:3},arr=[{a:'a'},2];
    var obj1=deepCloneNick(obj),arr1=deepCloneNick(arr);
    console.log(obj);
    console.log(obj1);
    console.log(arr);
    console.log(arr1);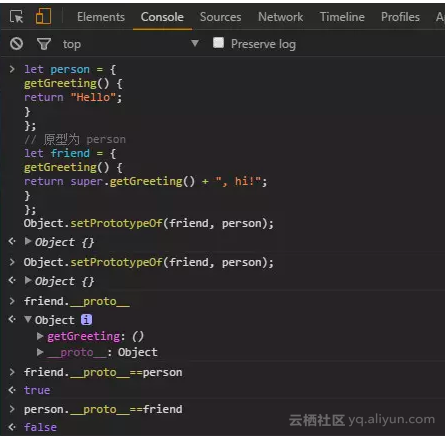
let person = {
getGreeting() {
return "Hello";
}
};
// 原型为 person
let friend = {
getGreeting() {
return super.getGreeting() + ", hi!";
}
};
Object.setPrototypeOf(friend, person);
console.log(friend.getGreeting()); // "Hello, hi!"
前言:这是笔者第一次写博客,主要是学习之后自己的理解。如果有错误或者疑问的地方,请大家指正,我会持续更新!
z-index属性描述元素的堆叠顺序(层级),意思是A元素可以覆盖B元素,但是B元素并没有消失(display:none)
 z-index属性可以为负值,默认为auto(可以理解为0),值最大的处于最上层.
一些元素设置z-index无效,可能的原因:
z-index属性必须和position属性(absolute/relative/fixed)配合使用,否则无效.
 z-index属性应该继承父元素的z-idnex值,意思就是祖先元素优先,如果两个父元素层级已决高下,那么他们两个的子元素之间再设层级就不会起作用了.
额,先就这么多了,原本想画个图来解释的,发现不会画图,还是要继续学习。
网页上添加一个input file HTML控件:
1
默认是这样的,所有文件类型都会显示出来,如果想限制它只显示我们设定的文件类型呢,比如“word“,”excel“,”pdf“文件
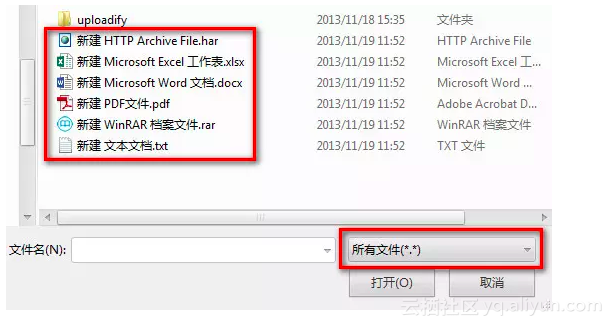
解决办法是可以给它添加一个accept属性,比如:
<input type="file" id="userImage" name="userImage" accept="image/x-png,image/gif,image/jpeg,image/bmp"/>
WebSocket :
WebSocket API是下一代客户端-服务器的异步通信方法。该通信取代了单个的TCP套接字,使用ws或wss协议,可用于任意的客户端和服务器程序。WebSocket目前由W3C进行标准化。WebSocket已经受到Firefox 4、Chrome 4、Opera 10.70以及Safari 5等浏览器的支持。
WebSocket API最伟大之处在于服务器和客户端可以在给定的时间范围内的任意时刻,相互推送信息。WebSocket并不限于以Ajax(或XHR)方式通信,因为Ajax技术需要客户端发起请求,而WebSocket服务器和客户端可以彼此相互推送信息;XHR受到域的限制,而WebSocket允许跨域通信。
Ajax技术很聪明的一点是没有设计要使用的方式。WebSocket为指定目标创建,用于双向推送消息。
二、WebSocket API的用法
只专注于客户端的API,因为每个服务器端语言有自己的API。下面的代码片段是打开一个连接,为连接创建事件监听器,断开连接,消息时间,发送消息返回到服务器,关闭连接。
// 创建一个Socket实例
var socket = new WebSocket('ws://localhost:8080');
// 打开Socket
socket.onopen = function(event) {
// 发送一个初始化消息
socket.send('I am the client and I\'m listening!');
// 监听消息
socket.onmessage = function(event) {
console.log('Client received a message',event);
};
// 监听Socket的关闭
socket.onclose = function(event) {
console.log('Client notified socket has closed',event);
};
// 关闭Socket....
//socket.close()
};
让我们来看看上面的初始化片段。参数为URL,ws表示WebSocket协议。onopen、onclose和onmessage方法把事件连接到Socket实例上。每个方法都提供了一个事件,以表示Socket的状态。
onmessage事件提供了一个data属性,它可以包含消息的Body部分。消息的Body部分必须是一个字符串,可以进行序列化/反序列化操作,以便传递更多的数据。
WebSocket的语法非常简单,使用WebSockets是难以置信的容易……除非客户端不支持WebSocket。
Websocket
1.websocket是什么?
WebSocket是为解决客户端与服务端实时通信而产生的技术。其本质是先通过HTTP/HTTPS协议进行握手后创建一个用于交换数据的TCP连接,
此后服务端与客户端通过此TCP连接进行实时通信。
2.websocket的优点
以前我们实现推送技术,用的都是轮询,在特点的时间间隔有浏览器自动发出请求,将服务器的消息主动的拉回来,在这种情况下,我们需要不断的向服务器 发送请求,然而HTTP request 的header是非常长的,里面包含的数据可能只是一个很小的值,这样会占用很多的带宽和服务器资源。会占用大量的带宽和服务器资源。
WebSocket API最伟大之处在于服务器和客户端可以在给定的时间范围内的任意时刻,相互推送信息。在建立连接之后,服务器可以主动传送数据给客户端。
此外,服务器与客户端之间交换的标头信息很小。
WebSocket并不限于以Ajax(或XHR)方式通信,因为Ajax技术需要客户端发起请求,而WebSocket服务器和客户端可以彼此相互推送信息;
关于ajax,comet,websocket的详细介绍,和websocket报文的介绍,大家可以参看www.shaoqun.com/a/54588.asp… 网页设计]Ajax、Comet与Websocket,
3.如何使用websocket
客户端
在支持WebSocket的浏览器中,在创建socket之后。可以通过onopen,onmessage,onclose即onerror四个事件实现对socket进行响应
一个简单是示例
var ws = new WebSocket(“ws://localhost:8080”);
ws.onopen = function()
{
  console.log(“open”);
  ws.send(“hello”);
};
ws.onmessage = function(evt)
{
  console.log(evt.data)
};
ws.onclose = function(evt)
{
  console.log(“WebSocketClosed!”);
};
ws.onerror = function(evt)
{
  console.log(“WebSocketError!”);
};
1.var ws = new WebSocket(“ws://localhost:8080”);
申请一个WebSocket对象,参数是需要连接的服务器端的地址,同http协议使用http://开头一样,WebSocket协议的URL使用ws://开头,另外安全的WebSocket协议使用wss://开头。
ws.send(“hello”);
用于叫消息发送到服务端
2.ws.onopen = function() { console.log(“open”)};
当websocket创建成功时,即会触发onopen事件
3.ws.onmessage = function(evt) { console.log(evt.data) };
当客户端收到服务端发来的消息时,会触发onmessage事件,参数evt.data中包含server传输过来的数据
4.ws.onclose = function(evt) { console.log(“WebSocketClosed!”); };
当客户端收到服务端发送的关闭连接的请求时,触发onclose事件
5.ws.onerror = function(evt) { console.log(“WebSocketError!”); };
如果出现连接,处理,接收,发送数据失败的时候就会触发onerror事件
我们可以看出所有的操作都是采用事件的方式触发的,这样就不会阻塞UI,使得UI有更快的响应时间,得到更好的用户体验。
服务端:
现在有很多的服务器软件支持websocket,比如node.js,jetty,tomcat等
原文发布时间为:2017年10月21日
原文作者:掘金
本文来源:掘金 如需转载请联系原作者


