1.简介
本文是上一篇文章实践篇,在上一篇文章中,我分析了选择器 Selector 的原理。本篇文章,我们来说说 Selector 的应用,如标题所示,这里我基于 Java NIO 实现了一个简单的 HTTP 服务器。在接下来的章节中,我会详细讲解 HTTP 服务器实现的过程。另外,本文所对应的代码已经上传到 GitHub 上了,需要的自取,仓库地址为 toyhttpd。好了,废话不多说,进入正题吧。
2. 实现
本节所介绍的 HTTP 服务器是一个很简单的实现,仅支持 HTTP 协议极少的特性。包括识别文件后缀,并返回相应的 Content-Type。支持200、400、403、404、500等错误码等。由于支持的特性比较少,所以代码逻辑也比较简单,这里罗列一下:
- 处理请求,解析请求头
- 响应请求,从请求头中获取资源路径, 检测请求的资源路径是否合法
- 根据文件后缀匹配 Content-Type
- 读取文件数据,并设置 Content-Length,如果文件不存在则返回404
- 设置响应头,并将响应头和数据返回给浏览器。
接下来我们按照处理请求和响应请求两步操作,来说说代码实现。先来看看核心的代码结构,如下:
/**
 * TinyHttpd
 *
 * @author code4wt
 * @date 2018-03-26 22:28:44
 */
public class TinyHttpd {

    private static final int DEFAULT_PORT = 8080;
    private static final int DEFAULT_BUFFER_SIZE = 4096;
    private static final String INDEX_PAGE = "index.html";
    private static final String STATIC_RESOURCE_DIR = "static";
    private static final String META_RESOURCE_DIR_PREFIX = "/meta/";
    private static final String KEY_VALUE_SEPARATOR = ":";
    private static final String CRLF = "\r\n";

    private int port;

    public TinyHttpd() {
        this(DEFAULT_PORT);
    }

    public TinyHttpd(int port) {
        this.port = port;
    }

    public void start() throws IOException {
        // 初始化 ServerSocketChannel
        ServerSocketChannel ssc = ServerSocketChannel.open();
        ssc.socket().bind(new InetSocketAddress("localhost", port));
        ssc.configureBlocking(false);

        // 创建 Selector
        Selector selector = Selector.open();

        // 注册事件
        ssc.register(selector, SelectionKey.OP_ACCEPT);

        while(true) {
            int readyNum = selector.select();
            if (readyNum == 0) {
                continue;
            }

            Set<SelectionKey> selectedKeys = selector.selectedKeys();
            Iterator<SelectionKey> it = selectedKeys.iterator();
            while (it.hasNext()) {
                SelectionKey selectionKey = it.next();
                it.remove();

                if (selectionKey.isAcceptable()) {
                    SocketChannel socketChannel = ssc.accept();
                    socketChannel.configureBlocking(false);
                    socketChannel.register(selector, SelectionKey.OP_READ);
                } else if (selectionKey.isReadable()) {
                    // 处理请求
                    request(selectionKey);
                    selectionKey.interestOps(SelectionKey.OP_WRITE);
                } else if (selectionKey.isWritable()) {
                    // 响应请求
                    response(selectionKey);
                }
            }
        }
    }

    private void request(SelectionKey selectionKey) throws IOException {...}
    private Headers parseHeader(String headerStr) {...}
    private void response(SelectionKey selectionKey) throws IOException {...}

    private void handleOK(SocketChannel channel, String path) throws IOException {...}
    private void handleNotFound(SocketChannel channel)  {...}
    private void handleBadRequest(SocketChannel channel) {...}
    private void handleForbidden(SocketChannel channel) {...}
    private void handleInternalServerError(SocketChannel channel) {...}
    private void handleError(SocketChannel channel, int statusCode) throws IOException {...}

    private ByteBuffer readFile(String path) throws IOException {...}
    private String getExtension(String path) {...}
    private void log(String ip, Headers headers, int code) {}
}
上面的代码是 HTTP 服务器的核心类的代码结构。其中 request 负责处理请求,response 负责响应请求。handleOK 方法用于响应正常的请求,handleNotFound 等方法用于响应出错的请求。readFile 方法用于读取资源文件,getExtension 则是获取文件后缀。
2.1 处理请求
处理请求的逻辑比较简单,主要的工作是解析消息头。相关代码如下:
private void request(SelectionKey selectionKey) throws IOException {
    // 从通道中读取请求头数据
    SocketChannel channel = (SocketChannel) selectionKey.channel();
    ByteBuffer buffer = ByteBuffer.allocate(DEFAULT_BUFFER_SIZE);
    channel.read(buffer);

    buffer.flip();
    byte[] bytes = new byte[buffer.limit()];
    buffer.get(bytes);
    String headerStr = new String(bytes);
    try {
        // 解析请求头
        Headers headers = parseHeader(headerStr);
        // 将请求头对象放入 selectionKey 中
        selectionKey.attach(Optional.of(headers));
    } catch (InvalidHeaderException e) {
        selectionKey.attach(Optional.empty());
    }
}

private Headers parseHeader(String headerStr) {
    if (Objects.isNull(headerStr) || headerStr.isEmpty()) {
        throw new InvalidHeaderException();
    }

    // 解析请求头第一行
    int index = headerStr.indexOf(CRLF);
    if (index == -1) {
        throw new InvalidHeaderException();
    }

    Headers headers = new Headers();
    String firstLine = headerStr.substring(0, index);
    String[] parts = firstLine.split(" ");

    /*
     * 请求头的第一行必须由三部分构成,分别为 METHOD PATH VERSION
     * 比如:
     *     GET /index.html HTTP/1.1
     */
    if (parts.length < 3) {
        throw new InvalidHeaderException();
    }

    headers.setMethod(parts[0]);
    headers.setPath(parts[1]);
    headers.setVersion(parts[2]);

    // 解析请求头属于部分
    parts = headerStr.split(CRLF);
    for (String part : parts) {
        index = part.indexOf(KEY_VALUE_SEPARATOR);
        if (index == -1) {
            continue;
        }
        String key = part.substring(0, index);
        if (index == -1 || index + 1 >= part.length()) {
            headers.set(key, "");
            continue;
        }
        String value = part.substring(index + 1);
        headers.set(key, value);
    }

    return headers;
}
简单总结一下上面的代码逻辑,首先是从通道中读取请求头,然后解析读取到的请求头,最后将解析出的 Header 对象放入 selectionKey 中。处理请求的逻辑很简单,不多说了。
2.2 响应请求
看完处理请求的逻辑,接下来再来看看响应请求的逻辑。代码如下:
private void response(SelectionKey selectionKey) throws IOException {
    SocketChannel channel = (SocketChannel) selectionKey.channel();
    // 从 selectionKey 中取出请求头对象
    Optional<Headers> op = (Optional<Headers>) selectionKey.attachment();

    // 处理无效请求,返回 400 错误
    if (!op.isPresent()) {
        handleBadRequest(channel);
        channel.close();
        return;
    }

    String ip = channel.getRemoteAddress().toString().replace("/", "");
    Headers headers = op.get();
    // 如果请求 /meta/ 路径下的资源,则认为是非法请求,返回 403 错误
    if (headers.getPath().startsWith(META_RESOURCE_DIR_PREFIX)) {
        handleForbidden(channel);
        channel.close();
        log(ip, headers, FORBIDDEN.getCode());
        return;
    }

    try {
        handleOK(channel, headers.getPath());
        log(ip, headers, OK.getCode());
    } catch (FileNotFoundException e) {
        // 文件未发现,返回 404 错误
        handleNotFound(channel);
        log(ip, headers, NOT_FOUND.getCode());
    } catch (Exception e) {
        // 其他异常,返回 500 错误
        handleInternalServerError(channel);
        log(ip, headers, INTERNAL_SERVER_ERROR.getCode());
    } finally {
        channel.close();
    }
}

// 处理正常的请求
private void handleOK(SocketChannel channel, String path) throws IOException {
    ResponseHeaders headers = new ResponseHeaders(OK.getCode());

    // 读取文件
    ByteBuffer bodyBuffer = readFile(path);
    // 设置响应头
    headers.setContentLength(bodyBuffer.capacity());
    headers.setContentType(ContentTypeUtils.getContentType(getExtension(path)));
    ByteBuffer headerBuffer = ByteBuffer.wrap(headers.toString().getBytes());

    // 将响应头和资源数据一同返回
    channel.write(new ByteBuffer[]{headerBuffer, bodyBuffer});
}

// 处理请求资源未发现的错误
private void handleNotFound(SocketChannel channel)  {
    try {
        handleError(channel, NOT_FOUND.getCode());
    } catch (Exception e) {
        handleInternalServerError(channel);
    }
}

private void handleError(SocketChannel channel, int statusCode) throws IOException {
    ResponseHeaders headers = new ResponseHeaders(statusCode);
    // 读取文件
    ByteBuffer bodyBuffer = readFile(String.format("/%d.html", statusCode));
    // 设置响应头
    headers.setContentLength(bodyBuffer.capacity());
    headers.setContentType(ContentTypeUtils.getContentType("html"));
    ByteBuffer headerBuffer = ByteBuffer.wrap(headers.toString().getBytes());

    // 将响应头和资源数据一同返回
    channel.write(new ByteBuffer[]{headerBuffer, bodyBuffer});
}
上面的代码略长,不过逻辑仍然比较简单。首先,要判断请求头存在,以及资源路径是否合法。如果都合法,再去读取资源文件,如果文件不存在,则返回 404 错误码。如果发生其他异常,则返回 500 错误。如果没有错误发生,则正常返回响应头和资源数据。这里只贴了核心代码,其他代码就不贴了,大家自己去看吧。
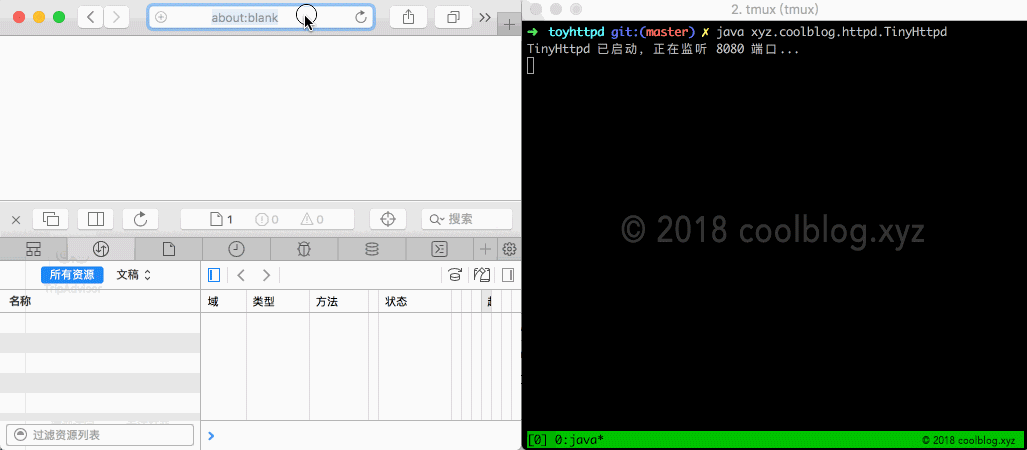
2.3 效果演示
分析完代码,接下来看点轻松的吧。下面贴一张代码的运行效果图,如下:
3.总结
本文所贴的代码是我在学习 Selector 过程中写的,核心代码不到 300 行。通过动手写代码,也使得我加深了对 Selector 的了解。在学习 JDK 的过程中,强烈建议大家多动手写代码。通过写代码,并踩一些坑,才能更加熟练运用相关技术。这个是我写 NIO 系列文章的一个感触。
好了,本文到这里结束。谢谢阅读!
本文在知识共享许可协议 4.0 下发布,转载需在明显位置处注明出处
作者:coolblog
本文同步发布在我的个人博客:http://www.coolblog.xyz/?r=cb

本作品采用知识共享署名-非商业性使用-禁止演绎 4.0 国际许可协议进行许可。