环境说明
配置好yum源
上传greenplum软件(greenplum-db-5.4.1-rhel6-x86_64)至需要安装greenplum的服务器
参考网址:https://gpdb.docs.pivotal.io/540/main/index.html

master  服务器:l-test5
standby 服务器:l-test6
segment 服务器:(primary + mirror):l-test[7-12]
greenplum集群说明:1 master  +  1 standby + 24 primary segments + 24 mirror segments
一 环境准备(需在所有的服务器做相同的配置)
1、安装yum包

[root@l-test ~]# yum -y install ed.x86_64 sed.x86_64

2、关闭iptables

[root@l-test ~]# /sbin/chkconfig iptables off

3、关闭selinux

# vi /etc/sysconfig/selinux
SELINUX=disabled

4、修改 /etc/sysctl.conf

# vi  /etc/sysctl.conf

net.ipv4.ip_forward = 0
net.ipv4.conf.default.rp_filter = 1
net.ipv4.conf.default.accept_source_route = 0
kernel.core_uses_pid = 1
kernel.sysrq = 1
kernel.msgmnb = 65536
kernel.msgmax = 65536
kernel.shmall = 30453241651
kernel.shmmax = 124736477803315
kernel.core_uses_pid = 0
net.core.somaxconn = 10240
net.ipv4.tcp_syncookies = 1
net.ipv4.tcp_tw_reuse = 0
net.ipv4.tcp_tw_recycle = 0
net.ipv4.tcp_fin_timeout = 30
net.ipv4.tcp_keepalive_time = 300
net.ipv4.tcp_synack_retries = 3
net.ipv4.tcp_syn_retries = 3
net.core.rmem_max = 16777216
net.core.wmem_max = 16777216
net.ipv4.tcp_rmem = 4096 87380 16777216
net.ipv4.tcp_wmem = 4096 65536 16777216
net.ipv4.tcp_no_metrics_save = 0
net.core.netdev_max_backlog = 2500
net.ipv4.tcp_max_syn_backlog = 4196
net.ipv6.conf.all.disable_ipv6 = 1
net.ipv6.conf.default.disable_ipv6 = 1
net.ipv4.conf.all.arp_ignore = 1
net.ipv4.conf.all.arp_announce = 2
net.ipv4.conf.lo.arp_ignore = 1
net.ipv4.conf.lo.arp_announce = 2
vm.swappiness = 0

#add by yunlong

kernel.msgmni = 2048
kernel.shmmni = 4096
kernel.sem = 250 512000 100 2048
net.ipv4.conf.all.arp_filter = 1
net.ipv4.conf.all.rp_filter = 1
net.ipv4.ip_local_port_range = 1025 65535
net.ipv4.tcp_tw_reuse = 1
net.ipv4.tcp_tw_recycle = 1
vm.overcommit_memory = 2
kernel.core_uses_pid = 1
kernel.shmall = 4000000000
kernel.shmmax = 500000000
net.core.netdev_max_backlog = 10000
net.ipv4.tcp_max_syn_backlog = 4096


使内核参数立即生效
# sysctl -p

5、修改/etc/security/limits.conf

[root@l-test ~]# sed -ri 's/soft    nproc  65536/soft    nproc  131072/g' /etc/security/limits.conf
[root@l-test ~]# sed -ri 's/hard    nproc  65536/hard    nproc  131072/g'
/etc/security/limits.conf
[root@l-test]# cat /etc/security/limits.conf
* soft nofile 65536
* hard nofile 65536
* soft nproc 131072
* hard nproc 131072

注意:对于RedHat6.x系统,还需要修改/etc/security/limits.d/90-nproc.conf文件中的配置,否则limit文件中的配置会被覆盖。
查看是否修改成功:ulimit -a
6、配置 /etc/ntp.conf

vi /etc/ntp.conf

driftfile /var/lib/ntp/drift
pidfile /var/run/ntpd.pid
这部分根据自己的需要去配置

注:所有服务器要保持一致,由于各个服务器之间不能ssh互信,所以没有办法使用greenplum自带的gpssh做检测
二、安装greenplum
1、在所有服务器上创建用户组及用户

[root@l-test ~]# groupadd gpadmin
[root@l-test ~]# useradd -g gpadmin gpadmin

2、安装greenplum

注:由于ops那边不允许机器之间通过root账号进行ssh互信(其实我们也不敢改root密码),所以就需要手工安装greenplum 的bin包,然后可以通过saltstack统一部署一些安装目录啥的

# /bin/bash greenplum-db-5.4.1-rhel6-x86_64.bin
指定安装目录
/opt/greenplum-db-5.4.1

# ln -s ./greenplum-db-5.4.1 greenplum-db
# chown -R gpadmin:  /opt/greenplum-db*

3、在服务器上创建数据目录

在master、slave上创建
[root@l-test ~]# mkdir -p /export/gp_data/master && chown -R gpadmin: /export/gp_data

在segment服务器上创建
[root@l-test ~]# mkdir -p /export/gp_data/primary/data1 && mkdir -p /export/gp_data/primary/data2 && mkdir -p /export/gp_data/primary/data3 && mkdir -p /export/gp_data/primary/data4

[root@l-test ~]# mkdir -p /export/gp_data/mirror/data1 && mkdir -p /export/gp_data/mirror/data2 && mkdir -p /export/gp_data/mirror/data3 && mkdir -p /export/gp_data/mirror/data4

[root@l-test ~]# chown -R gpadmin: /export/gp_data
三、配置greenplum参数文件
1、配置hostfile_exkeys文件

在master服务器上执行
[root@l-test5 ~]# su - gpadmin
[gpadmin@l-test5 ~]$ mkdir gpconfigs
[gpadmin@l-test5 ~]$ cd gpconfigs/
[gpadmin@l-test5 ~/gpconfigs]$ vi hostfile_exkeys
l-test5
l-test6
l-test7
l-test8
l-test9
l-test10
l-test11
l-test12

2、配置hostfile_gpssh_segonly文件

[gpadmin@l-test5 ~/gpconfigs]$ vi hostfile_gpssh_segonly
l-test7
l-test8
l-test9
l-test10
l-test11
l-test12

3、配置hostfile_gpinitsystem文件

[gpadmin@l-test5 ~/gpconfigs]$ vi hostfile_gpinitsystem
l-test7
l-test8
l-test9
l-test10
l-test11
l-test12

4、配置gpinitsystem_config文件

[gpadmin@l-test5 ~/gpconfigs]$ cp /opt/greenplum-db/docs/cli_help/gpconfigs/gpinitsystem_config /home/gpadmin/gpconfigs/.
[gpadmin@l-test5 ~/gpconfigs]$ chmod 775 gpinitsystem_config
[gpadmin@test5 ~/gpconfigs]$ vi gpinitsystem_config
# FILE NAME: gpinitsystem_config

# Configuration file needed by the gpinitsystem

################################################
#### REQUIRED PARAMETERS
################################################

#### Name of this Greenplum system enclosed in quotes.
ARRAY_NAME="Greenplum Data Platform"

#### Naming convention for utility-generated data directories.
SEG_PREFIX=gpseg

#### Base number by which primary segment port numbers
#### are calculated.
PORT_BASE=40000

#### File system location(s) where primary segment data directories
#### will be created. The number of locations in the list dictate
#### the number of primary segments that will get created per
#### physical host (if multiple addresses for a host are listed in
#### the hostfile, the number of segments will be spread evenly across
#### the specified interface addresses).
#declare -a DATA_DIRECTORY=(/data1/primary /data1/primary /data1/primary /data2/primary /data2/primary /data2/primary)
declare -a DATA_DIRECTORY=(/export/gp_data/primary/data1 /export/gp_data/primary/data2 /export/gp_data/primary/data3 /export/gp_data/primary/data4)

#### OS-configured hostname or IP address of the master host.
MASTER_HOSTNAME=l-test5

#### File system location where the master data directory
#### will be created.
MASTER_DIRECTORY=/export/gp_data/master

#### Port number for the master instance.
MASTER_PORT=65432

#### Shell utility used to connect to remote hosts.
TRUSTED_SHELL=ssh

#### Maximum log file segments between automatic WAL checkpoints.
CHECK_POINT_SEGMENTS=8

#### Default server-side character set encoding.
ENCODING=UNICODE

################################################
#### OPTIONAL MIRROR PARAMETERS
################################################

#### Base number by which mirror segment port numbers
#### are calculated.
MIRROR_PORT_BASE=50000

#### Base number by which primary file replication port
#### numbers are calculated.
REPLICATION_PORT_BASE=41000

#### Base number by which mirror file replication port
#### numbers are calculated.
MIRROR_REPLICATION_PORT_BASE=51000

#### File system location(s) where mirror segment data directories
#### will be created. The number of mirror locations must equal the
#### number of primary locations as specified in the
#### DATA_DIRECTORY parameter.
#declare -a MIRROR_DATA_DIRECTORY=(/data1/mirror /data1/mirror /data1/mirror /data2/mirror /data2/mirror /data2/mirror)
declare -a MIRROR_DATA_DIRECTORY=(/export/gp_data/mirror/data1 /export/gp_data/mirror/data2 /export/gp_data/mirror/data3 /export/gp_data/mirror/data4)


################################################
#### OTHER OPTIONAL PARAMETERS
################################################

#### Create a database of this name after initialization.
#DATABASE_NAME=name_of_database

#### Specify the location of the host address file here instead of
#### with the the -h option of gpinitsystem.
MACHINE_LIST_FILE=/home/gpadmin/gpconfigs/hostfile_gpinitsystem
四、服务器检测(在master上执行)
1、建立gpadmin系统用户之间ssh互信
[gpadmin@l-test5 ~/gpconfigs]$ source /opt/greenplum-db/greenplum_path.sh
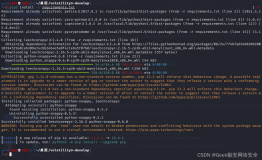
[gpadmin@l-test5 ~/gpconfigs]$ gpssh-exkeys -f ./hostfile_exkeys
[STEP 1 of 5] create local ID and authorize on local host
[STEP 2 of 5] keyscan all hosts and update known_hosts file
[STEP 3 of 5] authorize current user on remote hosts
... send to l-test6 ***
*** Enter password for l-test6:(再此输入gpadmin系统用户的密码,要保证所有服务器上的gpadmin系统用户密码保持一致)
... send to l-test7
... send to l-test8
... send to l-test9
... send to l-test10
... send to l-test11
... send to l-test12
[STEP 4 of 5] determine common authentication file content
[STEP 5 of 5] copy authentication files to all remote hosts
... finished key exchange with l-test6
... finished key exchange with l-test7
... finished key exchange with l-test8
... finished key exchange with l-test9
... finished key exchange with l-test10
... finished key exchange with l-test11
... finished key exchange with l-test12
[INFO] completed successfully
2、检测操作系统参数
[gpadmin@l-test5 ~/gpconfigs]$ source /opt/greenplum-db/greenplum_path.sh
[gpadmin@l-test5 ~/gpconfigs]$ gpcheck -f hostfile_exkeys -m l-test5 -s l-test6
.
.
gpcheck:l-test5:gpadmin-[INFO]:-gpcheck completing...
3、检测网络性能
[gpadmin@l-test5 ~/gpconfigs]$ source /opt/greenplum-db/greenplum_path.sh
[gpadmin@l-test5 ~/gpconfigs]$ gpcheckperf -f hostfile_exkeys -r N -d /tmp > subnet1.out
[gpadmin@l-test5 ~/gpconfigs]$ cat subnet1.out
/opt/greenplum-db/./bin/gpcheckperf -f hostfile_exkeys -r N -d /tmp
.
.
.
注:此步骤可以多执行几次
4、检测磁盘IO
[gpadmin@l-test5 ~/gpconfigs]$ source /opt/greenplum-db/greenplum_path.sh
[gpadmin@l-test5 ~/gpconfigs]$ gpcheckperf -f hostfile_gpssh_segonly -r ds -D -d /export/gp_data/primary -d /export/gp_data/mirror
/opt/greenplum-db/./bin/gpcheckperf -f hostfile_gpssh_segonly -r ds -D -d /export/gp_data/primary -d /export/gp_data/mirror
--------------------
-- DISK WRITE TEST
--------------------
--------------------
-- DISK READ TEST
--------------------
--------------------
-- STREAM TEST
--------------------
====================
== RESULT
====================
.
.
.
五、启动greenplum(在master上操作)
1、初始化greenplum数据库集群

[gpadmin@l-test5 ~]$ source /opt/greenplum-db/greenplum_path.sh
[gpadmin@l-test5 ~]$ gpinitsystem -c gpconfigs/gpinitsystem_config -h gpconfigs/hostfile_gpinitsystem -s l-test6 -S
.
.
.
2、登录数据库

[gpadmin@l-test5 ~]$ psql -p 65432 -d postgres
psql (8.3.23)
Type "help" for help.

postgres=# \l+
                                           List of databases
   Name    |  Owner  | Encoding |  Access privileges  |  Size  | Tablespace |        Description
-----------+---------+----------+---------------------+--------+------------+---------------------------
 postgres  | gpadmin | UTF8     |                     | 260 MB | pg_default |
 template0 | gpadmin | UTF8     | =c/gpadmin          | 258 MB | pg_default |
                                : gpadmin=CTc/gpadmin
 template1 | gpadmin | UTF8     | =c/gpadmin          | 260 MB | pg_default | default template database
                                : gpadmin=CTc/gpadmin
(3 rows)

postgres=#

3、配置~/.bashrc

在master 和 slave 服务器的gpadmin系统用户下都需要添加
source /opt/greenplum-db/greenplum_path.sh
export MASTER_DATA_DIRECTORY=/export/gp_data/master/gpseg-1
export PGPORT=65432
export PGUSER=gpadmin
export PGDATABASE=greendb

4、查看greenplum集群状态并登录数据库

[gpadmin@l-test5 ~]$ gpstate -s
20180202:17:31:58:006946 gpstate:l-test5:gpadmin-[INFO]:-Starting gpstate with args: -s
.
.
.
太多了,自己执行命令查看吧

[gpadmin@l-test5~]$ psql
psql (8.3.23)
Type "help" for help.

greendb=# \q