cobbler装机系统是较早前kickstart的升级版,优点比较容易配置,还自带web界面比较易于管理,不足在于中文资料较少。
这里就详细的介绍下笔者亲自经历的一次安装过程。
开始的时候笔者用的是centos 5.8系统,但是在安装cpbbler-web的时候报错,于是这次采用了centos6.4系统进行安装配置。
环境:
操作系统:CentOS 6.4
测试机器ip:10.0.0.128
先将iptables selinux 关掉。
/etc/init.d/iptables stop
chkconfig iptables off
setenforce 0
并修改配置文件/etc/sysconfig/selinux 将其disable一、导入yum源,安装软件.
| rpm -Uvh http://mirrors.hustunique.com/epel/6/x86_64/epel-release-6-8.noarch.rpm yum install cobbler cobbler-web yum install dhcp httpd chkconfig cobblerd on chkconfig httpd on cobbler check |
二:配置环境
1> 修改cobbler 的配置文件
Vi /etc/cobbler/settings
修改如下地方:
| next_server: 10.0.0.128 server: 10.0.0.128 manage_dhcp: 1 manage_rsync: 1 |
生成密码串
[root@puppet ~]# openssl passwd -1 -salt "cobber" "123456" #举个简单例子"123456"
$1$cobber$yV9XfOuaaiVDvImopK7o.1
openssl passwd -1 -salt '任间字符' '密码'
这个命令的用法,任意字符可以随便写,这个密码就是安装完系统root的密码了。替换配置文件里的字串。
vi /etc/cobbler/settings
default_password_crypted: "$1$cobber$yV9XfOuaaiVDvImopK7o.1"
2>启用tfpt 和 rsync
vim /etc/xinetd.d/tftp
vim /etc/xinetd.d/rsync
将disable的值修改成no
启动服务
/etc/init.d/xinetd restart
3>修改dhcp的配置文件
# vi /etc/cobbler/dhcp.template
| ddns-update-style interim; allow booting; allow bootp; ignore client-updates; set vendorclass = option vendor-class-identifier; option pxe-system-type code 93 = unsigned integer 16; subnet 10.0.0.0 netmask 255.255.255.0 { option routers 10.0.0.1; option domain-name-servers 8.8.8.8; option subnet-mask 255.255.255.0; range dynamic-bootp 10.0.0.2 10.0.0.100; default-lease-time 21600; max-lease-time 43200; next-server $next_server; } |
余下默认,只修改这个模板就行,cobbler 会同步到dhcp的配置。
[root@cobbler ~]# cobbler get-loaders
| task started: 2014-03-25_163306_get_loaders task started (id=Download Bootloader Content, time=Tue Mar 25 16:33:06 2014) path /var/lib/cobbler/loaders/README already exists, not overwriting existing content, use --force if you wish to update path /var/lib/cobbler/loaders/COPYING.elilo already exists, not overwriting existing content, use --force if you wish to update path /var/lib/cobbler/loaders/COPYING.yaboot already exists, not overwriting existing content, use --force if you wish to update path /var/lib/cobbler/loaders/COPYING.syslinux already exists, not overwriting existing content, use --force if you wish to update path /var/lib/cobbler/loaders/elilo-ia64.efi already exists, not overwriting existing content, use --force if you wish to update downloading http://www.cobblerd.org/loaders/yaboot-1.3.14-12 to /var/lib/cobbler/loaders/yaboot downloading http://www.cobblerd.org/loaders/pxelinux.0-3.61 to /var/lib/cobbler/loaders/pxelinux.0 downloading http://www.cobblerd.org/loaders/menu.c32-3.61 to /var/lib/cobbler/loaders/menu.c32 downloading http://www.cobblerd.org/loaders/grub-0.97-x86.efi to /var/lib/cobbler/loaders/grub-x86.efi downloading http://www.cobblerd.org/loaders/grub-0.97-x86_64.efi to /var/lib/cobbler/loaders/grub-x86_64.efi *** TASK COMPLETE *** |
三:配置web环境
#vi /etc/cobbler/modules.conf
module = authn_configfile /修改认证方式为密码文件类型
#htdigest /etc/cobbler/users.digest "Cobbler"cobbler/添加cobbler用户,提示输入2遍密码确认
# cobbler sync /输出*** TASK COMPLETE *** 表示配置无错误
# /etc/init.d/httpd restart
# /etc/init.d/cobblerd restart
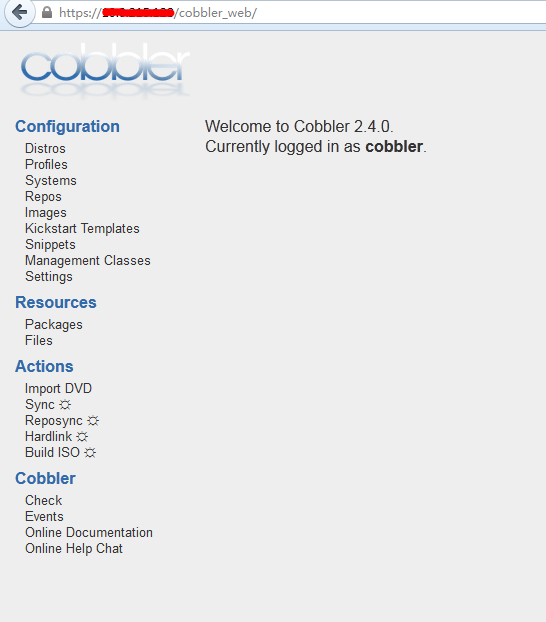
访问web页面 https://10.0.0.128/cobbler_web /使用刚才创建的用户登录
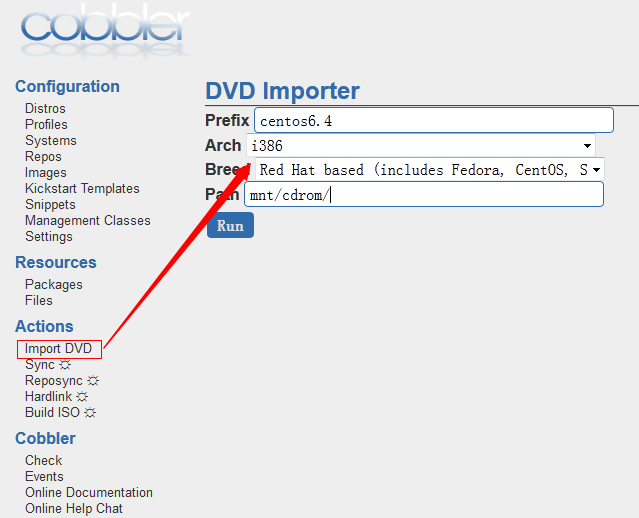
1:添加DVD源,
[root@puppet soft]# mount /dev/cdrom /mnt/cdrom/
cobbler import --path=/mnt/cdrom --name=centos6.4
[root@cobbler ~]# cobbler import --path=/mnt/cdrom --name=centos6.4
| task started: 2014-03-25_182605_import task started (id=Media import, time=Tue Mar 25 18:26:05 2014) Found a candidate signature: breed=redhat, version=rhel6 Found a matching signature: breed=redhat, version=rhel6 Adding distros from path /var/www/cobbler/ks_mirror/centos6.4: creating new distro: centos6.4-i386 trying symlink: /var/www/cobbler/ks_mirror/centos6.4 -> /var/www/cobbler/links/centos6.4-i386 creating new profile: centos6.4-i386 associating repos checking for rsync repo(s) checking for rhn repo(s) checking for yum repo(s) starting descent into /var/www/cobbler/ks_mirror/centos6.4 for centos6.4-i386 processing repo at : /var/www/cobbler/ks_mirror/centos6.4 need to process repo/comps: /var/www/cobbler/ks_mirror/centos6.4 looking for /var/www/cobbler/ks_mirror/centos6.4/repodata/*comps*.xml running: createrepo -c cache -s sha --groupfile /var/www/cobbler/ks_mirror/centos6.4/repodata/151ad5b0a3056212a6012b429192adcabba8b37571ff12453d6a29bc5199c943-c6-i386-comps.xml /var/www/cobbler/ks_mirror/centos6.4 received on stdout: Spawning worker 0 with 3114 pkgs Workers Finished Gathering worker results
Saving Primary metadata Saving file lists metadata Saving other metadata Generating sqlite DBs Sqlite DBs complete
received on stderr: *** TASK COMPLETE *** |
图形界面操作点击Importer DVD (先挂载镜像ISO),然后再Importer,点击run
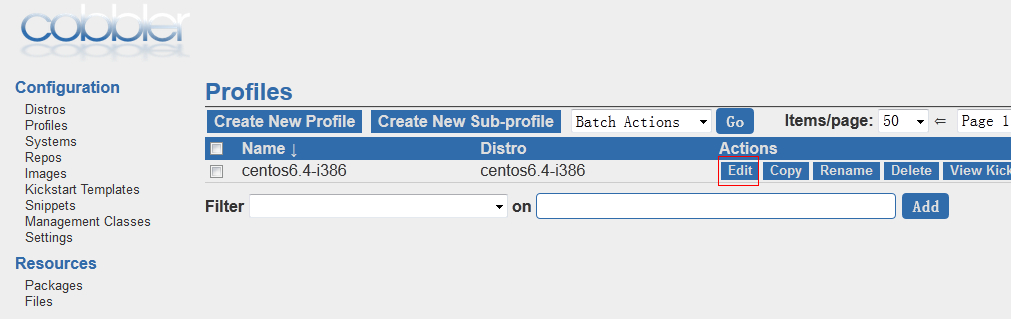
导入完成后可以看到

选择左侧profile配置ks文件
输入你所需要的ks文件路径
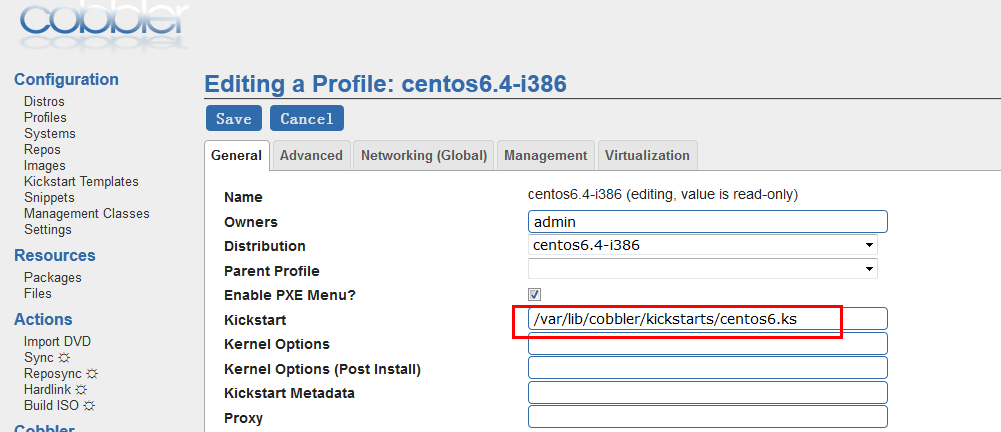
Centos6.ks文件如下,这里只是个比较简单的ks文件,大家可以根据自己的需求配置。
| #platform=x86, AMD64, or Intel EM64T # System authorization information auth --useshadow --enablemd5 # System bootloader configuration bootloader --location=mbr # Partition clearing information clearpart --all --initlabel # Use text mode install text # Firewall configuration firewall --disable # Run the Setup Agent on first boot firstboot --disable # System keyboard keyboard us # System language lang en_US # Use network installation url --url=$tree # If any cobbler repo definitions were referenced in the kickstart profile, include them here. $yum_repo_stanza # Network information $SNIPPET('network_config') # Reboot after installation reboot #Root password rootpw --iscrypted $default_password_crypted # SELinux configuration selinux --disabled # Do not configure the X Window System skipx # System timezone timezone --utc Asia/Shanghai # Install OS instead of upgrade install # Clear the Master Boot Record zerombr # Allow anaconda to partition the system as needed autopart clearpart --all --drives=sda --initlabel part /boot --fstype ext3 --size=200 part / --fstype ext3 --size=8000 part swap --size=2048
%pre $SNIPPET('log_ks_pre') $kickstart_start $SNIPPET('pre_install_network_config') # Enable installation monitoring $SNIPPET('pre_anamon') %packages @admin-tools @base @chinese-support @core @development-libs @development-tools @editors @system-tools @text-internet OpenIPMI-tools hardlink kernel-PAE kernel-PAE-devel kernel-devel libpng-devel lrzsz minicom net-snmp-utils pcre-devel sysstat x86info puppet
%pre $SNIPPET('log_ks_pre') $SNIPPET('kickstart_start') $SNIPPET('pre_install_network_config') # Enable installation monitoring $SNIPPET('pre_anamon') %packages $SNIPPET('func_install_if_enabled') $SNIPPET('puppet_install_if_enabled') %post $SNIPPET('log_ks_post') # Start yum configuration $yum_config_stanza # End yum configuration $SNIPPET('post_install_kernel_options') $SNIPPET('post_install_network_config') $SNIPPET('func_register_if_enabled') $SNIPPET('puppet_register_if_enabled') $SNIPPET('download_config_files') $SNIPPET('koan_environment') $SNIPPET('redhat_register') $SNIPPET('cobbler_register') # Enable post-install boot notification $SNIPPET('post_anamon') # Start final steps $SNIPPET('kickstart_done') # End final steps
|
5:客户端从网络启动后选择对应的工程文件开始自动部署
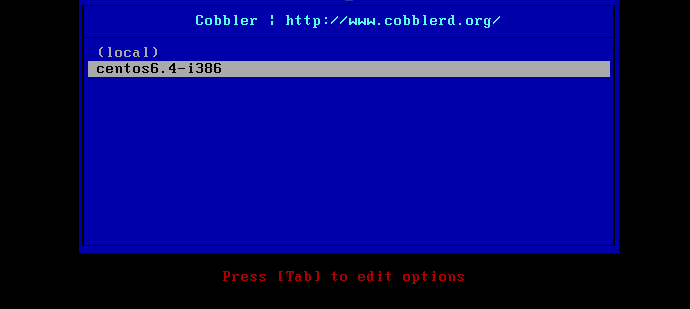
选择配置好的选项开始自动安装
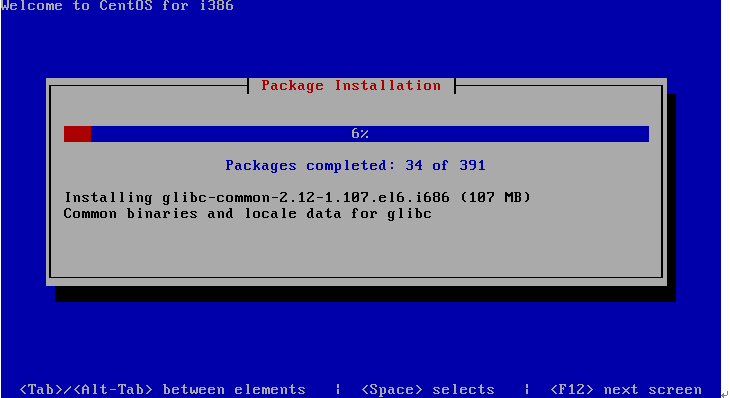
完成后自动重启,可以用先前定义好的密码("123456")登陆了.
附:错误排除
# cobbler check
The following are potential configuration items that you may want to fix:
1 : Must enable a selinux boolean to enable vital web services components, run: setsebool -P httpd_can_network_connect true
2 : you need to set some SELinux content rules to ensure cobbler serves content correctly in your SELinux environment, run the following: /usr/sbin/semanage fcontext -a -t public_content_t "/tftpboot/.*" && /usr/sbin/semanage fcontext -a -t public_content_t "/var/www/cobbler"/images/.*
3 : you need to set some SELinux rules if you want to use cobbler-web (an optional package), run the following: /usr/sbin/semanage fcontext -a -t httpd_sys_content_rw_t "/var/lib/cobbler/webui_sessions/.*"
解决:关闭selinux
# vim /etc/sysconfig/selinux
SELINUX=disabled
4 : change 'disable' to 'no' in /etc/xinetd.d/tftp
解决:编辑/etc/xinetd.d/tftp文件,将文件中的disable字段的配置由yes改为no
5 : change 'disable' to 'no' in /etc/xinetd.d/rsync
解决:编辑/etc/xinetd.d/rsync文件,将文件中的disable字段的配置由yes改为no
6 : since iptables may be running, ensure 69, 80, and 25151 are unblocked
解决:在iptables中将69,80,25151端口打开。如果仅仅只是在内部环境中使用,建议直接将防火墙关掉
7 : debmirror package is not installed, it will be required to manage debian deployments and repositories
解决:yum install debmirror
或:rpm -Uvh ftp://rpmfind.net/linux/epel/5/i386/debmirror-20090807-1.el5.noarch.rpm –nodeps –force
8 : ksvalidator was not found, install pykickstart
解决:yum install pykickstart
9 : The default password used by the sample templates for newly installed machines (default_password_crypted in /etc/cobbler/settings) is still set to 'cobbler' and should be changed, try: "openssl passwd -1 -salt 'random-phrase-here' 'your-password-here'" to generate new one
解决: 修改默认密码就OK了,然后把密码写入到/etc/cobbler/settings中
# openssl passwd -1 -salt 'random-phrase-here' 'your-password-here'
10 : comment 'dists' on /etc/debmirror.conf for proper debian support
11 : comment 'arches' on /etc/debmirror.conf for proper debian support
解决:注释/etc/debmirror.conf 下面两行
#@dists="sid";
@sections="main,main/debian-installer,contrib,non-free";
#@arches="i386";
12:fencing tools were not found, and are required to use the (optional) power management features. install cman or fence-agents to use them
解决: yum install cman
修复完成,再用 cobbler check 检查一下,确认没问题后用 cobbler sync 做同步操作:
# cobbler check
No configuration problems found. All systems go.
13. comment out 'dists' on /etc/debmirror.conf for proper debian support
comment out 'arches' on /etc/debmirror.conf for proper debian supportvim vi /etc/debmirror.conf
#注释掉@dists="sid"与@arches="i386即可
#@dists="sid";
#@arches="i386";
14. 较验cobbler check出错
Traceback (most recent call last):
File "/usr/bin/cobbler", line 35, in ?
sys.exit(app.main())
File "/usr/lib/python2.4/site-packages/cobbler/cli.py", line 558, in main
rc = cli.run(sys.argv)
File "/usr/lib/python2.4/site-packages/cobbler/cli.py", line 202, in run
self.token = self.remote.login("", self.shared_secret)
File "/usr/lib64/python2.4/xmlrpclib.py", line 1096, in __call__
return self.__send(self.__name, args)
File "/usr/lib64/python2.4/xmlrpclib.py", line 1383, in __request
verbose=self.__verbose
File "/usr/lib64/python2.4/xmlrpclib.py", line 1147, in request
return self._parse_response(h.getfile(), sock)
File "/usr/lib64/python2.4/xmlrpclib.py", line 1286, in _parse_response
return u.close()
File "/usr/lib64/python2.4/xmlrpclib.py", line 744, in close
raise Fault(**self._stack[0])
xmlrpclib.Fault:
解决方法:此为BUG,按下方操作执行即
service cobblerd restart
cobbler get-loaders
返回这个结果就OK了


