(一) 在之前的文章中,我介绍了如何创建基于Fetch的报表,并使用数据预筛选功能。在这篇文章中,我们使用一个比较复杂的FetchXML来完成一个更有实际意义的报表。
在这个报表中,显示相关客户,客户的订单,以及订单的产品信息。报表使用了三个inner join,account inner join order inner join orderdetail inner join product。
(1) 利用CRM的高级查找创建FetchXML

下载Fetch XML:

<fetch version="1.0" output-format="xml-platform" mapping="logical" distinct="true">
  <entity name="account">
    <attribute name="name" />
    <attribute name="primarycontactid" />
    <attribute name="telephone1" />
    <attribute name="accountid" />
    <order attribute="name" descending="false" />
    <filter type="and">
      <condition attribute="statuscode" operator="eq" value="1" />
    </filter>
    <link-entity name="salesorder" from="customerid" to="accountid" alias="aa">
      <filter type="and">
        <condition attribute="statecode" operator="ne" value="2" />
      </filter>
      <link-entity name="salesorderdetail" from="salesorderid" to="salesorderid" alias="ab">
        <link-entity name="product" from="productid" to="productid" alias="ac"></link-entity>
      </link-entity>
    </link-entity>
  </entity>
</fetch>
(2) 我们将它拷贝到报表中数据集的Query,并进行一些修改(添加我们需要的attribute)
<fetch version="1.0" output-format="xml-platform" mapping="logical" distinct="true">
  <entity name="account">
    <attribute name="name" />
    <attribute name="accountid" />
    <order attribute="name" descending="false" />
    <filter type="and">
      <condition attribute="statuscode" operator="eq" value="1" />
    </filter>
    <link-entity name="salesorder" from="customerid" to="accountid" alias="aa">
      <attribute name="ordernumber" />
      <attribute name="name" />
      <attribute name="totalamount" />
      <filter type="and">
        <condition attribute="statecode" operator="ne" value="2" />
      </filter>
      <link-entity name="salesorderdetail" from="salesorderid" to="salesorderid" alias="ab">
        <attribute name="quantity" />
        <attribute name="priceperunit" />
        <attribute name="baseamount" />
        <link-entity name="product" from="productid" to="productid" alias="ac">
          <attribute name="name" />
        </link-entity>
      </link-entity>
    </link-entity>
  </entity>
</fetch>
(3) 按照之前的文章介绍,使用数据预筛选功能。
添加一个CRM_FilteredAccount参数,使用以下的Query:
<fetch version="1.0" output-format="xml-platform" mapping="logical" distinct="false"><entity name="account"><all-attributes /></entity></fetch>
(4) 修改数据集Query的Fetch XML:
对这一行修改: <entity name="account" enableprefiltering="1" prefilterparametername="CRM_FilteredAccount">
修改结果为:
<fetch version="1.0" output-format="xml-platform" mapping="logical" distinct="true">
  <entity name="account" enableprefiltering="1" prefilterparametername="CRM_FilteredAccount">
    <attribute name="name" />
    <attribute name="accountid" />
    <order attribute="name" descending="false" />
    <filter type="and">
      <condition attribute="statuscode" operator="eq" value="1" />
    </filter>
    <link-entity name="salesorder" from="customerid" to="accountid" alias="aa">
      <attribute name="ordernumber" />
      <attribute name="name" />
      <attribute name="totalamount" />
      <filter type="and">
        <condition attribute="statecode" operator="ne" value="2" />
      </filter>
      <link-entity name="salesorderdetail" from="salesorderid" to="salesorderid" alias="ab">
        <attribute name="quantity" />
        <attribute name="priceperunit" />
        <attribute name="baseamount" />
        <link-entity name="product" from="productid" to="productid" alias="ac">
          <attribute name="name" />
        </link-entity>
      </link-entity>
    </link-entity>
  </entity>
</fetch>
(5) 在设计面板中添加Table:

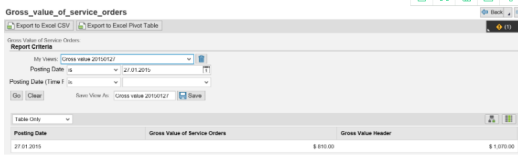
(6) 到这一步报表就完成了。将报表上传到CRM中看一下结果:

(二) 使用FetchXML实现inner join
在上面的实例中,已经看到如何使用 link-entity 来实现 inner join。link-entity 有一个属性 -- link-type,它的默认值为inner,你可以不指定该属性值,也可以指定其为inner。
<fetch distinct="false" no-lock="false" mapping="logical">
  <entity name="account" enableprefiltering="1" prefilterparametername="CRM_FilteredAccount">
    <attribute name="name" alias="name" />
    <attribute name="accountid" />
    <link-entity name="contact" to="accountid" from="parentcustomerid" alias="contact1">
      <attribute name="fullname" alias="contact1_fullname" />
      <attribute name="contactid" />
    </link-entity>
  </entity>
</fetch>
<fetch distinct="false" no-lock="false" mapping="logical">
  <entity name="account" enableprefiltering="1" prefilterparametername="CRM_FilteredAccount">
    <attribute name="name" alias="name" />
    <attribute name="accountid" />
    <link-entity name="contact" to="accountid" from="parentcustomerid" link-type="inner" alias="contact1">
      <attribute name="fullname" alias="contact1_fullname" />
      <attribute name="contactid" />
    </link-entity>
  </entity>
</fetch>
(三) 使用FetchXML实现outer join
实现outer join需要指定link-entity 的属性 link-type的值为outer
<fetch distinct="false" no-lock="false" mapping="logical">
  <entity name="account" enableprefiltering="1" prefilterparametername="CRM_FilteredAccount">
    <attribute name="name" alias="name" />
    <attribute name="accountid" />
    <link-entity name="contact" to="accountid" from="parentcustomerid" link-type="outer" alias="contact1">
      <attribute name="fullname" alias="contact1_fullname" />
      <attribute name="contactid" />
    </link-entity>
  </entity>
</fetch>
(四) 使用 Order + Count
你可以使用order对fetchxml返回的数据集进行排序,并且可以用count指定返回数据的个数。下面的代码指定按照contact fullname 和 account name 进行排序,并返回最多1条数据。
<fetch distinct="false" no-lock="false" mapping="logical" count="1">
  <entity name="account" enableprefiltering="1" prefilterparametername="CRM_FilteredAccount">
    <attribute name="name" alias="name" />
    <attribute name="accountid" />
    <link-entity name="contact" to="accountid" from="parentcustomerid" link-type="inner" alias="contact1">
      <attribute name="fullname" alias="contact1_fullname" />
      <attribute name="contactid" />
      <order attribute="fullname"/>
    </link-entity>
    <order attribute="name"/>
  </entity>
</fetch>
(五) 使用 fetchXML来获取 N:N 关系的数据
如果你使用的是Native N:N 关系,CRM 会自动为你的关系创建一个Entity。比如我做的一个项目中,有如下的关系, account 与 aw_aansluitadres 是 1 : N 的关系, aw_aansluitadres 与 aw_deelcontract 是 N : N 的关系, 系统便自动生成一个名为 aw_deelcontract_aansluitadres的entity。
如果你想获得 account inner join aw_aansluitadres inner join aw_deelcontract, 你可以使用下面的fetchXML:
<fetch distinct="false" mapping="logical" >
  <entity name="account" enableprefiltering="1" prefilterparametername="CRM_FilteredAccount">
    <attribute name="name" alias="name" />
    <link-entity name="aw_aansluitadres" from="aw_accountid" to="accountid" alias="aa" >
      <link-entity name="aw_deelcontract_aansluitadres" from="aw_aansluitadresid" to="aw_aansluitadresid" visible="false" intersect="true">
        <link-entity name="aw_deelcontract" from="aw_deelcontractid" to="aw_deelcontractid" alias="ab">
          <attribute name="aw_einddatum" alias="ab_aw_einddatum" />
          <attribute name="aw_leverancierid" alias="ab_aw_leverancierid" />
          <attribute name="aw_jaartalid" alias="ab_aw_jaartalid" />
        </link-entity>
      </link-entity>
    </link-entity>
  </entity>
</fetch>
如果想得到 account outer join aw_aansluitadres outer join aw_deelcontract,我在上面已经解释过了,需要为每个link-entity 的 link-type属性指定值为outer
<fetch distinct="false" mapping="logical" count="1">
  <entity name="account" enableprefiltering="1" prefilterparametername="CRM_FilteredAccount">
    <attribute name="name" alias="name" />
    <link-entity name="aw_aansluitadres" from="aw_accountid" to="accountid" alias="aa" link-type="outer">
      <link-entity name="aw_deelcontract_aansluitadres" from="aw_aansluitadresid" to="aw_aansluitadresid" visible="false" link-type="outer">
        <link-entity name="aw_deelcontract" from="aw_deelcontractid" to="aw_deelcontractid" alias="ab" link-type="outer">
          <attribute name="aw_einddatum" alias="ab_aw_einddatum" />
          <attribute name="aw_leverancierid" alias="ab_aw_leverancierid" />
          <attribute name="aw_jaartalid" alias="ab_aw_jaartalid" />
        </link-entity>
      </link-entity>
    </link-entity>
  </entity>
</fetch>
总结: fetchXML可以实现inner join,也可以实现outer join,关键在于link-entity的link-type属性,inner为inner join, outer 为 outer join,默认值为 inner。通过对数据使用order 排序,还可以通过设置fetch 的 count属性来指定返回的数据数目。
本文转自JF Zhu博客园博客,原文链接: http://www.cnblogs.com/jfzhu/archive/2012/10/07/2713507.html ,如需转载请自行联系原作者