SVN作为新一代代码版本管理工具,有很多优点,管理方便,逻辑明确,安全性高,代码一致性高。SVN数据存储有两种方式,BDB(事务安全表类型)和FSFS(一种不需要数据库的存储系统),为了避免在服务器连接中断时锁住数据,FSFS是一种更安全也更多人使用的方式。SVN的运行方式也有两种,一种是独立服务器,另一种是借助apache服务,各有利弊,下面就介绍一下这两种方式各自的部署步骤。
1、作为独立服务器运行:
①安装svn,使用本地yum源安装,操作系统镜像里自带的就有,yum install svn,具体步骤请参考http://ailurus.blog.51cto.com/4814469/1168336;
②创建版本库:
mkdir /svn/project //创建版本库所在文件夹
svnadmin create --fs-type fsfs /svn/project/first
//创建版本库,如果需要使用bdb方式存储,则将fsfs改成bdb即可
③初始化版本库,即导入文件到版本库中:
svn import /home/software file:///svn/project/first --message "初始化版本"
//将home文件夹的文件导入版本库
svn list --verbose file:///svn/project/first //查看导入的文件
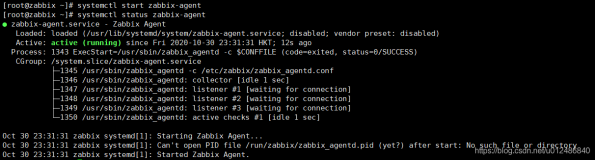
④启动svn服务,svn服务默认端口为3690,可以使用“netstat -ntlp”命令查看服务启动是否成功:
svnserve -d -r /svn/project
⑤修改策略控制文件,vi authz,如果以后要添加用户,就将用户名加在相应的用户组(admin或者user)后面即可:
### This file is an example authorization file for svnserve.
### Its format is identical to that of mod_authz_svn authorization
### files.
### As shown below each section defines authorizations for the path and
### (optional) repository specified by the section name.
### The authorizations follow. An authorization line can refer to:
### - a single user,
### - a group of users defined in a special [groups] section,
### - an alias defined in a special [aliases] section,
### - all authenticated users, using the '$authenticated' token,
### - only anonymous users, using the '$anonymous' token,
### - anyone, using the '*' wildcard.
###
### A match can be inverted by prefixing the rule with '~'. Rules can
### grant read ('r') access, read-write ('rw') access, or no access
### ('').
[aliases]
# joe = /C=XZ/ST=Dessert/L=Snake City/O=Snake Oil, Ltd./OU=Research Institute/CN=Joe Average
[groups]
# harry_and_sally = harry,sally
# harry_sally_and_joe = harry,sally,&joe
admin=first,second,third //用户组admin包含的成员
user=anyone //用户组user包含的成员
# [/foo/bar]
# harry = rw
# &joe = r
# * =
# [repository:/baz/fuz]
# @harry_and_sally = rw
# * = r
[/]
@admin=rw //用户组admin内成员拥有读写权限
@user=r //用户组user内成员拥有读权限
⑥添加svn访问用户,vi passwd,为authz里分配的用户设置密码,等号左边为用户名,等号右边是密码;
### This file is an example password file for svnserve.
### Its format is similar to that of svnserve.conf. As shown in the
### example below it contains one section labelled [users].
### The name and password for each user follow, one account per line.
[users]
# harry = harryssecret
# sally = sallyssecret
first=first
second=second
third=third
anyone=anyone
⑦修改svn读取的权限策略文件,vi /svn/project/first/conf/svnserve.conf:
anon-access = none //不允许匿名用户读写
auth-access = write
password-db = passwd //svn读取的passwd文件
authz-db = authz //svn读取的权限控制文件
⑧安装svn客户端,就可以使用客户端通过如下的url就可以访问了:
svn://IP地址/svn/project/first
2、借助apache服务器,通过web端访问svn:
①给apache服务器安装两个svn插件,这两个插件同样可以使用yum安装:
yum install mod_dav_svn //使subversion与dav模块通信的功能
yum install mod_authz_svn //实现权限控制功能
②使用命令“httpd -M”可以查看是否加载这两个模块,如加载,则有如下回应:
Loaded Modules:
core_module (static)
mpm_prefork_module (static)
http_module (static)
so_module (static)
auth_basic_module (shared)
auth_digest_module (shared)
authn_file_module (shared)
authn_alias_module (shared)
authn_anon_module (shared)
authn_dbm_module (shared)
authn_default_module (shared)
authz_host_module (shared)
authz_user_module (shared)
authz_owner_module (shared)
authz_groupfile_module (shared)
authz_dbm_module (shared)
authz_default_module (shared)
ldap_module (shared)
authnz_ldap_module (shared)
include_module (shared)
log_config_module (shared)
logio_module (shared)
env_module (shared)
ext_filter_module (shared)
mime_magic_module (shared)
expires_module (shared)
deflate_module (shared)
headers_module (shared)
usertrack_module (shared)
setenvif_module (shared)
mime_module (shared)
dav_module (shared)
status_module (shared)
autoindex_module (shared)
info_module (shared)
dav_fs_module (shared)
vhost_alias_module (shared)
negotiation_module (shared)
dir_module (shared)
actions_module (shared)
speling_module (shared)
userdir_module (shared)
alias_module (shared)
substitute_module (shared)
rewrite_module (shared)
proxy_module (shared)
proxy_balancer_module (shared)
proxy_ftp_module (shared)
proxy_http_module (shared)
proxy_ajp_module (shared)
proxy_connect_module (shared)
cache_module (shared)
suexec_module (shared)
disk_cache_module (shared)
cgi_module (shared)
version_module (shared)
authz_ldap_module (shared)
dav_svn_module (shared)
authz_svn_module (shared)
Syntax OK
③编辑apache服务配置文件vi /etc/httpd/conf/httpd.conf,加入下面几行:
<Location /svn>
DAV svn
SVNPath /svn/project/zbw
AuthzSVNAccessFile /etc/httpd/conf.d/authz
//apache服务器读取的权限策略文件
AuthType Basic
AuthName "Project"
AuthUserFile /etc/httpd/conf.d/passwd
//apache服务器读取的密码存储文件
Require valid-user
④编辑文件authz放在文件夹/etc/httpd/conf.d中,文件格式同文章上面的那个authz文件,编辑文件passwd放在文件夹/etc/httpd/conf.d中,使用如下命令生成用户名和密码:
htpasswd -c /svn/project/first admin
//命令为htpasswd,-c为参数,/svn/project/first为访问的版本库,admin为用户名
然后重复输入你想设置的密码就可以自动存储在文件passwd中,默认为md5存储。
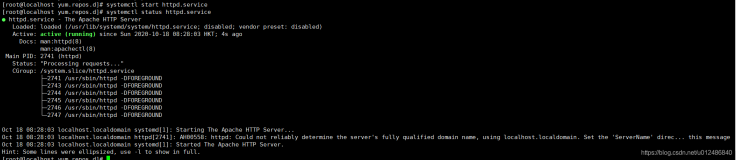
⑤重启apache服务,就可以在网页端使用刚才设置的用户名密码访问了,网址为http://192.168.2.100:8088/svn.