一、安装扩展源
[root@www ~]# rpm -ivh http://mirrors.ustc.edu.cn/fedora/epel/6/i386/epel-release-6-8.noarch.rpm
二、安装LAMP环境
[root@www ~]# yum -y install httpd mysql mysql-libs php php-mysql mysql-server php-bcmath php-gd php-mbstring
三、安装zabbix服务(zabbix2.0版本)
[root@www ~]# yum -y install zabbix20 zabbix20-agent zabbix20-server zabbix20-server-mysql zabbix20-web zabbix20-web-mysql net-snmp-devel
四、启动服务
|
1
2
3
4
5
6
7
8
9
10
11
12
13
14
15
16
17
18
|
[root@www ~]
# service mysqld start
[root@www ~]
# service httpd start
[root@www ~]
# service zabbix-server start
Starting Zabbix server: [ OK ]
[root@www ~]
# service zabbix-agent start
Starting Zabbix agent: [ OK ]
[root@www ~]
# netstat -ntlp
Active Internet connections (only servers)
Proto Recv-Q Send-Q Local Address Foreign Address State PID
/Program
name
tcp 0 0 0.0.0.0:22 0.0.0.0:* LISTEN 1281
/sshd
tcp 0 0 127.0.0.1:25 0.0.0.0:* LISTEN 1015
/master
tcp 0 0 0.0.0.0:10050 0.0.0.0:* LISTEN 4796
/zabbix_agentd
tcp 0 0 0.0.0.0:3306 0.0.0.0:* LISTEN 4594
/mysqld
tcp 0 0 :::80 :::* LISTEN 2712
/httpd
tcp 0 0 :::22 :::* LISTEN 1281
/sshd
tcp 0 0 ::1:25 :::* LISTEN 1015
/master
tcp 0 0 :::10050 :::* LISTEN 4796
/zabbix_agentd
|
五、配置mysql
1、增加或修改以下配置
|
1
2
3
4
5
6
|
[root@www ~]
# vim /etc/my.cnf
[mysqld]
character_set_server = utf8
[mysql]
default-character-
set
= utf8
|
|
1
2
3
|
[root@www ~]
# service mysqld restart
Stopping mysqld: [ OK ]
Starting mysqld: [ OK ]
|
2、创建zabbix数据库
|
1
|
[root@www ~]
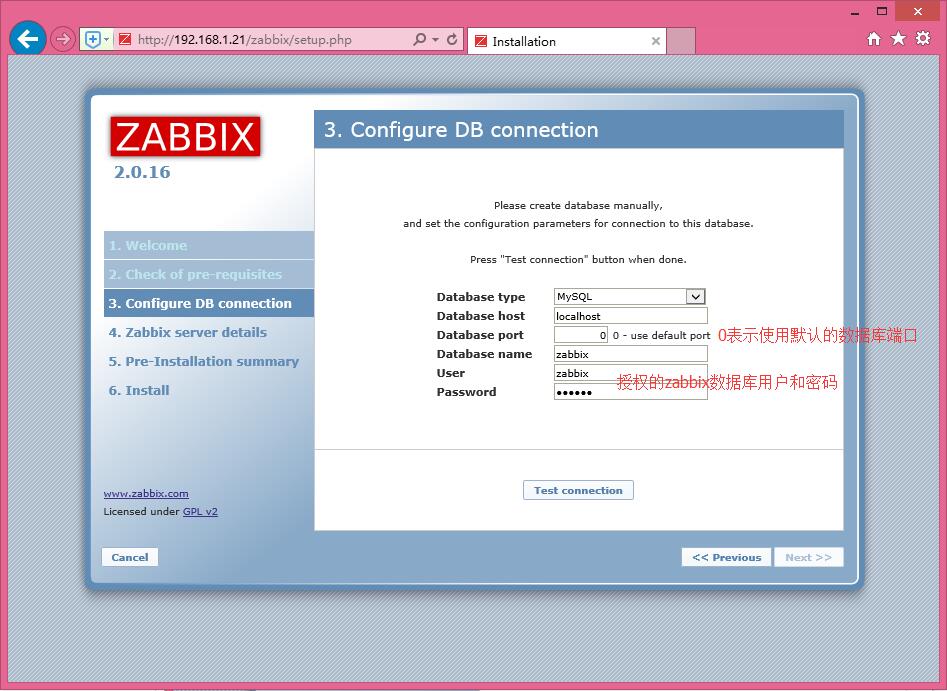
# mysql -uroot -p -e "create database zabbix"
|
3、创建授权zabbix数据库用户
|
1
|
[root@www ~]
# mysql -uroot -p -e "grant all on zabbix.* to 'zabbix'@'localhost' identified by 'zabbix';"
|
4、导入zabbix数据库
|
1
2
|
[root@www ~]
# ls /usr/share/zabbix-mysql/
data.sql images.sql schema.sql upgrades
|
|
1
2
3
|
[root@www ~]
# mysql -uroot -p --default-character-set=utf8 zabbix < /usr/share/zabbix-mysql/schema.sql
[root@www ~]
# mysql -uroot -p --default-character-set=utf8 zabbix < /usr/share/zabbix-mysql/images.sql
[root@www ~]
# mysql -uroot -p --default-character-set=utf8 zabbix < /usr/share/zabbix-mysql/data.sql
|
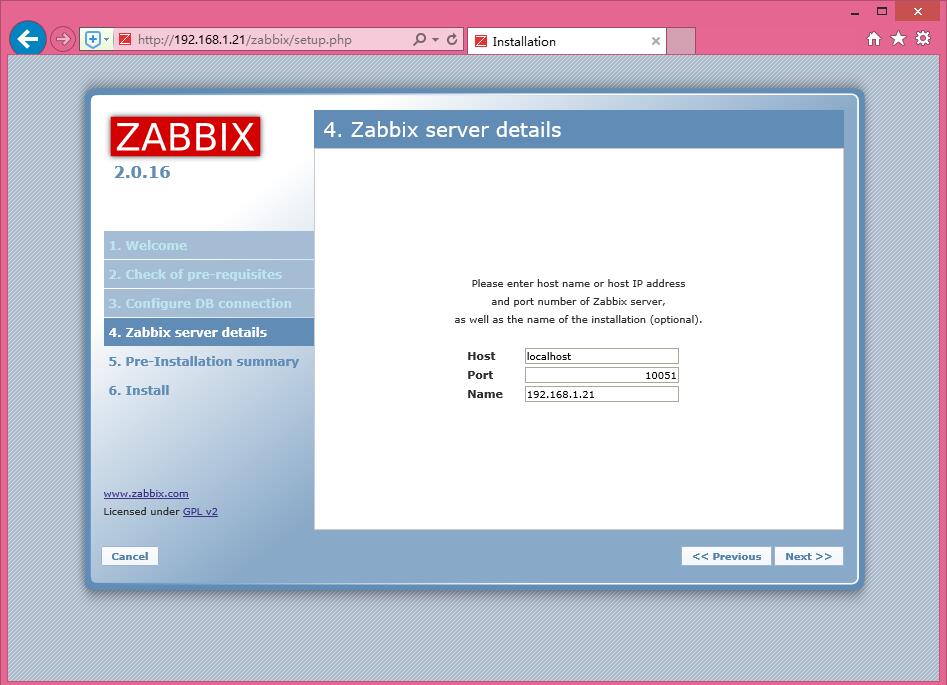
六、安装zabbix网页端
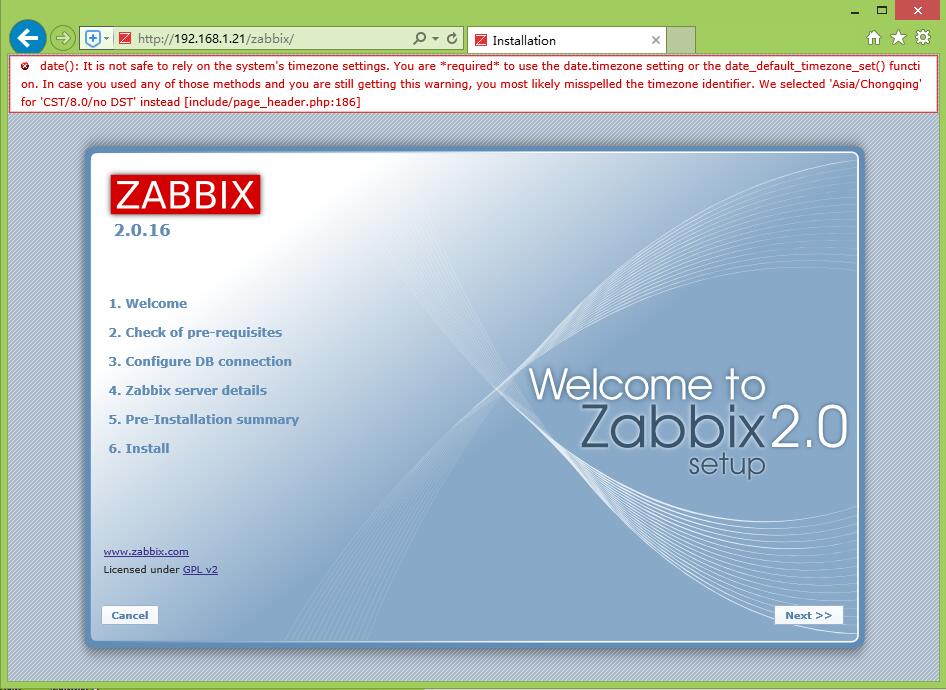
http://192.168.1.21/zabbix
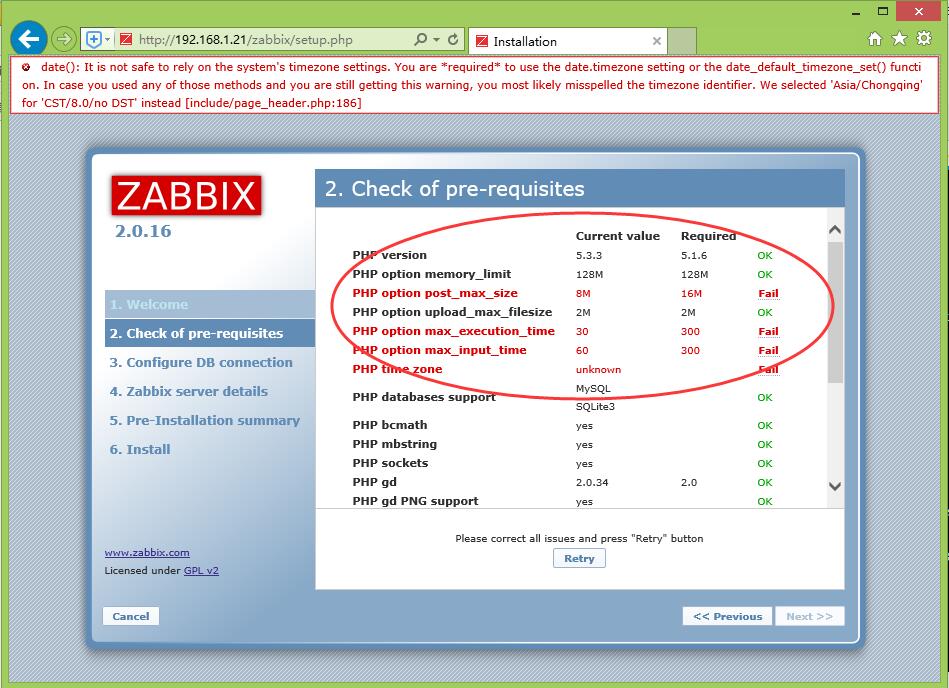
根据页面上的提示更改相关配置
|
1
2
3
4
5
|
[root@www ~]
# vim /etc/php.ini
post_max_size = 16M
max_execution_time = 300
max_input_time = 300
date
.timezone = Asia
/Shanghai
|
|
1
2
3
|
[root@www ~]
# service httpd restart
Stopping httpd: [ OK ]
Starting httpd: [ OK ]
|
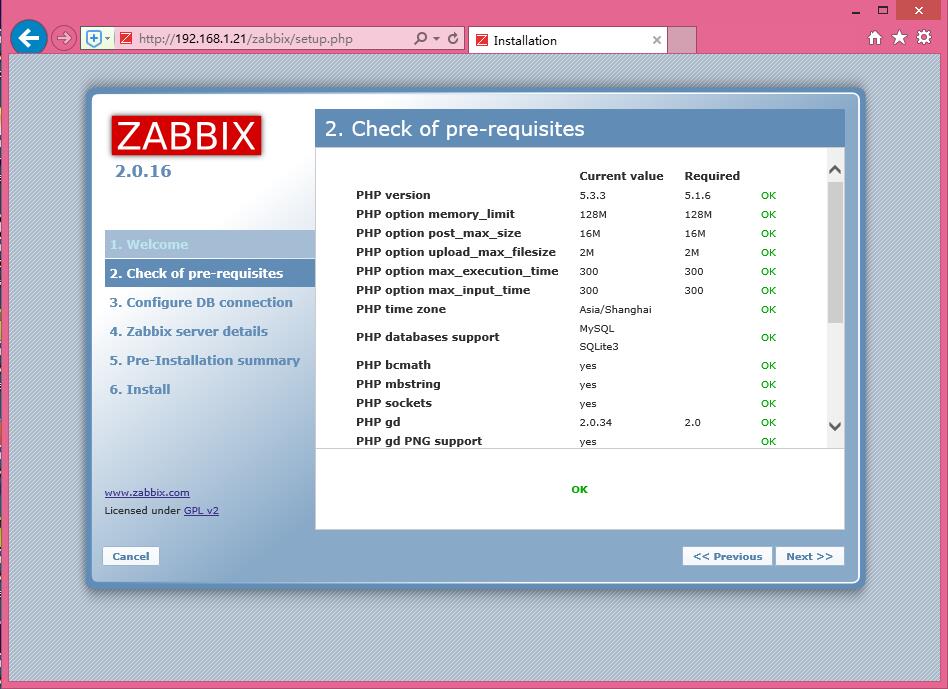
刷新页面,【Next】
自定义Name--->Next
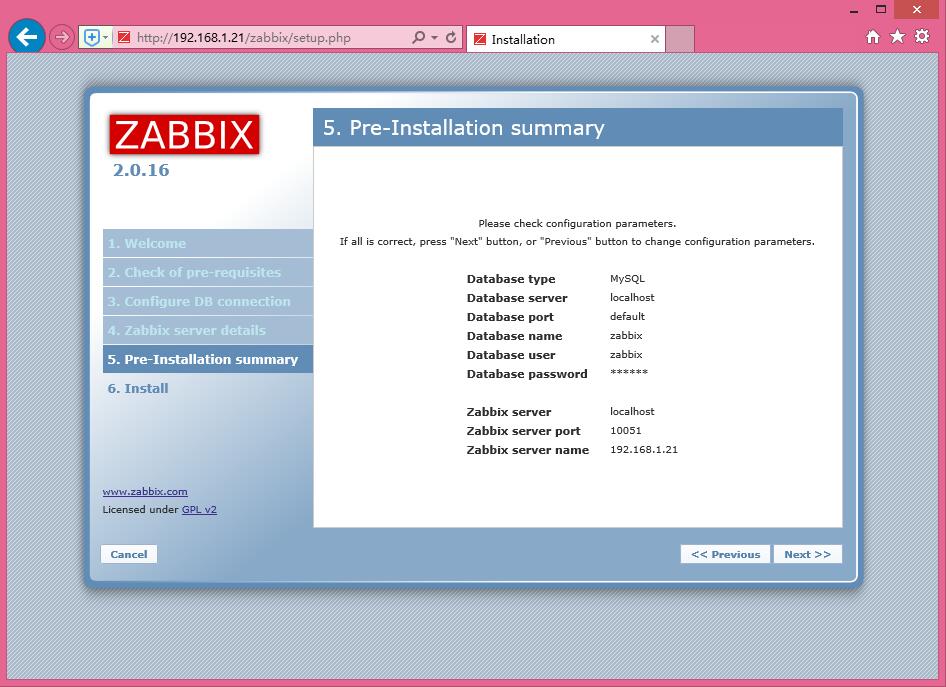
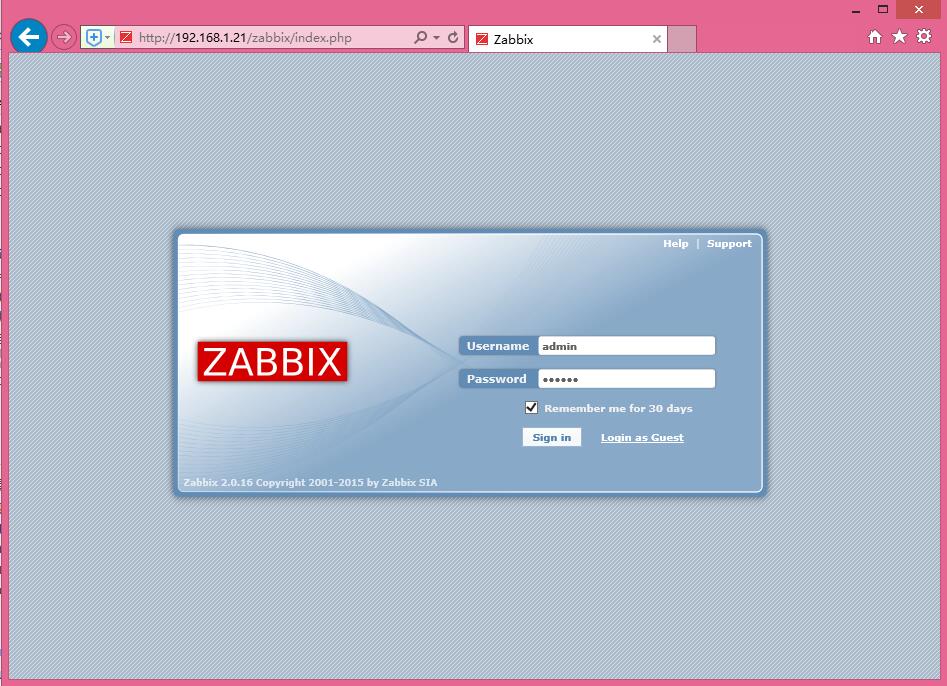
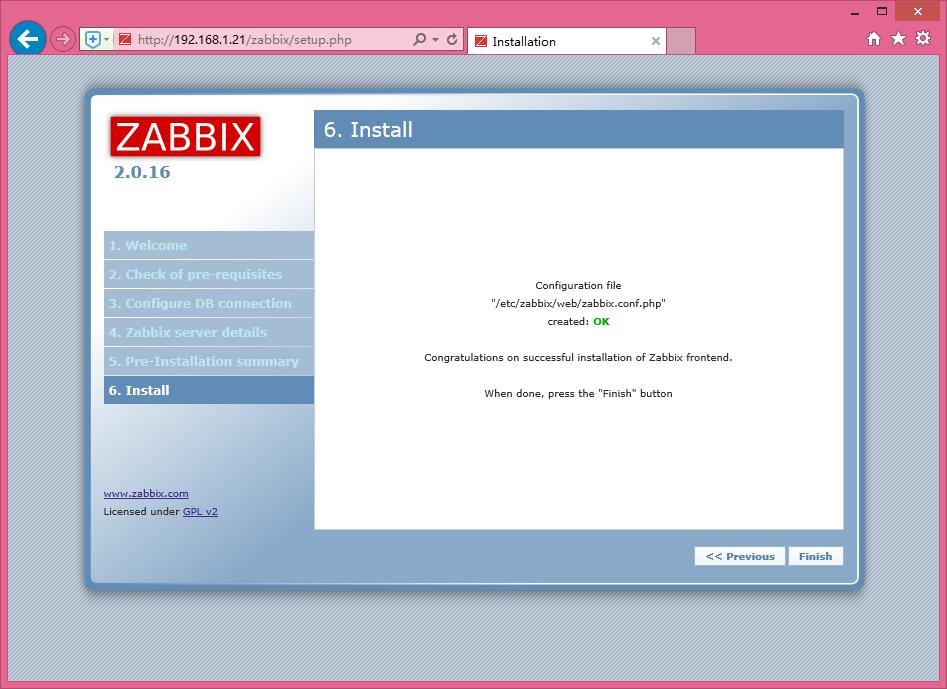 Finish,跳转到登录页面,默认的管理员用户:admin 密码:zabbix
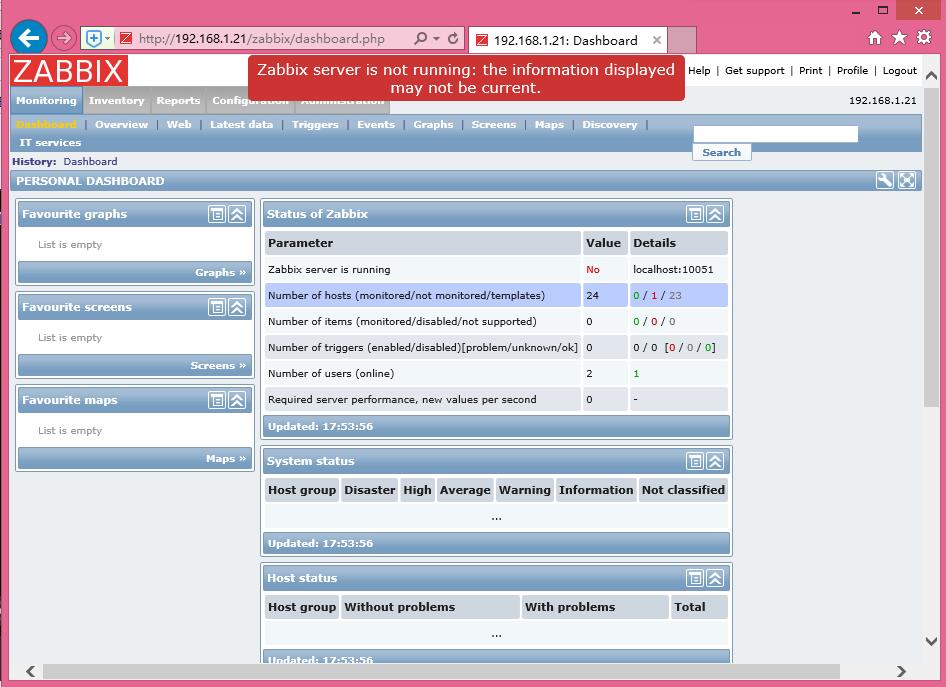
由于前面添加了zabbix用户,没有修改相应的配置文件/etc/zabbix/zabbix_server.conf,导致zabbix-server没有启动
查看日志文件zabbix_server日志(提示没有设置zabbix数据库密码)
|
1
2
3
4
5
6
7
8
9
10
11
|
[root@www ~]
# tail /var/log/zabbix/zabbix_server.log
6153:20160109:180057.467 [Z3001] connection to database
'zabbix'
failed: [1045] Access denied
for
user
'zabbix'
@
'localhost'
(using password: NO)
6153:20160109:180057.467 Database is down. Reconnecting
in
10 seconds.
6153:20160109:180107.470 [Z3001] connection to database
'zabbix'
failed: [1045] Access denied
for
user
'zabbix'
@
'localhost'
(using password: NO)
6153:20160109:180107.470 Database is down. Reconnecting
in
10 seconds.
6153:20160109:180117.473 [Z3001] connection to database
'zabbix'
failed: [1045] Access denied
for
user
'zabbix'
@
'localhost'
(using password: NO)
6153:20160109:180117.473 Database is down. Reconnecting
in
10 seconds.
6153:20160109:180127.474 [Z3001] connection to database
'zabbix'
failed: [1045] Access denied
for
user
'zabbix'
@
'localhost'
(using password: NO)
6153:20160109:180127.474 Database is down. Reconnecting
in
10 seconds.
6153:20160109:180137.476 [Z3001] connection to database
'zabbix'
failed: [1045] Access denied
for
user
'zabbix'
@
'localhost'
(using password: NO)
6153:20160109:180137.476 Database is down. Reconnecting
in
10 seconds.
|
修改/etc/zabbix/zabbix_server.conf配置文件
|
1
2
3
4
5
6
7
8
|
[root@www ~]
# vim /etc/zabbix/zabbix_server.conf
LogFile=
/var/log/zabbix/zabbix_server
.log
LogFileSize=0
PidFile=
/var/run/zabbix/zabbix_server
.pid
DBName=zabbix
DBUser=zabbix
DBPassword=zabbix
#默认是注释的
DBSocket=
/var/lib/mysql/mysql
.sock
|
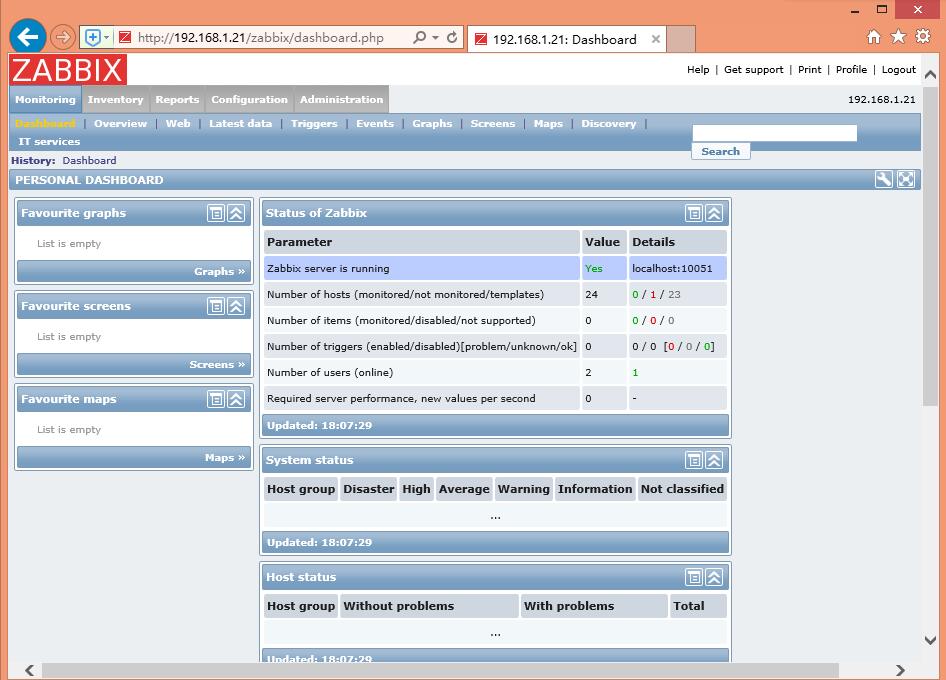
重启启动zabbix-server服务
|
1
2
3
|
[root@www ~]
# service zabbix-server restart
Shutting down Zabbix server: [ OK ]
Starting Zabbix server: [ OK ]
|
|
1
2
3
4
5
|
[root@www ~]
# netstat -ntlp |grep zabbix
tcp 0 0 0.0.0.0:10050 0.0.0.0:* LISTEN 6106
/zabbix_agentd
tcp 0 0 0.0.0.0:10051 0.0.0.0:* LISTEN 6888
/zabbix_server
tcp 0 0 :::10050 :::* LISTEN 6106
/zabbix_agentd
tcp 0 0 :::10051 :::* LISTEN 6888
/zabbix_server
|
七、添加监控客户端主机
1、安装zabbix20-agent
|
1
|
[root@sh ~]
# yum -y install zabbix20-agent
|
2、配置zabbix_agentd.conf 文件
|
1
2
3
4
|
[root@sh ~]
# vim /etc/zabbix_agentd.conf
Server=192.168.1.21
ServerActive=0.0.0.0:10050
Hostname=sh_zabbix
#自定义名称
|
3、启动zabbix-agent
|
1
2
|
[root@sh ~]
# /etc/init.d/zabbix-agent start
Starting Zabbix agent: [ OK ]
|
4、服务端测试
|
1
2
|
[root@www ~]
# zabbix_get -s 192.168.1.251 -p10050 -k "system.hostname"
sh.huangmingming.com
|
5、web界面下配置
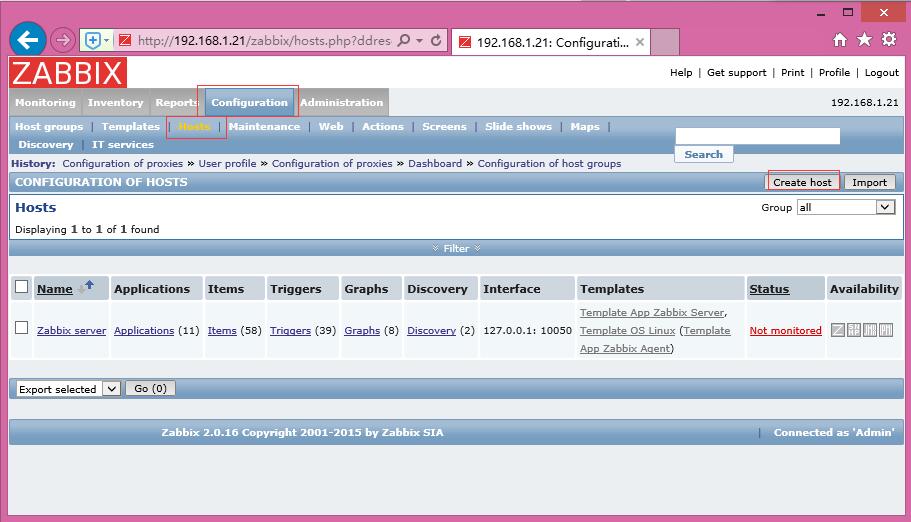
Configuration--->Hosts--->Create hosts
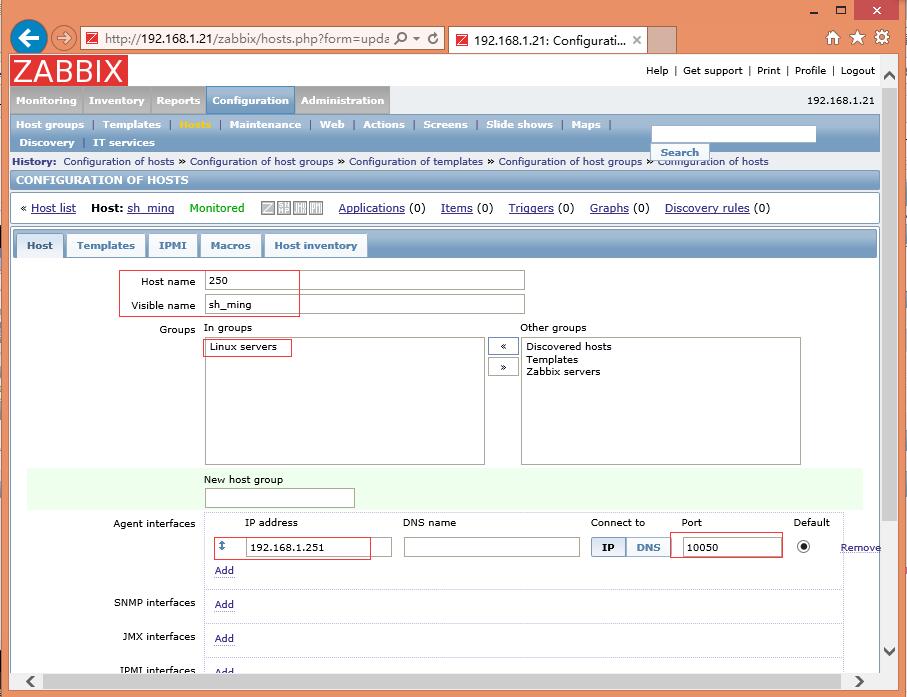
添加主机:Host name(自定义)--->Visible name(自定义)--->Groups(添加一个组)--->IP address--->Save
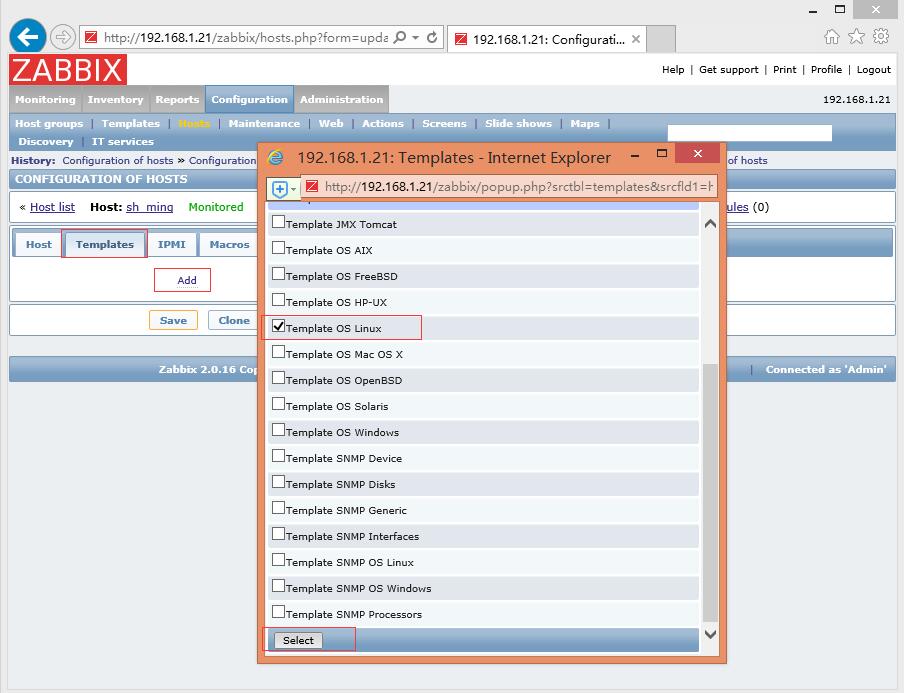
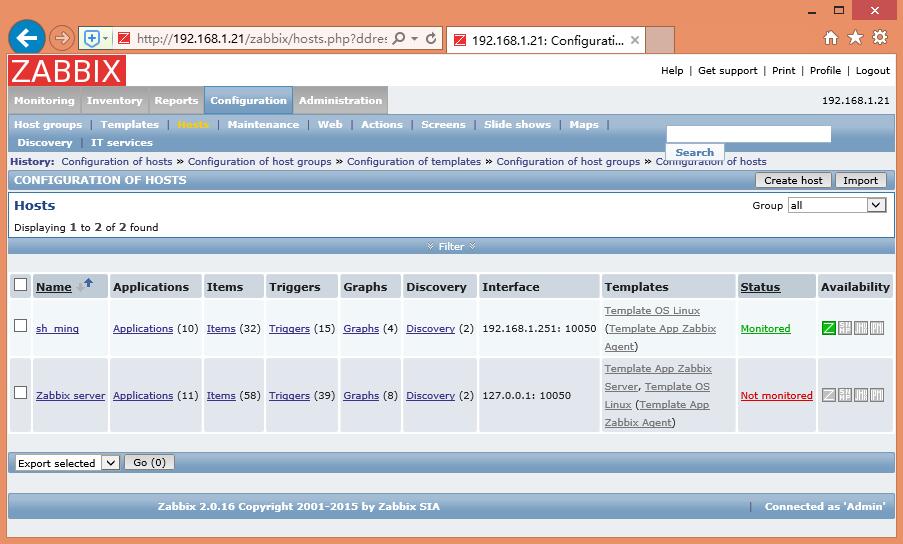
添加模板:Host list--->sh_ming--->Templates--->add--->Template OS Linux(选择一个模板)--->Select--->Save
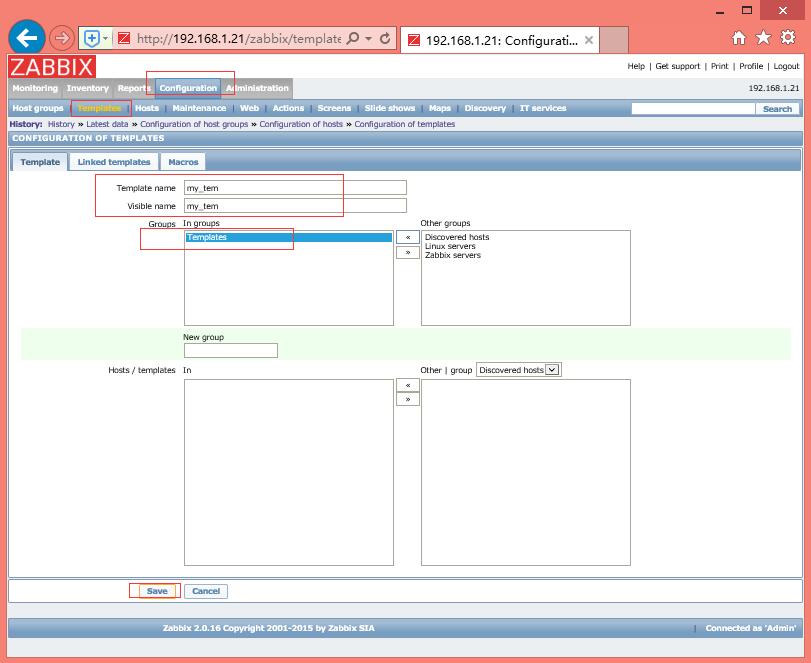
自定义模板:Configuration--->Create template--->Template--->Template name(自定义)--->Visible name(自定义)--->Groups(Templates)---Save
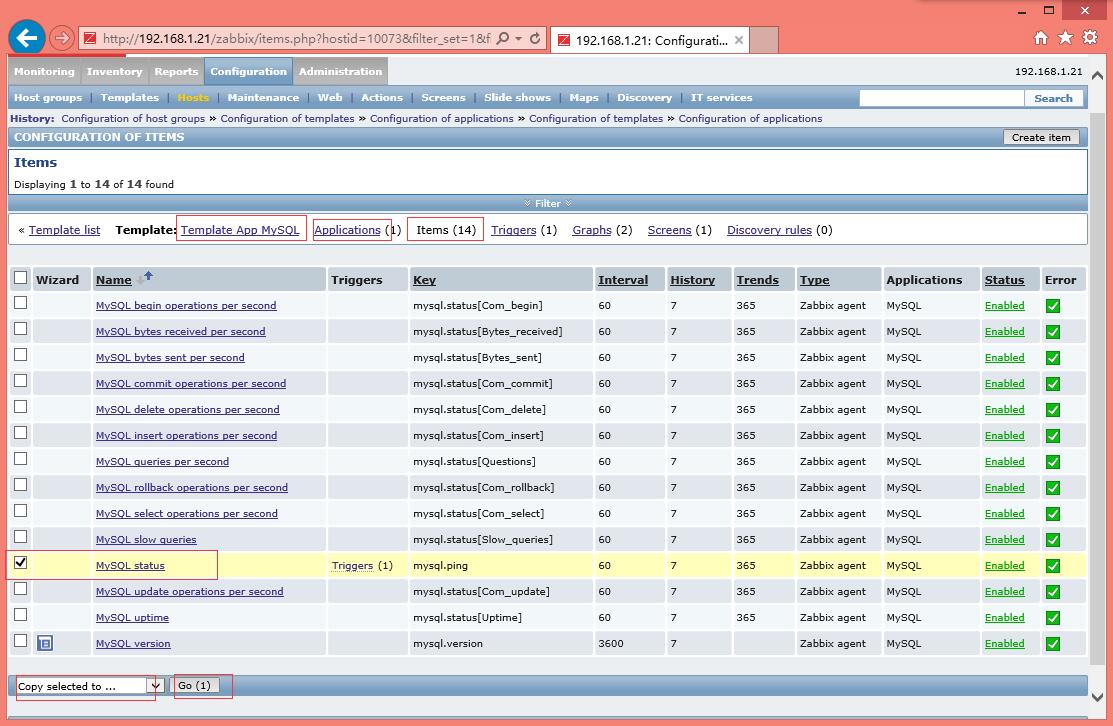
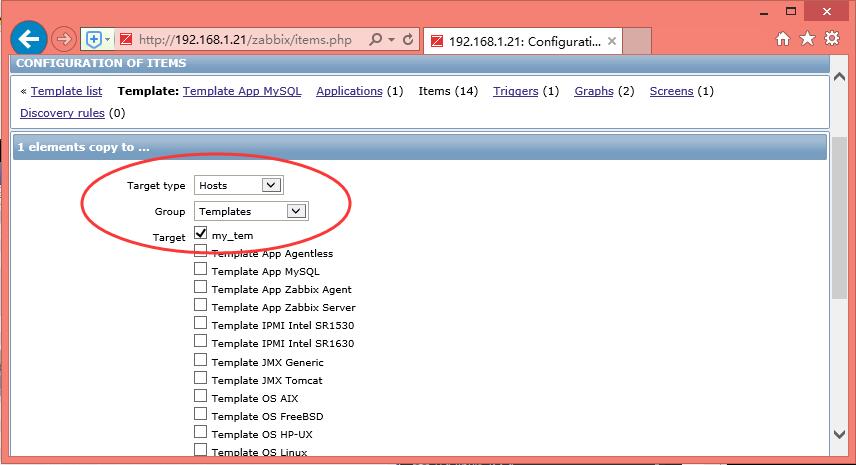
拷贝项目:MySQL Items--->Copy Select to--->my_tem
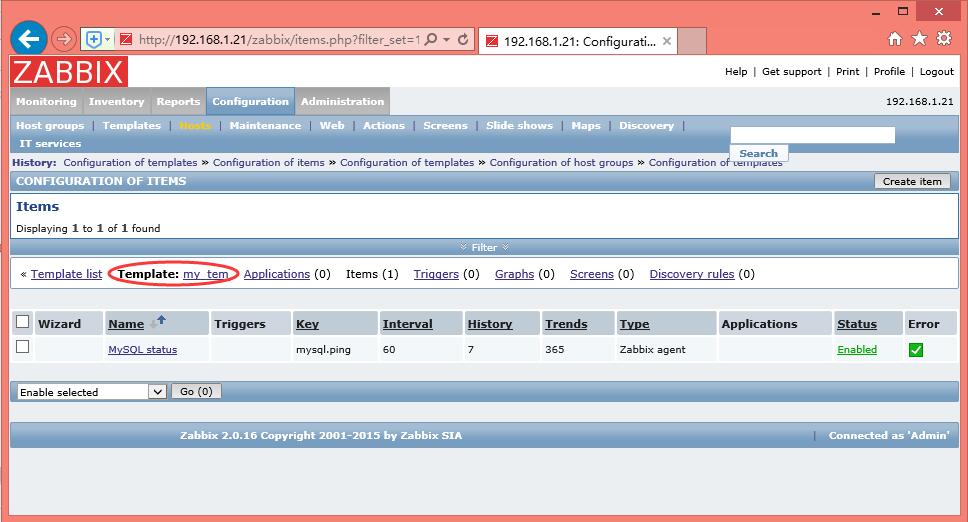
查看:Templates list
八、配置zabbix邮件告警
1、安装sendmail,使用sendmail发送邮件
|
1
2
3
4
|
[root@www ~]
# yum install sendmail
[root@www ~]
# /etc/init.d/postfix restart
Shutting down postfix: [ OK ]
Starting postfix: [ OK ]
|
|
1
2
3
4
5
6
|
[root@www ~]
# mail -s "test11" 741616710@qq.com </etc/inittab
[root@www ~]
# mailq
-Queue ID- --Size-- ----Arrival Time---- -Sender
/Recipient-------
1E86460728* 1347 Sat Jan 9 19:57:03 root@www.huangmingming.net
741616710@qq.com
-- 1 Kbytes
in
1 Request.
|
2、编写脚本
|
1
2
3
4
5
6
|
[root@www ~]
# mkdir /home/zabbix_mail/bin/ -p
[root@www ~]
# vim /home/zabbix_mail/bin/baojing.sh
#!/bin/bash
echo
"$3"
|
/bin/mail
-s
"$2"
$1
[root@www ~]
# chmod a+x /home/zabbix_mail/bin/baojing.sh
|
3、修改zabbix_server.conf文件
|
1
2
3
|
[root@www ~]
# vim /etc/zabbix_server.conf
AlertScriptsPath=
/home/zabbix_mail/bin
ExternalScripts=
/home/zabbix_mail/bin
|
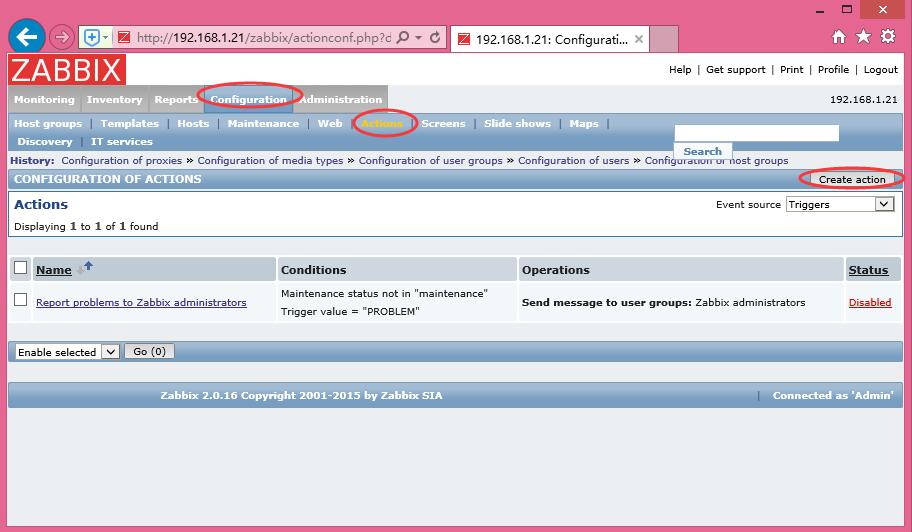
4、zabbix服务端web页面配置
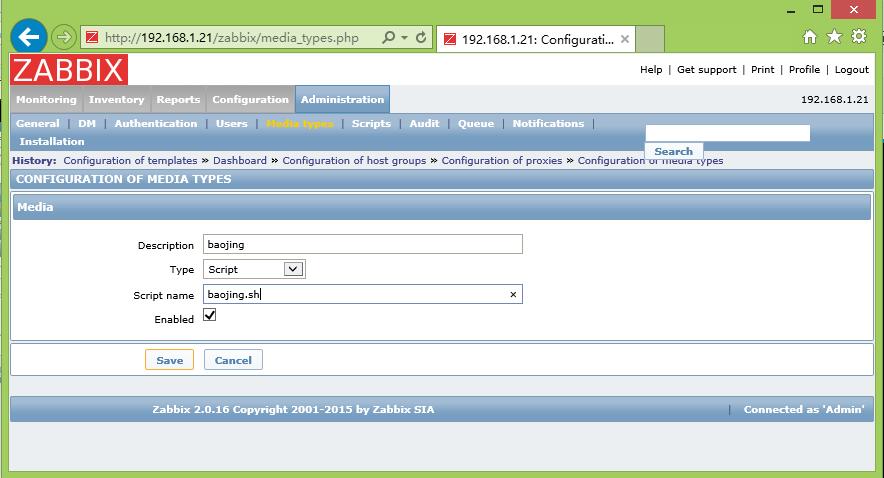
Administration--->Media types--->Create Media type--->Type(script)--->Save
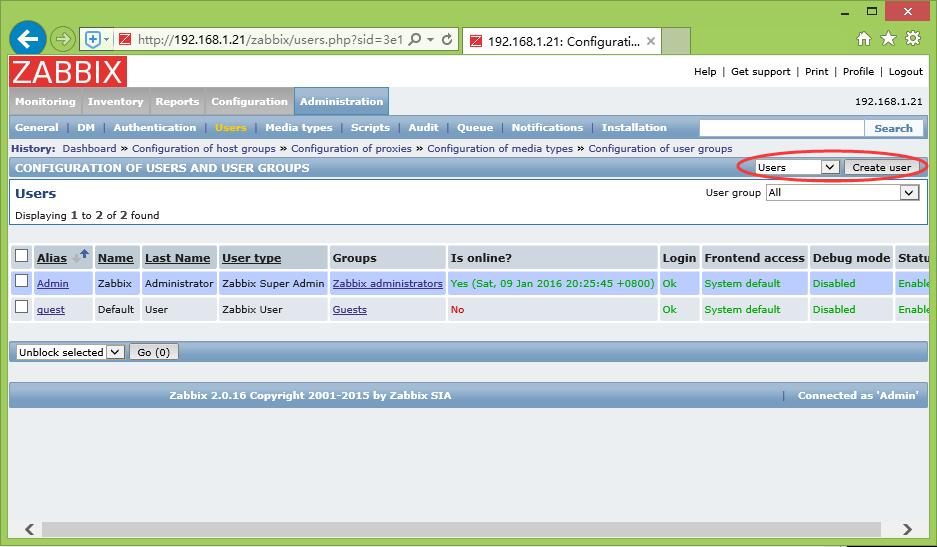
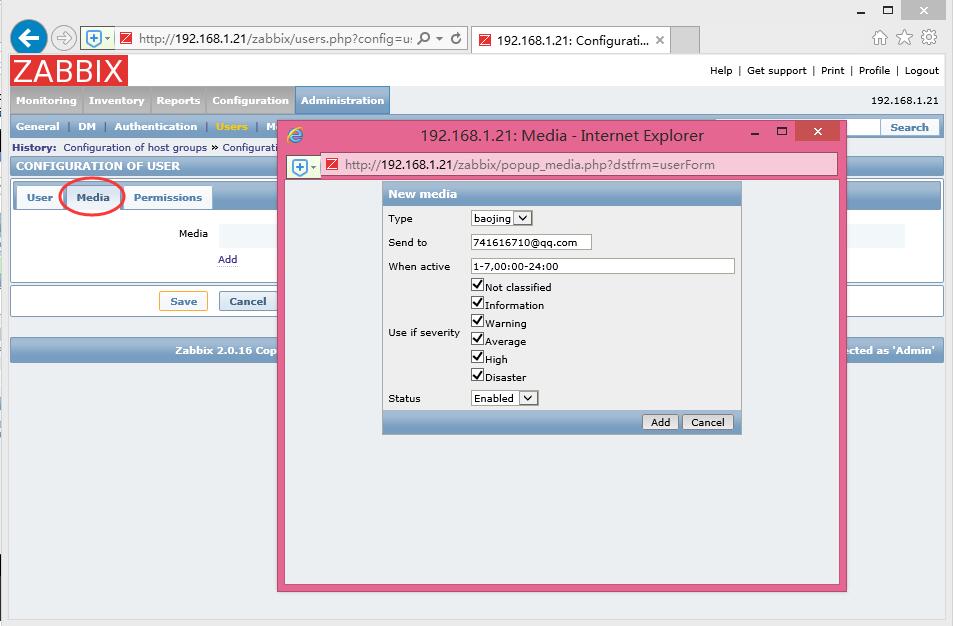
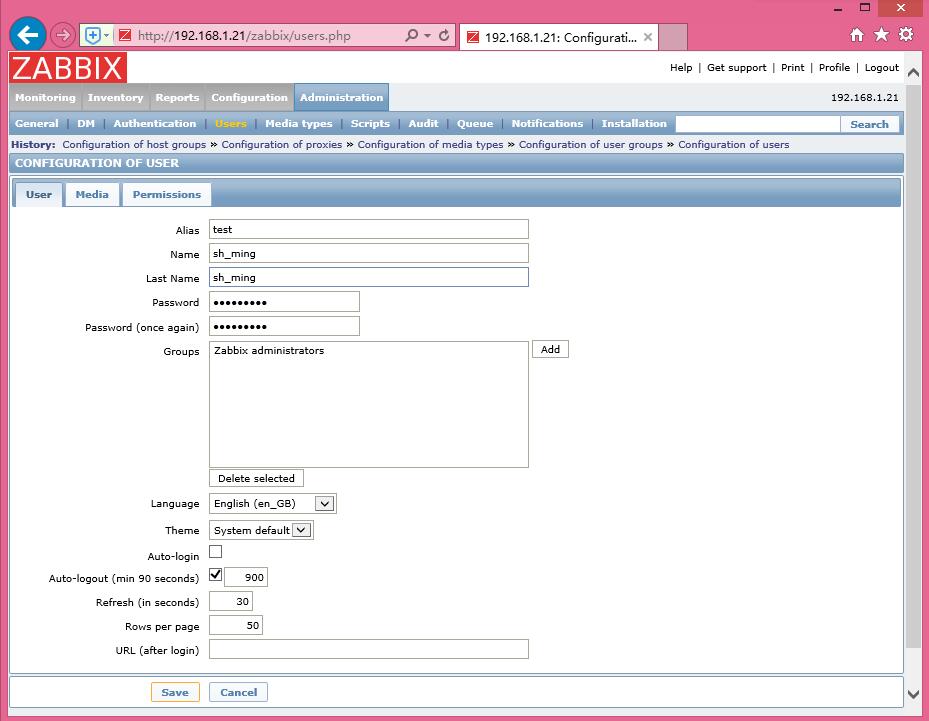
创建user:
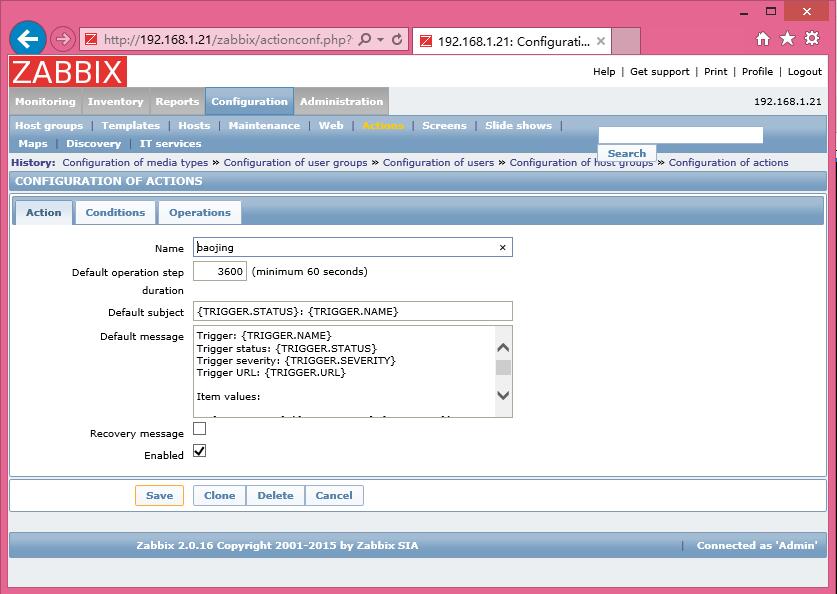
创建action:
Action:name(自定义)
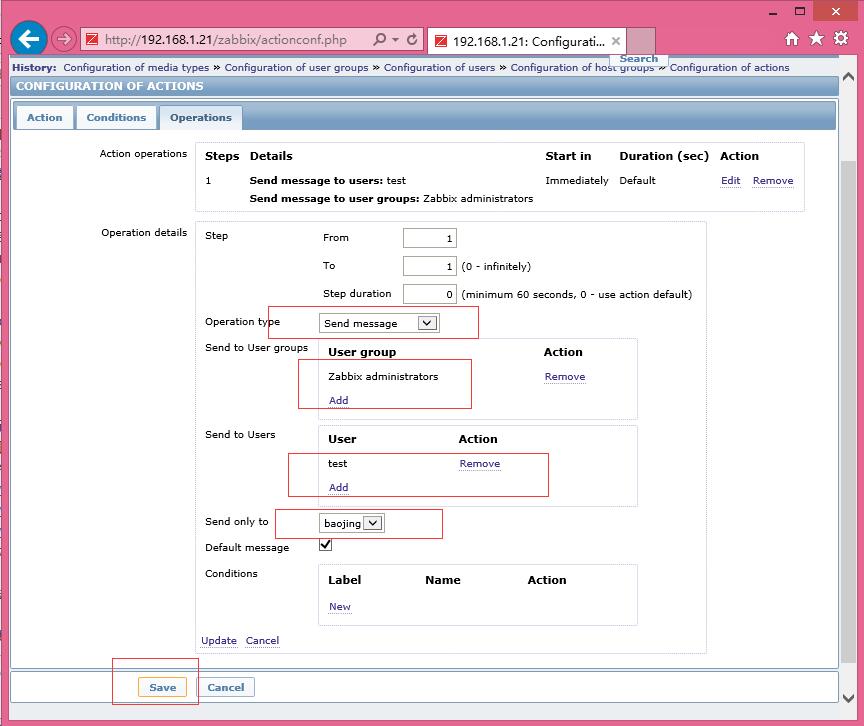
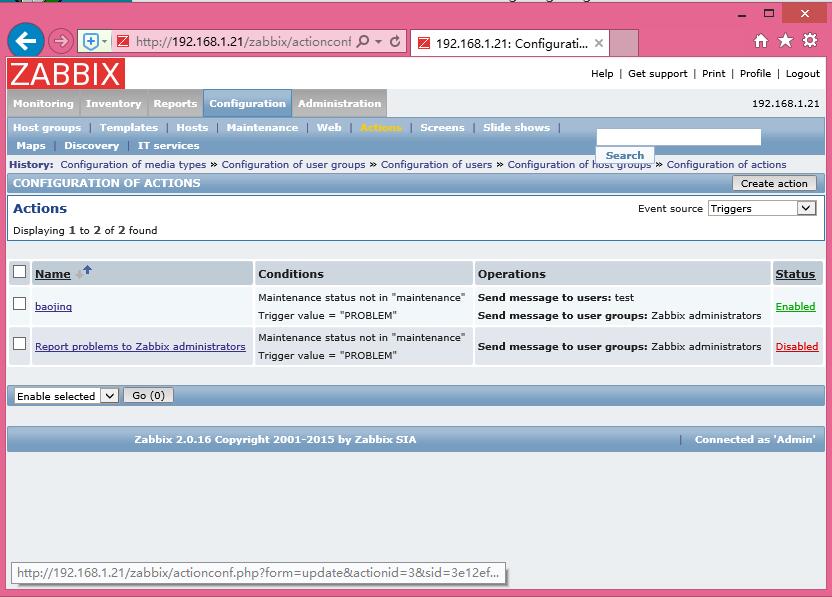
Operations:
本文转自 HMLinux 51CTO博客,原文链接:http://blog.51cto.com/7424593/1733330
