先决条件:
1、硬件需要支持esxi操作系统
2、目标主机网卡支持pex启动
3、ESXI安装镜像校验完整
4、需要有TFTP、FTP支持
5、防火墙运行TFTP/FTP流量通过
安装过程:
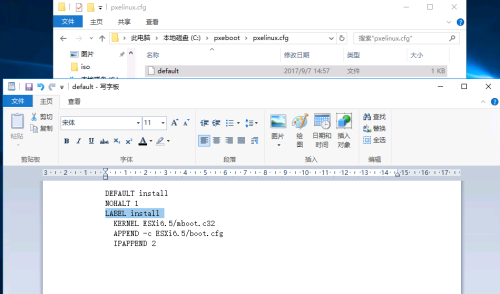
1、C盘创建文件夹pexboot
2、获取 SYSLINUX 版本 3.86 并进行解压,然后将 pxelinux.0 文件复制到 pexboot里面(pxelinux.0文件在syslinux-3.86.zip\core)
3、在ftpboot文件夹里面创建文件夹pxelinux.cfg,在此文件夹创建文本文档,重命名为“default”,取消文件后缀
4、使用写字板打开default文件写入下列内容
|
1
2
3
4
5
6
|
DEFAULT
install
NOHALT 1
LABEL
install
KERNEL ESXi6.5
/mboot
.c32
APPEND -c ESXi6.5
/boot
.cfg
IPAPPEND 2
|
5、在pxeboot文件里面创建ESXI6.5,将esxi6.5安装镜像全部内容减压到此目录
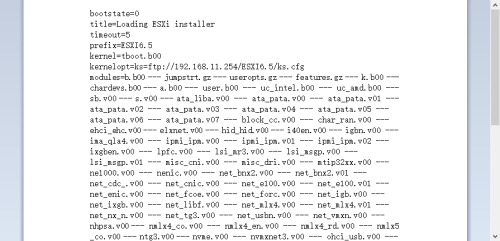
6、修改镜像文件里面的boot.cfg文件
|
1
2
3
4
|
a. 去掉文件中所以的 / (可以使用替换,将/替换为为空内容)
b. 添加下列内容
prefix=ESXI6.5
kernelopt=ks= (
ftp
地址按自己的环境写)
|
7、在ESXI6.5文件夹中新建文件ks.cfg,写入下列内容(mypassword为安装完成后esxiroot密码)
|
1
2
3
4
5
6
7
8
9
10
11
12
13
14
15
16
17
18
|
#
# Sample scripted installation file
#
# Accept the VMware End User License Agreement
vmaccepteula
# Set the root password for the DCUI and Tech Support Mode
rootpw mypassword
# Install on the first local disk available on machine
install
--firstdisk --overwritevmfs
# Set the network to DHCP on the first network adapter
network --bootproto=dhcp --device=vmnic0
# Reboot at the end
reboot
|
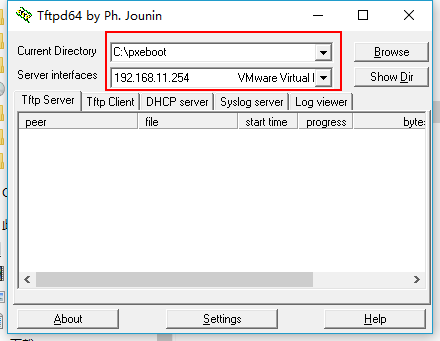
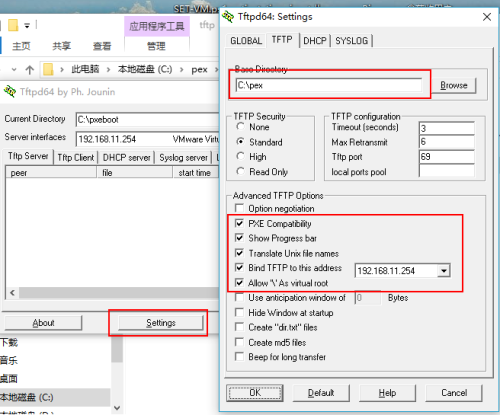
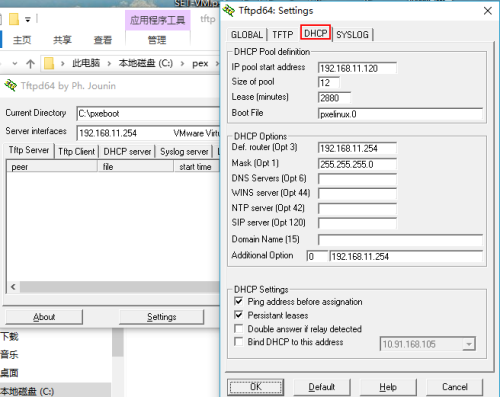
8、使用TFTP、dhcp
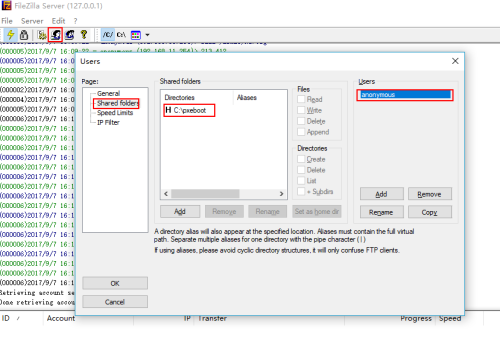
9、配置FTP服务器,使用filezilla server
10、至此配置已全部完成,可以开始从网络不是esxi,开机等待安装完成就可以了
本文转自bard_zhang51CTO博客,原文链接:http://blog.51cto.com/timefiles/1963475 ,如需转载请自行联系原作者
