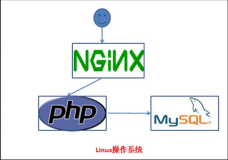
实验目的:应用Nginx网页服务器,掌握LNMP基本架构
实验前提:此实验除Nginx和php需要重新编译外,其他相关软件与LAMP安装方式相同,故删除之前LAMP架构中的Apache和PHP,编译安装Nginx和PHP
实验环境:RHEL61_64 nginx-1.0.9 php-5.2.17
内核版本:2.6.32-131.0.15.el6.x86_64
实验步骤:
1.Nginx-1.0.9 编译安装
./configure --prefix=/usr/local/nginx --user=daemon --group=daemon --with-rtsig_module --with-select_module --with-poll_module
--with-file-aio --with-http_ssl_module --with-http_realip_module
--with-http_addition_module --with-http_image_filter_module --with-http_sub_module --with-http_dav_module --with-http_flv_module --with-http_mp4_module --with-http_gzip_static_module --with-http_random_index_module --with-http_secure_link_module --with-http_degradation_module --http-log-path=/var/log/nginx/access.log --error-log-path=/var/log/nginx/error.log --pid-path=/var/run/nignx/nginx.pid --http-client-body-temp-path=/tmp/nginx_http --http-proxy-temp-path=/tmp/nginx_proxy --http-fastcgi-temp-path=/tmp/nginx_fcgi --with-cpu-opt=pentium4 --without-http_uwsgi_module --without-http_scgi_module --with-http_stub_status_module --with-http_perl_module --with-perl=/usr/bin/perl --with-perl_modules_path=/usr/share/perl5 --with-pcre
检查安装时会显示:
nginx path prefix: "/usr/local/nginx" ----nginx安装路径
nginx binary file: "/usr/local/nginx/sbin/nginx" ----nginx启动脚本
nginx configuration prefix: "/usr/local/nginx/conf" ----nginx配置文件所在位置
nginx configuration file: "/usr/local/nginx/conf/nginx.conf" ----nginx配置文件
nginx pid file: "/var/run/nignx/nginx.pid"
nginx error log file: "/var/log/nginx/error.log"
nginx http access log file: "/var/log/nginx/access.log"
nginx http client request body temporary files: "/tmp/nginx"
nginx http proxy temporary files: "/tmp/nginx"
nginx http fastcgi temporary files: "/tmp/nginx"
apache和nginx通信机制对比:
apache --> mod_libphp5.so --> /usr/local/bin/php --> php.ini -> socket -> mysql
nginx --> tcp/ip -> /usr/local/bin/php-fcgi -> php.ini -> tcp/ip -> mysql
nginx简单配置:
vim /usr/local/nginx/conf/nginx.conf
user daemon;
worker_processes 5; 打开的进程数量
error_log /var/log/nginx/error.log info;
pid /var/run/nginx/nginx.pid;
events {
worker_connections 1024; 并发连接数量
}
http {
include mime.types;
default_type application/octet-stream;
log_format main 'remoteaddr−remote_user [timelocal]"request" '
'statusbody_bytes_sent "httpreferer"″"http_user_agent" "$http_x_forwarded_for"';
access_log /var/log/nginx/access.log main;
sendfile on; 允许文件上传
keepalive_timeout 65;
server {
listen 80;
server_name www.cluster.com;
charset gb2312;
access_log /var/log/nginx/www.access.log main;
location / {
root /www;
index index.html index.htm index.php;
}
error_page 500 502 503 504 /50x.html; 定义错误代码
location = /50x.html {
root html;
}
}
}
检查nginx.conf配置文件是否有语法错误
[root@station10 nginx-1.0.9]# /usr/local/nginx/sbin/nginx -t
nginx: the configuration file /usr/local/nginx/conf/nginx.conf syntax is ok
nginx: configuration file /usr/local/nginx/conf/nginx.conf test is successful
[root@station10 nginx-1.0.9]# /usr/local/nginx/sbin/nginx <- 启动服务器
[root@station10 nginx-1.0.9]# /usr/local/nginx/sbin/nginx -s stop <- 关闭服务器
2.编译安装php-5.2.17
./configure --enable-fastcgi --enable-force-cgi-redirect --disable-ipv6 --with-libxml-dir=/usr --with-openssl --with-zlib --with-bz2
--enable-calendar --with-curl --with-curlwrappers --with-pcre-dir=/usr/local --enable-ftp --with-gd=/usr/local
--with-jpeg-dir=/usr/local --with-png-dir=/usr/local --with-xpm-dir --with-freetype-dir=/usr/local --enable-gd-native-ttf
--enable-gd-jis-conv --enable-mbstring --with-mcrypt=/usr/local --with-mhash=/usr/local --with-mysql=/usr/local/mysql
--with-mysql-sock=/var/run/mysqld/mysql5.socket --with-mysqli=/usr/local/mysql/bin/mysql_config --with-ncurses=/usr
--with-snmp=/usr --enable-zip --enable-sockets
编译之后会生成/usr/local/bin/php-cgi 此为连接nginx和php的工具
一般情况下并发访问不大的时候:
启动 tcp ->开启9000端口,用于连接nginx和php
/usr/local/bin/php-cgi -b 127.0.0.1:9000 -c /usr/local/lib/php.ini -a &
在虚拟主机中增加
location ~ \.php{ root /www; fastcgi_pass 127.0.0.1:9000; fastcgi_index index.php; fastcgi_param SCRIPT_FILENAME /wwwfastcgi_script_name;
include fastcgi_params;
}
接下来重启nginx,就可以支持php,php与mysql的连接通过php.ini定义mysql的socket来实现
注意:
当并发访问非常大的时候,此时/usr/local/bin/php-cgi就会由于压力而死掉,但nginx可能还会正常工作,
依然能解释静态页面,而php页面将不被解析!
解决方法:
为保持php的稳定性,使用spawn-fcgi-1.6.3.tar.gz产蛋工具,可以解决此问题
spawn-fcgi-1.6.3.tar.gz
./configure --enable-extra-warnings&& make && make install
/usr/local/bin/spawn-fcgi -a 127.0.0.1 -p 9000 -C 200 -f /usr/local/bin/php-cgi -u daemon -g daemon
\-将会生成200个/usr/local/bin/php-cgi后台进程
本文转自 geekwolf 51CTO博客,原文链接:
http://blog.51cto.com/linuxgeek/995228