成功界面图:

使用ES注意事项:
1、es版本2.x以上需要JDK 1.8以上
2、运行es不能使用root用来来运行
3、es目录必须指定一个普通用户和组(授权)
4、es对内存和CPU的消耗比较高
5、es版本在5.X以上系统要求至少要能够开启2048个线程才可以启动,系统版本使用CENTOS7才可以
6、es使用的端口看开放iptables:9200,9300等
7、es配置其他插件实现资源等可视化监控
8、es的版本和插件之间版本要匹配
9、es集群配置,第一节点配置好scp到其他节点即可(修改配置文件)
一、es启动
1、下载es包.2.4.2版本、解压到/usr/local/并命名为elasticsearch
2、修改配置文件
cluster.name: my-application
node.name: mycat
path.data: /home/elastic/
path.logs: /home/elastic/logs
network.host: 192.168.1.114
http.port: 9200
discovery.zen.ping.unicast.hosts: ["192.168.1.114"]
3、添加用户
useradd elastic
4、给/usr/local/elasticsearch授权
chown -R elastic.elastic /usr/local/elasticsearch
5、切换用户启动elastcisearch
su elastic
/usr/local/elasticsearch/bin/elasticsearch &
6、验证服务
登陆http://192.168.1.114:9200/
{
"name" : "mycat",
"cluster_name" : "my-application",
"cluster_uuid" : "nwPLOaaEQrGrMXsQpL61sg",
"version" : {
"number" : "2.4.1",
"build_hash" : "c67dc32e24162035d18d6fe1e952c4cbcbe79d16",
"build_timestamp" : "2016-09-27T18:57:55Z",
"build_snapshot" : false,
"lucene_version" : "5.5.2"
},
"tagline" : "You Know, for Search"
}
启动OK~~!
8、安装kibana+sence可视化报表
1、修改kibana的配置文件/usr/local/kibana/config/kibana.yml
server.port: 5601#kibana使用的服务端口
server.host: "192.168.1.114"#kibana实例主机
elasticsearch.url: "http://192.168.1.114:9200" ##指向elasticsearch实例,监控es服务的状态,关闭服务先关闭kibana服务先
2、启动kibana,这个可以在root模式下启动
/usr/local/kibana/bin/kibana &
3、加载sence插件
/usr/local/kibana/bin/kibana plugin --install elastic/sense
3、通过http://192.168.1.114:5601就可以可视化页面
8、安装管理和监控工具,使用marvel插件,这个插件是收费的,免费试用一个月。
Marvel基础功能是免费的 但是下载的是全功能版本 需要后续申请基础功能的license
Marvel是Elasticsearch的管理和监控工具
##在/usr/local/elasticsearch/目录下,安装marvel的许可和代理,用root来执行
Step 1: bin/plugin install license
bin/plugin install marvel-agent
#cd /usr/local/kibana/ #把marvel服务安装到kibana里
Step 2: Install Marvel into Kibanabin/kibana plugin --install elasticsearch/marvel/latest
#重启es和kibana服务
Step 3: bin/elasticsearch
bin/kibana
Step 4: http://localhost:5601
Step 5:配置index pattern
修改index name or pattern里值为:.marvel-*(第一次的时候这么配置,后期使用后又索引了,写索引名字即可)

至此可以登录kibana页面,可以看到kibana\marvel\sence都集成在页面也里了。
默认安装的是带有安全模块的30天试用版 https://www.elastic.co/guide/en/marvel/current/license-management.html
如果只使用marvel的监控模块 需要更换license为Basic License
register for a Basic license
安装license
curl -XPUT -u admin 'http://<host>:<port>/_license?acknowledge=true' -d @license.json ### @后面是license文件, 安装后不需要重启ES和kibana
查看license是否更新成功
curl -XGET -u admin:password 'http://<host>:<port>/_license'
全文索引的设置:
1、下载包、解压
https://www.elastic.co/downloads/past-releases/logstash-2-4-1
2、添加配置文件目录
mkdir /usr/local/logstash/conf
touch /usr/local/logstash/conf/logstash.conf
input {
jdbc {
jdbc_driver_library => "/opt/logstash/mysql-connector-java-5.1.39/mysql-connector-java-5.1.39-bin.jar" #这个包要在logstash服务器上存在包
jdbc_driver_class => "com.mysql.jdbc.Driver"
jdbc_connection_string => "jdbc:mysql://host:3306/database" #数据库信息
jdbc_user => ""
jdbc_password => ""
# schedule => "0 1 * * *"
statement => "select * from aaa"
clean_run => true
}
}
output
{
elasticsearch {
hosts => ["host:9200"]
index => "index" #自定义
document_type => "index" #自定义
document_id => "%{id}" ###设置ID为ES主键,当数据库有update操作时,原记录会被覆盖
}
}
####
input {
jdbc {
jdbc_driver_library => "/usr/local/mysql-connector-java-5.1.40-bin.jar"
jdbc_driver_class => "com.mysql.jdbc.Driver"
jdbc_connection_string => "jdbc:mysql://192.168.1.114:3306/test"
jdbc_user => "dlan"
jdbc_password => "root123"
schedule => "0 1 * * *"
statement => "select * from aaa"
jdbc_paging_enabled =>"true"
clean_run => "true"
}
}
output
{
elasticsearch {
hosts => ["192.168.1.114:9200"]
index => "index"
document_type => "index"
document_id => "%{id}"
}
}
###
3、启动logstash
/usr/local/logstash/bin/logstash -f /usr/local/logstash/conf/logstash.conf &
4、然后再kibana里面sense
Server的localhost改成es的ip地址
GET /index_mycat/index_mycat/_search#返回所有的数据
GET /index_mycat/index_mycat/_search
{
"query": {
"term": {
"id": {
"value": "7"
}
}
}
}#查看某个值
GET /index_mycat/index_mycat/_search
{
"query": {
"terms": {
"id": [
"1",
"2",
"3"
]
}
}
}#查询一个ID的多个值
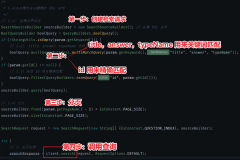
ES写入和查询数据
POST /logstach20161203/testlog
{
"date":"111111111",
"user":"chen",
"mesg":"first message"
}
GET _cat/indices
GET /logstach20161203/testlog/AVjCxeOOVWWuc1n8AVQu/_source#返回原始的数据,根据hash取回来的值
GET /logstach20161203/testlog/AVjCxeOOVWWuc1n8AVQu?fields=user,mesg
#返回多个值
GET /logstach20161203/testlog/_search/
{
"query": {
"term": {
"user": {
"value": "chen"
}
}
}
}
ES数据更新的方法:
一种为全量提交,即根据_id再发送一次写请求
POST /logstach20161203/testlog/AVjCxeOOVWWuc1n8AVQu
{
"date":"111111112",
"user":"chen",
"mesg":"first message1"
}
另外一种是局部更新
POST /logstach20161203/testlog/AVjCxeOOVWWuc1n8AVQu/_update
{"doc":{"user":"aaa1a"}}
curl -XPOST 'http://192.168.1.114:9200/logstach20161203/testlog/AVjCxeOOVWWuc1n8AVQu/_update' -d '{"doc":{"user":"aaaa"}}'
ES的查询
GET /logstach20161203/testlog/_search?q=aaa1a
GET /logstach20161203/testlog/_search?q=user:"aaa1a"
?q=后写写就是querystring语法
1、全文检索:直接写搜索的单词,如上例中的?? first?;
2、单字段的全文检索:在搜索单词之前加上字段名和冒号,比如如果知道单词
first?肯定出现在?mesg?字段,可以写作?? mesg:first?;
3、单字段的精确检索:在搜索单词前后加双引号,比如?? user:"chenlin7"?;
4、多个检索条件的组合:可以使用?? NOT?,?? AND??和??OR??来组合检索,注意必须是大写。比如?? user:("chenlin7"?OR?"chenlin")?AND?NOT
mesg:first?;
5、字段是否存在:? _exists_:user??表示要求?user?字段存在,? _missing_:user??表示要求?user?字段不存在;
6、通配符:用?? ???表示单字母,? *??表示任意个字母。比如??fir?t?mess*?;
7、正则:需要比通配符更复杂一点的表达式,可以使用正则。比如
? mesg:/mes{2}ages?/?。注意?ES?中正则性能很差,而且支持的功能也不是
特别强大,尽量不要使用。ES?支持的正则语法
见:https://www.elastic.co/guide/en/elasticsearch/reference/current/query-dsl-
regexp-query.html#regexp-syntax;
8、近似搜索:用?? ~??表示搜索单词可能有一两个字母写的不对,请?ES?按照相似
9、度返回结果。比如?? frist~?;
10、范围搜索:对数值和时间,ES?都可以使用范围搜索,比
如:? rtt:>300?,? date:["now-6h"?TO?"now"}??等。其中,?[]??表示端点
数值包含在范围内,? {}??表示端点数值不包含在范围内;