一、必要的软件环境
1、jakarta-tomcat-5.0.28.exe
2、mysql-5.5.22-win32.msi
3、apache-ant-1.8.3-bin.zip
4、xplanner-0.7b7b-war
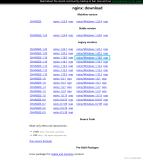
下载地址:http://download.csdn.net/detail/lovejuan007/4219126
经过测试以上版本兼容
汉化文件:ResourceBundle_zh_CN.properties
下载地址 http://download.csdn.net/detail/lovejuan007/4219164
二、ant 的安装
1、配置环境变量:我的电脑----属性-----高级----环境变量
如:ANT_HOME:D:\apache-ant-1.8.3
PATH:%ANT_HOME%\bin (为了方便在dos环境下操作)
2、查看是否安装成功:在dos窗口中输入命令ant,若出现结果
Buildfile:build.xml does not exist!
Build failed
说明ant安装成功!因为ant默认运行build.xml文件,这个文件需要我们建立。
3、使用:
(1)在D盘根目录下建立build.xml
<?xml version="1.0" encoding="GBK"?>
<project name="测试脚本" default="copyfile" basedir="." >
<target name="copyfile">
<copy file="d:/a.txt" todir="e:/Temp" overwrite="true" />
</target>
</project>
(2)在D盘根目录下建立文件a.txt。
(3)进入dos,
d:

三、mysql的安装
安装mysql5.5.22,有几步根据实际需要改一下.
a.选择详细安装模式

b.选择server Macheine

c、选择DSS模式

d.选择默认字符集为utf-8模式

e.配置数据库的默认访问账户

f、配置mysql环境变量:我的电脑----属性-----高级----环境变量
PATH:C:\Program Files\MySQL\MySQL Server 5.5\bin(为了方便在dos环境下操作)
配置成功显示如下

四、tommcat安装
安装部署省略
五、XPlanner安装
步骤:
1、创建数据库xplanner及赋权
# mysql -u root -p
Enter password:
mysql> create database xplanner character set utf8;
mysql>create user xplauser identified by 'xplanner';
mysql>grant all privileges on xplanner.* to xplauser@'%' identified by 'xplanner' with grant option;
mysql>grant all privileges on xplanner.* to xplauser@'localhost' identified by 'xplanner' with grant option;
mysql> flush privileges;
2、把XPlanner解压到D盘修改xplanner/web-inf/classes/xplanner.properties 和xplanner-custom.properties文件,改成相应的数据库连接
hibernate.dialect=com.technoetic.xplanner.db.hibernate.XPlannerMySQLDialect
hibernate.connection.driver_class=com.mysql.jdbc.Driver
hibernate.connection.url=jdbc:mysql://localhost/xplanner?autoReconnect=true&useUnicode=true&characterEncoding=UTF8
hibernate.connection.username=xplauser
hibernate.connection.password=xplanner
3、运行cmd,进入d:\xplanner-0.7b7b-war目录,ant create.db.schema.script会在installer目录下生成文件


BUILD SUCCESSFUL 表示成功。
4、將 installer 目录下的 hibernate_schema.sql 的資料跑一遍,会在数据库产生需要的表
这个脚本文件每条语句都没有用分号包住,还要自己修改成mysql可执行的格式(语句后面添加';')

5、运行cmd,进入d:\xplanner-0.7b7b-war目录,ant bootstrap 建立 sysadmin 的資料進 mysql


如图执行成功。
6、删除 \WEB-INF\classes\patches 下所有資料
7、 xplanner Copy 到 Tomcat\webapps目录下
8、替换内容
打开 /xplanner/WEB-INF/classes/spring-beans.xml
找到 bean id="metaRepository"
替换成如下样子
<property name="repositories">
<bean class="java.util.HashMap">
<constructor-arg>
<map>.....</map>
</constructor-arg>
</bean>
</property>
就是把<map>...</map>用外面两个属性包住.
9、foot.jsp页面报错,JSP页面报错其实挺简单的,就是引号里面套了个引号,把里面的引号转义下就OK了。
10、汉化,把文件ResourceBundle_zh_CN.properties
安装成功如下: 账户默认为 sysadmin 密码默认为 admin

问题:
1、重新安装mysql会不能start service
原因是mysql没有卸除干净
除了路径C:\Program Files\MySQL\MySQL Server 5.5
还有C:\Documents and Settings\All Users\Application Data\MySQL\MySQL Server 5.5\data 也要清除干净
原来是spring-beans.xml文件中的问题
就是这个部分
<bean id=”metaRepository” class=”com.technoetic.xplanner.domain.repository.MetaRepositoryImpl”>
<property name=”repositories”>
<map>
com.technoetic.xplanner.domain.repository.MetaRepositoryImpl的repositories需要一个map,
spring中使用使用的实现是org.apache.commons.collections.map.LinkedMap
但是org.apache.commons.collections.map.LinkedMap实现了java.util.Map接口啊!
理论上应该的可以的啊!但是却出现了转化错误,没有找到原因,但是找到了解决方案啊!
把<property name=”repositories”><map>……</map></property>
修改为
<property name="repositories">
<bean class="java.util.HashMap">
<constructor-arg>
<map>…..</map>
</constructor-arg>
</bean>
</property>
就可以了啊!
还有两个问题。。。。
1.JSP页面错误
WEB-INF/jsp/view/notes.jsp
原来的: <xplanner:link page="/do/delete/note" confirm('Do you want to delete note ////'" + StringUtilities.replaceQuotationMarks(StringEscapeUtils.escapeJavaScript(note.getSubject())) + "////'?')"%>'>
替换成:<xplanner:link page="/do/delete/note" confirm(/'Do you want to delete note /////'" + StringUtilities.replaceQuotationMarks(StringEscapeUtils.escapeJavaScript(note.getSubject())) + "/////'?/')"%>'>
WEB-INF/jsp/common/footer.jsp
原来的:<bean:message key="footer.message" arg0="<%=productionSupportEmail%>" arg1="<%=issueLink%>" arg2="<%=appUrl+"/do/systemInfo"%>"/>
替换成:<bean:message key="footer.message" arg0="<%=productionSupportEmail%>" arg1="<%=issueLink%>" arg2="<%=appUrl+/"/do/systemInfo/"%>"/>
2.用户怎么不能登陆?
ant命令: ant install.db.schema(改命令是完全可用的,只是生成的SQL文件每句后面没有分号)
然后把的到得脚本在数据库里执行,就可以了。
数据库的库表结构搭建完成。网上很多地方都说到这里,就结束。事实上并没有完成。还需要一些初始化的工作。官网提供的脚本中,存在错误。那是由于0.6的版本的脚本,参合到0.7中。同时在这里也说明一个开源的弊端。
具体初始化脚本在xplanner/WEB-INF/classes/patches目录下。里面的很多脚本基本上没有用,有用的只是patch0002_bootstrap_users_and_permissions.sql。这个数据库脚本的主要作用就是生成一个管理员账号和定义具体的任务规则。但是,这个官网版本执行会直接报错(至少在mysql 5.0 下报错)。为此,需要删除掉该脚本下的所有关于permission的插入操作。会缺少一个字段的值。
INSERT INTO permission VALUES(6,5,'%','%',0, 1);
INSERT INTO permission VALUES(7,3,'-create.project','system.project',0, 1);
INSERT INTO permission VALUES(8,3,'-create.person','system.person',0, 1);
INSERT INTO permission VALUES(9,4,'-create.project','system.project',0, 1);
INSERT INTO permission VALUES(10,4,'admin%','%',0, 1);
INSERT INTO permission VALUES(11,3,'create%','%',0, 1);
INSERT INTO permission VALUES(12,3,'edit%','%',0, 1);
INSERT INTO permission VALUES(13,3,'integrate%','%',0, 1);
INSERT INTO permission VALUES(14,3,'delete%','%',0, 1);
INSERT INTO permission VALUES(15,2,'read%','%',0, 1);
还有件重要的是,后面的positive这个字段一定要给1,否则后面你即将无法显示相应的工程,为了这个问题,代码都方便。
本文转自 holy2009 51CTO博客,原文链接:http://blog.51cto.com/holy2010/832269