参考文章:
http://ourmysql.com/archives/1359?utm_source=tuicool&utm_medium=referral
官方:https://github.com/box/Anemometer
单节点Anemometer监控
1 安装anemometer
|
1
2
|
# cd /data/www/web3
# git clone https://github.com/box/Anemometer.gitanemometer && cd anemometer
|
2 创建表和用户名
|
1
2
3
4
|
# mysql -uroot -proot <install.sql
# mysql -uroot -proot -e"grant ALL ON slow_query_log.* to 'anemometer'@'localhost' IDENTIFIED BY '123456';"
# mysql -uroot -proot -e"grant SELECT ON *.* to 'anemometer'@'localhost' IDENTIFIED BY '123456';"
# mysql -uroot -proot -e"flushprivileges;"
|
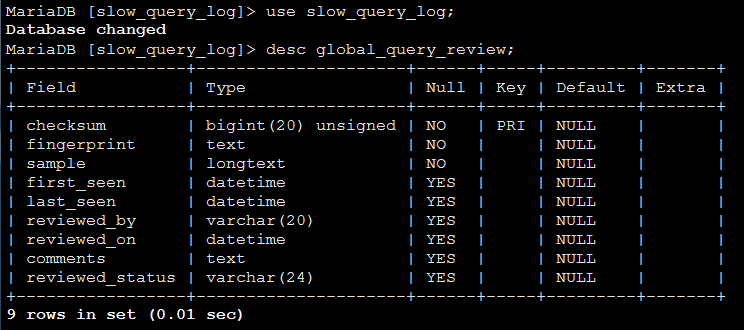
我们可以看下表结构如下
3 分析mysql慢日志
# pt版本高于2.2的执行下面语句,将慢查询日志放入名为slow_query_log数据库中
|
1
2
3
4
|
# pt-query-digest --user=anemometer -h 127.0.0.1 --password=123456 \
--review h=localhost,D=slow_query_log,t=global_query_review\
--
history
h=localhost,D=slow_query_log,t=global_query_review_history\
--no-report --limit=0% --filter=
" \$event->{Bytes} = length(\$event->{arg}) and\$event->{hostname}=\"$HOSTNAME\""
/usr/local/mariadb/var/localhost-slow
.log
|
这时候,数据库的slow_query_log 库,里面的global_query_review_history和global_query_review这2张表已经已经有一些数据了。
4 修改anemometer配置文件及配置展示日志用的虚拟主机
|
1
2
3
|
# cd /data/www/web3/anemometer/conf
# cp sample.config.inc.php config.inc.php
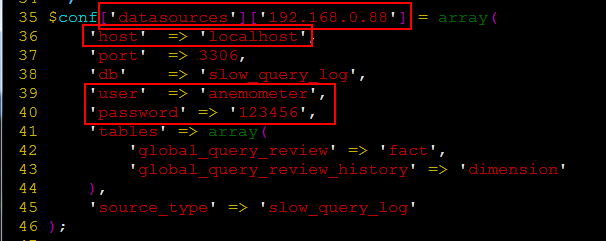
# vim config.inc.php 主要修改的地方如下2个:
|
配置nginx
# vim /usr/local/nginx/conf/vhost/anemometer.conf 内容如下:
|
1
2
3
4
5
6
7
8
|
server {
listen 80;
server_name 192.168.0.88;
access_log
/home/wwwlogs/anemometer
.log access;
index index.php index.html;
root
/data/web3/anemometer
;
include
enable
-php.conf;
}
|
|
1
|
# /etc/init.d/nginx reload 重载nginx配置文件
|
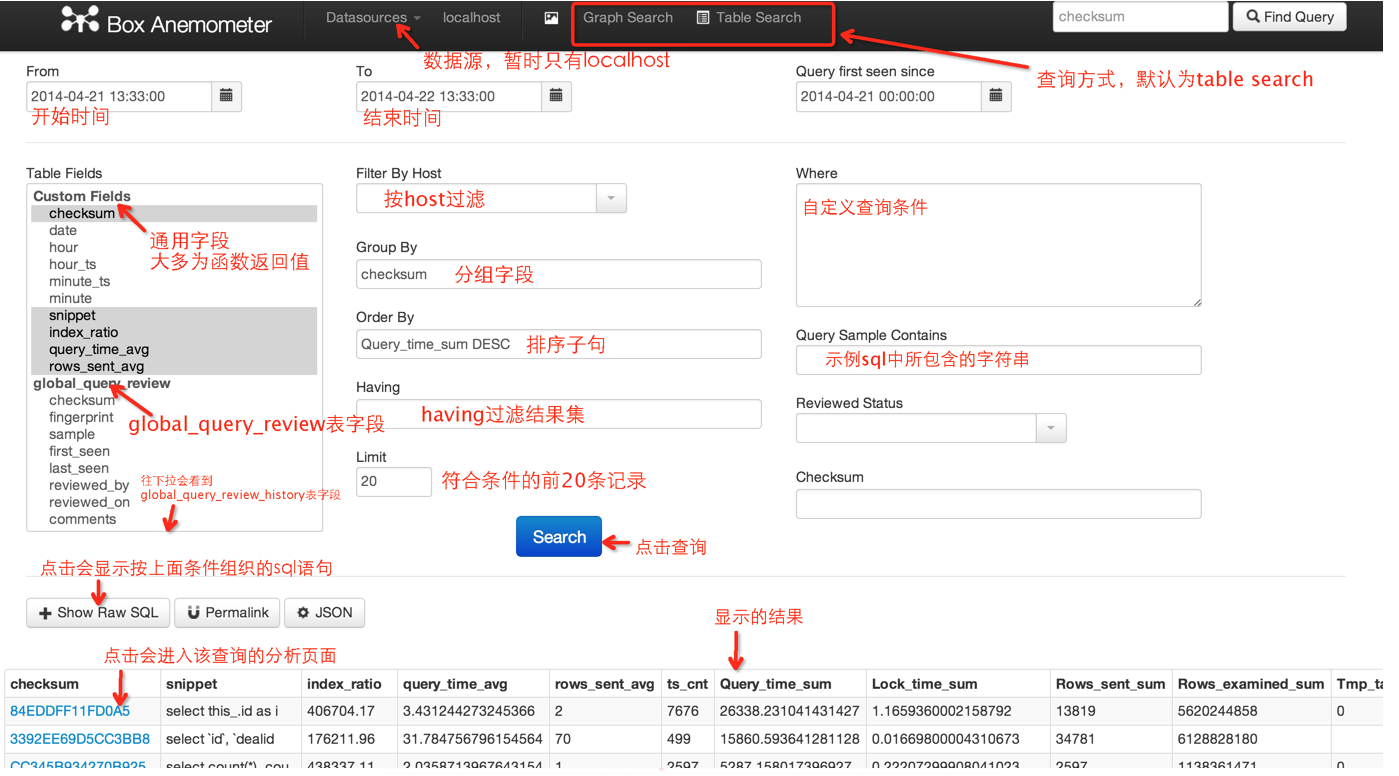
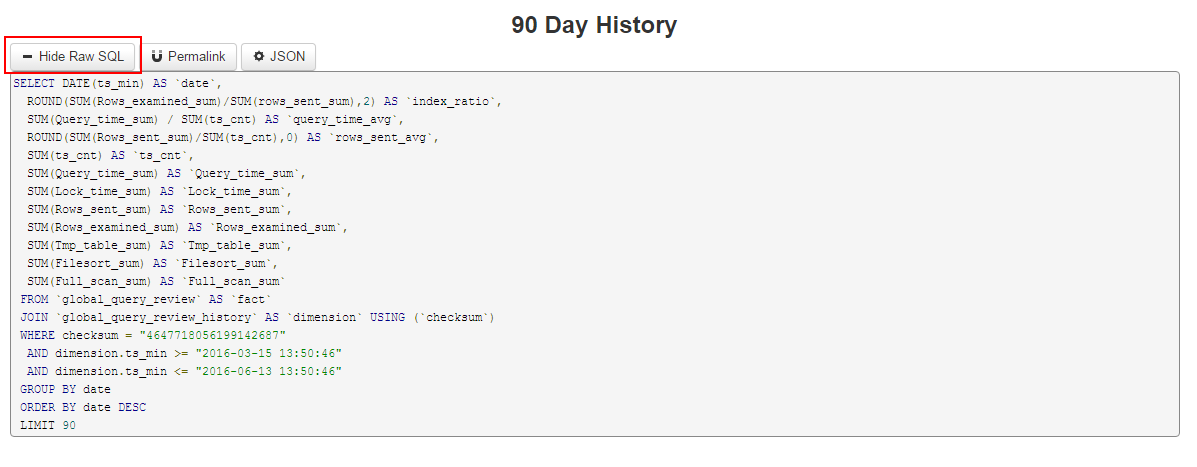
在浏览器访问http://192.168.0.88/ 即可如下图所示(这几张图片是从别人博客摘录的,他这个截图做的特别详细)
5 自动滚动日志
# vi /etc/logrotate.d/mysql
|
1
2
3
4
5
6
|
postrotate
pt-query-digest --user=anemometer --password=123456 \
--review D=slow_query_log,t=global_query_review \
--review-
history
D=slow_query_log,t=global_query_review_history \
--no-report --limit=0% --filter=
" \$event->{Bytes} = length(\$event->{arg}) and\$event->{hostname}=\"$HOSTNAME\""
/usr/local/mariadb/var/localhost-slow
.log
endscript
|
至此,我们的anemometer算是跑通了。
但是生产环境的话,我们不可能就一个节点的啊,下面就是多节点部署的问题了。
多节点mySQL监控慢查询日志
node1:192.168.2.11 MariaDB10.0.17 还部署有nginx的anemometer web前端
node2:192.168.2.12 MariaDB10.0.17
各个节点的my.cnf里面开启慢查询,相关配置如下:
|
1
2
3
4
5
6
|
[mysqld]
innodb_file_per_table = ON
skip_name_resolve = ON
slow_query_log=ON
slow_query_log_file =localhost-slow.log
long_query_time = 2
|
1. 安装anemometer
node1上安装到nginx的网站目录下
|
1
2
3
|
# cd /home/wwwroot/
# git clonehttps://github.com/box/Anemometer.git anemometer
# cd anemometer
|
node2上anemometer的安装目录没什么要求
|
1
2
3
|
# cd /root
# git clone https://github.com/box/Anemometer.gitanemometer
# cd anemometer
|
2. 创建表和用户名
node1上执行:
|
1
2
3
4
|
# mysql -uroot -proot <install.sql
# mysql -uroot -proot -e"grant ALL ON slow_query_log.* to 'anemometer'@'192.168.2.%' IDENTIFIED BY'123456';"
# mysql -uroot -proot -e "grantSELECT ON *.* to 'anemometer'@'192.168.2.%' IDENTIFIED BY '123456';"
# mysql -uroot -proot -e"flush privileges;"
|
node2上执行:
|
1
2
3
4
|
# mysql -uroot -proot <install.sql
# mysql -uroot -proot -e"grant ALL ON slow_query_log.* to 'anemometer'@'192.168.2.%' IDENTIFIED BY'123456';"
# mysql -uroot -proot -e"grant SELECT ON *.* to 'anemometer'@'192.168.2.%' IDENTIFIED BY'123456';"
# mysql -uroot -proot -e"flush privileges;"
|
3. 在两个节点执行pt命令分析慢查询日志,并写入到各自的数据库中
node1上执行:
|
1
2
3
4
|
# pt-query-digest --user=anemometer --password=123456--host=192.168.2.11 \
--review h=192.168.2.11,D=slow_query_log,t=global_query_review\
--
history
h=192.168.2.11,D=slow_query_log,t=global_query_review_history\
--no-report --limit=0% --filter=
" \$event->{Bytes} = length(\$event->{arg}) and \$event->{hostname}=\"$HOSTNAME\""
localhost-slow.log
|
node2上执行:
|
1
2
3
4
|
# pt-query-digest --user=anemometer --password=123456--host=192.168.2.12 \
--review h=192.168.2.12,D=slow_query_log,t=global_query_review \
--
history
h=192.168.2.12,D=slow_query_log,t=global_query_review_history \
--no-report --limit=0% --filter=
" \$event->{Bytes} = length(\$event->{arg}) and\$event->{hostname}=\"$HOSTNAME\""
localhost-slow.log
|
4. 在node1上配置前端
|
1
2
3
|
# cd /home/wwwroot/anemometer/conf
# cp sample.config.inc.php config.inc.php
# vim config.inc.php 主要修改的地方如下2个【conf项,plugins项】:
|
|
1
2
3
4
5
6
7
8
9
10
11
12
13
14
15
16
17
18
19
20
21
22
23
24
25
26
27
28
29
30
31
|
$conf[
'datasources'
][
'192.168.2.11'
] = array(
'host'
=>
'192.168.2.11'
,
'port'
=> 3306,
'db'
=>
'slow_query_log'
,
'user'
=>
'anemometer'
,
'password'
=>
'123456'
,
'tables'
=> array(
'global_query_review'
=>
'fact'
,
'global_query_review_history'
=>
'dimension'
),
'source_type'
=>
'slow_query_log'
);
$conf[
'datasources'
][
'192.168.2.12'
] = array(
'host'
=>
'192.168.2.12'
,
'port'
=> 3306,
'db'
=>
'slow_query_log'
,
'user'
=>
'anemometer'
,
'password'
=>
'123456'
,
'tables'
=> array(
'global_query_review'
=>
'fact'
,
'global_query_review_history'
=>
'dimension'
),
'source_type'
=>
'slow_query_log'
);
$conf[
'plugins'
] = array(
...省略代码...
$conn[
'user'
] =
'anemometer'
;
$conn[
'password'
] =
'123456'
;
...省略代码...
|
|
1
|
# /etc/init.d/nginx restart 重启Nginx
|
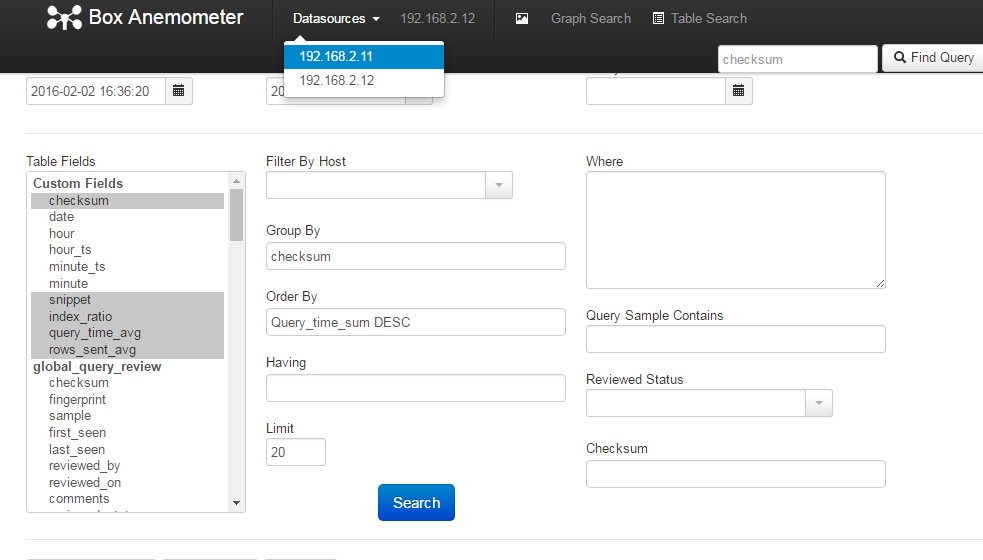
Chrome查看http://192.168.2.11/ 如下图所示
5. 下面是我自己写pt分析慢查询日志的脚本
(anemometer提供的那个个人感觉用不惯,自己照着写了个更简单的)
vim /home/scripts/pt-digest.sh 内容如下:
|
1
2
3
4
5
6
7
8
9
10
11
12
13
14
15
16
17
18
19
20
21
|
#!/bin/bash
# 我这里直接把配置写死了,觉得不太好的话大家可以参考其它文章将数据库的连接配置独立出来
# 慢查询日志存放的目录
SQL_DATADIR=
"/usr/local/mariadb/var"
# 慢查询日志的文件名(basename)
SLOW_LOG_FILE=$( mysql -uroot -proot -e
" show global variables like'slow_query_log_file'"
|
tail
-n1 |
awk
'{ print $2 }'
)
# 获取本机IP地址
IP_ADDR=$(
/sbin/ifconfig
|
grep
'inet addr'
|
egrep
'172.|192.'
|
awk
'{print $2}'
|
awk
-F
":"
'{print $2}'
)
cp
$SQL_DATADIR/$SLOW_LOG_FILE
/tmp/
# 分析日志并存入slow_query_log这个数据库
/usr/local/bin/pt-query-digest
--user=anemometer --password=123456 --host=$IP_ADDR \
--review h=$IP_ADDR,D=slow_query_log,t=global_query_review\
--
history
h=$IP_ADDR,D=slow_query_log,t=global_query_review_history\
--no-report --limit=0% --filter=
"\$event->{Bytes} = length(\$event->{arg}) and\$event->{hostname}=\"$HOSTNAME\""
/tmp/
$SLOW_LOG_FILE
rm
-f
/tmp/
$SLOW_LOG_FILE
|
调试通过以后,在crontab添加如下命令实现定期采集慢查询日志到数据库存储
59 23 * * * /bin/bash /home/scripts/pt-digest.sh> /dev/null
这样每天就能自动分析采集慢查询日志了。
另外,慢查询日志建议按天切分,这样用pt-query-digest进行SQL慢查询日志统计的时候就避免重复分析了。慢查询按天切分的脚本如下:
Tips下面是慢查询日志切分脚本:
下面是一个轮询切割mySQL慢查询和错误日志的脚本(/home/scripts/mysql_log_rotate):
|
1
2
3
4
5
6
7
8
9
10
11
12
13
14
15
16
|
"/usr/local/mariadb/var/localhost-slow.log"
"/usr/local/mariadb/var/localhost_err"
{
create 660 mariadb mariadb
# 这个文件权限和属主属组需要根据自己的情况修改
dateext
notifempty
daily
maxage 60
rotate 30
missingok
olddir
/usr/local/mariadb/var/oldlogs
# 这个目录不存在的话,要自己先新建好,并修改属主为mariadb
postrotate
if
/usr/local/mariadb/bin/mysqladminping
-uroot -proot &>
/dev/null
;
then
/usr/local/mariadb/bin/mysqladminflush-logs
-uroot -proot
fi
endscript
}
|
再配置个CRONTAB:
|
1
|
00 00 * * * (
/usr/sbin/logrotate-f
/home/scripts/mysql_log_rotate
>
/dev/null
2>&1)
|
这样的话,每天慢查询日志、错误日志就自动存储到/usr/local/mariadb/var/oldlogs/这个目录下了。
