一、概述
本文将介绍python3中的pymysql模块对mysql进行增,删,改,查日常数据操作;实验的环境Ubuntu 16.04 mysql5.7.20 python3.5.2 数据库的安装忽略,如果也是ubuntu可直接通过sudo apt-get install mysql-server
pymysql是专门用于操作MySQL 的python模块.python2.x也支持(还有MySQLdb),但在python3中目前只支持pymysql
安装#pip3 install pymysql
测试数据库名test1 表tb1可通过以下sql创建
create table tb1(id int(5) not null auto_increment primary key,name varchar(30) not null,gender varchar(3) default null,age int(3) default 0)engine=innodb default charset="utf8";以下测试是基于这个tb1空表
表结构如下: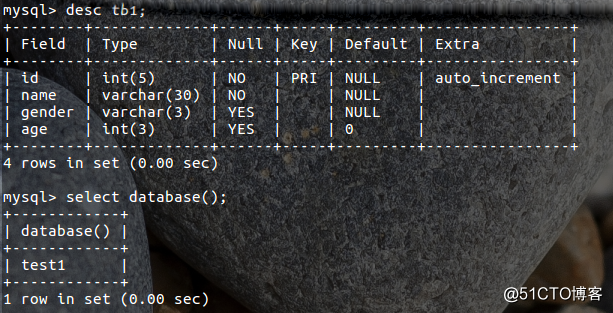
二、操作数据库
1、连接数据库
import pymysql

# 创建连接
conn = pymysql.connect(host='127.0.0.1', port=3306, user='root', passwd='redhat', db='test1',charset='utf8')
# 创建游标
cursor = conn.cursor()   #元组类型返回

##对数据库操作部分####
cursor.execute("")   #对数据库单条操作操作 直接写sql语句放入括号中
cursor.executemany("") #多条操作
#######

#对操作后的提交
conn.commit()

# 关闭游标
cursor.close()
# 关闭连接
conn.close()
以上就是对数据连接操作过程的模板,
参数说明:
host:连接数据库的地址,本例使用本地数据库127.0.0.1,如若连接远程数据库请开放权限并打开防火墙
port:连接数据端口,默认为3306,默认端口可不填写
user:连接的用户
password:连接密码
db:需要操作的数据库
charset:设置数据类型
2、插入数据
a、单条数据插入(写入)
把以下行代码放入上面模板操作部分执行
f = cursor.execute('insert into tb1(name,gender,age) values("san","男",18)')
print(f)     #受影响的行数
运行结果:
/usr/bin/python3.5 /home/san/mysqldb/s1.py
1
Process finished with exit code 0
此时到数据库中登录查询如图: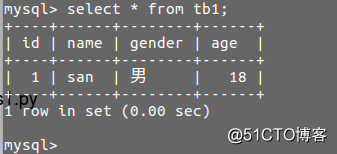
一条数据插入数据成功.
b、多条插入
infos = [
    ("hehe","女",22),
    ("gege","男",19),
    ("mimi","女",20),
]

f = cursor.executemany('insert into tb1(name,gender,age) values(%s,%s,%s)',infos)
print(f)
运行结果:
/usr/bin/python3.5 /home/san/mysqldb/s1.py
3
Process finished with exit code 0
如图: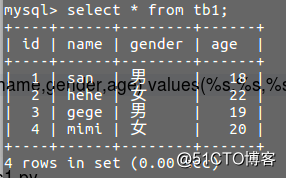
多条插入成功;
3、删除数据
f = cursor.execute("delete from tb1 where id = %s",(4,))   #单独删除,多条删除可以通过where条件来决定
print(f)
运行结果:
/usr/bin/python3.5 /home/san/mysqldb/s1.py
1
Process finished with exit code 0
删除id为了的mini信息成功
如图: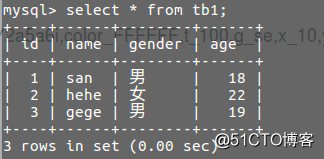
4、修改数据(更新)
f = cursor.execute("update tb1 set age='28' where id=3")
print(f)
运行结果:
/usr/bin/python3.5 /home/san/mysqldb/s1.py
1
Process finished with exit code 0
如图: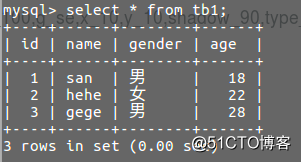
5、查询数据
a、获取一条数据
f = cursor.execute("select * from tb1")
print(f,cursor.fetchonel())
运行结果:
/usr/bin/python3.5 /home/san//mysqldb/s1.py
3
(1, 'san', '男', 18)
Process finished with exit code 0
b、获取所有数据
f = cursor.execute("select * from tb1")
print(f,cursor.fetchall())
运行结果 :
/usr/bin/python3.5 /home/san/mysqldb/s1.py
3
((1, 'san', '男', 18), (2, 'hehe', '女', 22), (3, 'gege', '男', 28))
Process finished with exit code 0
c、获取多条数据
为了更好的效果往tb1中再多插几条数据:
insert into tb1(name,gender,age) values('while','男',26),('red','女',18),('Ling','女',25),('hile','男',22),('ded','女',28),('emma','女',24);mysql> select * from tb1;
+----+-------+--------+------+
| id | name | gender | age |
+----+-------+--------+------+
| 1 | san | 男 | 18 |
| 2 | hehe | 女 | 22 |
| 3 | gege | 男 | 28 |
| 5 | while | 男 | 26 |
| 6 | red | 女 | 18 |
| 7 | Ling | 女 | 25 |
| 8 | hile | 男 | 22 |
| 9 | ded | 女 | 28 |
| 10 | emma | 女 | 24 |
+----+-------+--------+------+
9 rows in set (0.00 sec)
#获取4条数据
f = cursor.execute("select * from tb1")
print(f)
print(cursor.fetchmany(4))
运行结果:
/usr/bin/python3.5 /home/san/mysqldb/s1.py
9
((1, 'san', '男', 18), (2, 'hehe', '女', 22), (3, 'gege', '男', 28), (5, 'while', '男', 26))

Process finished with exit code 0
d、关于查询时的位置(指针)说明
cursor.fetchone() #只拿查询结果中的第一条
cursor.fetchmany(4) #指定从查询结果中取多少条,默认是从第一条开始拿
cursor.fetchall() #取出所有查询结果
问题:当我们fetchall所有结果后或fetchmany指定条结果后如何再获取第一条数据?
例如:
我们在获取了前4条结果后想重新获取第一条数据和全部结果时
f = cursor.execute("select * from tb1")
print(f)
print(cursor.fetchmany(4))
print("#########")
print(cursor.fetchone())
print("#########")
print(cursor.fetchall())
结果如下:
/usr/bin/python3.5 /home/san/mysqldb/s1.py
9
((1, 'san', '男', 18), (2, 'hehe', '女', 22), (3, 'gege', '男', 28), (5, 'while', '男', 26))
#########
(6, 'red', '女', 18)
#########
((7, 'Ling', '女', 25), (8, 'hile', '男', 22), (9, 'ded', '女', 28), (10, 'emma', '女', 24))
Process finished with exit code 0
并非是我们想要的结果,当我们取出前4条再运行fetchone时获取的是第5条数据
再fetchall时是从第5条开始.要想得到我们想要的结果就需要涉及到位置问题或叫指针位置,可以通过以下两个函数来重新获取新的位置;
cursor.scroll(0,mode="absolute") #数字0表示从第一条开始,绝对模式,即把位置指针移动到第一条开始
因此把cursor.scroll(0,mode="absolute") 代码添加到以上print(cursor.fetchmany(4))后面和print(cursor.fetchall())前面;就可以达到我们要的效果;
cursor.scroll(1,mode="relative") #相对模式,即相对于当前位置 ,正数是往后,负数是往前获取
来个实例:
为了便于测试 说明了问题,先往数据中插入id为4的信息,
>insert into tb1(id,name,gender,age) values(4,'min','女',19);
f = cursor.execute("select * from tb1")
print(f)
print("#####获取前4条####")
print(cursor.fetchmany(4))
print("####往后移两条即第7条#####")
cursor.scroll(2,mode="relative")
print(cursor.fetchone())
print("#####往前移动4条即第4条####")
cursor.scroll(-4,mode="relative")
print(cursor.fetchone())
print("####位置移动到第一条开始#####")
cursor.scroll(0,mode="absolute")
print(cursor.fetchall())运行结果: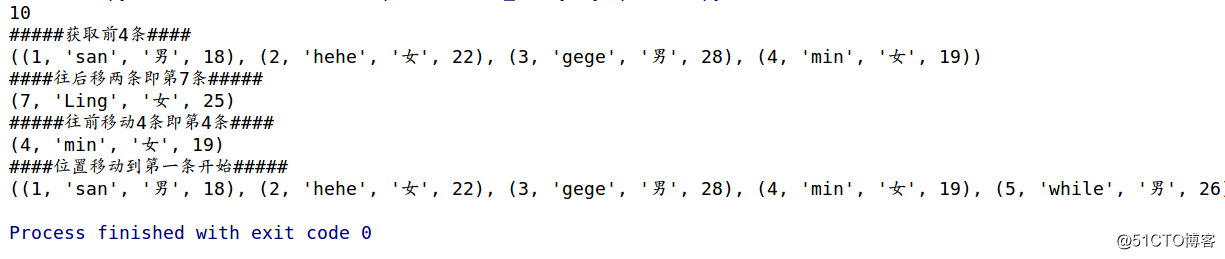
tb1表:
mysql> select * from tb1;
+----+-------+--------+------+
| id | name  | gender | age  |
+----+-------+--------+------+
|  1 | san   | 男     |   18 |
|  2 | hehe  | 女     |   22 |
|  3 | gege  | 男     |   28 |
|  4 | min   | 女     |   19 |
|  5 | while | 男     |   26 |
|  6 | red   | 女     |   18 |
|  7 | Ling  | 女     |   25 |
|  8 | hile  | 男     |   22 |
|  9 | ded   | 女     |   28 |
| 10 | emma  | 女     |   24 |
+----+-------+--------+------+
10 rows in set (0.00 sec)
以上是对数据库的基本操作,注意点:
向数据库中写入,删除,修改后需要注意的是必须要conn.commit()提交
查询时尽量避免select * ,数据量大会导致很慢;甚至会死机;
三、安全相关其他
1、简单sql注入
以上的操作没有和用户名交互,比如说插入数据时用的都是硬编码写在程序中
如果我们需要用户输入时就涉及到sql连接问题,先来一个示例:
把tb1增加一列password并修改密码为1234
mysql> alter table tb1 add column password varchar(30) after name;
mysql> update tb1 set password="1234";
Query OK, 10 rows affected (0.03 sec)
Rows matched: 10  Changed: 10  Warnings: 0

mysql> select * from tb1;
+----+-------+----------+--------+------+
| id | name  | password | gender | age  |
+----+-------+----------+--------+------+
|  1 | san   | 1234     | 男     |   18 |
|  2 | hehe  | 1234     | 女     |   22 |
|  3 | gege  | 1234     | 男     |   28 |
|  4 | min   | 1234     | 女     |   19 |
|  5 | while | 1234     | 男     |   26 |
|  6 | red   | 1234     | 女     |   18 |
|  7 | Ling  | 1234     | 女     |   25 |
|  8 | hile  | 1234     | 男     |   22 |
|  9 | ded   | 1234     | 女     |   28 |
| 10 | emma  | 1234     | 女     |   24 |
+----+-------+----------+--------+------+
10 rows in set (0.00 sec)
模拟验证用户名和密码:
sql = 'select name,password from tb1 where name="%s" and password="%s"'
sql = sql %('min',1234)  #正常获取结果
cursor.execute(sql)
result=cursor.fetchone()
print(result)
if result:
    print("login ok")
else:
    print("login fatal!")
运行结果:
/usr/bin/python3.5 /home/san/mysqldb/s1.py
('min', '1234')
1
login ok
Process finished with exit code 0
但我们把密码修改非正确的密码1234时
运行是
None
0
login fatal!
我们把代码 换成以下:
sql = 'select name,password from tb1 where name="%s" and password="%s"'
sql = sql %('min" -- ', 1236)
cursor.execute(sql)
result=cursor.fetchone()
print(result)

if result:
    print("login ok")
else:
    print("login fatal!")
运行结果:
/usr/bin/python3.5 /home/san/mysqldb/s1.py
('min', '1234')
login ok
Process finished with exit code 0
错误的密码竟然也能登录成功,why?先不说why 我们再用错误的用户名和密码试试!
sql = 'select name,password from tb1 where name="%s" and password="%s"'
sql = sql %('lsb" or 1=1 -- ', 1236)

cursor.execute(sql)
result=cursor.fetchone()
print(result)
if result:
    print("login ok")
else:
    print("login fatal!")
结果:
/usr/bin/python3.5 /home/san/mysqldb/s1.py
('san', '1234')
login ok
Process finished with exit code 0
错误填写用户名和密码也能获取第一条正确的数据?why,必须知道why
这其实是一个简单的注入原因在于sql语句不规范,用了字符串拼接,sql中的--是注释
sql = sql %('min" -- ', 1236) 被替换成
sql = 'select name,password from tb1 where name='min -- " and password="1236"'
从--之后都被注释了,变成 了
select name,password from tb1 where name='min';
而用错误 的用户名 ql = sql %('lsb" or 1=1 -- ', 1236)时被替换成
sql = 'select name,password from tb1 where name='lsb or 1=1 -- " and password="1236"'
成为select name,password from tb1;
解决 方案:
规范操作sql语句
cursor.execute('select name,password fromt b1 where name=%s and password=%s',('min',1234))
result= cursor.fetchone()
print(result)
这里再输入错误字符时转换成
info=('min" -- ',1234)
cursor.execute('select name,password from tb1 where name=%s and password=%s',info)
result=cursor.fetchone()
print(result)
if result:
    print("login ok")
else:
    print("login fatal!")
执行结果没有问题:
/usr/bin/python3.5 /home/san/mysqldb/s1.py
None
login fatal!
Process finished with exit code 0
而正确的用户名和密码就会登录成功没有问题!
2、修改游标类型
默认的获取数据的类型是元组,只能通过索引去获取,要是有一种方案能直接通过键获取值不是很好?
pymysql提供了方案,修改游标返回类型
修改获取为字典类型
cursor = conn.cursor(pymysql.cursors.DictCursor)  #字典类型
f = cursor.execute("select * from tb1")
print(f)
print(cursor.fetchall())
运行结果:
/usr/bin/python3.5 /home/san/mysqldb/s1.py
10
[{'id': 1, 'gender': '男', 'name': 'san', 'password': '1234', 'age': 18}, {'id': 2, 'gender': '女', 'name': 'hehe', 'password': '1234', 'age': 22}, {'id': 3, 'gender': '男', 'name': 'gege', 'password': '1234', 'age': 28}, {'id': 4, 'gender': '女', 'name': 'min', 'password': '1234', 'age': 19}, {'id': 5, 'gender': '男', 'name': 'while', 'password': '1234', 'age': 26}, {'id': 6, 'gender': '女', 'name': 'red', 'password': '1234', 'age': 18}, {'id': 7, 'gender': '女', 'name': 'Ling', 'password': '1234', 'age': 25}, {'id': 8, 'gender': '男', 'name': 'hile', 'password': '1234', 'age': 22}, {'id': 9, 'gender': '女', 'name': 'ded', 'password': '1234', 'age': 28}, {'id': 10, 'gender': '女', 'name': 'emma', 'password': '1234', 'age': 24}]

Process finished with exit code 0
以上就是python3通过pymysql模块操作mysql的基础操作和需要注意力的事项,以防注入;如有不当之处 欢迎指正 !