在linux下使用轻量级目录访问协议(LDAP)构建集中的身份验证系统可以减少管理成本,增强安全性,避免数据复制的问题。本实验是演示如何配置服务器和客户机OPENldap服务的。
实验环境:VMWare虚拟机下Red Hat Linux 企业版5.4 两台
准备工作:两台虚拟机分别为服务器和客户机。在服务器端安装openldap-servers软件包,在客户端安装openldap-clients软件包。
在该文档中,为了节约时间,所有试验步骤均摘自实验代码。还请各位朋友见谅!
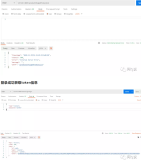
1、 切换到/usr/share/openldap/migration/目录下,来编辑migrate_common.ph文件,
修改71、72行如下内容:
[root@ldap ~]# cd /usr/share/openldap/migration/
[root@ldap migration]# vim migrate_common.ph
70 # Default DNS domain
71 $DEFAULT_MAIL_DOMAIN = "example.com";
72
73 # Default base
74 $DEFAULT_BASE = "dc=example,dc=com";
2、在服务器端添加linuxtro1和linuxtro2两个用户,并添加密码为redhat
[root@ldap ~]# useradd linuxtro1 && echo redhat | passwd --stdin linuxtro1
Changing password for user linuxtro1.
passwd: all authentication tokens updated successfully.
[root@ldap ~]# useradd linuxtro2 && echo redhat | passwd --stdin linuxtro2
Changing password for user linuxtro2.
passwd: all authentication tokens updated successfully.
3、在/root/下创建ldap目录,用于存放条目文件。
[root@ldap ~]# mkdir /root/ldap
[root@ldap ~]# cd /usr/share/openldap/migration/
4、迁移base.ldif 、passwd.ldif和group.ldif文件,这个步骤有顺序,必须先迁移bash.ldif文件
[root@ldap migration]# ./migrate_base.pl > /root/ldap/base.ldif
[root@ldap migration]# tail -2 /etc/passwd > /tmp/passwd
[root@ldap migration]# tail -2 /etc/group > /tmp/group
[root@ldap migration]# ./migrate_passwd.pl /tmp/passwd /root/ldap/passwd.ldif
[root@ldap migration]# ./migrate_group.pl /tmp/group /root/ldap/group.ldif
[root@ldap migration]# cd /root/ldap/
[root@ldap ldap]# ll
total 24
-rw-r--r-- 1 root root 1200 Mar 31 18:57 base.ldif
-rw-r--r-- 1 root root 270 Mar 31 18:59 group.ldif
-rw-r--r-- 1 root root 722 Mar 31 18:59 passwd.ldif
5、分别将base.ldif、passwd.ldif和group.ldif文件导入到ldap中去。
[root@ldap ldap]# ldapadd -D "cn=Manager,dc=example,dc=com" -W -x -f base.ldif
Enter LDAP Password:
adding new entry "dc=example,dc=com"
adding new entry "ou=Hosts,dc=example,dc=com"
adding new entry "ou=Rpc,dc=example,dc=com"
adding new entry "ou=Services,dc=example,dc=com"
adding new entry "nisMapName=netgroup.byuser,dc=example,dc=com"
adding new entry "ou=Mounts,dc=example,dc=com"
adding new entry "ou=Networks,dc=example,dc=com"
adding new entry "ou=People,dc=example,dc=com"
adding new entry "ou=Group,dc=example,dc=com"
adding new entry "ou=Netgroup,dc=example,dc=com"
adding new entry "ou=Protocols,dc=example,dc=com"
adding new entry "ou=Aliases,dc=example,dc=com"
adding new entry "nisMapName=netgroup.byhost,dc=example,dc=com"
[root@ldap ldap]# ldapadd -D "cn=Manager,dc=example,dc=com" -W -x -f group.ldif
Enter LDAP Password:
adding new entry "cn=linuxtro1,ou=Group,dc=example,dc=com"
adding new entry "cn=linuxtro2,ou=Group,dc=example,dc=com"
[root@ldap ldap]# ldapadd -D "cn=Manager,dc=example,dc=com" -W -x -f passwd.ldif
Enter LDAP Password:
adding new entry "uid=linuxtro1,ou=People,dc=example,dc=com"
adding new entry "uid=linuxtro2,ou=People,dc=example,dc=com"
6、切换到客户端来登录一下,首先要配置一下客户端启用LDAP。
在命令行下输入setup,会弹出图形界面,选择第一个选项。

选择“Use LDAP”和“Use LDAP Authentication”认证方式,点击“Next”,进入下一步。

在Server一栏中填入LDAP服务器的IP地址,ldap://192.168.0.43
Base DN一栏中填入dc=example,dc=com

7、实验结果显示,可以登陆成功,但是令人遗憾的是登录后没有家目录,那么该如何来解决这个问题呢?


可以尝试查询一下linuxtro1的信息,可以正常显示。

8、回到服务器接着做如下的配置:
编辑nismap.ldif文件,添加如下内容,完成后保存退出。
[root@ldap ~]# vim nismap.ldif
dn: nisMapName=auto.master,dc=example,dc=com
objectClass: top
objectClass: nisMap
nisMapName: auto.master
dn: cn=/home,nisMapName=auto.master,dc=example,dc=com
objectClass: top
objectClass: nisObject
cn: /home
nisMapName: auto.master
nisMapEntry: ldap://192.168.0.43:nisMapName=auto.home,dc=example,dc=com
dn: nisMapName=auto.home,dc=example,dc=com
objectClass: top
objectClass: nisMap
nisMapName: auto.home
dn: cn=linuxtro1,nisMapName=auto.home,dc=example,dc=com
objectClass: top
objectClass: nisObject
cn: linuxtro1
nisMapName: auto.home
nisMapEntry: -rw,soft,intr 192.168.0.43:/home/linuxro1
dn: cn=linuxtro2,nisMapName=auto.home,dc=example,dc=com
objectClass: top
objectClass: nisObject
cn: linuxtro2
nisMapName: auto.home
nisMapEntry: -rw,soft,intr 192.168.0.43:/home/linuxtro2
9、将条目文件添加到LDAP中去。
[root@ldap ~]# ldapadd -D "cn=Manager,dc=example,dc=com" -W -x -f nismap.ldif
Enter LDAP Password:
adding new entry "nisMapName=auto.master,dc=example,dc=com"
adding new entry "cn=/home,nisMapName=auto.master,dc=example,dc=com"
adding new entry "nisMapName=auto.home,dc=example,dc=com"
adding new entry "cn=linuxtro1,nisMapName=auto.home,dc=example,dc=com"
adding new entry "cn=linuxtro2,nisMapName=auto.home,dc=example,dc=com"
10、编辑/etc/exports文件,添加如下两行,并保存退出。
[root@ldap ~]# vim /etc/exports
/home/linuxtro1 192.168.0.43/24(rw,sync)
/home/linuxtro2 192.168.0.43/24(rw,sync)
11、启动nfs服务。
[root@ldap ~]# service nfs start
Starting NFS services: [ OK ]
Starting NFS quotas: [ OK ]
Starting NFS daemon: [ OK ]
Starting NFS mountd: [ OK ]
[root@ldap ~]# chkconfig nfs on
[root@ldap ~]#
12、切换到LDAP客户端,编辑/etc/auto.master文件,添加如下一行内容。
[root@linuxtro ~]# vim /etc/auto.master
/home ldap:192.168.0.43:nisMapName=auto.home,dc=example,dc=com
重启autofs 服务。
[root@linuxtro ~]# service autofs restart
Stopping automount: [ OK ]
Starting automount: [ OK ]
13、再次切换到客户端上重新登录LDAP服务器。查看登录时是否有家目录。

好了,在客户端可也看到家目录了,来庆祝一下吧!!到此为止,基于LinuxOPENldap实验之账户管理就配置完成了。
本文转自 linuxtro 51CTO博客,原文链接:http://blog.51cto.com/linuxtro/290502,如需转载请自行联系原作者