集合Haproxy,Keepalived双主双机高可用模型,不论是Haproxy还是Keepalived甚至是上游服务器均提高生产力并增强可用性,也就是如下架构中Haproxy,Keepalived,Httpd服务器任意宕机一台服务还是可以正常运行的
规划:
|
1
2
3
|
172.16.43.1 , 172.16.43.2 两台keepalived节点 (为haproxy做高可用)
172.16.43.1(172.16.43.2) 两台haproxy (为上游服务器做反带)
172.16.43.3 , 172.16.43.4 两台web后端服务器
|
|
1
2
3
4
5
6
7
8
9
10
11
12
13
14
15
16
17
18
19
20
21
22
23
24
25
26
27
28
29
30
31
32
33
34
35
36
37
38
39
40
41
42
43
44
45
46
47
48
49
50
51
52
53
54
55
56
57
58
59
60
61
62
|
# 安装keepalived, 两台均要做 (172.16.43.1,2)
yum -y
install
keepalived
#
# keepalived配置 (172.16.43.1)
# vim /etc/keepalived/keepalived.conf
#
global_defs {
notification_email {
root@localhost
# 本地邮件地址
}
notification_email_from keepadmin@localhost
smtp_connect_timeout 3
smtp_server 127.0.0.1
router_id LVS_DEVEL_KING
}
#
vrrp_script chk_haproxy {
script
"/etc/keepalived/chk_haproxy.sh"
# 检查脚本
interval 2
weight 2
}
#
vrrp_instance VI_1 {
interface eth0
state MASTER
# 172.16.43.1 这是主,那么 172.16.43.2 就是备
priority 100
# 主 比 备 优先级高
virtual_router_id 173
# vrid是行为vmac的根本
garp_master_delay 1
#
authentication {
auth_type PASS
auth_pass 1111
}
track_interface {
eth0
}
virtual_ipaddress {
172.16.43.88
/16
dev eth0
}
track_script {
chk_haproxy
# 脚本跟踪监测
}
}
#
vrrp_instance VI_2 {
interface eth0
state BACKUP
# master for slave routers
priority 99
# 99 for master
virtual_router_id 174
garp_master_delay 1
#
authentication {
auth_type PASS
auth_pass 11111
}
track_interface {
eth0
}
virtual_ipaddress {
172.16.43.188
/16
dev eth0
}
}
|
|
1
2
3
4
5
6
7
8
9
10
11
12
13
14
15
16
17
18
19
20
21
22
23
24
25
26
27
28
29
30
31
32
33
34
35
36
37
38
39
40
41
42
43
44
45
46
47
48
49
50
51
52
53
54
55
56
57
58
59
|
# 172.16.43.2 keepalived配置
# vim /etc/keepalived/keepalived.conf
#
global_defs {
notification_email {
root@localhost
}
notification_email_from keepadmin@localhost
smtp_connect_timeout 3
smtp_server 127.0.0.1
router_id LVS_DEVEL_KING
}
#
vrrp_script chk_haproxy {
script
"/etc/keepalived/chk_haproxy.sh"
interval 2
weight 2
}
#
vrrp_instance VI_1 {
interface eth0
state BACKUP
# BACKUP for slave routers
priority 99
# 99 for BACKUP
virtual_router_id 173
garp_master_delay 1
#
authentication {
auth_type PASS
auth_pass 1111
}
track_interface {
eth0
}
virtual_ipaddress {
172.16.43.88
/16
dev eth0
}
track_script {
chk_haproxy
}
}
#
vrrp_instance VI_2 {
interface eth0
state MASTER
# master for slave routers
priority 10000
# 99 for master
virtual_router_id 174
garp_master_delay 1
#
authentication {
auth_type PASS
auth_pass 11111
}
track_interface {
eth0
}
virtual_ipaddress {
172.16.43.188
/16
dev eth0
}
}
|
|
1
2
3
4
5
6
7
8
9
10
11
12
13
|
# 刚才两个节点 均要有 的监测脚本文件 , 防止 haproxy 停止而 keepalived 不切换的情况
# vim /etc/keepalived/chk_haproxy.sh
#
#
#!/bin/bash
#
if
! `pidof haproxy &>
/dev/null
`;
then
/etc/rc
.d
/init
.d
/haproxy
start
fi
sleep
2
if
! `pidof haproxy &>
/dev/null
`;
then
/etc/rc
.d
/init
.d
/keepalived
stop
fi
|
### 启动服务 #### service keepalived start
keepalived双主模型启动
ii) 两台haproxy
|
1
2
3
4
5
6
7
8
9
10
11
12
13
14
15
16
17
18
19
20
21
22
23
24
25
26
27
28
29
30
31
32
33
34
35
36
37
38
39
40
41
42
43
44
45
46
47
48
49
50
51
52
53
54
55
56
57
58
59
60
61
62
63
64
|
# 安装haproxy,两台均要 (172.16.43.1 , 2)
yum -y
install
haproxy
#
# 为haproxy分别提供配置文件 , 两台均一样 , 不需要更改
global
log 127.0.0.1 local2
chroot
/var/lib/haproxy
pidfile
/var/run/haproxy
.pid
maxconn 4000
user haproxy
group haproxy
daemon
#
defaults
mode http
# http tcp health 模型, 这里监控 web 站点所以使用 http
log global
option httplog
option dontlognull
option redispatch
# 调度到健康的服务器
option http-server-close
# 不接受长连接
option forwardfor except 127.0.0.0
/8
# 在响应头中加入forwardfor标记
retries 3
timeout http-request 10s
# 超时时间设置
timeout queue 1m
timeout connect 10s
timeout client 1m
timeout server 1m
timeout http-keep-alive 10s
timeout check 10s
maxconn 30000
#
listen stats
mode http
bind 0.0.0.0:8080
# status 页面在8080提供服务
stats
enable
# status 允许操作
stats hide-version
# status 隐藏haproxy版本信息
stats uri
/haproxyadmin
?stats
# status 访问路径
stats realm Haproxy\ Statistics
# status 登陆验证信息
stats auth admin:admin
# status 页面登陆用户名或密码
stats admin
if
TRUE
#
frontend http-
in
bind *:80
mode http
log global
option httpclose
option logasap
option dontlognull
capture request header Host len 20
capture request header Referer len 60
acl url_static path_beg -i
/static
/images
/javascript
/stylesheets
acl url_static path_end -i .html .jpg .jpeg .gif .png .css .js
#
use_backend static_servers
if
url_static
default_backend dynamic_servers
#
backend static_servers
balance roundrobin
server imgsrv1 172.16.43.3:80 check maxconn 6000
#
backend dynamic_servers
balance
source
server websrv1 172.16.43.3:80 check maxconn 1000
server websrv2 172.16.43.4:80 check maxconn 1000
|
### 启动服务 #### service haproxy start
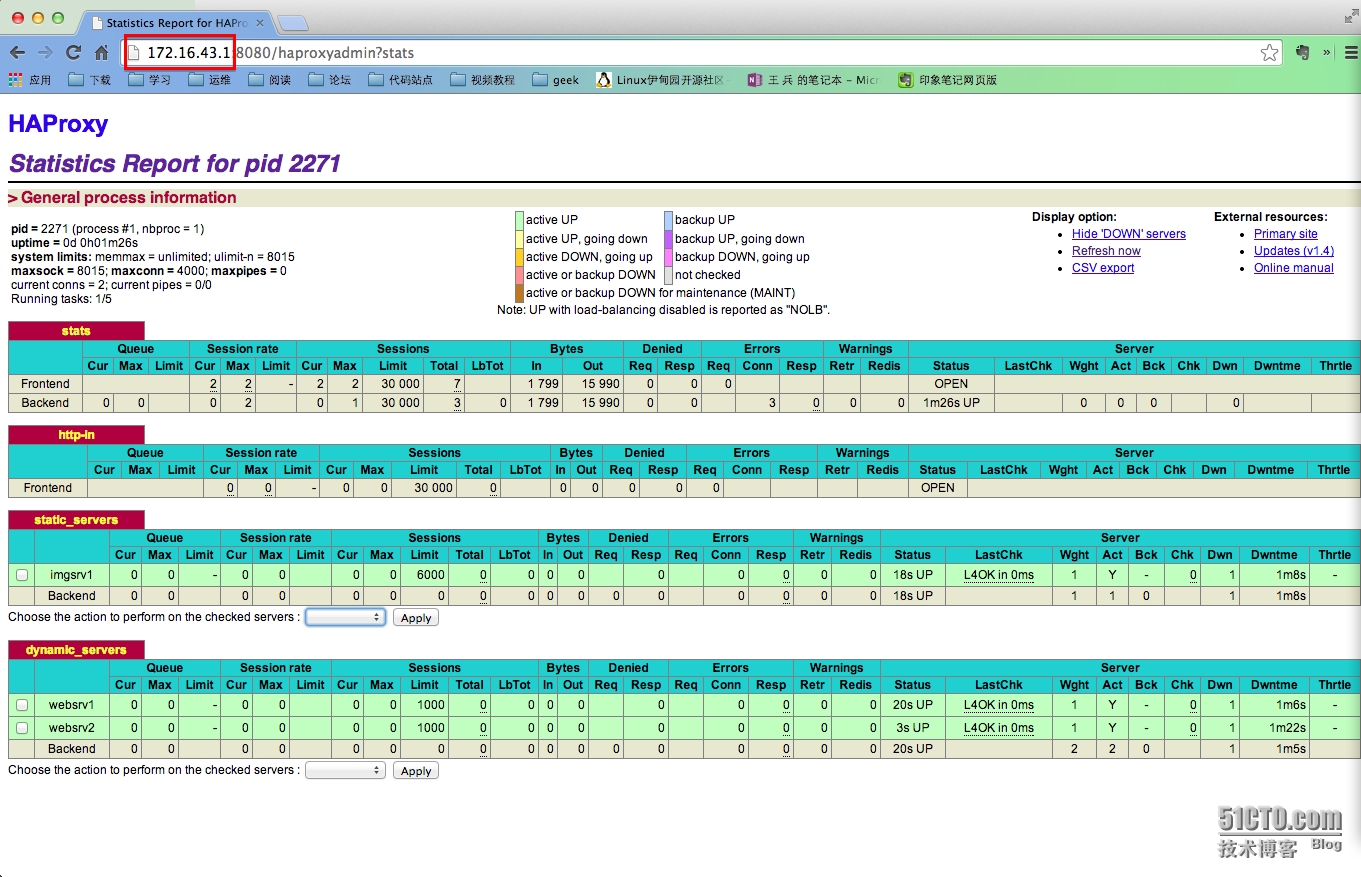
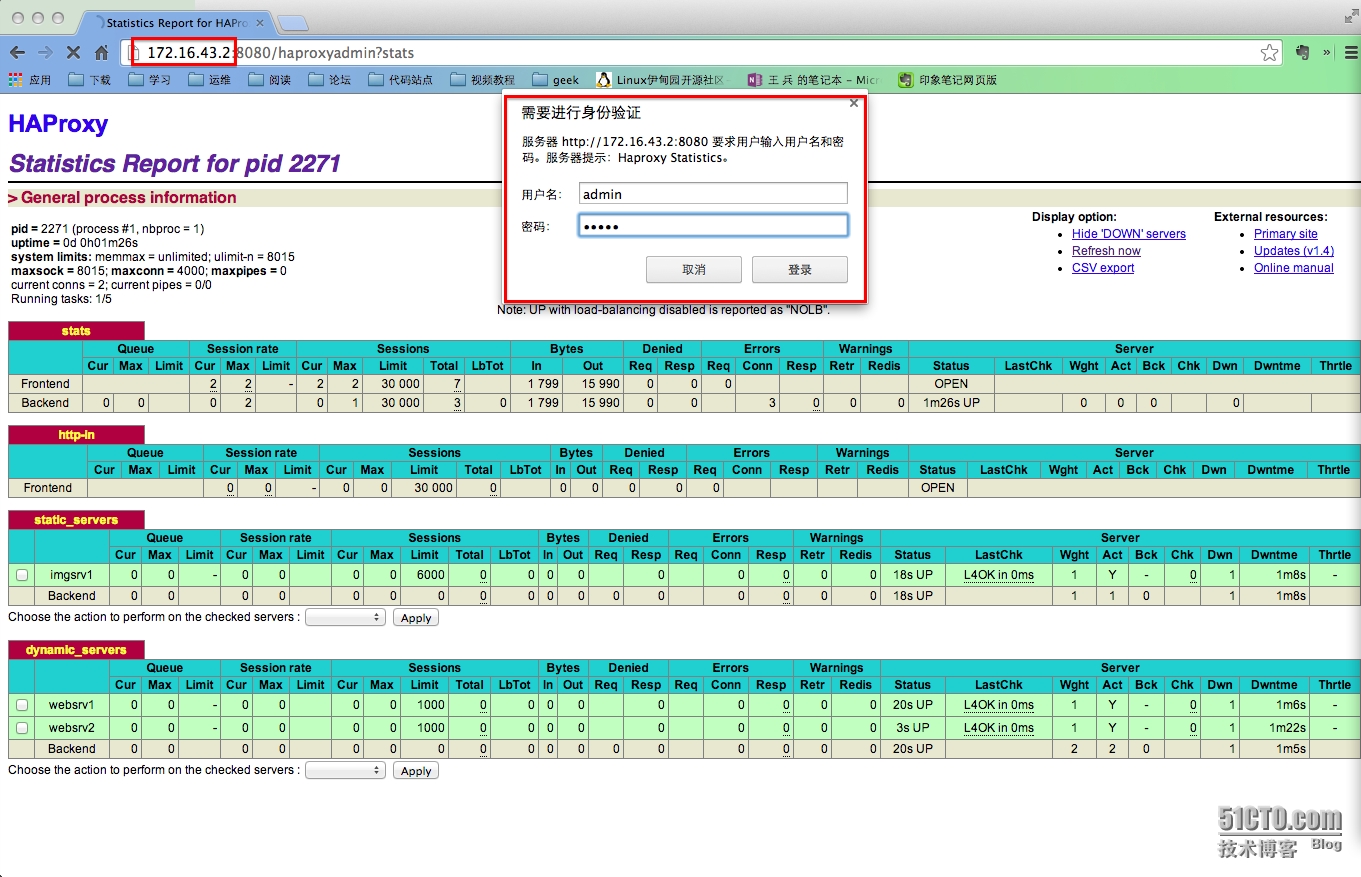
输出状态页面
iii) 两台web后端服务器
|
1
2
3
|
# 安装 httpd , php
yum -y
install
httpd php
|
### 启动服务 #### service httpd start
iv) 测试
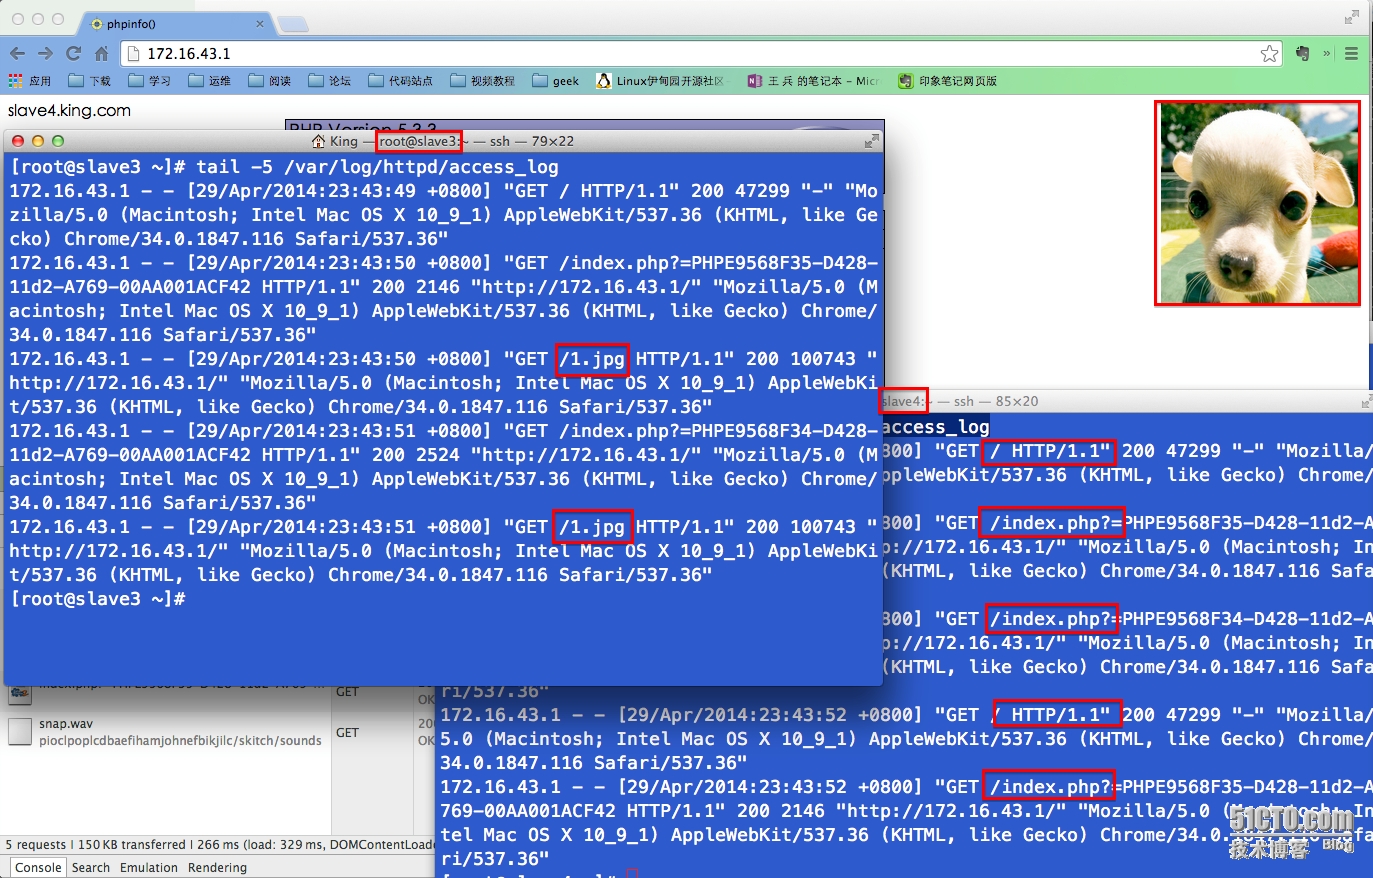
动静分离
高可用性
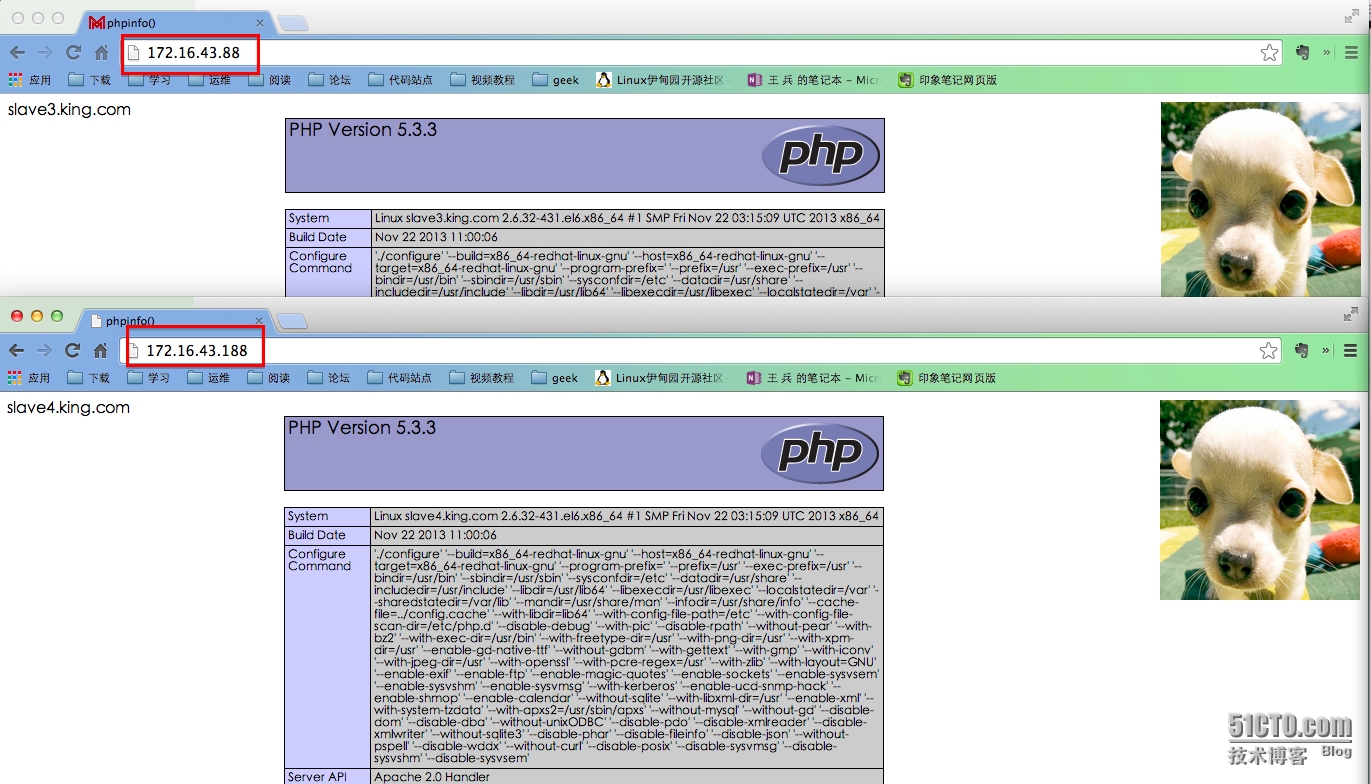
关闭了上游一台web服务器,可以见到服务请求没有任何问题, 172.16.43.88 , 188 没有问题
本文转自My_King1 51CTO博客,原文链接:http://blog.51cto.com/apprentice/1404853,如需转载请自行联系原作者
