一、基本组件
Xen包含三大部分:
Hypervisor:直接运行于硬件之上,是Xen客户操作系统与硬件资源之间的访问接口。通过将客户操作系统与硬件进行分类,Xen管理系统可以允许客户操作系统安全,独立的运行在相同硬件环境之上。
Domain 0:运行在Xen管理程序之上,具有直接访问硬件和管理其他客户操作系统的特权的客户操作系统。
DomainU:运行在Xen管理程序之上的普通客户操作系统或业务操作系统,不能直接访问硬件资源(如:内存,硬盘等),但可以独立并行的存在多个。
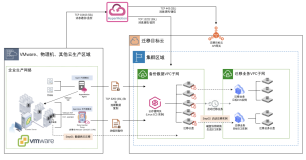
二、拓扑图


三、安装xen
1、200部署xen
|
1
2
3
4
5
6
7
8
9
10
11
12
13
14
15
16
17
18
19
20
21
22
23
24
25
|
[root@xenserver1 ~]# yum install centos-release-xen
[root@xenserver1 ~]# yum install xen
[root@xenserver1 ~] vim /etc/grub.conf
# grub.conf generated by anaconda
#
# Note that you
do
not have to rerun grub after making changes to
this
file
# NOTICE: You have a /boot partition. This means that
# all kernel and initrd paths are relative to /boot/, eg.
# root (hd0,
0
)
# kernel /vmlinuz-version ro root=/dev/sda3
# initrd /initrd-[generic-]version.img
#boot=/dev/sda
default
=
0
timeout=
5
splashimage=(hd0,
0
)/grub/splash.xpm.gz
hiddenmenu
title CentOS (
3.18
.
17
-
13
.el6.x86_64)
root (hd0,
0
)
kernel /xen.gz dom0_mem=1024M,max:1024M loglvl=all guest_loglvl=all
module /vmlinuz-
3.18
.
17
-
13
.el6.x86_64 ro root=UUID=9820b40c-2de5-
4962
-
9407
-6b99def9f5ed rd_NO_LUKS KEYBOARDTYPE=pc KEYTABLE=us rd_NO_MD crashkernel=auto LANG=zh_CN.UTF-
8
rd_NO_LVM rd_NO_DM rhgb quiet
module /initramfs-
3.18
.
17
-
13
.el6.x86_64.img
title CentOS (
2.6
.
32
-
431
.el6.x86_64)
root (hd0,
0
)
kernel /vmlinuz-
2.6
.
32
-
431
.el6.x86_64 ro root=UUID=9820b40c-2de5-
4962
-
9407
-6b99def9f5ed rd_NO_LUKS KEYBOARDTYPE=pc KEYTABLE=us rd_NO_MD crashkernel=auto LANG=zh_CN.UTF-
8
rd_NO_LVM rd_NO_DM rhgb quiet
initrd /initramfs-
2.6
.
32
-
431
.el6.x86_64.img
|
重启系统,查看内核
[root@xenserver1 ~]# uname -r
3.18.17-13.el6.x86_64
2、创建桥设备
|
1
2
3
4
5
6
7
8
9
10
11
12
13
14
15
16
17
18
19
20
21
22
23
|
[root@xenserver1 ~]# vim /etc/sysconfig/network-scripts/ifcfg-eth0
DEVICE=eth0
TYPE=Ethernet
BRIDGE=br0
ONBOOT=yes
NM_CONTROLLED=no
BOOTPROTO=none
IPV6INIT=no
USERCTL=no
~
[root@xenserver1 ~]# vim /etc/sysconfig/network-scripts/ifcfg-br0
DEVICE=br0
TYPE=Bridge
ONBOOT=yes
NM_CONTROLLED=no
BOOTPROTO=none
IPADDR=
10.1
.
2.200
NETMASK=
255.255
.
225.0
GATEWAY=
10.1
.
2.254
DNS1=
114.114
.
114.114
IPV6INIT=no
USERCTL=no
~
|
四、配置iscsi 190服务器
1、
scsi-target-utils:用来将 Linux 系统仿真成为 iSCSI target 的功能;
iscsi-initiator-utils:挂载来自 target 的磁盘到 Linux 本机上。
iscsi-target-utils 主要提供哪些档案呢?基本上有底下几个比较重要需要注意的:
/etc/tgt/targets.conf:主要配置文件,设定要分享的磁盘格式与哪几颗;
/usr/sbin/tgt-admin:在线查询、删除 target 等功能的设定工具;
/usr/sbin/tgt-setup-lun:建立 target 以及设定分享的磁盘与可使用的客户端等工具软件。
/usr/sbin/tgtadm:手动直接管理的管理员工具 (可使用配置文件取代);
/usr/sbin/tgtd:主要提供 iSCSI target 服务的主程序;
/usr/sbin/tgtimg:建置预计分享的映像文件装置的工具 (以映像文件仿真磁盘);
|
1
|
[root@hadoop3 xen]# yum install iscsi-initiator-utils
|
2、设定 tgt 的配置文件 /etc/tgt/targets.conf
backing-store (虚拟的装置), direct-store (实际的装置): 设定装置时,如果你的整颗磁盘是全部被拿来当 iSCSI 分享之用,那么才能够使用 direct-store 。不过,根据网络上的其他文件, 似乎说明这个设定值有点危险的样子。所以,基本上还是建议单纯使用模拟的 backing-store 较佳。
initiator-address (用户端地址): 如果你想要限制能够使用这个 target 的客户端来源,才需要填写这个设定值。基本上,不用设定它 (代表所有人都能使用的意思), 因为我们后来会使用 iptables 来规范可以联机的客户端嘛!
incominguser (用户账号密码设定): 如果除了来源 IP 的限制之外,你还想要让使用者输入账密才能使用你的 iSCSI target 的话,那么就加用这个设定项目。 此设定后面接两个参数,分别是账号与密码啰。
write-cache [off|on] (是否使用快取): 在预设的情况下,tgtd 会使用快取来增快速度。不过,这样可能会有遗失数据的风险。所以,如果你的数据比较重要的话, 或许不要使用快取,直接存取装置会比较妥当一些。
|
1
2
3
4
5
6
7
8
9
10
11
12
13
14
15
16
17
18
19
20
21
22
23
24
25
26
27
28
29
30
31
32
33
34
35
36
37
38
|
[root@hadoop3 xen]# vim /etc/tgt/targets.conf
<target iqn.
2015
-
10
.com.qingyun:qingyundisk>
backing-store /dev/sdb1
</target>
[root@hadoop3 xen]# tgt-admin --show
Target
1
: iqn.
2015
-
10
.com.qingyun:qingyundisk
System information:
Driver: iscsi
State: ready
I_T nexus information:
LUN information:
LUN:
0
Type: controller
SCSI ID: IET
00010000
SCSI SN: beaf10
Size:
0
MB, Block size:
1
Online: Yes
Removable media: No
Prevent removal: No
Readonly: No
Backing store type:
null
Backing store path: None
Backing store flags:
LUN:
1
Type: disk
SCSI ID: IET
00010001
SCSI SN: beaf11
Size:
345
MB, Block size:
512
Online: Yes
Removable media: No
Prevent removal: No
Readonly: No
Backing store type: rdwr
Backing store path: /dev/sdb1
Backing store flags:
Account information:
ACL information:
ALL
|
3、190客户端设置
要设定 iSCSI initiator 必须要安装 iscsi-initiator-utils 才行
/etc/iscsi/iscsid.conf:主要的配置文件,用来连结到 iSCSI target 的设定;
/sbin/iscsid:启动 iSCSI initiator 的主要服务程序;
/sbin/iscsiadm:用来管理 iSCSI initiator 的主要设定程序;
/etc/init.d/iscsid:让本机模拟成为 iSCSI initiater 的主要服务;
/etc/init.d/iscsi:在本机成为 iSCSI initiator 之后,启动此脚本,让我们可以登入 iSCSI target。所以 iscsid 先启动后,才能启动这个服务。为了防呆,所以 /etc/init.d/iscsi 已经写了一个启动指令, 启动 iscsi 前尚未启动 iscsid ,则会先呼叫 iscsid 才继续处理 iscsi
|
1
|
[root@xenserver1 ~]# yum install iscsi-initiator-utils
|
|
1
2
3
4
|
root@xenserver1 ~]# chkconfig iscsid on
[root@xenserver1 ~]# chkconfig iscsi on
[root@xenserver1 ~]# iscsiadm -m discovery -t sendtargets -p
10.1
.
2.190
10.1
.
2.190
:
3260
,
1
iqn.
2015
-
10
.com.qingyun:qingyundisk
|
开始进行联机 iSCSI target
|
1
|
[root@xenserver1 ~]# iscsiadm -m node -T iqn.
2015
-
10
.com.qingyun:qingyundisk -p
10.1
.
2.190
-l
|
查看iscsi磁盘
|
1
2
3
4
5
6
7
8
9
10
11
12
13
14
15
16
17
18
|
[root@xenserver1 ~]# fdisk -l
Disk /dev/sda:
500.1
GB,
500107862016
bytes
255
heads,
63
sectors/track,
60801
cylinders
Units = cylinders of
16065
*
512
=
8225280
bytes
Sector size (logical/physical):
512
bytes /
512
bytes
I/O size (minimum/optimal):
512
bytes /
512
bytes
Disk identifier:
0xb578102a
Device Boot Start End Blocks Id System
/dev/sda1 *
1
39
307200
83
Linux
Partition
1
does not end on cylinder boundary.
/dev/sda2
39
12787
102400000
83
Linux
/dev/sda3
12787
14827
16384000
82
Linux swap / Solaris
Disk /dev/sdb:
42.9
GB,
42944154624
bytes
64
heads,
32
sectors/track,
40954
cylinders
Units = cylinders of
2048
*
512
=
1048576
bytes
Sector size (logical/physical):
512
bytes /
512
bytes
I/O size (minimum/optimal):
512
bytes /
512
bytes
Disk identifier:
0x00000000
|
180客户端设置
注意了,如果出现这样错误
|
1
2
3
|
[root@logicserver ~]# iscsiadm -m discovery -t sendtargets -p
10.1
.
2.190
iscsiadm: Cannot perform discovery. Invalid Initiatorname.
iscsiadm: Could not perform SendTargets discovery: invalid parameter
|
|
1
2
|
[root@logicserver ~]# server iscsi stop
-bash: server: command not found
|
|
1
2
3
4
5
|
[root@logicserver ~]# service iscsid restart
停止 iscsid:
正在启动 iscsid: [确定]
[root@logicserver ~]# iscsiadm -m discovery -t sendtargets -p
10.1
.
2.190
10.1
.
2.190
:
3260
,
1
iqn.
2015
-
10
.com.qingyun:qingyundisk
|
|
1
2
3
4
5
6
7
8
9
10
11
12
13
14
15
16
17
18
19
20
21
22
23
|
[root@logicserver ~]# iscsiadm -m node -T iqn.
2015
-
10
.com.qingyun:qingyundisk -p
10.1
.
2.190
-l
Logging
in
to [iface:
default
, target: iqn.
2015
-
10
.com.qingyun:qingyundisk, portal:
10.1
.
2.190
,
3260
] (multiple)
Login to [iface:
default
, target: iqn.
2015
-
10
.com.qingyun:qingyundisk, portal:
10.1
.
2.190
,
3260
] successful.
[root@logicserver ~]# fdisk -l
Disk /dev/sda:
500.1
GB,
500107862016
bytes
255
heads,
63
sectors/track,
60801
cylinders
Units = cylinders of
16065
*
512
=
8225280
bytes
Sector size (logical/physical):
512
bytes /
4096
bytes
I/O size (minimum/optimal):
4096
bytes /
4096
bytes
Disk identifier:
0xc36a87de
Device Boot Start End Blocks Id System
/dev/sda1 *
1
17
131072
83
Linux
Partition
1
does not end on cylinder boundary.
/dev/sda2
17
6544
52428800
83
Linux
/dev/sda3
6544
7849
10485760
82
Linux swap / Solaris
/dev/sda4
7849
60802
425339928
5
Extended
/dev/sda5
7850
60802
425338880
83
Linux
Disk /dev/sdb:
42.9
GB,
42944154624
bytes
64
heads,
32
sectors/track,
40954
cylinders
Units = cylinders of
2048
*
512
=
1048576
bytes
Sector size (logical/physical):
512
bytes /
512
bytes
I/O size (minimum/optimal):
512
bytes /
512
bytes
Disk identifier:
0x00000000
|
五、格式化磁盘和挂载
1、180,从/dev/sdb下划分20G分区
|
1
2
3
4
5
6
7
8
9
10
11
12
13
14
15
16
17
18
19
20
21
22
23
24
25
26
27
28
29
30
31
32
33
34
35
36
|
[root@logicserver ~]# fdisk /dev/sdb
Device contains neither a valid DOS partition table, nor Sun, SGI or OSF disklabel
Building a
new
DOS disklabel
with
disk identifier
0xeb1c0668
.
Changes will remain
in
memory only, until you decide to write them.
After that, of course, the previous content won't be recoverable.
Warning: invalid flag
0x0000
of partition table
4
will be corrected by w(rite)
WARNING: DOS-compatible mode
is
deprecated. It's strongly recommended to
switch
off the mode (command
'c'
) and change display units to
sectors (command
'u'
).
Command (m
for
help): n
Command action
e extended
p primary partition (
1
-
4
)
1
Invalid partition number
for
type `
1
'
Command action
e extended
p primary partition (
1
-
4
)
p
Partition number (
1
-
4
):
1
First cylinder (
1
-
40954
,
default
1
):
Using
default
value
1
Last cylinder, +cylinders or +size{K,M,G} (
1
-
40954
,
default
40954
): +20G
Command (m
for
help): p
Disk /dev/sdb:
42.9
GB,
42944154624
bytes
64
heads,
32
sectors/track,
40954
cylinders
Units = cylinders of
2048
*
512
=
1048576
bytes
Sector size (logical/physical):
512
bytes /
512
bytes
I/O size (minimum/optimal):
512
bytes /
512
bytes
Disk identifier:
0xeb1c0668
Device Boot Start End Blocks Id System
/dev/sdb1
1
20481
20972528
83
Linux
Command (m
for
help): w
The partition table has been altered!
Calling ioctl() to re-read partition table.
Syncing disks.
|
|
1
2
3
4
5
6
7
8
9
10
|
[root@logicserver ~]# fdisk -l /dev/sdb
Disk /dev/sdb:
42.9
GB,
42944154624
bytes
64
heads,
32
sectors/track,
40954
cylinders
Units = cylinders of
2048
*
512
=
1048576
bytes
Sector size (logical/physical):
512
bytes /
512
bytes
I/O size (minimum/optimal):
512
bytes /
512
bytes
Disk identifier:
0xeb1c0668
Device Boot Start End Blocks Id System
/dev/sdb1
1
20481
20972528
83
Linux
[root@logicserver ~]# mke2fs -t ext4 /dev/sdb1
|
2、挂载
|
1
2
3
|
[root@logicserver ~]# mkdir /xen/share -pv
mkdir: 已创建目录
"/xen/share"
[root@logicserver ~]# mount /dev/sdb1 /xen/share
|
六、把centos6.img复制到/xen/share启动
1、
|
1
|
[root@logicserver vm1]# cp /xen/vm1/centos6.img /xen/share/
|
2、先把centos6 shutdown
|
1
2
3
4
5
6
|
[root@logicserver share]# xm list
WARNING: xend/xm
is
deprecated.
Name ID Mem VCPUs State Time(s)
Domain-
0
0
1021
2
r-----
27666.9
centos6
6
1024
2
-b----
189.2
centos601
5
512
2
-b----
176.7
|
|
1
|
[root@logicserver share]# xm shutdown centos6
|
3、修改配置文件下disk存放路径
|
1
2
|
[root@logicserver vm1]# vim /etc/xen/centos6
disk = [
'file:/xen/share/centos6.img,xvda,w'
]
|
4、连接启动
|
1
|
[root@logicserver vm1]# xm create -c centos6
|
输入账号和密码,即可正常登录
|
1
|
[root@centos6 ~]#
|
六、在200这一台,挂载能否启动centos6
1、创建/xen/share目录
|
1
2
3
|
[root@xenserver1 ~]# mkdir /xen/share -pv
mkdir: 已创建目录
"/xen"
mkdir: 已创建目录
"/xen/share"
|
2、
|
1
2
3
|
[root@xenserver1 ~]# fdisk -l | grep /dev/sdb
Disk /dev/sdb:
42.9
GB,
42944154624
bytes
/dev/sdb1
1
20481
20972528
83
Linux
|
3、挂载前,先去把200这台主机的umount了
|
1
|
[root@logicserver share]# xm shutdown centos6
|
|
1
|
[root@logicserver ~]# umount /dev/sdb1
|
4、挂载到/xen/share目录
|
1
|
[root@xenserver1 ~]# mount /dev/sdb1 /xen/share
|
5、创建xen启动配置文件
|
1
2
3
4
5
6
7
|
[root@xenserver1 share]# vim /xen/cento6
bootloader=
"/usr/bin/pygrub"
vcpus=
2
memory=
1024
vif=[
'bridge=br0'
]
disk=[
'file:/xen/share/centos6.img,xvda,w'
]
on_reboot=
"destroy"
|
6、登录
|
1
2
3
4
5
6
7
8
9
10
11
12
13
14
15
16
17
18
19
20
21
22
23
24
25
26
27
28
29
30
31
32
33
34
35
36
37
38
39
40
41
42
43
44
45
46
47
48
49
50
51
52
53
54
55
56
57
58
59
|
[root@xenserver1 xen]# xm create -c centos6
WARNING: xend/xm
is
deprecated.
Using config file
"./centos6"
.
Using <
class
'grub.GrubConf.GrubConfigFile'
> to parse /grub/menu.lst
pyGRUB version
0.6
lqqqqqqqqqqqqqqqqqqqqqqqqqqqqqqqqqqqqqqqqqqqqqqqqqqqqqqqqqqqqqqqqqqqqqqqqk
x CentOS (
2.6
.
32
-
431
.el6.x86_64) x
x x
x x
x x
x x
x x
x x
x x
mqqqqqqqqqqqqqqqqqqqqqqqqqqqqqqqqqqqqqqqqqqqqqqqqqqqqqqqqqqqqqqqqqqqqqqqqj
Use the ^ and v keys to select which entry
is
highlighted.
Press enter to boot the selected OS,
'e'
to edit the
commands before booting,
'a'
to modify the kernel arguments
Started domain centos6 (id=
1
)
in
1
seconds
PCI: Fatal: No config space access
function
found
ipmi_si: Could not
set
up I/O space
ipmi_si: Could not
set
up I/O space
ipmi_si: Could not
set
up I/O space
Welcome to CentOS
Starting udev: [ OK ]
Setting hostname centos6: [ OK ]
Setting up Logical Volume Management:
2
logical volume(s)
in
volume group
"VolGroup"
now active
[ OK ]
Checking filesystems
Checking all file systems.
[/sbin/fsck.ext4 (
1
) -- /] fsck.ext4 -a /dev/mapper/VolGroup-lv_root
/dev/mapper/VolGroup-lv_root: clean,
22401
/
544576
files,
247019
/
2174976
blocks
[/sbin/fsck.ext4 (
1
) -- /boot] fsck.ext4 -a /dev/xvda1
/dev/xvda1: clean,
38
/
128016
files,
49633
/
512000
blocks
[ OK ]
Remounting root filesystem
in
read-write mode: [ OK ]
Mounting local filesystems: [ OK ]
Enabling /etc/fstab swaps: [ OK ]
Entering non-interactive startup
Starting monitoring
for
VG VolGroup:
2
logical volume(s)
in
volume group
"VolGroup"
monitored
[ OK ]
ip6tables: Applying firewall rules: [ OK ]
iptables: Applying firewall rules: [ OK ]
Bringing up loopback
interface
: [ OK ]
Bringing up
interface
eth0: Determining
if
ip address
10.1
.
2.181
is
already
in
use
for
device eth0...
[ OK ]
Starting auditd: [ OK ]
Starting system logger: [ OK ]
Mounting filesystems: [ OK ]
Retrigger failed udev events[ OK ]
Starting sshd: [ OK ]
Starting postfix: [ OK ]
Starting crond: [ OK ]
CentOS release
6.5
(Final)
Kernel
2.6
.
32
-
431
.el6.x86_64 on an x86_64
centos6 login: root
Password:
Last login: Sun Sep
13
23
:
45
:
31
on hvc0
[root@centos6 ~]#
|
七、xen实时迁移,配置文件使用细节
1、修改选项有
(xend-relocation-server yes)
(xend-relocation-port 8002)
(xend-relocation-address '')
(xend-relocation-hosts-allow '')
|
1
2
3
|
[root@logicserver xen]# pwd
/etc/xen
[root@logicserver xen]# vim xend-config.sxp
|
|
1
|
[root@logicserver xen]# service xend restart
|
2、重启xend服务
3、从180复制到200这台机器上
|
1
|
[root@logicserver xen]# scp xend-config.sxp
10.1
.
2.200
:/etc/xen/
|
200重启xend服务
|
1
|
[root@xenserver1 xen]# service xend restart
|
3、180主机上,挂载
|
1
|
[root@logicserver xen]# mount /dev/sdb1 /xen/share/
|
4、连接
|
1
2
|
[root@logicserver share]# cd /etc/xen
[root@logicserver xen]# xm create -c centos6
|
登录到centos6,配置eht0的IP地址
|
1
|
[root@centos6 ~]# ifconfig eth0
10.1
.
2.183
/
25
up
|
5、在CMD下,ping 10.1.2.183是正常的

6、迁移到200的主机上
|
1
|
[root@logicserver xen]# xm migrate -l centos6
10.1
.
2.200
|

这个centos6就没有了
|
1
2
3
4
5
|
[root@logicserver xen]# xm list
WARNING: xend/xm
is
deprecated.
Name ID Mem VCPUs State Time(s)
Domain-
0
0
1021
2
r-----
28232.6
centos601
5
512
2
-b----
180.7
|
到200主机上看
|
1
2
3
4
5
|
[root@xenserver1 xen]# xm list
WARNING: xend/xm
is
deprecated.
Name ID Mem VCPUs State Time(s)
Domain-
0
0
1021
4
r-----
764.0
centos6
2
1024
2
-b----
0.1
|
|
1
2
3
4
5
6
7
8
9
10
11
12
13
14
15
16
17
18
19
20
|
root@xenserver1 xen]# xm console centos6
WARNING: xend/xm
is
deprecated.
[root@centos6 ~]# ifconfig
eth0 Link encap:Ethernet HWaddr
00
:
16
:3E:
00
:
25
:0E
inet addr:
10.1
.
2.183
Bcast:
10.1
.
2.255
Mask:
255.255
.
255.0
inet6 addr: fe80::
216
:3eff:fe00:250e/
64
Scope:Link
UP BROADCAST RUNNING MULTICAST MTU:
1500
Metric:
1
RX packets:
6461
errors:
0
dropped:
0
overruns:
0
frame:
0
TX packets:
537
errors:
0
dropped:
0
overruns:
0
carrier:
0
collisions:
0
txqueuelen:
1000
RX bytes:
1126213
(
1.0
MiB) TX bytes:
38514
(
37.6
KiB)
Interrupt:
18
lo Link encap:Local Loopback
inet addr:
127.0
.
0.1
Mask:
255.0
.
0.0
inet6 addr: ::
1
/
128
Scope:Host
UP LOOPBACK RUNNING MTU:
16436
Metric:
1
RX packets:
2
errors:
0
dropped:
0
overruns:
0
frame:
0
TX packets:
2
errors:
0
dropped:
0
overruns:
0
carrier:
0
collisions:
0
txqueuelen:
0
RX bytes:
162
(
162.0
b) TX bytes:
162
(
162.0
b)
|