自动存储管理 (ASM) 是 Oracle 数据库 10g/11g 的一个特性,它为数据库管理员提供了一个简单的存储管理界面,并且该界面在所有服务器和存储平台上都是一致的。作为专门为 Oracle 数据库文件创建的垂直集成文件系统和卷管理器,ASM 提供了异步 I/O 的性能以及文件系统的易管理性。ASM 提供了可节省 DBA 时间的功能,以及管理动态数据库环境的灵活性,并且提高了效率。(摘自oracle官网)
为了这个伟大的功能,我们在虚拟机中尝试一把,其中的味道怎么样?只有在尝试过才能知道,做技术的就讨厌废话连篇,好!下面开始!
虚拟机和操作系统的安装就不在这展示了(不是本文的重点)
注意:本文中实验的环境是:
VMware Server 1.0
OS: oracle enterprise Linux 4 下载地址:http://edelivery.oracle.com/linux
DB: oracle 10G R2

安装的OS 因为是oracle自己出的,所以其中在oracle安装所依赖的各种软件、内核参数
用户等都存在的省去了很多的步骤,还包括今天的主角(ASM)驱动等,所以在后面的步骤中我们只要稍加配置磁盘存储即可!
首先我们要添加四个磁盘,磁盘的添加有要注意的地方,下面是我的截图
点击虚拟机的VM>settings>弹出添加设备提示框> add>选中磁盘图标>下一步>下一步

选择创建新虚拟磁盘
Create a new virtual disk

磁盘类型选择SCSI

大小是2G 默认勾选现在分配磁盘空间 下一步 磁盘文件位置,默认就可以了,名字默认

点击高级 选择设备的节点号 scsi 1:0

点击Finish 完成
等待磁盘创建完成即可

以此类推创建四块磁盘大小2G 系统总线号 分别为 scsi 1:1 scsi 1:2 scsi1:3
创建好磁盘后启动虚拟机,接下来配置ASM驱动
前面提到了这个是oracle的linux 很多必要的软件都已经在安装系统的时候安装过了,免去了很多不必要的麻烦
检查一下ASM软件包的情况:
[root@andylhz ~]# rpm -qa |grep asm
oracleasm-2.6.9-89.0.0.0.1.ELxenU-2.0.5-1.el4
oracleasm-2.6.9-89.0.0.0.1.EL-2.0.5-1.el4
oracleasm-2.6.9-89.0.0.0.1.ELhugemem-2.0.5-1.el4
oracleasm-2.6.9-89.0.0.0.1.ELsmp-2.0.5-1.el4
oracleasm-support-2.1.3-1.el4
必要的软件包已安装
初始化ASM驱动
[root@andylhz ~]# /etc/init.d/oracleasm configure
Configuring the Oracle ASM library driver.
This will configure the on-boot properties of the Oracle ASM library
driver. The following questions will determine whether the driver is
loaded on boot and what permissions it will have. The current values
will be shown in brackets ('[]'). Hitting <ENTER> without typing an
answer will keep that current value. Ctrl-C will abort.
Default user to own the driver interface []: oracle
Default group to own the driver interface []: oinstall
Start Oracle ASM library driver on boot (y/n) [n]: y
Scan for Oracle ASM disks on boot (y/n) [y]: y
Writing Oracle ASM library driver configuration: done
Initializing the Oracle ASMLib driver: [ OK ]
Scanning the system for Oracle ASMLib disks: [ OK ]
[root@andylhz ~]#
检查设置结果:
[root@andylhz ~]# oracleasm configure
ORACLEASM_ENABLED=true 启用
ORACLEASM_UID=oracle 用户oracle
ORACLEASM_GID=oinstall 组 oinstall
ORACLEASM_SCANBOOT=true 启动时扫描磁盘
ORACLEASM_SCANORDER=""
ORACLEASM_SCANEXCLUDE=""
接下来要格式化添加的四块硬盘以用来创建asm磁盘:
查看已有的硬盘:
[root@andylhz ~]# fdisk -l
Disk /dev/sda: 10.7 GB, 10737418240 bytes
255 heads, 63 sectors/track, 1305 cylinders
Units = cylinders of 16065 * 512 = 8225280 bytes
Device Boot Start End Blocks Id System
/dev/sda1 * 1 13 104391 83 Linux
/dev/sda2 14 523 4096575 83 Linux
/dev/sda3 524 784 2096482+ 82 Linux swap
/dev/sda4 785 1305 4184932+ 5 Extended
/dev/sda5 785 1305 4184901 83 Linux
Disk /dev/sdb: 2147 MB, 2147483648 bytes
255 heads, 63 sectors/track, 261 cylinders
Units = cylinders of 16065 * 512 = 8225280 bytes
Disk /dev/sdb doesn't contain a valid partition table
Disk /dev/sdc: 2147 MB, 2147483648 bytes
255 heads, 63 sectors/track, 261 cylinders
Units = cylinders of 16065 * 512 = 8225280 bytes
Disk /dev/sdc doesn't contain a valid partition table
Disk /dev/sdd: 2147 MB, 2147483648 bytes
255 heads, 63 sectors/track, 261 cylinders
Units = cylinders of 16065 * 512 = 8225280 bytes
Disk /dev/sdd doesn't contain a valid partition table
Disk /dev/sde: 2147 MB, 2147483648 bytes
255 heads, 63 sectors/track, 261 cylinders
Units = cylinders of 16065 * 512 = 8225280 bytes
Disk /dev/sde doesn't contain a valid partition table
[root@andylhz ~]#
其中 /dev/sdb /dev/sdc /dev/sdd /dev/sde 是添加的磁盘需要格式化:
格式化操作:
[root@andylhz ~]# fdisk /dev/sdb
Device contains neither a valid DOS partition table, nor Sun, SGI or OSF disklabel
Building a new DOS disklabel. Changes will remain in memory only,
until you decide to write them. After that, of course, the previous
content won't be recoverable.
Warning: invalid flag 0x0000 of partition table 4 will be corrected by w(rite)
Command (m for help): n
Command action
e extended
p primary partition (1-4)
p
Partition number (1-4): 1
First cylinder (1-261, default 1):
Using default value 1
Last cylinder or +size or +sizeM or +sizeK (1-261, default 261):
Using default value 261
Command (m for help): w
The partition table has been altered!
Calling ioctl() to re-read partition table.
Syncing disks.
按照上面的方法格式化剩下的三块磁盘:
[root@andylhz ~]# fdisk -l
Disk /dev/sda: 10.7 GB, 10737418240 bytes
255 heads, 63 sectors/track, 1305 cylinders
Units = cylinders of 16065 * 512 = 8225280 bytes
Device Boot Start End Blocks Id System
/dev/sda1 * 1 13 104391 83 Linux
/dev/sda2 14 523 4096575 83 Linux
/dev/sda3 524 784 2096482+ 82 Linux swap
/dev/sda4 785 1305 4184932+ 5 Extended
/dev/sda5 785 1305 4184901 83 Linux
Disk /dev/sdb: 2147 MB, 2147483648 bytes
255 heads, 63 sectors/track, 261 cylinders
Units = cylinders of 16065 * 512 = 8225280 bytes
Device Boot Start End Blocks Id System
/dev/sdb1 1 261 2096451 83 Linux
Disk /dev/sdc: 2147 MB, 2147483648 bytes
255 heads, 63 sectors/track, 261 cylinders
Units = cylinders of 16065 * 512 = 8225280 bytes
Device Boot Start End Blocks Id System
/dev/sdc1 1 261 2096451 83 Linux
Disk /dev/sdd: 2147 MB, 2147483648 bytes
255 heads, 63 sectors/track, 261 cylinders
Units = cylinders of 16065 * 512 = 8225280 bytes
Device Boot Start End Blocks Id System
/dev/sdd1 1 261 2096451 83 Linux
Disk /dev/sde: 2147 MB, 2147483648 bytes
255 heads, 63 sectors/track, 261 cylinders
Units = cylinders of 16065 * 512 = 8225280 bytes
Device Boot Start End Blocks Id System
/dev/sde1 1 261 2096451 83 Linux
下面创建ASM磁盘:
[root@andylhz ~]# /etc/init.d/oracleasm createdisk VOL1 /dev/sdb1
Marking disk "VOL1" as an ASM disk: [ OK ]
[root@andylhz ~]# /etc/init.d/oracleasm createdisk VOL2 /dev/sdc1
Marking disk "VOL2" as an ASM disk: [ OK ]
[root@andylhz ~]# /etc/init.d/oracleasm createdisk VOL3 /dev/sdd1
Marking disk "VOL3" as an ASM disk: [ OK ]
[root@andylhz ~]# /etc/init.d/oracleasm createdisk VOL4 /dev/sde1
Marking disk "VOL4" as an ASM disk: [ OK ]
查看创建好的磁盘
[root@andylhz ~]# /etc/init.d/oracleasm listdisks
VOL1
VOL2
VOL3
VOL4
安装10GR2软件:
安装oracle 软件不安装数据库,数据库软件的安装没有什么难处,设置好内核参数等等就OK了!(在这里跳过)
下面开始创建数据库在ASM磁盘
root@andylhz ~]#Su – oracle
[oracle @andylhz ~]$dbca

下一步Next
创建数据库 Next

默认即可Next

输入要创建数据库全局名字和实例名 andylhz Next

是否启用OEM 默认即可 Next

设置sys sysman 密码

这步是关键选择Automatic Storage Management (ASM)Next


下一步会提示群集同步CSS服务必须配置且已经启动,
要配置CSS 需要使用 root 用户运行
[root@andylhz ~]# /opt/app/oracle/10g/bin/localconfig add
/etc/oracle does not exist. Creating it now.
Successfully accumulated necessary OCR keys.
Creating OCR keys for user 'root', privgrp 'root'..
Operation successful.
Configuration for local CSS has been initialized
Adding to inittab
Startup will be queued to init within 90 seconds.
Checking the status of new Oracle init process...
Expecting the CRS daemons to be up within 600 seconds.
CSS is active on these nodes.
andylhz
CSS is active on all nodes.
Oracle CSS service is installed and running under init(1M)
好了检查一下看是否完成启动
[root@andylhz ~]# ps aux |grep css
root 7308 0.4 0.4 3172 1080 ? S<s 14:37 0:00 /bin/su -l oracle -c sh -c 'cd /opt/app/oracle/10g/log/dg1/cssd; ulimit -c unlimited; exec /opt/app/oracle/10g/bin/ocssd '
oracle 7391 3.1 3.2 148632 8356 ? S<sl 14:38 0:02 /opt/app/oracle/10g/bin/ocssd.bin
点击OK 在次点击Next

提示说需要有一个ASM实例运行,如果不存在将创建,输入asm 实例SYS的密码 点击下一步

DBCA现在会创建并且启动asm实例
点击OK


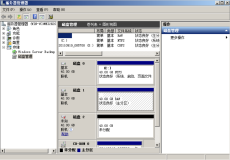
点击Create New
里面是空的什么都没有,没关系
点击右下角change disk discover path
/dev/oracleasm/disks/*

点击OK 就会找到创建的asm磁盘

输入磁盘组名字 diskgroup1
勾选前两个磁盘

创建了磁盘组diskgroup1
点击添加 Add Disks
将剩下的两个磁盘添加到刚才创建的磁盘组diskgroup1 中(其实第一次可以全部选取,这里只是做个演示添加磁盘到磁盘组中)

添加完成容量大小也增加了

点击Next 下一步

默认使用oracle管理文件
点击Next指定闪回区

点击Next 是否安装示例表空间

点击Next
SGA的设置,默认就可以了,虚拟机内存太小,嘿嘿

点击Next 数据库存储默认是oracle管理文件OMF

点击Next

点击Finish 完成

安装的概要
开始安装,妈呀,真累!


安装完成了
查看进程:

我们在添加两块磁盘,格式化并创建ASM磁盘
/dev/sdf1 VOL5 /dev/sdg1 VOL6
[root@andylhz ~]#/etc/init.d/oracleasm listdisks
VOL1
VOL2
VOL3
VOL4
VOL5
VOL6
[root@andylhz ~]#su - oracle
[oracle@andylhz ~]#dbca
如下:选择 configure Automatic Storage Management

下一步 Next 显示第一次创建的磁盘组diskgroup1
点击Add Disk 添加新磁盘

出现在之前创建的ASM磁盘 VOL5 和VOL6,并勾选,Next

点击OK
显示 正在添加磁盘到磁盘组

容量增加了10226m

点击Finish 完成
查看磁盘组

创建表空间ceshi 就这么简单!


附件:http://down.51cto.com/data/2356449
本文转自andylhz 51CTO博客,原文链接:http://blog.51cto.com/andylhz2009/367611,如需转载请自行联系原作者