(1)关于模拟器选择
思科模拟器主要有Packet Tracer(简称PT)和GNS3(IOU暂且不说),可以根据个人的情况做适当的选择,实际上,GNS3的效果要比Packet Tracer好很多,但是如果想深入学习思科网络技术,首选GNS3.(对于华为设备,使用eNSP,而对于华三设备,使用HCL)
下面的隧道技术,有些只能在GNS3上实现,在Packet Tracer上是无法完成的,所以在配置时会着重说明。
(2)关于IPv6隧道技术
IPv6隧道技术本质上就是使用IPv4数据包封装IPv6数据包,来达到IPv6数据包可在IPv4网络传送的目的,所以也称为过渡技术。不管使用的设备是思科的,还是华为、华三的,配置IPv6隧道技术的命令可能不同,但是原理肯定都是一样的。
这里介绍的IPv6隧道技术的配置主要有:Manual隧道、GRE隧道、6to4隧道、ISATAP隧道,其中Manual隧道最简单,强烈推荐完成该Manual隧道的实验。
另外,为了方便同学们理解和配置,所有的网络和配置都是最简单化的,比如,能使用尽量少的网络就使用尽量少的网络,能用静态路由就不用动态路由等等。
所以,选择一个自己感兴趣的隧道(如果不熟悉,建议选择Manual隧道),认真按照下面的步骤进行配置,是肯定没有问题的,如果遇到问题,请及时联系博主。
有些隧道技术使用PT是无法完成的,下面用表格列出说明(GRE隧道与Manual隧道类似,不说明):
| 隧道名称 | 能否使用Packet Tracer完成 | 能否使用GNS3完成 |
| Manual隧道 | 能 | 能 |
| 6to4隧道 | 建议使用GNS3 | 能 |
| ISATAP隧道 | 基本能 (路由器能完成配置,但是双栈主机无法配置) |
能 (配置双栈主机时,建议桥接VMware虚拟机完成该实验) |
本文档的原则是,能使用Packet Tracer完成,就尽量使用Packet Tracer来进行该实验的配置,根据上面的信息,本文档给出的完整实验是Manual隧道和6to4隧道的配置。
1.Manual隧道
Manual隧道实验可以使用Packet Tracer来完成,所以这里使用Packet Tracer进行该实验。
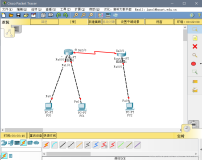
(1)网络拓扑

需要说明的是,路由器型号尽量选择高的,比如这里选择型号为2811的路由器。
(2)实验配置
需要说明的是,在配置的时候,一定要注意看当前配置是在哪种模式下完成的,>表示用户模式,#表示特权模式,(config)#表示配置模式,关于用户模式的关系及如何切换,可以看下面的图示说明:

另外需要注意的是,适当的时候请在特权模式下使用命令write保存配置,否则重启设备后配置会丢失。
-
R1配置
配置IP/IPv6地址:
|
1
2
3
4
5
6
7
8
9
10
11
12
13
|
Router>en
Router
#conf t
Router(config)
#hostname R1
R1(config)
#int f0/0
R1(config-
if
)
#no shu
R1(config-
if
)
#ip add 10.1.1.1 255.255.255.0
R1(config-
if
)
#exit
R1(config)
#ipv6 unicast-routing
R1(config)
#int f0/1
R1(config-
if
)
#no shu
R1(config-
if
)
#ipv6 add 2011:1:1:11::1/64
R1(config-
if
)
#exit
R1(config)
#
|
配置Manual隧道:
|
1
2
3
4
5
6
7
|
R1(config)
#int tunnel 0
R1(config-
if
)
#ipv6 add 2012:1:1:11::1/64
R1(config-
if
)
#tunnel source f0/0
R1(config-
if
)
#tunnel destination 10.1.1.2
R1(config-
if
)
#tunnel mode ipv6ip
R1(config-
if
)
#exit
R1(config)
#
|
配置IPv6静态路由:
|
1
|
R1(config)
#ipv6 route 2022:2:2:22::/64 2012:1:1:11::2
|
-
R2配置
配置IP/IPv6地址:
|
1
2
3
4
5
6
7
8
9
10
11
12
13
|
Router>en
Router
#conf t
Router(config)
#hostname R2
R2(config)
#int f0/0
R2(config-
if
)
#no shu
R2(config-
if
)
#ip add 10.1.1.2 255.255.255.0
R2(config-
if
)
#exit
R2(config)
#ipv6 unicast-routing
R2(config)
#int f0/1
R2(config-
if
)
#no shu
R2(config-
if
)
#ipv6 add 2022:2:2:22::2/64
R2(config-
if
)
#exit
R2(config)
#
|
配置Manual隧道:
|
1
2
3
4
5
6
7
|
R2(config)
#int tunnel 0
R2(config-
if
)
#ipv6 add 2012:1:1:11::2/64
R2(config-
if
)
#tunnel source f0/0
R2(config-
if
)
#tunnel destination 10.1.1.1
R2(config-
if
)
#tunnel mode ipv6ip
R2(config-
if
)
#exit
R2(config)
#
|
配置IPv6静态路由:
|
1
|
R2(config)
#ipv6 route 2011:1:1:11::/64 2012:1:1:11::1
|
-
PC0配置:

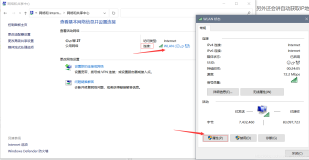
选择IP Configuration:

-
PC1配置
配置方式与PC0一样,只是IPv6 Address字段改为:2022:2:2:22::22,IPv6 Gateway改为:2022:2:2:22::2。
(3)实验验证:连通性测试
-
在PC0上进行验证

-
在PC1上进行验证

至此,Manual隧道的实验完成!
2.6to4隧道
6to4隧道实验建议使用GNS3完成。
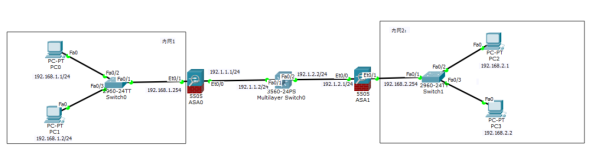
(1)网络拓扑

(2)实验配置
关于用户模式的说明,可以参照Manual隧道中的内容,这里不再重复。另外需要注意的是,适当的时候请在特权模式下使用命令write保存配置,否则重启设备后配置会丢失。
-
R1配置
配置IP/IPv6地址:
|
1
2
3
4
5
6
7
8
9
10
11
12
13
14
|
Router>en
Router
#conf t
Router(config)
#hostname R1
R1(config)
#int s0/0
R1(config-
if
)
#no shu
R1(config-
if
)
#encapsulation ppp
R1(config-
if
)
#ip add 133.32.2.1 255.255.255.0
R1(config-
if
)
#exit
R1(config)
#ipv6 unicast-routing
R1(config)
#int f1/0
R1(config)
#no shu
R1(config-
if
)
#ipv6 add 2002:8520:201:1::1/64
R1(config-
if
)
#exit
R1(config)
#
|
配置6to4隧道:
|
1
2
3
4
5
6
7
|
R1(config)
#int tunnel 0
R1(config-
if
)
#no ip address
R1(config-
if
)
#tunnel source s0/0
R1(config-
if
)
#ipv6 unnumbered f1/0
R1(config-
if
)
#tunnel mode ipv6ip 6to4
R1(config-
if
)
#exit
R1(config)
#
|
配置静态路由:
|
1
|
R1(config)
#ipv6 route 2002:8520:301::/48 tunnel 0
|
-
R2配置
配置IP/IPv6地址:
|
1
2
3
4
5
6
7
8
9
10
11
12
13
14
|
Router>en
Router
#conf t
Router(config)
#hostname R2
R2(config)
#int s0/0
R2(config-
if
)
#no shu
R2(config-
if
)
#encapsulation ppp
R2(config-
if
)
#ip add 133.32.3.1 255.255.255.0
R2(config-
if
)
#exit
R2(config)
#ipv6 unicast-routing
R2(config)
#int f1/0
R2(config-
if
)
#no shu
R2(config-
if
)
#ipv6 add 2002:8520:301:1::1/64
R2(config-
if
)
#exit
R2(config)
#
|
配置6to4隧道:
|
1
2
3
4
5
6
7
|
R2(config)
#int tunnel 0
R2(config-
if
)
#no ip address
R2(config-
if
)
#tunnel source s0/0
R2(config-
if
)
#ipv6 unnumbered f1/0
R2(config-
if
)
#tunnel mode ipv6ip 6to4
R2(config-
if
)
#exit
R2(config)
#
|
配置静态路由:
|
1
|
R2(config)
#ipv6 route 2002:8520:201::/48 tunnel 0
|
-
HostA配置
配置IPv6地址:
|
1
2
3
4
5
6
7
8
9
|
Router>en
Router
#conf t
Router(config)
#hostname HostA
HostA(config)
#ipv6 unicast-routing
HostA(config)
#int f0/0
HostA(config)
#no shu
HostA(config-
if
)
#ipv6 add 2002:8520:201:1::2/64
HostA(config-
if
)
#exit
HostA(config)
#
|
配置默认路由:
|
1
|
HostA(config)
#ipv6 route ::/0 2002:8520:201:1::1
|
-
HostB配置
配置IPv6地址:
|
1
2
3
4
5
6
7
8
9
|
Router>en
Router
#conf t
Router(config)
#hostname HostB
HostB(config)
#ipv6 unicast-routing
HostB(config)
#int f0/0
HostB(config)
#no shu
HostB(config-
if
)
#ipv6 add 2002:8520:301:1::2/64
HostB(config-
if
)
#exit
HostB(config)
#
|
配置默认路由:
|
1
|
HostB(config)
#ipv6 route ::/0 2002:8520:301:1::1
|
(3)实验验证:连通性测试
-
在HostA上进行验证
|
1
2
3
4
5
6
|
HostA
#ping ipv6 2002:8520:301:1::2
Type escape sequence to abort.
Sending 5, 100-byte ICMP Echos to 2002:8520:301:1::2, timeout is 2 seconds:
!!!!!
Success rate is 100 percent (5
/5
), round-trip min
/avg/max
= 40
/54/68
ms
|
-
在HostB上进行验证
|
1
2
3
4
5
6
|
HostB
#ping ipv6 2002:8520:201:1::2
Type escape sequence to abort.
Sending 5, 100-byte ICMP Echos to 2002:8520:201:1::2, timeout is 2 seconds:
!!!!!
Success rate is 100 percent (5
/5
), round-trip min
/avg/max
= 36
/53/60
ms
|
至此,6to4隧道的实验完成!
3.ISATAP隧道
ISATAP隧道实验可以使用Packet Tracer来完成路由器的核心配置,但是无法配置双栈主机,所以下面的配置只是针对路由器,不提供主机的配置,同时也不提供验证,如果需要完整完成该实验,建议使用GNS3桥接Vmware虚拟机来完成。
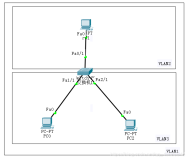
(1)网络拓扑

由于路由器需要使用到串行口,所以需要分别在两个路由器上添加相应的模块,这里添加的模块为NM-4A/S模块,添加方法如下:

如上图所示,添加模块时,只需要用鼠标点击该模块名称,然后拖动模块到相应的插槽位置就可以了,不过需要注意的是,在添加模块前,请先关闭路由器。
(2)实验配置
关于用户模式的说明,可以参照Manual隧道中的内容,这里不再重复。另外需要注意的是,适当的时候请在特权模式下使用命令write保存配置,否则重启设备后配置会丢失。
-
R1配置
配置IP地址:
|
1
2
3
4
5
6
7
8
9
10
11
12
13
|
Router>en
Router
#conf t
Router(config)
#hostname R1
R1(config)
#int s1/0
R1(config-
if
)
#no shu
R1(config-
if
)
#encapsulation ppp
R1(config-
if
)
#ip add 133.32.2.1 255.255.255.0
R1(config-
if
)
#exit
R1(config)
#int f0/0
R1(config-
if
)
#no shu
R1(config-
if
)
#ip add 133.33.2.1 255.255.255.0
R1(config-
if
)
#exit
R1(config)
#
|
-
R2配置
配置IP/IPv6地址:
|
1
2
3
4
5
6
7
8
9
10
11
12
13
14
|
Router>en
Router
#conf t
Router(config)
#hostname R2
R2(config)
#int s1/0
R2(config-
if
)
#no shu
R2(config-
if
)
#encapsulation ppp
R2(config-
if
)
#ip add 133.32.3.1 255.255.255.0
R2(config-
if
)
#exit
R2(config)
#ipv6 unicast-routing
R2(config)
#int f0/0
R2(config-
if
)
#no shu
R2(config-
if
)
#ipv6 add 3ffe:b00:ffff:1::1/64
R2(config-
if
)
#exit
R2(config)
#
|
配置ISATAP隧道:
|
1
2
3
4
5
6
7
|
R2(config)
#int tunnel 0
R2(config-
if
)
#tunnel source s1/0
R2(config-
if
)
#tunnel mode ipv6ip isatap
R2(config-
if
)
#no ipv6 nd ra suppress
R2(config-
if
)
#ipv6 add 3ffe:c00:ffff:1::/64 eui-64
R2(config-
if
)
#exit
R2(config)
#
|
配置静态路由:
|
1
|
R2(config)
#ip route 133.33.2.0 255.255.255.0 133.32.2.1
|
本文转自 xpleaf 51CTO博客,原文链接:http://blog.51cto.com/xpleaf/1919155,如需转载请自行联系原作者