这个是PowerShell创建AWS高可用博客的第三部分,我们来看看后半截工作是怎么完成的。
-
创建EC2-S3的Role,这个Role是分配给EC2虚拟机的,这样他们创建之后自动就有权限访问S3的内容。
-
创建VPC网络
-
创建VPC的2个子网,位于不同的AZ
-
创建Internet网关
-
配置路由表
-
创建并配置EC2的Security Group,确保80和22端口可用
-
创建高可用的MariaDB数据库
-
配置数据库的Security Group,确保3306端口可用
-
创建S3 Bucket 并配置Policy
-
创建CloudFront分布点,绑定S3 Bucket
-
准备WordPress的配置文档
-
准备Virtualhost的配置文档
-
上传配置文档到S3 Bucket中
-
配置Bash Shell脚本,包括LAMP,WordPress,AWS,Crontab和S3同步等等
-
创建EC2虚拟机,指定14步创建的BootStrap命令
-
更新DNS记录,指向该虚拟机
-
确认无误之后生成镜像文件
-
配置ELB
-
更新DNS记录到ELB的地址
-
配置Launch Configuration
-
配置Auto Scaling
11. 首先来准备WordPress的配置文档。
下载WordPress 保存在对应的目录, 然后就可以修改wp-config.php的内容来绑定数据库了
|
1
2
3
4
5
6
7
|
$content
=
get-content
C:\Users\yli\Downloads\wordpress-4.5.3\wordpress\wp-config-sample.php
$content
.Replace(
"define('DB_NAME', 'database_name_here')"
,
"define('DB_NAME', 'wordpress')"
).`
Replace(
"define('DB_USER', 'username_here')"
,
"define('DB_USER', 'wordpress')"
).`
Replace(
"define('DB_PASSWORD', 'password_here')"
,
"define('DB_PASSWORD', 'wordpress')"
).`
Replace(
"define('DB_HOST', 'localhost')"
,
"define('DB_HOST', '$adddress')"
) |
set-content
C:\Users\yli\Downloads\wordpress-4.5.3\wordpress\wp-config.php
gc C:\Users\yli\Downloads\wordpress-4.5.3\wordpress\wp-config.php
|
12 接下来,需要配置apache的vhost文件,这里我指定了根目录,域名,已经很重要的一点,重定向本地图片路径到S3上去。
|
1
2
3
4
5
6
7
8
9
10
11
12
13
14
|
$vhost
=
@"
<VirtualHost *:80>
ServerName blog.beanxyz.com
ServerAdmin webmaster@localhost
DocumentRoot /var/www/wordpress
ErrorLog ${APACHE_LOG_DIR}/error.log
CustomLog ${APACHE_LOG_DIR}/access.log combined
RewriteEngine on
Rewritecond %{HTTP_HOST} !^$
RewriteRule ^/wp-content/uploads(.*)$ http://$($cfd.domainname)/uploads$1 [R=302]
</VirtualHost>
"@
$vhost
|
Set-Content
C:\Users\yli\Downloads\wordpress-4.5.3\wordpress.conf
|
13. 最后上传到我到S3 Bucket中
|
1
2
3
|
Write-S3Object
-BucketName yuanliwordpress -Folder C:\Users\yli\Downloads\wordpress-4.5.3\wordpress -KeyPrefix wordpress -Recurse
Write-S3Object
-BucketName yuanliwordpress -Key wordpress_vhosts
-File
C:\users\yli\Downloads\wordpress-4.5.3\wordpress.conf
Get-S3Object
-BucketName yuanliwordpress
|

14-15 这2步是最麻烦的,我需要绑定Role,安装LAMP和WordPress的脚本,还得自动从S3拷贝配置文件,配置计划任务,每分钟同步一次,以及重定向。Shell脚本处理好以后,就可以生成一个EC2的实例了
|
1
2
3
4
5
6
7
8
9
10
11
12
13
14
15
16
17
18
19
20
21
22
23
24
25
26
27
28
29
30
31
32
33
34
35
36
37
38
39
40
|
#Create AMI Image
#创建EC2实例
#绑定Role
New-IAMInstanceProfile
-InstanceProfileName
"WordPress"
Add-IAMRoleToInstanceProfile
-RoleName EC2-S3 -InstanceProfileName
"WordPress"
$groupid
=
Get-EC2SecurityGroup
|
Where-Object
{
$_
.GroupName
-eq
"WordPress"
} | select -ExpandProperty groupid
#配置LAMP和WordPress
$userdata
=
@"
#!/bin/bash
apt-get update
apt-get upgrade -y
apt-get install -y mysql-client libmysqlclient15-dev apache2 apache2-doc apache2-mpm-prefork apache2-utils libexpat1 ssl-cert libapache2-mod-php5 php5 php5-common php5-curl php5-dev php5-gd php5-idn php-pear php5-imagick php5-mcrypt php5-mysql php5-ps php5-pspell php5-recode php5-xsl python-pip && pip install awscli
aws s3 cp --recursive s3://yuanliwordpress/wordpress /var/www/wordpress/
chown -R www-data.www-data wordpress
chmod 755 /var/www/wordpress/
aws s3 cp s3://yuanliwordpress/wordpress_vhosts /etc/apache2/sites-available/wordpress.conf
cd /etc/apache2/sites-avaiable
a2ensite wordpress.conf
service apache2 restart
chmod 777 /var/www/wordpress/wp-contents
echo */1 * * * * root aws s3 sync /var/www/wordpress/wp-content/uploads s3://yuanliwordpress/uploads >> /etc/crontab
a2enmod rewrite
service apache2 restart
"@
$b
=
[System.Text.Encoding]
::UTF8.GetBytes(
$userdata
)
$a
=
[System.Convert]
::ToBase64String(
$b
)
$instance
=
New-EC2Instance
-ImageId ami-6c14310f -InstanceType t2.micro -KeyName aws -SubnetId
$subnet1
-SecurityGroupId
$groupid
-MinCount 1 -MaxCount 1 -InstanceProfile_Name
"WordPress"
-UserData
$a
$instanceid
=(
$instance
| select -expand instances).instanceid
write-host
"Initilizing EC2 Instance, Please wait ..."
-ForegroundColor Cyan -NoNewline
$state
=
$false
while
(
$state
-eq
$false
){
$name
= (
Get-EC2Instance
-InstanceId
$instanceid
| select -ExpandProperty instances | select -ExpandProperty state).name
if
(
$name
.Value
-eq
"running"
){
$state
=
$true
}
else
{
start-sleep
-Seconds 2
write-host
"..."
-ForegroundColor Cyan -NoNewline
}
}
|
大概几分钟之后 就可以使用了。

下面这一部分代码可有可无,我是为了测试这个模板是否工作。他的主要作用其实就是更新一下DNS指向我的模板EC2 的公共IP
|
1
2
3
4
5
6
7
8
9
10
11
12
13
14
15
16
17
18
19
20
21
22
23
24
25
26
27
28
29
30
31
32
|
$publicip
=
Get-EC2Instance
-InstanceId
$instanceid
| select -ExpandProperty instances | select -ExpandProperty publicipaddress
#更新DNS记录
write-host
"Updating DNS Record.."
-ForegroundColor Cyan
$domain
=
Get-R53HostedZonesByName
-DNSName beanxyz.com
$hostid
=
$domain
.id.Split(
"/"
)[2]
$recordsets
=
Get-R53ResourceRecordSet
-HostedZoneId
$domain
.id.Split(
"/"
)[2]
$currentip
=
$recordsets
| select -ExpandProperty resourceRecordSets |
where-object
{
$_
.name
-eq
"blog.beanxyz.com."
} | select -ExpandProperty ResourceRecords | select -ExpandProperty value
$type
=
$recordsets
| select -ExpandProperty resourceRecordSets |
where-object
{
$_
.name
-eq
"blog.beanxyz.com."
} | select -ExpandProperty Type | select -ExpandProperty value
$change1
=
New-Object
Amazon.Route53.Model.Change
$change1
.Action =
"DELETE"
$change1
.ResourceRecordSet =
New-Object
Amazon.Route53.Model.ResourceRecordSet
$change1
.ResourceRecordSet.Name =
"blog.beanxyz.com"
$change1
.ResourceRecordSet.Type =
$type
$change1
.ResourceRecordSet.TTL = 300
$change1
.ResourceRecordSet.ResourceRecords.Add(@{Value=
$currentip
})
$change3
=
New-Object
Amazon.Route53.Model.Change
$change3
.Action =
"CREATE"
$change3
.ResourceRecordSet =
New-Object
Amazon.Route53.Model.ResourceRecordSet
$change3
.ResourceRecordSet.Name =
"blog.beanxyz.com"
$change3
.ResourceRecordSet.Type =
"A"
$change3
.ResourceRecordSet.TTL = 300
$change3
.ResourceRecordSet.ResourceRecords.Add(@{Value=
$publicip
})
$params
= @{
HostedZoneId=
$hostid
ChangeBatch_Comment=
"Replace a record of blog.beanxyz.com from $currentip to $publicip"
ChangeBatch_Change=
$change1
,
$change3
}
Edit-R53ResourceRecordSet
@params
$tagec2
=
new-object
Amazon.EC2.Model.Tag -Property @{key=
"Name"
;value=
"wordpress"
}
New-EC2Tag
-Resource
$instanceid
-Tag
$tagec2
write-host
"The WordPress blog is ready. Please login to blog.beanxyz.com to finish the inital setup"
-ForegroundColor Cyan
start-process
http://blog.beanxyz.com
|
再往下就很容易了,配置镜像
|
1
2
3
|
#14.配置AMI镜像
New-EC2Image
-Description TemplateWordPress -Name TemplateWordPress -InstanceId
$instanceid
Get-EC2Image
-Owner self |
Unregister-EC2Image
-PassThru
|
配置ELB,更新DNS记录
|
1
2
3
4
5
6
7
8
9
10
11
12
13
14
15
16
17
18
19
20
21
22
23
24
25
26
27
28
29
30
31
32
33
34
35
36
37
38
39
|
#Create ELB and Auto Scaling
#15.配置ELB
#Create ELB
$HTTPListener
=
New-Object
-TypeName ‘Amazon.ElasticLoadBalancing.Model.Listener’
$HTTPListener
.Protocol = ‘http’
$HTTPListener
.InstancePort = 80
$HTTPListener
.LoadBalancerPort = 80
$groupid
=(
Get-EC2SecurityGroup
|
where-object
{
$_
.GroupName
-eq
"wordpress"
}).GroupId
$subnet1
=(
Get-EC2Subnet
|
Where-Object
{
$_
.CidrBlock
-eq
"10.2.1.0/24"
}).SubnetId
$subnet2
=(
Get-EC2Subnet
|
Where-Object
{
$_
.CidrBlock
-eq
"10.2.2.0/24"
}).SubnetId
$elb
=
New-ELBLoadBalancer
-LoadBalancerName
"MyLoadBalance"
-Listener
$HTTPListener
-SecurityGroup
$groupid
-Subnet @(
$subnet1
,
$subnet2
)
#$elb=Get-ELBLoadBalancer
#Register-ELBInstanceWithLoadBalancer -LoadBalancerName "MyLoadBalance" -Instance @($instance2Id)
#更新DNS到LoadBalancer上
write-host
"Updating DNS Record.."
-ForegroundColor Cyan
$domain
=
Get-R53HostedZonesByName
-DNSName beanxyz.com
$hostid
=
$domain
.id.Split(
"/"
)[2]
$recordsets
=
Get-R53ResourceRecordSet
-HostedZoneId
$domain
.id.Split(
"/"
)[2]
$currentip
=
$recordsets
| select -ExpandProperty resourceRecordSets |
where-object
{
$_
.name
-eq
"blog.beanxyz.com."
} | select -ExpandProperty ResourceRecords | select -ExpandProperty value
$change1
=
New-Object
Amazon.Route53.Model.Change
$change1
.Action =
"DELETE"
$change1
.ResourceRecordSet =
New-Object
Amazon.Route53.Model.ResourceRecordSet
$change1
.ResourceRecordSet.Name =
"blog.beanxyz.com"
$change1
.ResourceRecordSet.Type =
"A"
$change1
.ResourceRecordSet.TTL = 300
$change1
.ResourceRecordSet.ResourceRecords.Add(@{Value=
$currentip
})
$change3
=
New-Object
Amazon.Route53.Model.Change
$change3
.Action =
"CREATE"
$change3
.ResourceRecordSet =
New-Object
Amazon.Route53.Model.ResourceRecordSet
$change3
.ResourceRecordSet.Name =
"blog.beanxyz.com"
$change3
.ResourceRecordSet.Type =
"CNAME"
$change3
.ResourceRecordSet.TTL = 300
$change3
.ResourceRecordSet.ResourceRecords.Add(@{Value=
$elb
})
$params
= @{
HostedZoneId=
$hostid
ChangeBatch_Comment=
"Replace a record of blog.beanxyz.com from $currentip to $newname"
ChangeBatch_Change=
$change1
,
$change3
}
Edit-R53ResourceRecordSet
@params
|
最后配置Launch config文件和Auto Scaling Group就行了。别忘了配置CloudWatch,这样他可以自动根据负载进行添加或是删除实例
|
1
2
3
4
5
6
7
8
9
10
11
12
|
#配置 Launch Configuration- UserData(Bootstrap)
New-ASLaunchConfiguration
-ImageId (
Get-EC2Image
-Owner self).imageid -LaunchConfigurationName
"My-launchconfigurationfile"
-InstanceType
"t2.micro"
-SecurityGroup
$groupid
-UserData
$a
-KeyName aws
New-ASAutoScalingGroup
-AutoScalingGroupName
"my-asg"
-LaunchConfigurationName
"My-launchconfigurationfile"
-MinSize 1 -MaxSize 3 -LoadBalancerName
"MyLoadBalance"
`
-VPCZoneIdentifier
$subnet1
Write-ASScalingPolicy
-AutoScalingGroupName my-asg -AdjustmentType
"ChangeInCapacity"
-PolicyName
"myScaleInPolicy"
-ScalingAdjustment 1
#Remove-ASAutoScalingGroup -AutoScalingGroupName "my-asg"
$stepadjustment
=
New-Object
Amazon.AutoScaling.Model.StepAdjustment
$stepadjustment
.MetricIntervalLowerBound=20
$stepadjustment
.ScalingAdjustment=-1
Write-ASScalingPolicy
-AutoScalingGroupName my-asg -AdjustmentType
"ChangeInCapacity"
-PolicyName
"myScaleInPolicy1"
-PolicyType
"StepScaling"
-StepAdjustment
$stepadjustment
Write-CWMetricAlarm
-ActionsEnabled
$true
-Alarmname
"testonly"
-AlarmAction {arn:aws:autoscaling:ap-southeast-2:503646143282:scalingPolicy:fba2d6ec-1566-459a-a3d5-bb800e88f7ad:autoScalingGroupName/my-asg:policyName/myScaleInPolicy1} -Namespace
"AWS/EC2"
-Period 300 -Statistic
"Average"
-MetricName
"CPUUtlilization"
`
-ComparisonOperator
"LessThanOrEqualToThreshold"
-Threshold 60 -EvaluationPeriod 1
|
|
1
2
3
4
5
6
7
|
$stepadjustment
=
New-Object
Amazon.AutoScaling.Model.StepAdjustment
$stepadjustment
.MetricIntervalLowerBound=20
$stepadjustment
.ScalingAdjustment=-1
Write-ASScalingPolicy
-AutoScalingGroupName my-asg -AdjustmentType
"ChangeInCapacity"
-PolicyName
"myScaleInPolicy1"
-PolicyType
"StepScaling"
-StepAdjustment
$stepadjustment
Write-CWMetricAlarm
-ActionsEnabled
$true
-Alarmname
"testonly"
-AlarmAction {arn:aws:autoscaling:ap-southeast-2:503646143282:scalingPolicy:4cb293a4-1e6f-4d3e-8c02-2baec06ee663:autoScalingGroupName/my-asg:policyName/myScaleInPolicy1
} -Namespace
"AWS/EC2"
-Period 300 -Statistic
"Average"
-MetricName
"CPUUtlilization"
`
-ComparisonOperator
"LessThanOrEqualToThreshold"
-Threshold 60 -EvaluationPeriod 1
|
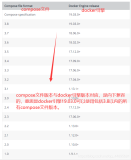
最后登录看看,成功

我的脚本目前只是简单的实现了上述的功能,全长大概500行左右,各种异常处理尚未添加。如果有感兴趣的,可以联系我看完整的源代码。