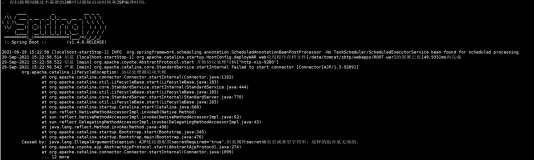
接上篇http://www.iteye.com/topic/994833,
我们看到JioEndPoint的start方法有下面一段代码:
// Create worker collection
if (executor == null) {
workers = new WorkerStack(maxThreads);
}
在上一篇中,executor一直都为null。什么时候不为空呢,这里因为Server.xml文件里的Connector元素还有一个executor属性,它指向一个Executor属性能名字。(参考:
http://tomcat.apache.org/tomcat-6.0-doc/config/http.html)。
在连接器上方有一个默认的Executor元素:
<Executor name="tomcatThreadPool" namePrefix="catalina-exec-"
maxThreads="150" minSpareThreads="4"/>
不过当前他是注释掉的,我们把他打开。
这个Executor默认的类是org.apache.catalina.core. StandardThreadExecutor,
当然你可以通过它的className属性使用自己的类,但必须像StandardThreadExecutor
一样实现Executor接口。
StandardThreadExecutor是在Doug lea大爷的ThreadPoolExecutor类构造出来的:
public void start() throws LifecycleException {
lifecycle.fireLifecycleEvent(BEFORE_START_EVENT, null);
TaskQueue taskqueue = new TaskQueue();
TaskThreadFactory tf = new TaskThreadFactory(namePrefix);
lifecycle.fireLifecycleEvent(START_EVENT, null);
executor = new ThreadPoolExecutor(getMinSpareThreads(), getMaxThreads(), maxIdleTime, TimeUnit.MILLISECONDS,taskqueue, tf) {
@Override
protected void afterExecute(Runnable r, Throwable t) {
AtomicInteger atomic = submittedTasksCount;
if(atomic!=null) {
atomic.decrementAndGet();
}
}
};
taskqueue.setParent( (ThreadPoolExecutor) executor);
submittedTasksCount = new AtomicInteger();
lifecycle.fireLifecycleEvent(AFTER_START_EVENT, null);
}
剩下的工作就是在Connector里添加属性executor,来引用tomcatThreadPool。
<Connector executor="tomcatThreadPool"
port="8080" protocol="HTTP/1.1"
connectionTimeout="20000"
redirectPort="8443" />
这样executor就横空出世。
那么开始那段代码就不需要WorkerStack了。Tomcat自个搞了个WorkerStack出来,
还是给Doug lea大爷一个很大的面子哦。
这样processSocket不需大费周折,直接交给executor去执行就OK了:
protected boolean processSocket(Socket socket) {
try {
if (executor == null) {
getWorkerThread().assign(socket);
} else {
executor.execute(new SocketProcessor(socket));
}
} catch (Throwable t) {
// This means we got an OOM or similar creating a thread, or that
// the pool and its queue are full
log.error(sm.getString("endpoint.process.fail"), t);
return false;
}
return true;
}
上一篇说讨论BIO模式的连接器,无外乎创建ServerSocket -> 绑定(Bind)端口
->接受(accept)连接->取出一个线程处理Socket 的过程。
我们继续讨论NIO模型的连接器,首先更改连接器协议为org.apache.coyote.http11. Http11NioProtocol:
<Connector executor="tomcatThreadPool"
port="8080" protocol="org.apache.coyote.http11. Http11NioProtocol"
connectionTimeout="20000"
redirectPort="8443" />
很简单,这样就启动了NIO模型。
与BIO模型一致,Http11NioProtocol在init方法里初始化NioEndpoint,我们讨论BIO模型时提到JioEndPoint,以后还会提到AprEndpoint。同样后续工作主要由NioEndpoint来完成。
首先看NioEndpoint的init方法:
/**
* Initialize the endpoint.
*/
public void init()
throws Exception {
if (initialized)
return;
serverSock = ServerSocketChannel.open();
serverSock.socket().setPerformancePreferences(socketProperties.getPerformanceConnectionTime(),
socketProperties.getPerformanceLatency(),
socketProperties.getPerformanceBandwidth());
InetSocketAddress addr = (address!=null?new InetSocketAddress(address,port):new InetSocketAddress(port));
serverSock.socket().bind(addr,backlog);
serverSock.configureBlocking(true); //mimic APR behavior
serverSock.socket().setSoTimeout(getSocketProperties().getSoTimeout());
// Initialize thread count defaults for acceptor, poller
if (acceptorThreadCount == 0) {
// FIXME: Doesn't seem to work that well with multiple accept threads
acceptorThreadCount = 1;
}
if (pollerThreadCount <= 0) {
//minimum one poller thread
pollerThreadCount = 1;
}
stopLatch = new CountDownLatch(pollerThreadCount);
//SSL相关部分我们跳过
if (oomParachute>0) reclaimParachute(true);
selectorPool.open();
initialized = true;
}
首先创建ServerSocketChannel,绑定监听端口。这里有一点不同之外,在NIO模式下,我们传统的方式像这样建立服务监听:
serverSock = ServerSocketChannel.open();
serverSock.socket().bind(new InetSocketAddress(8888));
Selector selector = Selector.open();
serverSock.configureBlocking(false);
serverSock.register(selector, SelectionKey.OP_ACCEPT);
while (selector.select() > 0) {
//处理连接请求
}
但Tomcat采用了Blocking模式接收连接请求,在读写的时候采用No-Blocking模式。这种做法和weblogic的做法一致(我反编译看到的),像MINA等开源框架还是采用传统的方式。
我想这里有两个解释,一是接收线程的工作就是等待新的连接,没其他事可以,用No-Blocking已没有意义,另外selector.select()在一些OS上还会出现CPU 100%的空转现象,如果有其他见解,请告知我,在此感谢。
代码行设定了两个变量:acceptorThreadCount,pollerThreadCount。 前者是acceptor线程的个数,后者是读写线程的个数。这个模型是Dong Lea在《Scalable IO in Java》中的“Using Multiple Reactors”。acceptorThreadCount一般设定为1,而pollerThreadCount Tomcat给的默认值为CPU个数(Runtime.getRuntime().availableProcessors());
初始化完毕,我们接着看start方法:
public void start()
throws Exception {
// Initialize socket if not done before
if (!initialized) {
init();
}
if (!running) {
running = true;
paused = false;
// Create worker collection
if (getUseExecutor()) {
if ( executor == null ) {
TaskQueue taskqueue = new TaskQueue();
TaskThreadFactory tf = new TaskThreadFactory(getName() + "-exec-");
executor = new ThreadPoolExecutor(getMinSpareThreads(), getMaxThreads(), 60, TimeUnit.SECONDS,taskqueue, tf);
taskqueue.setParent( (ThreadPoolExecutor) executor, this);
}
} else if ( executor == null ) {//avoid two thread pools being created
workers = new WorkerStack(maxThreads);
}
// Start poller threads
pollers = new Poller[getPollerThreadCount()];
for (int i=0; i<pollers.length; i++) {
pollers[i] = new Poller();
Thread pollerThread = new Thread(pollers[i], getName() + "-ClientPoller-"+i);
pollerThread.setPriority(threadPriority);
pollerThread.setDaemon(true);
pollerThread.start();
}
// Start acceptor threads
for (int i = 0; i < acceptorThreadCount; i++) {
Thread acceptorThread = new Thread(new Acceptor(), getName() + "-Acceptor-" + i);
acceptorThread.setPriority(threadPriority);
acceptorThread.setDaemon(daemon);
acceptorThread.start();
}
}
}
到行创建工作线程集合,用来处理请求过来的socket,这些在上两篇我们已经讨论过了。
有一点不同,在配置BIO连接器时,连接器元素有executor属性,它指向一个Executor属性的名字,在NIO模型又加了一个useExecutor属性。在executor为空的时候,useExecutor会起作用。默认情况下useExecutor为true,为什么这么做,tomcat解释是:
Set to true to use the NIO thread pool executor. The default value is true. If set to false, it uses a thread pool based on a stack for its execution. Generally, using the executor yields a little bit slower performance, but yields a better fairness for processing connections in a high load environment as the traffic gets queued through a FIFO queue. If set to true(default) then the max pool size is the maxThreads attribute and the core pool size is the minSpareThreads。
大致是说用WorkerStack性能虽然会比用ThreadPoolExecutor好一些,但ThreadPoolExecutor采用FIFO队列,提供了更好的公平性。这在高并发情况下会取得比较好的效里。
到行创建并启动Acceptor线程用接收请求,到行创建并启动读写线程,读取request和发送respone.先看Acceptor线程
protected class Acceptor implements Runnable {
/**
* The background thread that listens for incoming TCP/IP connections and
* hands them off to an appropriate processor.
*/
public void run() {
// Loop until we receive a shutdown command
while (running) {
// Loop if endpoint is paused
while (paused) {
try {
Thread.sleep(1000);
} catch (InterruptedException e) {
// Ignore
}
}
try {
// Accept the next incoming connection from the server socket
SocketChannel socket = serverSock.accept();
// Hand this socket off to an appropriate processor
//TODO FIXME - this is currently a blocking call, meaning we will be blocking
//further accepts until there is a thread available.
if ( running && (!paused) && socket != null ) {
//processSocket(socket);
if (!setSocketOptions(socket)) {
try {
socket.socket().close();
socket.close();
} catch (IOException ix) {
if (log.isDebugEnabled())
log.debug("", ix);
}
}
}
}catch (SocketTimeoutException sx) {
//normal condition
}catch ( IOException x ) {
if ( running ) log.error(sm.getString("endpoint.accept.fail"), x);
} catch (OutOfMemoryError oom) {
try {
oomParachuteData = null;
releaseCaches();
log.error("", oom);
}catch ( Throwable oomt ) {
try {
try {
System.err.println(oomParachuteMsg);
oomt.printStackTrace();
}catch (Throwable letsHopeWeDontGetHere){}
}catch (Throwable letsHopeWeDontGetHere){}
}
} catch (Throwable t) {
log.error(sm.getString("endpoint.accept.fail"), t);
}
}//while
}//run
}
没什么好说的,和BIO模式一样,主要看setSocketOptions方法:
protected boolean setSocketOptions(SocketChannel socket) {
// Process the connection
try {
//disable blocking, APR style, we are gonna be polling it
socket.configureBlocking(false);
Socket sock = socket.socket();
socketProperties.setProperties(sock);
NioChannel channel = nioChannels.poll();
if ( channel == null ) {
// SSL 部分去除了
// normal tcp setup
NioBufferHandler bufhandler = new NioBufferHandler(socketProperties.getAppReadBufSize(),
socketProperties.getAppWriteBufSize(),
socketProperties.getDirectBuffer());
channel = new NioChannel(socket, bufhandler);
} else {
channel.setIOChannel(socket);
if ( channel instanceof SecureNioChannel ) {
SSLEngine engine = createSSLEngine();
((SecureNioChannel)channel).reset(engine);
} else {
channel.reset();
}
}
getPoller0().register(channel);
} catch (Throwable t) {
try {
log.error("",t);
}catch ( Throwable tt){}
// Tell to close the socket
return false;
}
return true;
}
这里有一个NioChannel 对像池nioChannels,主要目的大概是重用对像,降低GC,因为
NioBufferHandler是需要申请内存空间的。把内存空间清0重用比重新向操作系统申请要快一些。NioChannel只是SocketChannel的包装器,目的是使得SSL socket channel与
Non-SSL socket channel保持逻辑上的一致。
getPoller0采用轮循的方式取出一个Poller即读写线程。我们主要看一下Poller的register(channel)方法:
public void register(final NioChannel socket)
{
socket.setPoller(this);
KeyAttachment key = keyCache.poll();
final KeyAttachment ka = key!=null?key:new KeyAttachment();
ka.reset(this,socket,getSocketProperties().getSoTimeout());
PollerEvent r = eventCache.poll();
ka.interestOps(SelectionKey.OP_READ);//this is what OP_REGISTER turns into.
if ( r==null) r = new PollerEvent(socket,ka,OP_REGISTER);
else r.reset(socket,ka,OP_REGISTER);
addEvent(r);
}
首先构造一个KeyAttachment,然后构造一个PollerEvent事件,并添加到事件队列。
记住这里Tomcat虚拟了一个OP_REGISTER。待续…
本文转自 anranran 51CTO博客,原文链接:http://blog.51cto.com/guojuanjun/541028