Provides user persistence for your Symfony2 Project.
为您的Symfony2项目提供用户持久化
Features
功能
========
- Compatible with Doctrine ORM **and** ODM thanks to a generic repository.
- 与Doctrine ORM **和** ODM 兼容,这归功于通用库
- Model is extensible at will
- 模型可随意扩展
- REST-ful authentication
- REST风格的认证
- Current user available in your controllers and views
- 当前用户在您控制器和视图中可用
- Unit tested and functionally tested
- 支持单元测试和功能测试
Warning
警告
=======
The core SecurityBundle is required to use this bundle.
使用该Bundle必须启用核心SecurityBundle。
The supplied Controller and routing configuration files expose as much functionality as possible to illustrate how to use the Bundle. However using these exposes a lot of functionality which requires additional configuration to secure properly (for example delete, list etc). As such its not recommended to ever go into production while using one of the default routing configuration files.
为了说明如何使用该Bundle,其所提供的Controller和路由配置文件都尽可能多地展示功能。然而,展示大量这样的功能是需要额外的配置来确保安全的(如删除和列表等)。因此,并不建议在生产环境中使用某种缺省的路由配置文件。
The implementation of ACL checks via the JMSSecurityExtraBundle is also
currently incomplete (see issue #53) and activation of this Bundle is also
not enforced.
通过JMSSecurityExtraBundle实现ACL检查当前还不完整(参见问题#53),也并不强制激活该Bundle。
Furthermore it may be necessary to extend or even replace the default Controllers
with custom code to achieve the exact desired behavior. Trying to cover every possible use case is not feasible as it would complicate the Bundle to the point of being unmaintainable and impossible to comprehend in a reasonable amount of time.
此外,它也许会用自定义代码去扩展甚至替换缺省的控制器,以实现确实想要的行为。试图涵盖所有可能的用例是不现实的,因为它会使Bundle变得复杂,从而使之在合理的时间内变得不可维护和难以理解。
Installation
安装
============
Add FOSUserBundle to your vendor/bundles/ dir
将FOSUserBundle添加到您的vendor/bundles/目录中
------------------------------------------
Using the vendors script
使用vendors脚本
~~~~~~~~~~~~~~~~~~~~~~~~~~~~
Add the following lines in your ``deps`` file
添加以下语句到您的``deps``文件中
::
[FOSUserBundle]
git=git://github.com/FriendsOfSymfony/FOSUserBundle.git
target=bundles/FOS/UserBundle
Run the vendors script
运行vendors脚本
::
./bin/vendors install
Using submodules
使用子模块
~~~~~~~~~~~~~~~~
::
$ git submodule add git://github.com/FriendsOfSymfony/FOSUserBundle.git vendor/bundles/FOS/UserBundle
Add the FOS namespace to your autoloader
将FOS名称空间添加到您的自动加载器中
----------------------------------------
::
// app/autoload.php
$loader->registerNamespaces(array(
'FOS' => __DIR__.'/../vendor/bundles',
// your other namespaces
);
Add UserBundle to your application kernel
将UserBundle添加到您的应用程序内核中
-----------------------------------------
::
// app/AppKernel.php
public function registerBundles()
{
return array(
new Symfony\Bundle\SecurityBundle\SecurityBundle(),
// ...
new FOS\UserBundle\FOSUserBundle(),
// ...
);
}
Create your User class
创建您的User类
----------------------
You must create a User class that extends either the entity or document abstract
User class in UserBundle. All fields on the base class are mapped, except for
``id``; this is intentional, so you can select the generator that best suits
your application. Feel free to add additional properties and methods to your
custom class.
您必须创建一个User类去扩展UserBundle中的实体或文档抽象User类。除了``id``,基类中的所有字段都被映射;这是故意的,以便您可以选择您应用程序最适用的生成器。您可以向您自定义的类中随意添加额外的属性和方法。
ORM User class
ORM User类
~~~~~~~~~~~~~~
::
// src/MyProject/MyBundle/Entity/User.php
<?php
namespace MyProject\MyBundle\Entity;
use FOS\UserBundle\Entity\User as BaseUser;
use Doctrine\ORM\Mapping as ORM;
/**
* @ORM\Entity
* @ORM\Table(name="fos_user")
*/
class User extends BaseUser
{
/**
* @ORM\Id
* @ORM\Column(type="integer")
* @ORM\generatedValue(strategy="AUTO")
*/
protected $id;
public function __construct()
{
parent::__construct();
// your own logic
}
}
.. note
.. 注意
::
``User`` is a reserved keyword in SQL so you cannot use it as table name.
``User``是SQL中的保留关键词,因此您不能将其作为数据表名。
MongoDB User class
MongoDB User类
~~~~~~~~~~~~~~~~~~
::
// src/MyProject/MyBundle/Document/User.php
<?php
namespace MyProject\MyBundle\Document;
use FOS\UserBundle\Document\User as BaseUser;
use Doctrine\ODM\MongoDB\Mapping\Annotations as MongoDB;
/**
* @MongoDB\Document
*/
class User extends BaseUser
{
/** @MongoDB\Id(strategy="auto") */
protected $id;
public function __construct()
{
parent::__construct();
// your own logic
}
}
.. warning
.. 警告
::
Take care to call the parent constructor when you overwrite it in your own
entity as it initializes some fields.
当您为了初始化某些字段而在您自己的实体类中覆写了构造函数时,请小心调用父类的构造函数。
Configure your project
配置您的项目
----------------------
The UserBundle works with the Symfony Security Component, so make sure that is enabled in your kernel and in your project's configuration. A working security configuration using FOSUserBundle is available at the end of the doc.
UserBundle需要Symfony2的安全组件才能正常工作,因此请确保在您的内核和项目配置中启用了它。在本文档结束时,将向您展示一个可正常工作的使用FOSUserBundle的安全配置。
.. note
.. 注意
::
You need to activate SwiftmailerBundle to be able to use the functionalities
using emails (confirmation of the account, resetting of the password).
See the `Emails` section to know how using another mailer.
你需要激活SwiftmailerBundle来使用要电子邮件协助的功能(如帐号确认、密码重置等)
The login form and all the routes used to create a user and reset the password
have to be available to unauthenticated users but using the same firewall as
the pages you want to securize with the bundle. Assuming you import the
registration.xml routing file with the ``/register`` prefix and resetting.xml
with the ``/resetting`` prefix they will be
登录表单和所有用于创建用户和重置密码的路由都要向未经认证的用户开放,但使用同一防火墙,因为您要确保整个Bundle页面的安全。假设您准备使用``/register``前缀导入registration.xml路由文件,使用``/register``前缀导入resetting.xml。
::
/login
/register/
/register/check-email
/register/confirm/{token}
/register/confirmed
/resetting/request
/resetting/send-email
/resetting/check-email
/resetting/reset/{token}
The above example assumes an ORM configuration, but the ``mappings``
configuration block would be the same for MongoDB ODM.
上面的例子假设使用的是ORM配置,但对于MongoDB ODM来讲``mappings``配置区块也能达到相同的效果。
Minimal configuration
最小配置
---------------------
At a minimum, your configuration must define your DB driver ("orm" or "mongodb"), a User class and the firewall name. The firewall name matches the key in the firewall configuration that is used for users with the controllers of the
bundle.
至少,您的配置需要定义您的数据库驱动("orm"或"mongodb")、User类和防火墙名。防火墙名匹配防火墙配置中的关键词,该配置用于Bundle控制器的用户。
The firewall name needs to be configured so that the FOSUserBundle can determine against which firewall the user should be authenticated after activating the account for instance. This means that out of the box FOSUserBundle only supports being used for a single firewall, though with a custom Controller this
limitation can be circumvented.
配置防火墙名称是为了让FOSUserBundle可以确定用户帐户实例激活后确定使用哪个防火墙来进行认证。这就意味着FOSUserBundle仅被支持用于单个防火墙,虽然通过自定义控制器可以规避该限制。
For example for a security configuration like the following the firewall_name
would have to be set to "main", as shown in the proceeding examples:
接下来是安全配置的例子,firewall_name必须设为"main",如下所示:
::
# app/config/config.yml
security:
providers:
fos_userbundle:
id: fos_user.user_manager
firewalls:
main:
form_login:
provider: fos_userbundle
ORM
~~~
In YAML:
YAML格式:
::
# app/config/config.yml
fos_user:
db_driver: orm
firewall_name: main
user_class: MyProject\MyBundle\Entity\User
Or if you prefer XML:
如果你喜欢XML格式:
::
# app/config/config.xml
<fos_user:config
db-driver="orm"
firewall-name="main"
user-class="MyProject\MyBundle\Entity\User"
/>
ODM
~~~
In YAML:
YAML格式:
::
# app/config/config.yml
fos_user:
db_driver: mongodb
firewall_name: main
user_class: MyProject\MyBundle\Document\User
Or if you prefer XML:
如果你喜欢XML格式:
::
# app/config/config.xml
<fos_user:config
db-driver="mongodb"
firewall-name="main">
user-class="MyProject\MyBundle\Document\User"
/>
Add authentication routes
添加认证路由
-------------------------
If you want ready to use login and logout pages, include the built-in
routes:
如果你想使用包含内建路由的登录和退出页:
::
# app/config/routing.yml
fos_user_security:
resource: "@FOSUserBundle/Resources/config/routing/security.xml"
fos_user_profile:
resource: "@FOSUserBundle/Resources/config/routing/profile.xml"
prefix: /profile
fos_user_register:
resource: "@FOSUserBundle/Resources/config/routing/registration.xml"
prefix: /register
fos_user_resetting:
resource: "@FOSUserBundle/Resources/config/routing/resetting.xml"
prefix: /resetting
fos_user_change_password:
resource: "@FOSUserBundle/Resources/config/routing/change_password.xml"
prefix: /change-password
::
# app/config/routing.xml
<import resource="@FOSUserBundle/Resources/config/routing/security.xml"/>
<import resource="@FOSUserBundle/Resources/config/routing/profile.xml" prefix="/profile" />
<import resource="@FOSUserBundle/Resources/config/routing/registration.xml" prefix="/register" />
<import resource="@FOSUserBundle/Resources/config/routing/resetting.xml" prefix="/resetting" />
<import resource="@FOSUserBundle/Resources/config/routing/change_password.xml" prefix="/change-password" />
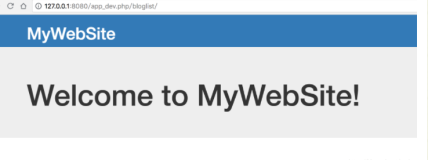
You now can login at http://app.com/app_dev.php/login
现在您可以通过http://app.com/app_dev.php/login登录了。
Command line
命令行
============
FOSUserBundle provides command line utilities to help manage your
application users.
FOSUserBundle提供命令行工具来帮助您管理您的管理程序用户。
Create user
创建用户
-----------
This command creates a new user
该命令新建一个用户
::
$ php app/console fos:user:create username email password
If you don't provide the required arguments, a interactive prompt will
ask them to you
如果您不能提供所需的参数,将出现询问您的提示
::
$ php app/console fos:user:create
Promote user as a super administrator
将用户提升为超级管理员
-------------------------------------
This command promotes a user as a super administrator
该命令将用户提升为超级管理员
::
$ php app/console fos:user:promote
User manager service
用户管理服务
====================
FOSUserBundle works with both ORM and ODM. To make it possible, it wraps
all the operation on users in a UserManager. The user manager is a service
of the container.
FOSUserBundle可以与ORM或ODM一起工作。为了使之成为可能,它在UserManager中封装了与用户相关的所有操作。
If you configure the db_driver to orm, this service is an instance of
``FOS\UserBundle\Entity\UserManager``.
如果您将db_driver配置为orm,该服务是``FOS\UserBundle\Entity\UserManager``的一个实例。
If you configure the db_driver to odm, this service is an instance of
``FOS\UserBundle\Document\UserManager``.
如果您将db_driver配置为odm,该服务就是``FOS\UserBundle\Document\UserManager``的一个实例。
Both these classes implement ``FOS\UserBundle\Model\UserManagerInterface``.
上述两个类都实现了``FOS\UserBundle\Model\UserManagerInterface``接口。
Access the user manager service
访问用户管理服务
-------------------------------
If you want to manipulate users in a way that will work as well with
ORM and ODM, use the fos_user.user_manager service
如果您想用一种方式操作用户,该方式能够使ORM或ODM都良好工作,那么使用fos_user.user_manager服务
::
$userManager = $container->get('fos_user.user_manager');
That's the way FOSUserBundle's internal controllers are built.
这是创建FOSUserBundle内部控制器的方式。
Access the current user class
访问当前用户类
-----------------------------
A new instance of your User class can be created by the user manager
通过用户管理器创建您User类的新实例
::
$user = $userManager->createUser();
`$user` is now an Entity or a Document, depending on the configuration.
`$user`现在是一个Entity或Document,这取决于配置。
Updating a User object
更新用户对象
----------------------
When creating or updating a User object you need to update the encoded password and the canonical fields. To make it easier, the bundle comes with a Doctrine listener handling this for you behind the scene.
当创建或更新用户对象时,您需要更新加密的密码和规范的字段。为了使这一切变得容易,该Bundle自带的Doctrine监听器将为您在幕后处理这一切。
If you don't want to use the Doctrine listener, you can disable it. In this case
you will have to call the ``updateUser`` method of the user manager each time
you do a change in your entity.
如果您不想使用Doctrine监听器,您也可以禁用它。在这种情况下,当您每次改变您的实体时,您都将不得不调用用户管理器的``updateUser``方法。
In YAML:
YAML格式:
::
# app/config/config.yml
fos_user:
db_driver: orm
firewall_name: main
use_listener: false
user_class: MyProject\MyBundle\Entity\User
Or if you prefer XML:
如果您喜欢XML格式:
::
# app/config/config.xml
<fos_user:config
db-driver="orm"
firewall-name="main"
use-listener="false">
user-class="MyProject\MyBundle\Entity\User"
/>
.. note
.. 注意
::
The default behavior is to flush the changes when calling this method. You
can disable the flush when using the ORM and the MongoDB implementations by
passing a second argument set to ``false``.
当调用该方法时,其缺省动作是去"flush"改变。您可以将该方法的第二个参数设为``false``,从而在使用ORM或MongoDB实现时禁用"flush"。
Using groups
使用组
============
The bundle allows to optionnally use groups. You need to explicitly
enable it in your configuration by giving the Group class which must
implement ``FOS\UserBundle\Model\GroupInterface``.
可以让该Bundle选择使用组。您需要通过指定的Group类在您的配置中明确地启用它,Group类必须实现``FOS\UserBundle\Model\GroupInterface``接口。
In YAML:
YAML格式:
::
# app/config/config.yml
fos_user:
db_driver: orm
firewall_name: main
user_class: MyProject\MyBundle\Entity\User
group:
group_class: MyProject\MyBundle\Entity\Group
Or if you prefer XML:
如果您喜欢XML格式:
::
# app/config/config.xml
<fos_user:config
db-driver="orm"
firewall-name="main">
user-class="MyProject\MyBundle\Entity\User"
>
<fos_user:group group-class model="MyProject\MyBundle\Entity\Group" />
</fos_user:config>
The Group class
Group类
---------------
The simpliest way is to extend the mapped superclass provided by the
bundle.
最简单的方式就是扩展由该Bundle提供的映射超类
ORM
~~~
::
// src/MyProject/MyBundle/Entity/Group.php
<?php
namespace MyProject\MyBundle\Entity;
use FOS\UserBundle\Entity\Group as BaseGroup;
use Doctrine\ORM\Mapping as ORM;
/**
* @ORM\Entity
* @ORM\Table(name="fos_group")
*/
class Group extends BaseGroup
{
/**
* @ORM\Id
* @ORM\Column(type="integer")
* @ORM\generatedValue(strategy="AUTO")
*/
protected $id;
}
.. note
.. 注意
::
``Group`` is also a reserved keyword in SQL so it cannot be used either.
``Group``也是SQL的保留关键词,因此它也不能使用。
ODM
~~~
::
// src/MyProject/MyBundle/Document/Group.php
<?php
namespace MyProject\MyBundle\Document;
use FOS\UserBundle\Document\Group as BaseGroup;
use Doctrine\ODM\MongoDB\Mapping as MongoDB;
/**
* @MongoDB\Document
*/
class Group extends BaseGroup
{
/** @MongoDB\Id(strategy="auto") */
protected $id;
}
Defining the relation
定义关系
---------------------
The next step is to map the relation in your User class.
下一步就是要映射您User类的关系
ORM
~~~
::
// src/MyProject/MyBundle/Entity/User.php
<?php
namespace MyProject\MyBundle\Entity;
use FOS\UserBundle\Entity\User as BaseUser;
use Doctrine\ORM\Mapping as ORM;
/**
* @ORM\Entity
* @ORM\Table(name="fos_user")
*/
class User extends BaseUser
{
/**
* @ORM\Id
* @ORM\Column(type="integer")
* @ORM\generatedValue(strategy="AUTO")
*/
protected $id;
/**
* @ORM\ManyToMany(targetEntity="MyProject\MyBundle\Entity\Group")
* @ORM\JoinTable(name="fos_user_user_group",
* joinColumns={@ORM\JoinColumn(name="user_id", referencedColumnName="id")},
* inverseJoinColumns={@ORM\JoinColumn(name="group_id", referencedColumnName="id")}
* )
*/
protected $groups;
}
ODM
~~~
::
// src/MyProject/MyBundle/Document/User.php
<?php
namespace MyProject\MyBundle\Document;
use FOS\UserBundle\Document\User as BaseUser;
use Doctrine\ODM\MongoDB\Mapping as MongoDB;
/**
* @MongoDB\Document
*/
class User extends BaseUser
{
/** @MongoDB\Id(strategy="auto") */
protected $id;
/** @MongoDB\ReferenceMany(targetDocument="MyProject\MyBundle\Document\Group") */
protected $groups;
}
Enabling the routing for the GroupController
为GroupController启用路由
--------------------------------------------
You can also the group.xml file to use the builtin controller to manipulate the
groups.
您也可以通过group.xml文件使用内建的控制器来维护组。
Configuration reference
配置参考
=======================
All configuration options are listed below
以下列出所有配置选项
::
# app/config/config.yml
fos_user:
db_driver: ~ # Required
firewall_name: ~ # Required
user_class: ~ # Required
use_listener: true
from_email: { webmaster@example.com: Admin }
profile:
form:
type: FOS\UserBundle\Form\ProfileFormType
handler: FOS\UserBundle\Form\ProfileFormHandler
name: fos_user_profile_form
validation_groups: [Profile]
change_password:
form:
type: FOS\UserBundle\Form\ChangePasswordFormType
handler: FOS\UserBundle\Form\ChangePasswordFormHandler
name: fos_user_change_password_form
validation_groups: [ChangePassword]
registration:
confirmation:
from_email: ~
enabled: false
template: FOSUserBundle:Registration:email.txt.twig
form:
type: FOS\UserBundle\Form\RegistrationFormType
handler: FOS\UserBundle\Form\RegistrationFormHandler
name: fos_user_registration_form
validation_groups: [Registration]
resetting:
token_ttl: 86400
email:
from_email: ~
template: FOSUserBundle:Resetting:email.txt.twig
form:
type: FOS\UserBundle\Form\ResettingFormType
handler: FOS\UserBundle\Form\ResettingFormHandler
name: fos_user_resetting_form
validation_groups: [ResetPassword]
service:
mailer: fos_user.util.mailer.default
email_canonicalizer: fos_user.util.email_canonicalizer.default
username_canonicalizer: fos_user.util.username_canonicalizer.default
user_manager: fos_user.user_manager.default
encoder:
algorithm: sha512
encode_as_base64: false
iterations: 1
template:
engine: twig
theme: FOSUserBundle::form.html.twig
group:
group_class: ~ # Required when using groups
form:
type: FOS\UserBundle\Form\GroupFormType
handler: FOS\UserBundle\Form\GroupHandler
name: fos_user_group_form
validation_groups: [Registration]
Configuration example
配置示例
=====================
This section provides a working configuration for the bundle and the security.
本段为Bundle和安全提供了一个可正常工作的配置。
FOSUserBundle configuration
FOSUserBundle配置
---------------------------
::
# app/config/config.yml
fos_user:
db_driver: orm
firewall_name: main
user_class: MyProject\MyBundle\Entity\User
Security configuration
安全配置
----------------------
::
# app/config/security.yml
security:
providers:
fos_userbundle:
id: fos_user.user_manager
firewalls:
main:
pattern: .*
form_login:
provider: fos_userbundle
login_path: /login
use_forward: false
check_path: /login_check
failure_path: null
logout: true
anonymous: true
access_control:
# The WDT has to be allowed to anonymous users to avoid requiring the login with the AJAX request必须允许匿名用户访问以避免使用AJAX请求时要求登录
# WDT必须允许匿名用户访问,以避免在使用AJAX请求时被要求登录
- { path: ^/_wdt/, role: IS_AUTHENTICATED_ANONYMOUSLY }
- { path: ^/_profiler/, role: IS_AUTHENTICATED_ANONYMOUSLY }
# AsseticBundle paths used when using the controller for assets
# 当为assets使用控制器时将AsseticBundle路径
- { path: ^/js/, role: IS_AUTHENTICATED_ANONYMOUSLY }
- { path: ^/css/, role: IS_AUTHENTICATED_ANONYMOUSLY }
# URL of FOSUserBundle which need to be available to anonymous users
# FOSUserBundle的URL,需要匿名用户可见
- { path: ^/login$, role: IS_AUTHENTICATED_ANONYMOUSLY }
- { path: ^/register, role: IS_AUTHENTICATED_ANONYMOUSLY }
- { path: ^/resetting, role: IS_AUTHENTICATED_ANONYMOUSLY }
# Secured part of the site
# 网站安全部分
# This config requires being logged for the whole site and having the admin role for the admin part.
# 这个配置要求正在被全站记录,并且对admin部分要求管理角色
# Change these rules to adapt them to your needs
# 改变这些角色使它们适应您的需要
- { path: ^/admin/, role: ROLE_ADMIN }
- { path: ^/.*, role: ROLE_USER }
role_hierarchy:
ROLE_ADMIN: ROLE_USER
ROLE_SUPER_ADMIN: ROLE_ADMIN
Replacing some part by your own implementation
使用您自己的实现替换一些部分
==============================================
Templating
模板
----------
The template names are not configurable, however Symfony2 makes it possible
to extend a bundle by defining a template in the app/ directory.
模板名是不可配置的,然而为了扩展Bundle,Symfony2可以通过在app/目录中定义模板来使之成为可能。
For example ``vendor/bundles/FOS/UserBundle/Resources/views/User/new.twig`` can be
replaced inside an application by putting a file with alternative content in
``app/Resources/FOSUserBundle/views/User/new.twig``.
举个例子,``vendor/bundles/FOS/UserBundle/Resources/views/User/new.twig``可以通过在应用程序中放置的``app/Resources/FOSUserBundle/views/User/new.twig``文件内容所取代。
You could also create a bundle defined as child of FOSUserBundle and placing the
templates in it.
您也可以创建一个FOSUserBundle的子Bundle,并将模板放置其中。
You can use a different templating engine by configuring it but you will have to
create all the needed templates as only twig templates are provided.
通过配置您可以使用不同的模板引擎,但您必须得创建所有需要的模板,而不仅是只提供twig模板。
Controller
控制器
----------
To overwrite a controller, create a bundle defined a child of FOSUserBundle
and create a controller with the same name in this bundle.
要覆写一个控制器,可以创建一个FOSUserBundle的子Bundle,并在该Bundle中创建同名的控制器。
Validation
验证
----------
The ``Resources/config/validation.xml`` file contains definitions for custom
validator rules for various classes. The rules defined by FOSUserBundle are
all in a validation group so you can choose not to use them.
``Resources/config/validation.xml``文件包含了为不同类自定义的验证器规则。这些被FOSUserBundle定义的规则都被放置在一个验证组中,因此您可以选择不使用它们。
Emails
电子邮件
------
The default mailer relies on Swiftmailer to send the mails of the bundle.
If you want to use another mailer in your project you can change it by defining
your own service implementing ``FOS\UserBundle\Mailer\MailerInterface`` and
setting its id in the configuration
缺省邮件系统依赖于Swiftmailer来发送Bundle的邮件。如果您想在您的项目中使用其它的邮件系统,您可以通过定义您自己的服务来改变它。该服务必须要实现 ``FOS\UserBundle\Mailer\MailerInterface``接口,并在配置中设置它的ID。
::
fos_user:
# ...
service:
mailer: custom_mailer_id
This bundle comes with two mailer implementations.
该Bundle有两个邮件系统实现。
- `fos_user.mailer.default` is the default implementation, and uses swiftmailer to send emails.
- `fos_user.mailer.default` 是缺省实现,它使用swiftmailer来发送邮件。
- `fos_user.mailer.noop` does nothing and can be used if your project does not depend on swiftmailer.
- `fos_user.mailer.noop` 不做任何事,如果您的项目不使用swiftmailer,可以使用它。
Canonicalization
规范
----------------
``Canonicalizer`` services are used to canonicalize the username and the email
fields for database storage. By default, username and email fields are
canonicalized in the same manner using ``mb_convert_case()``. You may configure
your own class for each field provided it implements
``FOS\UserBundle\Util\CanonicalizerInterface``.
``Canonicalizer`` 服务为数据库存储规范用户名和邮件字段。缺省情况下,用户名和邮件字段同样都是使用``mb_convert_case()``来进行规范的。您也许想为每个字段都配置您自己的类,这可以通过实现``FOS\UserBundle\Util\CanonicalizerInterface``接口来提供。
.. note
.. 注意
::
If you do not have the mbstring extension installed you will need to
define your own ``canonicalizer``.
如果您没有安装mbstring扩展,您需要定义您自己的``canonicalizer``
本文转自 firehare 51CTO博客,原文链接:http://blog.51cto.com/firehare/595319,如需转载请自行联系原作者