1. 常用命令
命令存放,哪些命令可以执行?
| root: |
/sbin /usr/sbin |
| all users:
|
/bin /usr/bin |
| bin--binary 二进制文件 Linux所有都是文件,都是二进制文件 usr—user sbin—super binary |
|
1.1文件处理命令
| 文件处理命令 |
|
||||
| 1 |
ls |
英文原意是list 功能:显示目录文件 属性可以连着写,比如ls -ld |
Eg |
含义 |
|
| -a all |
显示所有文件,包括隐藏文件 |
ls -a / |
|
||
| -l long
-I 显示i节点 |
详细信息显示 |
[root@localhost ~]# ls -l total 68 -rw------- 1 root root 1211 Feb 14 04:02 anaconda-ks.cfg drwxr-xr-x 3 root root 4096 Feb 14 11:20 Desktop -rw-r--r-- 1 root root 31736 Feb 14 04:02 install.log -rw-r--r-- 1 root root 0 Feb 14 03:16 install.log.syslog drwxr-xr-x 2 root root 4096 Feb 14 17:36 test |
drwxr-xr-x 2 root root 4096 Feb 14 11:20 每三个表示权限 表示硬连接数 所有者 所属组 文件大小 创建时间 数据块 block 512字节 第一个字符表示如下: d 目录directory - 二进制文件 l 软链接文件 每三个分配如下: r—read 读 w—write写 x—execute执行 rwx r-x r-x 所有者u 所属组g 其他人o user group others |
||
| -d |
查看目录属性 |
[root@localhost ~]# ls -ld /test drwxr-xr-x 3 root root 4096 Feb 14 17:42 /test |
|
||
| 2 |
cd |
切换目录 |
|
|
|
| Cd / |
进入根目录 |
|
|
||
| Cd [目录] |
|
|
|
||
| Cd .. |
返回父级目录 |
|
|
||
| 3 |
pwd |
英文:print working directory |
查看当前目录 |
[root@localhost ~]# pwd /root |
|
| 4 |
touch |
创建空文件 |
|
[root@localhost test]# touch testfile [root@localhost test]# ls -l testfile -rw-r--r-- 1 root root 0 Feb 14 18:51 testfile
|
|
| 5 |
mkdir |
英文:make directories |
创建空目录 |
[root@localhost ~]# mkdir test |
|
| 6 |
cp |
英文:copy |
复制文件 -R 复制目录 |
copy [源文件,可多个] [目的目录] [root@localhost test]# cp /etc/inittab /etc/services /test [root@localhost test]# ls /test abc.txt inittab lost+found samlee services testfile
将etc拷贝到test下 [root@localhost test]# cp -R /etc /test
|
/etc 主要是配置文件,很重要,记得备份 命令停止快捷键:Ctrl+c |
| 7. |
mv |
英文:move |
移动文件,改名 |
[root@localhost test]# ls /test abc.txt etc inittab lost+found samlee services testfile 改名: [root@localhost test]# mv services service [root@localhost test]# ls /test abc.txt etc inittab lost+found samlee service testfile 移动: [root@localhost test]# mv /test/inittab /tmp/ [root@localhost test]# ls /test abc.txt etc lost+found samlee service testfile 改名+移动: [root@localhost test]# mv /test/testfile /tmp/file.test [root@localhost test]# ls /tmp file.test scim-panel-socket:0-root gconfd-root scim-socket-frontend-root inittab ssh-yoUWCY4180 keyring-z1fmdW virtual-root.IYU2ep mapping-root vmware-config0 orbit-root VMwareDnD scim-bridge-0.3.0.lockfile-0@localhost:0.0 vmware-root scim-bridge-0.3.0.socket-0@localhost:0.0 vmware-root-592157060 scim-helper-manager-socket-root
|
|
| 8 |
rm |
remove |
删除 |
[root@localhost test]# ls /test abc.txt etc lost+found samlee service 删除service [root@localhost test]# rm service rm: remove regular file `service'? y [root@localhost test]# ls /test abc.txt etc lost+found samlee 删除不询问: [root@localhost test]# touch testfile [root@localhost test]# ls abc.txt etc lost+found samlee testfile [root@localhost test]# rm -f testfile [root@localhost test]# ls abc.txt etc lost+found samlee
|
rm –f 目录名称 不提示,强制删除,在写脚本的时候用,因为没有yes交互 r表示删除,f表示强制 |
| 9 |
cat |
concatenate and display files |
查看 |
[root@localhost test]# cat /etc/issue CentOS release 5.5 (Final) Kernel \r on an \m
|
适合查看文件小,因为多的话会把前面的覆盖,不能翻页。 比如cat /etc/services |
| 10 |
more |
(空格)或f 显示下一页 (enter)显示下一行 q或Q 退出 |
分页查看 |
[root@localhost test]# more /etc/services
|
|
| 11 |
head |
-num 文件名 |
查看文件前num行 |
[root@localhost test]# head -5 /etc/services # /etc/services: # Id:services,v1.422006/02/2313:09:23pknirschExp # # Network services, Internet style #
|
|
| 12 |
tail |
-num 文件名 -f 文件名 |
查看文件尾num行 动态查看文件尾部信息 |
[root@localhost test]# tail -5 /etc/services com-bardac-dw 48556/tcp # com-bardac-dw com-bardac-dw 48556/udp # com-bardac-dw iqobject 48619/tcp # iqobject iqobject 48619/udp # iqobject # Local services [root@localhost test]# tail -f /etc/services
|
tail –f 为了监视日志文件,默认显示10行 |
| 13 |
ln |
英文:link ln 文件名 目的目录 ln –s 文件名 目的目录 -s soft软连接 |
创建硬链接 创建软链接 |
[root@localhost test]# ln -s /etc/issue /issue.soft [root@localhost test]# ls -l /etc/issue /issue.soft -rw-r--r-- 1 root root 47 Apr 26 2010 /etc/issue lrwxrwxrwx 1 root root 10 Feb 14 16:51 /issue.soft -> /etc/issue
硬链接: [root@localhost test]# ln /etc/issue /issue.hard [root@localhost test]# ls -l /etc/issue /issue.hard -rw-r--r-- 2 root root 47 Apr 26 2010 /etc/issue -rw-r--r-- 2 root root 47 Apr 26 2010 /issue.hard
拷贝: [root@localhost test]# cp /etc/issue /test/issue [root@localhost test]# ls -l /etc/issue /test/issue -rw-r--r-- 2 root root 47 Apr 26 2010 /etc/issue -rw-r--r-- 1 root root 47 Feb 14 20:31 /test/issue
拷贝并且不改变时间,比如某些备份 [root@localhost test]# cp -p /etc/issue /test/issue cp: overwrite `/test/issue'? y [root@localhost test]# ls -l /etc/issue /test/issue -rw-r--r-- 2 root root 47 Apr 26 2010 /etc/issue -rw-r--r-- 1 root root 47 Apr 26 2010 /test/issue
|
软连接文件类型是l 软连接所有人都有权限,但能不能访问取决于源文件 软连接时间值 是创建软连接的时间 相当于快捷方式
类似于copy,文件大小相同 不同于copy的是,它是同步更新的。
还有一个不同的是,拷贝的时间是不同,时间是创建的时间
一个i节点可以映射到多个文件,所以硬链接可以同步更新。
|
1.2权限管理命令
| 权限管理命令 |
|||||
| 14 |
chmod |
change the permissions mode of a file |
chmod[{ugo0}{+-=}[文件或目录][mode=421][文件或目录] 功能: 改变文件或目录权限
用数字表示 r--4 w--2 x—1 rwxr-xr-- 754 rw-r-x—x 651
文件: r-car,more,head,tail w-echo,vi 可以修改内容 x-命令,脚本 目录: r-ls w-touch,mkdir,rm 对目录有这些权限 x-cd 对目录可以进去 所以,所有的目录都有rx权限,表示可以读取可以进去 |
[root@localhost test]# ls -l a -rwxr-x--- 1 root root 0 Feb 19 15:45 a [root@localhost test]# chmod o+rwx a [root@localhost test]# ls -l a -rwxr-xrwx 1 root root 0 Feb 19 15:45 a [root@localhost test]# chmod o-rw a [root@localhost test]# ls -l a -rwxr-x--x 1 root root 0 Feb 19 15:45 a [root@localhost test]# chmod g=r a [root@localhost test]# ls -l a -rwxr----x 1 root root 0 Feb 19 15:45 a [root@localhost test]# chmod g=rx a [root@localhost test]# ls -l a -rwxr-x--x 1 root root 0 Feb 19 15:45 a
[root@localhost test]# chmod 641 a [root@localhost test]# ls -l a -rw-r----x 1 root root 0 Feb 19 15:45 a |
chmod u+权限 文件或目录-------给所属者增加权限 chmod u+权限 文件或目录-------给所属者减少权限
chmod g=权限 文件或目录-------给所属组赋予权限
chmod o -----------------------------------同u,为加减权限
用数字表示权限,直接赋值就可以 chmod 641 a |
| 15 |
chown |
change file ownership |
改变所有者 |
[root@localhost test]# ls -l a -rw-r----x 1 root root 0 Feb 19 15:45 a [root@localhost test]# chown helen a [root@localhost test]# ls -l a -rw-r----x 1 helen root 0 Feb 19 15:45 a [root@localhost test]# chown nobody a [root@localhost test]# ls -l a -rw-r----x 1 nobody root 0 Feb 19 15:45 a
|
|
| 16 |
chgrp |
change file group ownership |
改变所属组 |
[root@localhost test]# ls -l a -rw-r----x 1 nobody root 0 Feb 19 15:45 a [root@localhost test]# chgrp adm a [root@localhost test]# ls -l a -rw-r----x 1 nobody adm 0 Feb 19 15:45 a
|
|
| 17 |
umask |
|
查看创建文件的默认权限 改变默认权限 umask 权限掩码值 |
[root@localhost test]# mkdir newdir [root@localhost test]# ls -ld newdir drwxr-xr-x 2 root root 4096 Feb 20 10:40 newdir [root@localhost test]# umask 0022 [root@localhost test]# umask -S u=rwx,g=rx,o=rx
|
|
| * |
0022 |
|
特殊权限位 022-用户权限位,权限掩码值 777 022 755 022 就是表示755
SetUID 4 SetGID 2 |
chmod u+s 4755 2755 组id 6755同时SetUID和SetGID |
|
| * |
Linux权限规则 |
|
缺省创建的文件不能授予可执行x权限 |
[root@localhost test]# touch testfile [root@localhost test]# ls -l testfile -rw-r--r-- 1 root root 0 Feb 20 10:50 testfile
|
虽然创建文件的默认权限是022,但创建的空文件testfile没有x权限 |
| * |
添加用户 |
|
|
[root@localhost test]# useradd miao [root@localhost test]# passwd miao Changing password for user miao. New UNIX password: BAD PASSWORD: it is too short Retype new UNIX password: passwd: all authentication tokens updated successfully. |
添加用户信息 设置密码 设置密码
|
| * |
su - |
切换用户 |
|
|
|
1.3文件搜索命令
Linux中所有都是文件,命令也是文件
| 文件搜索命令 |
||||||
| 18 |
which |
|
查询命令所在的绝对路径 |
[root@localhost ~]# which chmod /bin/chmod [root@localhost ~]# whereis ls ls: /bin/ls /usr/share/man/man1p/ls.1p.gz /usr/share/man/man1/ls.1.gz
|
命令也是文件 whereis除了绝对路径,还包括帮助文档 |
|
| 19 |
find |
|
查找文件或目录 find [搜索路径][搜索关键字]
-name 文件名 *匹配任意字符 init* ?匹配单个字符 init???
-size 文件大小 block数据块 512字节=0.5kb 大于+ 小于- 等于 find / -size 204800
-user 文件所有者
时间
c—change改变,表示文件的属性被修改过,所有者、所属组、权限 a—access访问 m—modify修改,表示文件的内容被修改过 -之内,+超过 find /etc –mmin -120 一分钟内被修改过 -type 文件类型 f 二进制文件 l 软连接文件 d 目录
-o or 逻辑或 2. 连接符 find …. –exec 命令{}\; {}find查询的结果 \转义符,符号命令使用本身的含义 ;结果 -ok提示
|
[root@localhost ~]# find /etc -name init /etc/sysconfig/init
试验通配符和占位符 [root@localhost ~]# find /etc -name init* /etc/selinux/targeted/contexts/initrc_context /etc/sysconfig/init /etc/sysconfig/network-scripts/init.ipv6-global /etc/init.d /etc/mail/spamassassin/init.pre /etc/inittab /etc/initlog.conf /etc/rc.d/init.d
[root@localhost ~]# find /etc -name init??? /etc/inittab [root@localhost ~]# find /etc -name init? [root@localhost ~]# find /etc -name init?? /etc/init.d /etc/rc.d/init.d
查找用户 [root@localhost ~]# find /home -user helen /home/helen /home/helen/.bash_logout /home/helen/.kde /home/helen/.kde/Autostart /home/helen/.kde/Autostart/.directory /home/helen/.mozilla /home/helen/.mozilla/extensions /home/helen/.mozilla/plugins /home/helen/.bash_profile /home/helen/.bashrc /home/helen/.bash_history
测试转义字符 [root@localhost ~]# which rm alias rm='rm -i' /bin/rm [root@localhost ~]# rm abc.txt rm: remove regular empty file `abc.txt'? [root@localhost ~]# \rm abc.txt
查找二进制文件 [root@host141 ~]# find /etc -name init* -a -type f /etc/inittab /etc/initlog.conf /etc/sysconfig/network-scripts/init.ipv6-global /etc/sysconfig/init /etc/selinux/targeted/contexts/initrc_context
测试连接符-exec [root@localhost ~]# find /etc -name inittab /etc/inittab [root@localhost ~]# find /etc -name inittab -exec ls -l {} \; -rw-r--r-- 1 root root 1666 Feb 14 04:02 /etc/inittab
[root@localhost ~]# cd /test [root@localhost test]# pwd /test [root@localhost test]# ls a a.hard a.soft etc issue lost+found [root@localhost test]# find /test -name a.soft /test/a.soft [root@localhost test]# find /test -name a.soft -exec rm {} \; [root@localhost test]# ls a a.hard etc issue lost+found
测试连接符-ok [root@localhost test]# find /etc -name inittab -exec ls -l {} \; -rw-r--r-- 1 root root 1666 Feb 14 04:02 /etc/inittab [root@localhost test]# find /etc -name inittab -ok ls -l {} \; < ls ... /etc/inittab > ? y -rw-r--r-- 1 root root 1666 Feb 14 04:02 /etc/inittab
[root@localhost test]# ls a a.hard etc issue lost+found [root@localhost test]# find /test -name a.hard -ok rm {} \; < rm ... /test/a.hard > ? y [root@localhost test]# ls a etc issue lost+found
[root@localhost test]# find /etc -name init* -a -type f -exec ls -l {} \; -rw-r--r-- 1 root root 28 Apr 10 2010 /etc/selinux/targeted/contexts/initrc_context -rw-r--r-- 1 root root 1068 Jul 4 2009 /etc/sysconfig/init -rwxr-xr-x 1 root root 5433 Jul 4 2009 /etc/sysconfig/network-scripts/init.ipv6-global -rw-r--r-- 1 root root 1299 Jan 21 2009 /etc/mail/spamassassin/init.pre -rw-r--r-- 1 root root 1666 Feb 14 04:02 /etc/inittab -rw-r--r-- 1 root root 658 Sep 29 2009 /etc/initlog.conf
测试根据i节点删除文件 [root@localhost test]# touch "a b"; [root@localhost test]# ls a a b [root@localhost test]# touch -- -abc [root@localhost test]# ls a a b -abc
[root@localhost test]# rm -abc rm: invalid option -- a Try `rm ./-abc' to remove the file `-abc'. Try `rm --help' for more information. [root@localhost test]# rm a b rm: remove regular empty file `a'? a rm: cannot lstat `b': No such file or directory [root@localhost test]# rm a b rm: remove regular empty file `a'? y rm: cannot lstat `b': No such file or directory
[root@localhost test]# rm -- -abc "a b" rm: remove regular empty file `-abc'? y rm: remove regular empty file `a b'? y [root@localhost test]# ls [root@localhost test]#
[root@localhost test]# ls -i 1653280 a b 1653352 -abc [root@localhost test]# find . -inum 1653280 ./a b [root@localhost test]# find . -inum 1653280 -exec rm {} \; [root@localhost test]# ls -abc
|
*通配符
大范围查找只在晚上2点左右进行,因为访问人数少,只占用一部分资源
?匹配单个字符,相当于占位
通常用>或者<
rm的别名是 rm-i 所以要提示,那么要使用本身的含义,加转义字符\
查找二进制文件
查找inittab 查找并显示详细信息
进入test 显示当前目录
显示当前目录下的文件
查找a.soft文件
查找a.soft文件并删除 a.soft已删除
查找inittab并查看详细信息
提示的查看(为了试验,真正用在rm)
查找init开头,文件类型是二进制文件的详细信息
一些奇葩的创建文件
这时候想要删除文件就会出问题
我们知道创建过程的时候可以这样删除,如果不知道呢?
查找i节点
.表示当前目录,即/test
根据i节点删除,万能
|
|
| 20 |
locate |
list files in databases |
locate [搜索关键字] locate file 可以查找所有跟file相关的文件,速度快 locate指令是根据数据库查找的,如果数据库中文件没有更新,那么就会找不到。
定期updatedb,则可以直接locate找到
|
|
|
|
| 21 |
updatedb |
update the slocate database |
建立整个系统目录文件的数据库 |
|
|
|
| 22 |
grep |
|
grep [指定字串][源文件] 在文件中搜寻字串匹配的行,并输出 |
[root@localhost test]# grep tftp /etc/services tftp 69/tcp tftp 69/udp tftp-mcast 1758/tcp tftp-mcast 1758/udp mtftp 1759/udp subntbcst_tftp 247/tcp # SUBNTBCST_TFTP subntbcst_tftp 247/udp # SUBNTBCST_TFTP etftp 1818/tcp # Enhanced Trivial File Transfer Protocol etftp 1818/udp # Enhanced Trivial File Transfer Protocol tftps 3713/tcp # TFTP over TLS tftps 3713/udp # TFTP over TLS |
查找和tftp相关的行 |
|
1.4帮助命令
| 帮助命令 |
|
|
|||||
| 23 |
man |
manual |
man [命令或配置文件] 获得帮助信息 命令和配置文件相同时优先查看命令的帮助 帮助分很多种,其中第一种是命令,第五种是配置文件,当名字相同时通过 man 5来查看配置文件
|
man ls 使用more查看,空格翻页,enter下一行
[root@localhost test]# man 5 passwd |
passwd可以修改用户密码, 和一个配置文件同名 |
||
| 24 |
info |
information |
info [任何关键字] 获取帮助信息 |
|
|
||
| 25 |
whatis |
|
whatis apropos[任何关键字] 获得索引的简短说明信息 |
[root@localhost test]# whatis whereis whereis (1) - locate the binary, source, and manual page files for a command
|
|
||
| 26 |
help |
|
命令 –help help 内置命令 |
[root@localhost test]# ls --help |
|
||
1.5压缩解压命令
windows可解压Linux所有,但相反不可
共同:zip 但压缩比不高,如果小文件建议使用
gzip 和 bzip2只能压缩文件且不保留源文件,但后者-k可以保留
| 27 |
gzip |
GNU zip |
gzip 选项[文件] 压缩后文件格式: .gz 只能压缩文件,不能压缩目录 不保留源文件
解压缩: gunzip 压缩文件 gzip –d 压缩文件
|
[root@localhost test]# ls etc issue lost+found newfile [root@localhost test]# gzip newfile [root@localhost test]# ls etc issue lost+found newfile.gz
不能压缩目录 [root@localhost test]# mkdir newdir [root@localhost test]# ls etc issue lost+found newdir newfile.gz [root@localhost test]# gzip newdir gzip: newdir is a directory – ignored
解压缩 [root@localhost test]# gzip -d newfile.gz [root@localhost test]# ls etc issue lost+found newdir newfile [root@localhost test]# gzip newfile [root@localhost test]# ls etc issue lost+found newdir newfile.gz [root@localhost test]# gunzip newfile.gz [root@localhost test]# ls etc issue lost+found newdir newfile
|
|
| 28 |
tar |
|
打包目录 tar 选项[cvf][目录] -c 产生.tar打包文件 -v 显示详细信息 -f 指定压缩后的文件名 -z 打包同时压缩 压缩后文件格式: .tar.gz
解压缩 -x 解包.tar文件 -v 显示详细信息 -f 指定解压文件 -z 解压缩 |
[root@localhost test]# ls etc issue lost+found newdir newfile [root@localhost test]# tar -zcf newdir.tar.gz newdir [root@localhost test]# ls etc issue lost+found newdir newdir.tar.gz newfile
当没有后缀,或者不知道文件类型 [root@localhost test]# tar -zcf new newdir [root@localhost test]# ls -l new -rw-r--r-- 1 root root 113 Feb 26 14:56 new [root@localhost test]# file new new: gzip compressed data, from Unix, last modified: Thu Feb 26 14:56:08 2015
先打包再压缩 [root@localhost test]# tar -cf newdir2.tar newdir [root@localhost test]# gzip newdir2.tar [root@localhost test]# ls etc issue lost+found new newdir newdir2.tar.gz newdir.tar.gz newfile
解压缩 [root@localhost test]# ls etc issue lost+found new newdir newdir2.tar.gz newdir.tar.gz newfile [root@localhost test]# tar -zxf newdir.tar.gz [root@localhost test]# ls etc issue lost+found new newdir newdir2.tar.gz newdir.tar.gz newfile [root@localhost test]# tar -zxf newdir2.tar.gz [root@localhost test]# ls etc issue lost+found new newdir newdir2.tar.gz newdir.tar.gz newfile [root@localhost test]# rm -rf newdir [root@localhost test]# ls etc issue lost+found new newdir2.tar.gz newdir.tar.gz newfile [root@localhost test]# tar -zxf new [root@localhost test]# ls etc issue lost+found new newdir newdir2.tar.gz newdir.tar.gz newfile |
tar –zcf 打包后的名字 要打包的文件名
注:打包后的文件名可以没有后缀,但是为了辨识方便,养成良好习惯
看起来像是文本文件,但这种使用cat是无法查看的 使用file查看文件了性 |
| 29 |
zip |
|
zip 选项[-r][压缩后文件名称][文件或目录] -r 压缩目录 功能:压缩文件或目录 压缩后文件格式:.zip 保留源文件 范例: zip services.zip /etc/services zip –r test.zip /test 压缩目录
|
|
|
| 30 |
unzip |
|
unzip [压缩文件] 功能:解压.zip的压缩文件 范例:unzip test.zip
|
|
|
| 31 |
bzip2 |
|
bzip2 选项[-k][文件] -k 产生压缩文件后保留源文件 不加k则和gzip相同,但压缩比很高 功能:压缩文件 压缩后文件格式: .bz2 范例: bzip2 –k file1 |
|
|
| 32 |
bunzip2 |
|
bunzip2 选项[-k][压缩文件] -k 解压缩后保留源文件 功能:解压缩 范例: bunzip2 –k file1.bz2 |
|
|
1.6网络通信指令
| 33 |
write |
|
当用户登陆的时候,可以进行信息交互, 以Ctrl+D作为结束
|
[root@localhost test]# write helen this is a test,hello [helen@localhost ~]$ 这里使用SSH登陆 Message from root@localhost.localdomain on pts/1 at 15:37 ... this is a test,hello |
|
| 34 |
wall |
|
登陆的所有人都会收到 |
|
|
| 35 |
ping |
|
测试网络连通性 ping 192.168.1.1
和windows不同的是,Linux如果不ctrl+c终止就会一直进行下去
注意: 丢包率:packet loss 有时候数据存取不完整,检查网络设备。 ping上万次
如果ping不通,先ping本机,证明自己没问题,ping 127.0.0.1 回环地址,检查自己的设置。 不通的时候不一定是网络不通,有可能防火墙等屏蔽了,不要武断的判断网络有问题。
|
改变ping的次数 [root@localhost test]# ping -c 3 192.168.0.141 像windows一样定义ping的次数 PING 192.168.0.141 (192.168.0.141) 56(84) bytes of data. 64 bytes from 192.168.0.141: icmp_seq=1 ttl=128 time=0.568 ms 64 bytes from 192.168.0.141: icmp_seq=2 ttl=128 time=0.456 ms 64 bytes from 192.168.0.141: icmp_seq=3 ttl=128 time=0.451 ms
--- 192.168.0.141 ping statistics --- 3 packets transmitted, 3 received, 0% packet loss, time 2001ms rtt min/avg/max/mdev = 0.451/0.491/0.568/0.059 ms
默认64字节,改变数据包大小 [root@localhost test]# ping -s 300 192.168.0.141 PING 192.168.0.141 (192.168.0.141) 300(328) bytes of data. 308 bytes from 192.168.0.141: icmp_seq=1 ttl=128 time=0.517 ms |
|
| 36 |
ifconfig |
|
ifconfig 选项[-a][网卡设备标识] -a 显示所有网卡信息 功能:查看网络设置信息 范例:ifconfig –a eth0 本机物理网卡 lo 回环网卡地址 ifconfig eth0 192.168.9.4 修改ip,仅本次生效 Linux基本:只有写入配置文件才会永久生效 |
|
|
| 37 |
shutdown |
只有root可以执行 |
|
[root@localhost test]# shutdown -h now最好不要使用,立马关机 关机前wall一下大家保存,然后shutdown,有缓冲时间 |
|
| 38 |
reboot |
重启,root,服务器通常不随便开关 |
|
|
|
1.7 Shell应用技巧
通常使用bash,查看cat /etc/shells
| 命令补全 |
按Tab,如果是唯一的则直接补全,如果不唯一则按两下之后出现候选命令 |
| 清屏 |
clear 或者Ctrl+l |
| 清除光标前字符 |
Ctrl+u |
| 查看以前的命令 |
history !123 执行第123条命令 方向键上下可以找到历史命令 |
| 定义别名
alias copy=cp alias xrm=”rm –r”组合要括起来
清除别名:unalias copy |
[root@localhost test]# alias alias cp='cp -i' alias l.='ls -d .* --color=tty' alias ll='ls -l --color=tty' alias ls='ls --color=tty' alias mv='mv -i' alias rm='rm -i' alias which='alias | /usr/bin/which --tty-only --read-alias --show-dot --show-tilde' 这是系统定义的别名
[root@localhost test]# alias copy=cp 自定义别名 [root@localhost test]# copy /etc/inittab . 拷贝到当前目录 [root@localhost test]# ls etc issue new newdir2.tar.gz newdir.zip newfile.bz2 inittab lost+found newdir newdir.tar.gz newfile
|
| 输入、输出重定向
通标准I/O一样,Shell对于每一个进程预先定义3个文件描述字(0,1,2),分别对应: 0 (STDIN)标准输入 1 (STDOUT)标准输出 2 (STDERR)标准错误输出
>或>>输出重定向 范例: ---------------------------------------》》
<输入重定向
2>错误除数重定向
|
[root@localhost test]# ls -l /tmp >tmp.msg [root@localhost test]# date > /tmp.msg [root@localhost test]# cat /tmp.msg Thu Feb 26 16:49:57 CST 2015 原内容被覆盖
使用>>追加进去 [root@localhost test]# ls -l /tmp >> /tmp.msg [root@localhost test]# cat /tmp.msg Thu Feb 26 16:49:57 CST 2015 total 92 drwx------ 3 root root 4096 Feb 13 20:52 gconfd-root drwx------ 2 root root 4096 Feb 25 10:19 keyring-djsYy2 drwx------ 2 root root 4096 Feb 13 20:52 keyring-z1fmdW srwxr-xr-x 1 root root 0 Feb 25 10:19 mapping-root drwx------ 2 root root 4096 Feb 26 14:32 orbit-root -rw-r--r-- 1 root root 6 Feb 26 16:32 scim-bridge-0.3.0.lockfile-0@localhost:0.0 srwxr-xr-x 1 root root 0 Feb 26 14:32 scim-bridge-0.3.0.socket-0@localhost:0.0 srw------- 1 root root 0 Feb 25 10:19 scim-helper-manager-socket-root srw------- 1 root root 0 Feb 25 10:19 scim-panel-socket:0-root srw------- 1 root root 0 Feb 25 10:19 scim-socket-frontend-root drwx------ 2 root root 4096 Feb 25 10:19 ssh-khlNme4534 drwx------ 2 root root 4096 Feb 25 10:19 virtual-root.U2Qf0Y drwxr-xr-x 2 root root 4096 Feb 25 09:34 vmware-root drwx------ 2 root root 4096 Feb 25 10:19 vmware-root-592157060
<输入重定向 可以写一个定时脚本,然后自动输出 [root@localhost test]# wall < /etc/issue
Broadcast message from root (Thu Feb 26 17:08:07 2015):
CentOS release 5.5 (Final) Kernel \r on an \m
2>错误除数重定向 晚上定期备份,如果出错,保存错误信息 [root@localhost test]# cp -R /usr /backup/usr.bak 2> /bak.error
[root@localhost test]# ls /kdls ls: /kdls: No such file or directory [root@localhost test]# ls /kdls 2> ls.err 将错误信息写入,这个在写自动化脚本时非常有用 [root@localhost test]# cat ls.err ls: /kdls: No such file or directory [root@localhost test]# ls /tmp 2> ls.err 如果不错则没有 gconfd-root scim-helper-manager-socket-root keyring-djsYy2 scim-panel-socket:0-root keyring-z1fmdW scim-socket-frontend-root mapping-root ssh-khlNme4534 orbit-root virtual-root.U2Qf0Y scim-bridge-0.3.0.lockfile-0@localhost:0.0 vmware-root scim-bridge-0.3.0.socket-0@localhost:0.0 vmware-root-592157060
|
| 管道 将一个命令的输出传送给另一个命令,作为另一个命令的输入
|
[root@localhost test]# ls -l /etc | more 将ls -l /etc的输出传送给more,可以空格翻页,enter换行,q退出 [root@localhost test]# ls -l /etc | grep init 包含init的行 lrwxrwxrwx 1 root root 11 Feb 14 03:18 init.d -> rc.d/init.d -rw-r--r-- 1 root root 658 Sep 29 2009 initlog.conf -rw-r--r-- 1 root root 1666 Feb 14 04:02 inittab lrwxrwxrwx 1 root root 15 Feb 14 03:25 rc.sysinit -> rc.d/rc.sysinit
[root@localhost test]# wc -l /etc/services wc可以查看行数 –l表示line行 9249 /etc/services [root@localhost test]# ls -l /etc | grep init | wc –l 多个管道 这里是说:查看etc下包含init多少行 4
|
| 命令连接符 ; 用; 间隔的各命令按顺序依次执行。 && 前后命令的执行存在逻辑与关系,只有&&前面的命令执行成功后,它后面的命令才被执行。 || 前后命令的执行存在逻辑或关系,只有||前面的命令执行失败后,它后面的命令才被执行。
|
顺序执行 [root@localhost test]# pwd ; ls ;date /test etc issue ls.err newdir2.tar.gz newdir.zip newfile.bz2 inittab lost+found new newdir.tar.gz newfile tmp.msg Thu Feb 26 17:27:57 CST 2015 可以将长时间的命令,比如升级内核,顺序执行,错误记录
逻辑与 [root@localhost test]# write Mary < /home/helen/love.txt && rm /home/helen/love.txt 小伙定时表白,如果发送成功,则毁灭证据 [root@localhost test]# ls && pwd etc issue ls.err newdir2.tar.gz newdir.zip newfile.bz2 inittab lost+found new newdir.tar.gz newfile tmp.msg /test [root@localhost test]# lslsl && pwd bash: lslsl: command not found
逻辑或 相反,只有一个能执行成功。 [root@localhost test]# write Mary < /home/helen/love.txt || mail Mary < /home/helen/love.txt 如果发情书成功就行了,如果发情书失败则发邮件 [root@localhost test]# ls || pwd etc issue ls.err newdir2.tar.gz newdir.zip newfile.bz2 inittab lost+found new newdir.tar.gz newfile tmp.msg [root@localhost test]# sfld || pwd bash: sfld: command not found /test
|
| 命令替换符 将一个命令的输出作为另一个命令的参数 键盘1左边的符号` |
[root@localhost test]# which touch 查看touch所在 /bin/touch [root@localhost test]# ls -l /bin/touch 查看详情 -rwxr-xr-x 1 root root 42284 Mar 1 2010 /bin/touch [root@localhost test]# ls -l `which touch` 可以直接做参数 -rwxr-xr-x 1 root root 42284 Mar 1 2010 /bin/touch
|
2. Vim/Vi
[root@localhost ~]# vi /root/.vimrc
1 set nu
2 map ^P I#<ESC>
3
[root@localhost ~]# vi /etc/inittab
[root@localhost ~]# grep -v "^#" /etc/inittab | more 可以把以#开头的行排除
| 第一级 – 存活
当你安装好一个编辑器后,你一定会想在其中输入点什么东西,然后看看这个编辑器是什么样子。但vim不是这样的,请按照下面的命令操作:
现在,你知道如何在 Insert 和 Normal 模式下切换了。下面是一些命令,可以让你在 Normal 模式下幸存下来:
推荐:
你能在vim幸存下来只需要上述的那5个命令,你就可以编辑文本了,你一定要把这些命令练成一种下意识的状态。于是你就可以开始进阶到第二级了。 当是,在你进入第二级时,需要再说一下 Normal 模式。在一般的编辑器下,当你需要copy一段文字的时候,你需要使用 Ctrl 键,比如:Ctrl-C。也就是说,Ctrl键就好像功能键一样,当你按下了功能键Ctrl后,C就不在是C了,而且就是一个命令或是一个快键键了,在VIM的Normal模式下,所有的键就是功能键了。这个你需要知道。 标记:
第二级 – 感觉良好 上面的那些命令只能让你存活下来,现在是时候学习一些更多的命令了,下面是我的建议:(陈皓注:所有的命令都需要在Normal模式下使用,如果你不知道现在在什么样的模式,你就狂按几次ESC键)
花点时间熟悉一下上面的命令,一旦你掌握他们了,你就几乎可以干其它编辑器都能干的事了。但是到现在为止,你还是觉得使用vim还是有点笨拙,不过没关系,你可以进阶到第三级了。 第三级 – 更好,更强,更快 先恭喜你!你干的很不错。我们可以开始一些更为有趣的事了。在第三级,我们只谈那些和vi可以兼容的命令。 更好 下面,让我们看一下vim是怎么重复自己的:
下面是一个示例,找开一个文件你可以试试下面的命令:
更强 你要让你的光标移动更有效率,你一定要了解下面的这些命令,千万别跳过。
> 如果你认为单词是由默认方式,那么就用小写的e和w。默认上来说,一个单词由字母,数字和下划线组成(陈皓注:程序变量) > 如果你认为单词是由blank字符分隔符,那么你需要使用大写的E和W。(陈皓注:程序语句)
下面,让我来说说最强的光标移动:
相信我,上面这三个命令对程序员来说是相当强大的。 更快 你一定要记住光标的移动,因为很多命令都可以和这些移动光标的命令连动。很多命令都可以如下来干: <start position><command><end position> 例如 0y$ 命令意味着:
你可可以输入 ye,从当前位置拷贝到本单词的最后一个字符。 你也可以输入 y2/foo 来拷贝2个 “foo” 之间的字符串。 还有很多时间并不一定你就一定要按y才会拷贝,下面的命令也会被拷贝:
(陈皓注:可视化选择是一个很有意思的命令,你可以先按v,然后移动光标,你就会看到文本被选择,然后,你可能d,也可y,也可以变大写等) 第四级 – Vim 超能力 你只需要掌握前面的命令,你就可以很舒服的使用VIM了。但是,现在,我们向你介绍的是VIM杀手级的功能。下面这些功能是我只用vim的原因。 在当前行上移动光标: 0 ^ $ f F t T , ;
还有一个很有用的命令是 dt" → 删除所有的内容,直到遇到双引号—— "。 区域选择 <action>a<object> 或 <action>i<object> 在visual 模式下,这些命令很强大,其命令格式为 <action>a<object> 和 <action>i<object>
假设你有一个字符串 (map (+) ("foo")).而光标键在第一个 o 的位置。
块操作: <C-v> 块操作,典型的操作: 0 <C-v> <C-d> I-- [ESC]
在Windows下的vim,你需要使用 <C-q> 而不是 <C-v> ,<C-v> 是拷贝剪贴板。 自动提示: <C-n> 和 <C-p> 在 Insert 模式下,你可以输入一个词的开头,然后按 <C-p>或是<C-n>,自动补齐功能就出现了……
宏录制: qa 操作序列 q, @a, @@
示例 在一个只有一行且这一行只有“1”的文本中,键入如下命令:
可视化选择: v,V,<C-v> 前面,我们看到了 <C-v>的示例 (在Windows下应该是<C-q>),我们可以使用 v 和 V。一但被选好了,你可以做下面的事:
在所有被选择的行后加上点东西:
分屏: :split 和 vsplit. 下面是主要的命令,你可以使用VIM的帮助 :help split. 你可以参考本站以前的一篇文章VIM分屏。
结束语
|
3. 引导
| 在 centOS 中的修改方法如下: 1.root登陆,免得老是sudo 2.打开/etc/inittab 文件 #vim /etc/inittab 5.保存文件后重启系统你就可以看见是启动的文本界面了。
|
|
# id:5:initdefault:
# System initialization. si::sysinit:/etc/rc.d/rc.sysinit
l0:0:wait:/etc/rc.d/rc 0 l1:1:wait:/etc/rc.d/rc 1 l2:2:wait:/etc/rc.d/rc 2 l3:3:wait:/etc/rc.d/rc 3 l4:4:wait:/etc/rc.d/rc 4 l5:5:wait:/etc/rc.d/rc 5 l6:6:wait:/etc/rc.d/rc 6
[root@localhost ~]# runlevel 5 3 |
# Default runlevel. The runlevels used by RHS are: # 0 - halt (Do NOT set initdefault to this) # 1 - Single user mode # 2 - Multiuser, without NFS (The same as 3, if you do not have networking) # 3 - Full multiuser mode # 4 - unused # 5 - X11 # 6 - reboot (Do NOT set initdefault to this) #
关机 单用户模式,只有root可以登录,没有界面 多用模式,没有界面,无NFS 多用户模式,没有图形界面,最多 可用户自己定义 系统缺省的,x11 reboot,重启
查看运行级别
|
| [root@localhost ~]# ls /etc/rc.d/rc3.d K01dnsmasq K80kdump S19rpcgssd K02avahi-dnsconfd K85mdmpd S22messagebus K02NetworkManager K87multipathd S23setroubleshoot K02oddjobd K87named S25bluetooth K05conman K88wpa_supplicant S25netfs K05innd K89dund S25pcscd K05saslauthd K89netplugd S26acpid K05wdaemon K89pand S26apmd K10dc_server K89rdisc S26haldaemon K10psacct K91capi S26hidd K10tcsd K99readahead_later S26lm_sensors K12dc_client S00microcode_ctl S28autofs K15httpd S02lvm2-monitor S50hplip K20nfs S03vmware-tools S55sshd K20rwhod S04readahead_early S56cups K24irda S05kudzu S56rawdevices K25squid S08ip6tables S56xinetd K30spamassassin S08iptables S57vmware-tools-thinprint K35dovecot S08mcstrans S58ntpd K35smb S09isdn S80sendmail K35vncserver S10network S85gpm K35winbind S11auditd S90crond K36lisa S12restorecond S90xfs K50ibmasm S12syslog S95anacron K50netconsole S13cpuspeed S95atd K50tux S13irqbalance S97yum-updatesd K50vsftpd S13portmap S98avahi-daemon K69rpcsvcgssd S14nfslock S99firstboot K73ypbind S15mdmonitor S99local K74nscd S18rpcidmapd S99smartd [root@localhost ~]# [root@localhost ~]# ls -ld /etc/rc3.d lrwxrwxrwx 1 root root 10 Feb 14 03:25 /etc/rc3.d -> rc.d/rc3.d
[root@localhost ~]# /etc/rc.d/init.d/sshd Usage: /etc/rc.d/init.d/sshd {start|stop|restart|reload|condrestart|status} [root@localhost ~]# /etc/rc.d/init.d/sshd start Starting sshd: [ OK ] [root@localhost ~]# /etc/rc.d/init.d/sshd stop Stopping sshd: [ OK ] [root@localhost ~]# /etc/rc.d/init.d/sshd restart Stopping sshd: [FAILED] Starting sshd: [ OK ] [root@localhost ~]# /etc/rc.d/init.d/sshd condrestart Stopping sshd: [ OK ] Starting sshd: [ OK ] [root@localhost ~]# /etc/rc.d/init.d/sshd status openssh-daemon (pid 28037) is running... [root@localhost ~]# /etc/rc.d/init.d/sshd reload Reloading sshd: [ OK ] [root@localhost ~]# |
S22messagebus 关于启动,对应级别的配置 S-start 表示启动 K-kill 表示不启动 之所以设置kill是为了方便切换用户级别的时候关闭哪些服务 22 表示启动顺序,越小越先 messagebus 表示脚本名称
关闭启动 [root@localhost ~]# mv S03vmware-tools s03vmvare-tools 修改脚本或删除脚本,只要不是S开头就好
firmvare CMOS/BIOS --POST | BootLoader Grub root-/boot kernel- initrd- | Kernel hardware | init PID=1 | /etc/inittab id:runlebels:action:process | initdefault | /etc/rc.d/rc.sysinit | /etc/rc.d/rc | /etc/rc.d/rcN.d
软连接
开启与关闭方法 使用方法 |
|
[root@localhost ~]# ntsysv [root@localhost ~]# ntsysv --level 3 |
设置启动还是关闭 空格改变是否启动,*表示启动,空白表示不启动 Tab选择是否保存与返回 |
|
[root@localhost ~]# dmesg | grep eth0 eth0: no IPv6 routers present eth0: no IPv6 routers present eth0: no IPv6 routers present [root@localhost ~]# dmeg | grep eth1 bash: dmeg: command not found [root@localhost ~]# dmesg | grep eth1 [root@localhost ~]# dmesg | grep sda SCSI device sda: 41943040 512-byte hdwr sectors (21475 MB) sda: Write Protect is off sda: Mode Sense: 61 00 00 00 sda: cache data unavailable sda: assuming drive cache: write through SCSI device sda: 41943040 512-byte hdwr sectors (21475 MB) sda: Write Protect is off sda: Mode Sense: 61 00 00 00 sda: cache data unavailable sda: assuming drive cache: write through sda: sda1 sda2 sda3 sda4 < sda5 > sd 0:0:0:0: Attached scsi disk sda SELinux: initialized (dev sda1, type ext3), uses xattr EXT3 FS on sda1, internal journal EXT3 FS on sda5, internal journal SELinux: initialized (dev sda5, type ext3), uses xattr EXT3 FS on sda2, internal journal SELinux: initialized (dev sda2, type ext3), uses xattr Adding 2096472k swap on /dev/sda3. Priority:-1 extents:1 across:2096472k |
判断硬件是否识别 |
|
[root@localhost ~]# ls /var /log ls: /log: No such file or directory /var: account crash empty games lib lock mail nis preserve run tmp www cache db ftp gdm local log named opt racoon spool tux yp [root@localhost ~]# grep sshd /var/log/messages [root@localhost ~]# grep syslog /var/log/messages Feb 25 10:39:53 localhost syslogd 1.4.1: restart. Feb 27 11:17:11 localhost syslogd 1.4.1: restart. |
查看引导时文件错误 |
| 忘记密码 |
|
| 重启,5s倒计时,按Esc,进入启动项选择, 选择内核编辑,第二行 按e编辑 按e编辑 后面空格 1,表示进入单用户模式,单用户模式只有root可以登录且不需要密码 按b启动
|
|
| 给grub添加密码 |
|
|
123456加密md5 |
|
4软件包的安装
4.1挂载光盘
| 安装sudo这个软件 |
|
|
| 挂载光盘: |
|
|
| mkdir /mnt/cdrom mount /dev/cdrom /mnt/cdrom |
前提是有光盘镜像,也就是VMware要设置光盘为镜像文件 |
|
| 查询: |
|
|
| rpm –q sudo rpm –qa |grep samba [root@localhost CentOS]# rpm -qa | grep samba samba-3.0.33-3.28.el5 system-config-samba-1.2.41-5.el5 samba-common-3.0.33-3.28.el5 samba-client-3.0.33-3.28.el5 |
查看和samba相关的软件包 |
|
| 误删文件 |
|
|
|
|
||
5.用户管理
| 用户管理 |
|
| [root@DBserver ~]# more /etc/passwd |
root:x:0:0:root:/root:/bin/bash 用户名:密码位:UID:GID:描述信息:宿主信息:shell
|
| 三种用户: 超级用户(root,uid=0) 普通用户 伪用户 |
将uid改为0即可获得root权限,后门 |
| 用户密码放在 /etc/shadow |
root:1Gy//UTmq$00qIJOFSX5brjnPoERd91/:15552:0:99999:7::: 用户名:加密密码:最后一次修改时间(以天为单位19700701之后):最小时间间隔(通常为0,表示两次修改的最小天数) :最大时间间隔:警告时间(快到期提醒,默认7天):闲置时间(空白表示天天登录): 将shadow密码删除后不需要密码就可以登录 |
| 为什么普通用户可以更改密码 |
|
| [root@localhost ~]# ls -l /usr/bin/passwd -rwsr-xr-x. 1 root root 25980 2月 22 2012 /usr/bin/passwd |
SetUID权限,用户执行这个命令的时候将以这个程序的 所有者root的身份执行。 |
5.1组管理
| [root@localhost ~]# more /etc/group sys:x:3:bin,adm 组名:组密码位:GID:组成员 |
|
5.2批量添加用户
| vi /test/user.info miao01::1001:1::/home/miao01:/bin/bash miao02::1002:1::/home/miao02:/bin/bash miao03::1003:1::/home/miao03:/bin/bash miao04::1004:1::/home/miao04:/bin/bash |
yy复制 p粘贴 dd删除 |
| newusers < user.info
[root@localhost test]# tail -8 /etc/passwd webalizer:x:67:67:Webalizer:/var/www/usage:/sbin/nologin sshd:x:74:74:Privilege-separated SSH:/var/empty/sshd:/sbin/nologin tcpdump:x:72:72::/:/sbin/nologin helen:x:500:500:yue:/home/helen:/bin/bash miao01:x:1001:501::/home/miao01:/bin/bash miao02:x:1002:501::/home/miao02:/bin/bash miao03:x:1003:501::/home/miao03:/bin/bash miao04:x:1004:501::/home/miao04:/bin/bash
[root@localhost test]# ls /home helen miao01 miao02 miao03 miao04
[root@localhost test]# pwunconv 取消shadow password功能
[root@localhost test]# vi pass.info 1 miao01:miaoruifeng 2 miao02:miaoruifeng 3 miao03:miaoruifeng 4 miao04:miaoruifeng
[root@localhost test]# chpasswd < pass.info
[root@localhost test]# tail -5 /etc/passwd helen:6hAI2Non/v8ILJHUB$hZRdcI84l6l8Z00SSSC47g/bZDvbw82elFrlkzw9/mgPzhtZ0DUZxEBZaKE.bg01YJ4KzC40enFZ9ICkQPK/U1:500:500:yue:/home/helen:/bin/bash miao01:6ss3Y3rTq5J/ZsM$RM4MxoMQY0hKQVoiYoDdIxd.rOxIvhhDX4KSAtwx/wz8HDi4R/6XPJjSFbaPF3GKOXhfp/4yxM42iqp3uudTi0:1001:501::/home/miao01:/bin/bash miao02:6v.82xwjZ0BM2$ALGUvJjUsccS6y.yE/S0gntEKtmvpriBL6Jd5sbr5AnySNrPi1Ay8gI4CDDNFr3U2X/i.Ai5sZqYFkFtu6rYV/:1002:501::/home/miao02:/bin/bash miao03:6SMGHf/SO2JW/M$8qFnwvCejx30Wg6RzpTVXyB3.hh7vYnOwkASEFQwowFZz7cZUQfYYLeTWCzspuJH8AbkWkdca4gQ3fwvhNWwZ0:1003:501::/home/miao03:/bin/bash miao04:65JzRLvtHoJCYs3KG$0JuxD5CbBxMq1vIn49Xv/HGtiF.z.JW9PbdshbylEpTv6iMu7mBM2k8z2BOUi.i8prODMl/vGyNEXsRqcSq7C0:1004:501::/home/miao04:/bin/bash
[root@localhost test]# tail -5 /etc/shadow tail: cannot open `/etc/shadow' for reading: No such file or directory 因为取消了shadow,需要打开
[root@localhost test]# pwconv 开启shadow
[root@localhost test]# tail -5 /etc/shadow 密码添加成功 helen:6hAI2Non/v8ILJHUB$hZRdcI84l6l8Z00SSSC47g/bZDvbw82elFrlkzw9/mgPzhtZ0DUZxEBZaKE.bg01YJ4KzC40enFZ9ICkQPK/U1:16498:0:99999:7::: miao01:6ss3Y3rTq5J/ZsM$RM4MxoMQY0hKQVoiYoDdIxd.rOxIvhhDX4KSAtwx/wz8HDi4R/6XPJjSFbaPF3GKOXhfp/4yxM42iqp3uudTi0:16498:0:99999:7::: miao02:6v.82xwjZ0BM2$ALGUvJjUsccS6y.yE/S0gntEKtmvpriBL6Jd5sbr5AnySNrPi1Ay8gI4CDDNFr3U2X/i.Ai5sZqYFkFtu6rYV/:16498:0:99999:7::: miao03:6SMGHf/SO2JW/M$8qFnwvCejx30Wg6RzpTVXyB3.hh7vYnOwkASEFQwowFZz7cZUQfYYLeTWCzspuJH8AbkWkdca4gQ3fwvhNWwZ0:16498:0:99999:7::: miao04:65JzRLvtHoJCYs3KG$0JuxD5CbBxMq1vIn49Xv/HGtiF.z.JW9PbdshbylEpTv6iMu7mBM2k8z2BOUi.i8prODMl/vGyNEXsRqcSq7C0:16498:0:99999:7:::
|
问题1:newusers:conmmand not found/// newusers: cannot lock /etc/passwd; try again later. 答:由于多用户操作密码文件未关闭而上锁,解决方法:删除:rm –rf /etc/*.lock 问题2:newusers: line 5: invalid line 答:第五行为空,删掉空行,不能空行。
|
| 限制su,用户授权 sudo可以让普通用户以root身份执行命令,权限精细化 |
|
| visudo miao01 miao=/usr/sbin/useradd,/usr/sbin/userdel 用户主机名权限
sudo /usr/sbin/useradd miao 添加用户miao
[sudo] password for miao01: 输入miao01的密码来验证
bash-4.1$ sudo –l 查看自己可以使用哪些root权限 Matching Defaults entries for miao01 on this host: requiretty, !visiblepw, always_set_home, env_reset, env_keep="COLORS DISPLAY HOSTNAME HISTSIZE INPUTRC KDEDIR LS_COLORS", env_keep+="MAIL PS1 PS2 QTDIR USERNAME LANG LC_ADDRESS LC_CTYPE", env_keep+="LC_COLLATE LC_IDENTIFICATION LC_MEASUREMENT LC_MESSAGES", env_keep+="LC_MONETARY LC_NAME LC_NUMERIC LC_PAPER LC_TELEPHONE", env_keep+="LC_TIME LC_ALL LANGUAGE LINGUAS _XKB_CHARSET XAUTHORITY", secure_path=/sbin\:/bin\:/usr/sbin\:/usr/bin
User miao01 may run the following commands on this host: (root) /usr/sbin/useradd, (root) /usr/sbin/userdel
miao02 miao=/sbin/shutdown -h now 用户2只可以马上关机:sudo使命令精确化!
|
|
| 授权用户使用Apache· |
|
| 首先名字叫做httpd
[root@miao ~]# ls -l /etc/httpd/conf/httpd.conf -rw-r--r--. 1 root root 34418 Aug 2 2013 /etc/httpd/conf/httpd.conf 由此看出,只有root有写权限
目标:
目标1方法(3种):
bash-4.1$ sudo /bin/vi /etc/httpd/conf/httpd.conf 可以执行了 Error detected while processing /root/.vimrc: line 1: E518: Unknown option: nocopatible Press ENTER or type command to continue 目标2方法:
|
|
|
|
|
- 6. 进程管理
| [root@miao ~]# pkill httpd 不用提取pid直接杀死进程 |
|
| 改变优先级 |
|
| [root@miao ~]# ps -le | grep httpd 1 S 0 5683 1 0 80 0 - 5096 - ? 00:00:00 httpd 5 S 48 5685 5683 0 80 0 - 5076 - ? 00:00:00 httpd 5 S 48 5686 5683 0 80 0 - 5331 - ? 00:00:00 httpd 5 S 48 5687 5683 0 80 0 - 5331 - ? 00:00:00 httpd 5 S 48 5688 5683 0 80 0 - 5331 - ? 00:00:00 httpd 5 S 48 5689 5683 0 80 0 - 5331 - ? 00:00:00 httpd 5 S 48 5690 5683 0 80 0 - 5331 - ? 00:00:00 httpd 5 S 48 5691 5683 0 80 0 - 5331 - ? 00:00:00 httpd 5 S 48 5692 5683 0 80 0 - 5331 - ? 00:00:00 httpd 5 S 48 5693 5683 0 80 0 - 5331 - ? 00:00:00 httpd [root@miao ~]# /etc/rc.d/init.d/httpd stop Stopping httpd: [ OK ] [root@miao ~]# nice --5 /etc/rc.d/init.d/httpd start Starting httpd: httpd: Could not reliably determine the server's fully qualified domain name, using 127.0.0.1 for ServerName [ OK ] [root@miao ~]# ps -le | grep httpd 1 S 0 5715 1 2 75 -5 - 5096 - ? 00:00:00 httpd 5 S 48 5717 5715 0 75 -5 - 5076 - ? 00:00:00 httpd 5 S 48 5718 5715 0 75 -5 - 5331 - ? 00:00:00 httpd 5 S 48 5719 5715 0 75 -5 - 5331 - ? 00:00:00 httpd 5 S 48 5720 5715 0 75 -5 - 5331 - ? 00:00:00 httpd 5 S 48 5721 5715 0 75 -5 - 5331 - ? 00:00:00 httpd 5 S 48 5722 5715 0 75 -5 - 5331 - ? 00:00:00 httpd 5 S 48 5723 5715 0 75 -5 - 5331 - ? 00:00:00 httpd 5 S 48 5724 5715 0 75 -5 - 5331 - ? 00:00:00 httpd 5 S 48 5725 5715 0 75 -5 - 5331 - ? 00:00:00 httpd |
|
| 用户退出后进程继续运行 |
|
| [root@miao ~]# nohup find / -name init* > /root/find.init.20150305 & |
|
| Ctrl+c终止 ctrl+z挂起 |
|
| 转到挂起的进程,前台执行 |
|
| [root@miao ~]# jobs [1]+ Stopped ps -aux | more [root@miao ~]# fg 1 |
|
| 转到后台执行 |
|
| bg 1 |
|
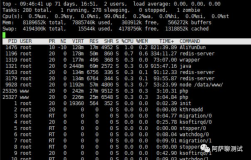
| top |
|
6.2计划任务
| at 时间 命令 |
|
| 如果这个进程没有启动,手动启动一下
|
|
| 执行计划任务,查看计划任务,删除计划任务
|
|
| 把具体的时间添上,不知道的都写* 分钟小时天月星期命令/脚本 0 4 * * * 0 18 * * 2,5 每周二周五下午六点执行 0 18 * 1-3 2,5 1到3月每周二周五下午六点执行 30 17 * * 1-5 /usr/bin/wall < /etc/issue 45 17 * * 1-5 /sbin/shutdown –h now */2 12-14 * 3-6,9-12 1-5 /bin/cp –r /etc/backup/etc.20150305 2>/backup/etc/etc.bak.err >/dev/null 每2分钟执行,错误信息保存 |
|
| crontab |
|
| [root@miao ~]# ps -le | grep crond 1 S 0 2290 1 0 80 0 - 989 - ? 00:00:00 crond [root@miao ~]# /etc/rc.d/init.d/crond start |
|
- 7. shell编程
7.1 hello world
| [root@miao ~]# mkdir sh [root@miao ~]# ls Desktop Music Templates find.init.20150305 sh Documents Pictures Videos install.log ?????? Downloads Public anaconda-ks.cfg install.log.syslog [root@miao ~]# cd sh/ [root@miao sh]# vim hello.sh
#!/bin/bash #miao the first echo "Mr hello" world ,this is my first shell ~
[root@miao sh]# ./hello.sh 通过相对路径或者绝对路径执行 Mr hello world ,this is my first shell |
|
7.2标准输入和输出
7.2变量,位置变量!# @* $?,环境变量,运算符
最好大写,以字母下划线开头,包含字母下划线数字。
| 查看变量 |
| set | more |
|
上面用的是分隔符,是键盘1左边的按键
|
|
|
| $?表示上一个命令是否执行成功:0表示成功 |
| sh -x 查看执行过程用+表示 |
|
|
2015年3月7日星期六
7.3if…else
| 由于服务器经常宕机(自己用pc做服务器的学校),需要经常查看Apache是否死掉,若死掉则重启,写了脚本如下
效果如下:
|
7.4for
7.5awk
| -F指定分隔符为:,若不指定则为空格,$1开始代表分割的每一部分 查找uid为0 的用户 |
| 查找用户密码位空的用户,注意长度的表示 |
|
|
7.6一个显示用户信息的脚本
|
|
|
|
7.7一个杀死登陆用户的脚本
| 结果如下
|
| 脚本内容 |
|
|
7.8select case
| select
select+case
case
|
|
|
7.9while
7.10批量添加用户
|
|
7.11批量删除用户
7.12break .. continue
7.13 shift,参数累加求和
| 效果: 参数左移
|
7.14用户执行脚本的权限
| sh script
脚本直接执行
|
7.15正则表达式
|
|
7.16截取字符串awk,cut,set
|
awk 列操作
第一行不执行,第一行先读取的
所以加BEGIN
行操作 |
|
选取某一行
去掉某一行
追加某一行或几行
替换
|
7.17定时任务
|
|
- 8. 安装jdk
8.1卸载原装openjdk
| [root@dc-01 java]# rpm -qa | grep jdk java-1.6.0-openjdk-1.6.0.0-1.45.1.11.1.el6.i686
卸载之: [root@dc-01 java]# yum -y remove java-1.6.0-openjdk-1.6.0.0-1.45.1.11.1.el6.i686
|
|
|
8.2下载安装包
| 查看系统位数 |
| 下载对应的安装包 |
8.3安装
| 1.修改权限为可执行 |
| 2.rpm –ivh 安装包 |
| 3.vi /etc/profile 尾部添加环境变量 |
|
79 JAVA_HOME=/usr/java/jdk1.7.0_67 80 PATH=JAVAHOME/bin:PATH 81 CLASSPATH=.:JAVAHOME/lib/dt.jar:JAVA_HOME/lib/tools.jar 82 export JAVA_HOME 83 export PATH 84 export CLASSPATH |
| 4. 执行source /etc/profile命令让修改生效。 |
| 5.查看安装结果 |
|
|
| 至此,安装jdk成功 |
- 9. 安装Tomcat
| 1.下载安装包,千万选好安装源,因为安装包的问题,硬是让我调试了一天,真是傻逼,重新官网下载安装之后立马可以用了 |
| 2.解压到/usr/local 下,并重命名为tomcat |
| #tar zxvf apache-tomcat-7.0.35.tar.gz /解压 #mv apache-tomcat-7.0.35 apache-tomcat /更名 #cd /apache-tomcat/bin/ /打开此目录 #chmod 777 *.sh /加777权限 #bash catalina.sh start /启动
|
本文转自Ryan.Miao博客园博客,原文链接:http://www.cnblogs.com/woshimrf/p/4292084.html,如需转载请自行联系原作者