<script src="js/prototype.js" type="text/javascript"></script>
<script src="js/scriptaculous.js?load=builder,dragdrop" type="text/javascript"></script>
<script src="js/cropper.js" type="text/javascript"></script>
<script type="text/javascript">
function onEndCrop( coords, dimensions ) {
    $( '<%=x1.ClientID%>' ).value = coords.x1;
    $( '<%=y1.ClientID%>' ).value = coords.y1;
    $( '<%=x2.ClientID%>' ).value = coords.x2;
    $( '<%=y2.ClientID%>' ).value = coords.y2;
    $( '<%=width.ClientID%>' ).value = dimensions.width;
    $( '<%=height.ClientID%>' ).value = dimensions.height;
}
Event.observe(
    window,
    'load',
    function() {
        new Cropper.ImgWithPreview(
            '<%=imgSample.ClientID%>',
            {
                minWidth: 67,
                minHeight: 86,
                onEndCrop: onEndCrop,
                displayOnInit: true
            }
        )
    }
);
</script>
<div>
        <asp:Image id="imgSample" runat="server" />
        <div id="previewArea"></div>
        <asp:Button ID="btnCrop" runat="server" Text="Crop Image" OnClick="btnCrop_Click" />
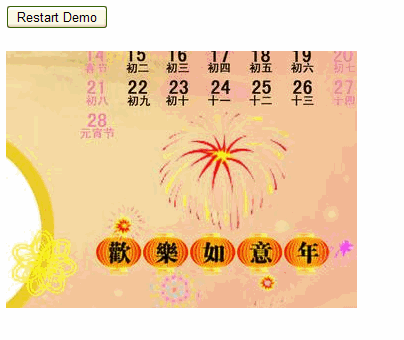
        <asp:Button ID="btnReset" runat="server" Text="Restart Demo" Visible="false" OnClick="btnReset_Click" />
         <br />
        <input type="text" name="x1" id="x1" runat="server" style="visibility:hidden;"/>
        <input type="text" name="y1" id="y1" runat="server" style="visibility:hidden;"/>
        <input type="text" name="x2" id="x2" runat="server" style="visibility:hidden;"/>
        <input type="text" name="y2" id="y2" runat="server" style="visibility:hidden;"/>
        <input type="text" name="width" id="width" runat="server" style="visibility:hidden;"/>
        <input type="text" name="height" id="height" runat="server" style="visibility:hidden;"/>
    </div>
using System;
using System.Web;
using System.IO;
using System.Web.UI;
using System.Drawing;
using System.Drawing.Imaging;
using System.Web.UI.WebControls;
using System.Web.UI.HtmlControls;


public partial class PhotoCropper : System.Web.UI.Page
{
    //原图
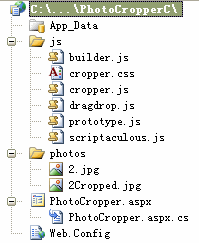
    private const string ORIG_SAMPLE_PHOTO_URL ="photos/2.jpg";
    //裁剪图
    private const string CROPPED_SAMPLE_PHOTO_URL = "photos/2Cropped.jpg";

protected void Page_Load(object sender, System.EventArgs e)
{
        if (!Page.IsPostBack)
        {
            loadPhoto(ORIG_SAMPLE_PHOTO_URL);
        }
        else
        {
            loadPhoto(CROPPED_SAMPLE_PHOTO_URL);
            btnCrop.Visible = !btnCrop.Visible;
            btnReset.Visible = !btnReset.Visible;
        }
}

    protected void loadPhoto(string url)
    {
        imgSample.ImageUrl = url;
    }

    protected void btnCrop_Click(object sender, EventArgs e)
    {
        int iWidth = Convert.ToInt16(width.Value);
        int iHeight =  Convert.ToInt16(height.Value);
        int iX =  Convert.ToInt16(x1.Value);
        int iY =  Convert.ToInt16(y1.Value);

        //用字节流读取
        byte[] rawData = File.ReadAllBytes(Context.Server.MapPath(""+ORIG_SAMPLE_PHOTO_URL+""));

        byte[] newImage = CropImageFile(rawData, iWidth, iHeight, iX, iY);

        writeByteArrayToFile(newImage);
    }

    //重置
    protected void btnReset_Click(object sender, EventArgs e)
    {
        Response.Redirect("PhotoCropper.aspx", true);
    }

    //字节数组换成图片文件
    protected void writeByteArrayToFile(byte[] byteImage) {
        using (BinaryWriter binWriter =
        new BinaryWriter(File.Open(Context.Server.MapPath("" + CROPPED_SAMPLE_PHOTO_URL + ""), FileMode.Create)))
        {
            binWriter.Write(byteImage);
        }
    }

    //裁剪
    protected byte[] CropImageFile(byte[] imageFile, int targetW, int targetH, int targetX, int targetY)
    {
        MemoryStream imgMemoryStream = new MemoryStream();
        System.Drawing.Image imgPhoto = System.Drawing.Image.FromStream(new MemoryStream(imageFile));

        Bitmap bmPhoto = new Bitmap(targetW, targetH, PixelFormat.Format24bppRgb);
        bmPhoto.SetResolution(72, 72);

        Graphics grPhoto = Graphics.FromImage(bmPhoto);
        grPhoto.SmoothingMode = System.Drawing.Drawing2D.SmoothingMode.AntiAlias;
        grPhoto.InterpolationMode = System.Drawing.Drawing2D.InterpolationMode.HighQualityBicubic;
        grPhoto.PixelOffsetMode = System.Drawing.Drawing2D.PixelOffsetMode.HighQuality;

        try
        {
            grPhoto.DrawImage(imgPhoto, new Rectangle(0, 0, targetW, targetH), targetX, targetY, targetW, targetH, GraphicsUnit.Pixel);
            bmPhoto.Save(imgMemoryStream, System.Drawing.Imaging.ImageFormat.Jpeg);
        }
        catch (Exception e)
        {
            throw e;
        }
        finally
        {
            imgPhoto.Dispose();
            bmPhoto.Dispose();
            grPhoto.Dispose();
        }
        return imgMemoryStream.GetBuffer();
    }

    //转换图片成子节流
    protected byteImage bytetry
        using MemoryStream new MemoryStreamImageFormatcatch Exception throw return
}
本文转自曾祥展博客园博客,原文链接:http://www.cnblogs.com/zengxiangzhan/archive/2010/01/04/1638780.html,如需转载请自行联系原作者


