在上篇随笔《在Winform开发中使用日程控件XtraScheduler》中介绍了DevExpress的XtraScheduler日程控件的各种使用知识点,对于我们来说,日程控件不陌生,如OutLook里面就有日历的模块,但是这个日程控件真的是很复杂的一个控件,需要全面掌握可能需要花费很多的时间去了解,由于是技术研究,我总是希望把它常用的功能剖析的更加彻底一些,前面随笔也介绍了它的存储功能,把它基于实体类的方式存储在数据库里面,不过介绍的还不够,本文继续上面的内容,进行数据存储方面的介绍。
在查阅了大量资料,以及一两天的潜入研究,总算把它的数据存储和相关熟悉有一个比较清晰的了解。
1、数据绑定及加载的处理回顾
在上篇随笔里面,我总体性介绍了这个控件的数据绑定,以及数据是如何保存到数据库里面的,绑定到DevExpress的XtraScheduler日程控件的步骤是需要先设置好映射关系(Mappings),然后绑定数据源即可。
操作代码如下所示。
        /// <summary>
        /// 设置日程控件的字段映射
        /// </summary>
        /// <param name="control">日程控件</param>
        private void SetMappings(SchedulerControl control)
        {
            AppointmentMappingInfo appoint = control.Storage.Appointments.Mappings;
            appoint.AllDay = "AllDay";
            appoint.Description = "Description";
            appoint.End = "EndDate";
            appoint.Label = "AppLabel";
            appoint.Location = "Location";
            appoint.RecurrenceInfo = "RecurrenceInfo";
            appoint.ReminderInfo = "ReminderInfo";
            appoint.ResourceId = "ResourceId";
            appoint.Start = "StartDate";
            appoint.Status = "Status";
            appoint.Subject = "Subject";
            appoint.Type = "EventType";

            ResourceMappingInfo res = control.Storage.Resources.Mappings;
            res.Caption = "ResourceName";
            res.Color = "Color";
            res.Id = "ResourceId";
            res.Image = "Image";
        }
然后接着就是绑定Appointment和Resource到对应的数据源里面接口。
            //从数据库加载日程信息
            List<AppResourceInfo> resouceList = BLLFactory<AppResource>.Instance.GetAll();
            this.schedulerStorage1.Resources.DataSource = resouceList;

            List<UserAppointmentInfo> eventList = BLLFactory<UserAppointment>.Instance.GetAll();
            this.schedulerStorage1.Appointments.DataSource = eventList;
2、日程数据的增删改处理
但是,上面这样的存储在是实际上是比较少的,也就是我们往往可能会在界面上进行新增或者复制记录,修改记录,或者删除记录等操作,因此需要进一步利用日程控件的完善接口来处理这些操作。
我们在VS的对应控件属性里面可以看到一些关于存储的重要事件,也就是日程的增删改处理事件,如下所示。
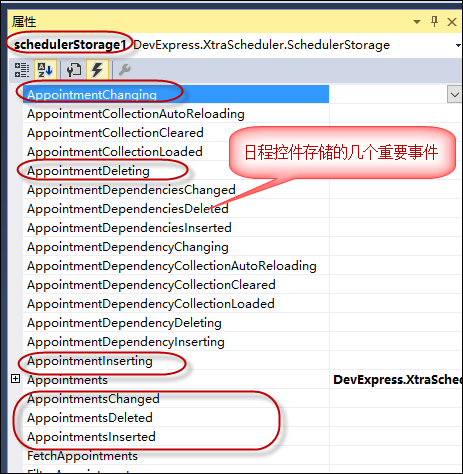
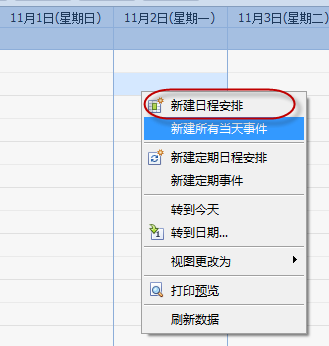
上面这几个事件也就是对应在日程控件里面右键菜单对应的增删改操作。
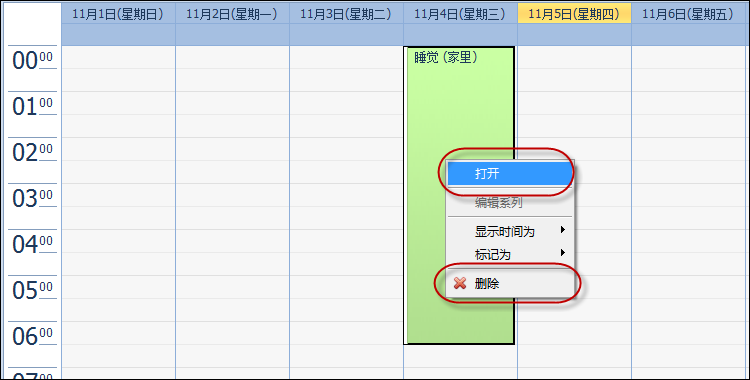
另外日程控件还可以支持拖动修改、拖动复制、删除键删除操作的,这些也是会继续调用上面那些增删改的操作事件的,所以我们就对他们进行完善,我们重点是处理ing类型的事件,如Inserting的事件,在写入日程控件集合之前的处理。
            //写回数据库操作的事件
            control.Storage.AppointmentInserting += Storage_AppointmentInserting;
            control.Storage.AppointmentChanging += Storage_AppointmentChanging;
            control.Storage.AppointmentDeleting += Storage_AppointmentDeleting;
对于修改数据前的处理,我们是让它在顺利写入数据库后,在决定是否更新日程对象的存储集合还是丢弃修改记录,如下所示。
        void Storage_AppointmentChanging(object sender, PersistentObjectCancelEventArgs e)
        {
            Appointment apt = e.Object as Appointment;
            UserAppointmentInfo info = ConvertToAppoint(apt);

            bool success = BLLFactory<UserAppointment>.Instance.Update(info, apt.Id);
            e.Cancel = !success;
        }
注意上面的e.Cancel =true或者false代表是否放弃,上面的代码逻辑就是如果我们顺利写入数据库,那么就可以成功更新到日程控件的存储集合里面,而且就可以在界面看到最新的结果。
有了上面的理解,我们就可以进一步完善在插入前、删除前的代码处理了。
对于删除前的操作,我们可以用的代码如下所示。
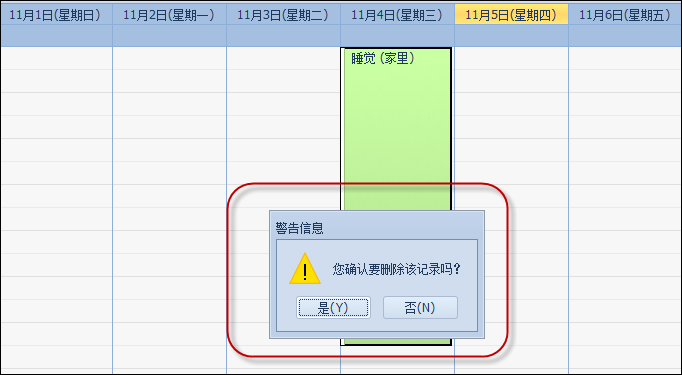
        void Storage_AppointmentDeleting(object sender, PersistentObjectCancelEventArgs e)
        {
            Appointment apt = e.Object as Appointment;
            if (apt != null && apt.Id != null)
            {
                if (MessageDxUtil.ShowYesNoAndWarning("您确认要删除该记录吗?") == DialogResult.Yes)
                {
                    bool success = BLLFactory<UserAppointment>.Instance.Delete(apt.Id);
                    e.Cancel = !success;
                }
            }
        }
我们使用代码MessageDxUtil.ShowYesNoAndWarning来判断是否继续,如下界面所示。
对于插入的记录,我们需要更加注意,需要写入数据库后,进行本地的存储记录的更新,这样才能合理显示,否则容易发生复制、创建的记录位置总是不对,偏移到其他地方去的。
        void Storage_AppointmentInserting(object sender, PersistentObjectCancelEventArgs e)
        {
            Appointment apt = e.Object as Appointment;
            UserAppointmentInfo info = ConvertToAppoint(apt);

            bool success = BLLFactory<UserAppointment>.Instance.Insert(info);
            e.Cancel = !success;
            if (success)
            {
                LoadData();
            }
        }
LoadData就是我们从数据库加载日程信息,并绑定到日程控件的存储对象里面,其中需要注意的就是需要使用RefreshData方法,让日程控件的存储对象刷新一下,这样才能够顺利显示我们添加的记录。
            //从数据库加载日程信息
            List<AppResourceInfo> resouceList = BLLFactory<AppResource>.Instance.GetAll();
            this.schedulerStorage1.Resources.DataSource = resouceList;

            List<UserAppointmentInfo> eventList = BLLFactory<UserAppointment>.Instance.GetAll();
            this.schedulerStorage1.Appointments.DataSource = eventList;
this.schedulerControl1.RefreshData();//必须,每次修改需要刷新数据源,否则界面需要重新刷新
3、多人资源的处理
在日程控件里面,支持多人资源的处理,默认是资源只能选择其一,需要多人的话,那么就需要设置下面的属性来显示声明使用多人资源,如下所示。
schedulerControl1.Storage.Appointments.ResourceSharing = true;
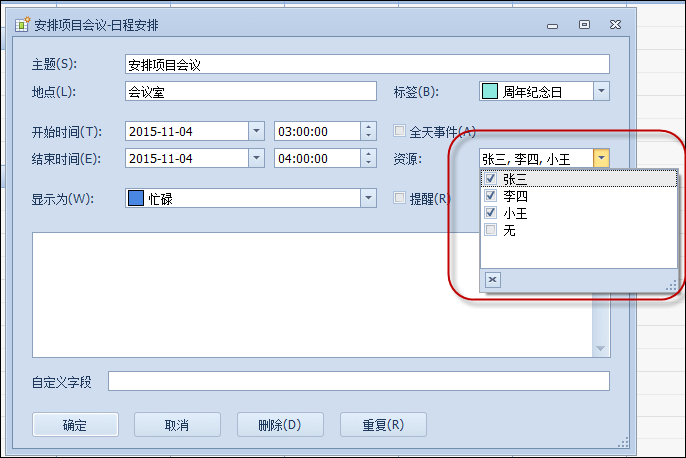
使用多人的资源,可以对资源进行复选,它的映射记录就是ResourceIds的了,所以设置映射属性的时候,我们需要判断这个ResourceSharing 属性。
            if(control.ResourceSharing)
            {
                appoint.ResourceId = "ResourceIds";
            }
            else
            {
                appoint.ResourceId = "ResourceId";
            }
其中ResourceId的内容格式如下所示
<ResourceIds> <ResourceId Type="System.String" Value="1" /><ResourceId Type="System.String" Value="2" /> </ResourceIds>
和ResourceId不同这里的值就是一个XML内容,这个和提醒等内容的存储格式一样,都是基于XML的内容。日程控件涉及到的几种XML的信息获取如下所示。
            //多人资源的信息
            if(apt.ResourceIds != null)
            {
                AppointmentResourceIdCollectionContextElement item =
                    new AppointmentResourceIdCollectionContextElement(apt.ResourceIds);
                info.ResourceIds = item.ValueToString();

                //第二种
                //AppointmentResourceIdCollectionXmlPersistenceHelper helper = new AppointmentResourceIdCollectionXmlPersistenceHelper(apt.ResourceIds);
                //info.ResourceIds = helper.ToXml();
            }

            //日程重复信息
            if (apt.RecurrenceInfo != null)
            {
                info.RecurrenceInfo = apt.RecurrenceInfo.ToXml();
            }
            //提醒信息
            if (apt.Reminder != null)
            {
                info.ReminderInfo = ReminderCollectionXmlPersistenceHelper.CreateSaveInstance(apt).ToXml();
            }
本文转自博客园伍华聪的博客,原文链接:在Winform开发中使用日程控件XtraScheduler(2)--深入理解数据的存储,如需转载请自行联系原博主。