开头是鸡蛋,后面全靠编!!!
========================================================
1.默认静态资源映射路径以及优先顺序
Spring Boot 默认为我们提供了静态资源处理,使用 WebMvcAutoConfiguration 中的配置各种属性。
建议大家使用Spring Boot的默认配置方式,提供的静态资源映射如下:
-
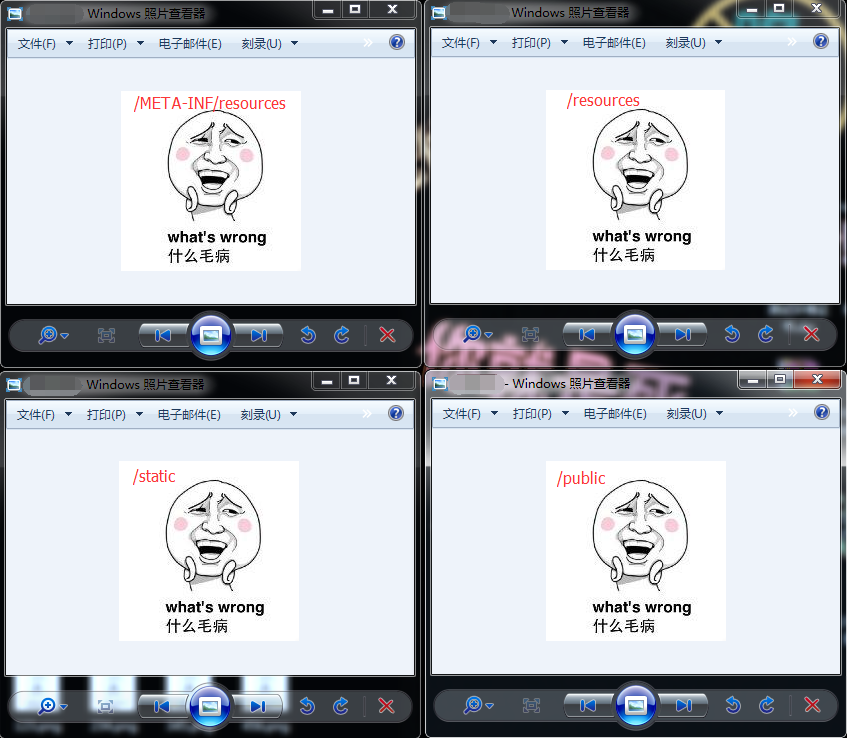
classpath:/META-INF/resources
-
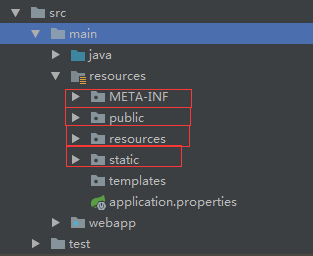
classpath:/resources
-
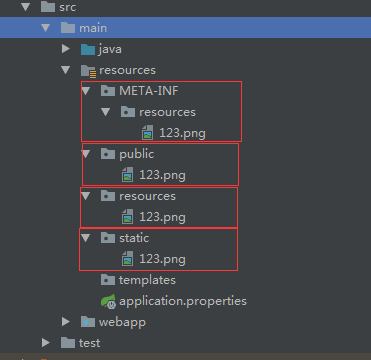
classpath:/static
-
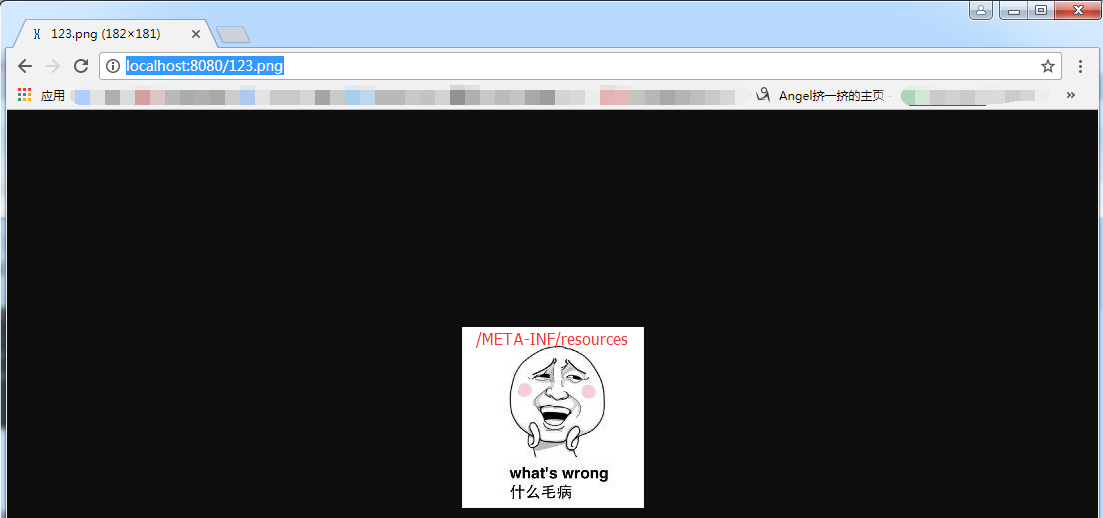
classpath:/public
制作【四个同名】的图片,分别在图片上标注对应要放在的【静态资源文件夹】下
一定要重启,让项目重新加载目录。然后再进行访问
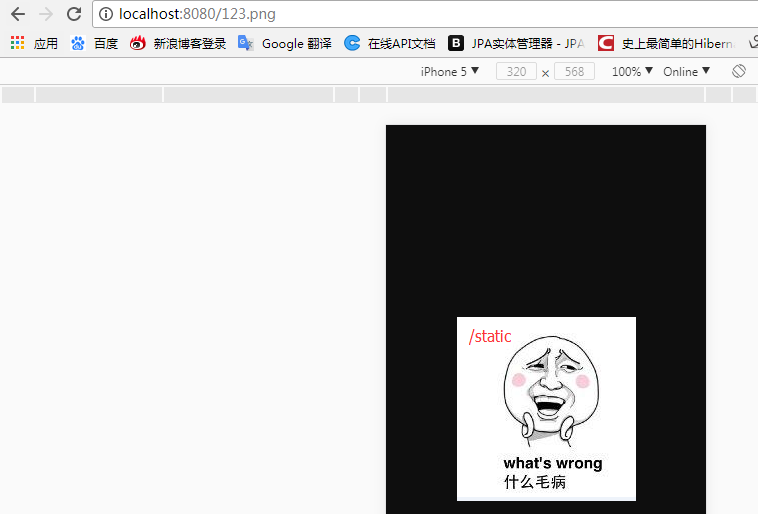
访问地址:http://localhost:8080/123.png
然后把这个目录下的图片删除,依次验证,完成后得出结论:
上面这几个都是静态资源的映射路径,优先级顺序为:META-INF/resources > resources > static > public
除此之外,这几个映射路径下可以放置任何的静态资源都可以被浏览器访问到。
查看完整的配置文件:http://www.cnblogs.com/sxdcgaq8080/p/7724506.html
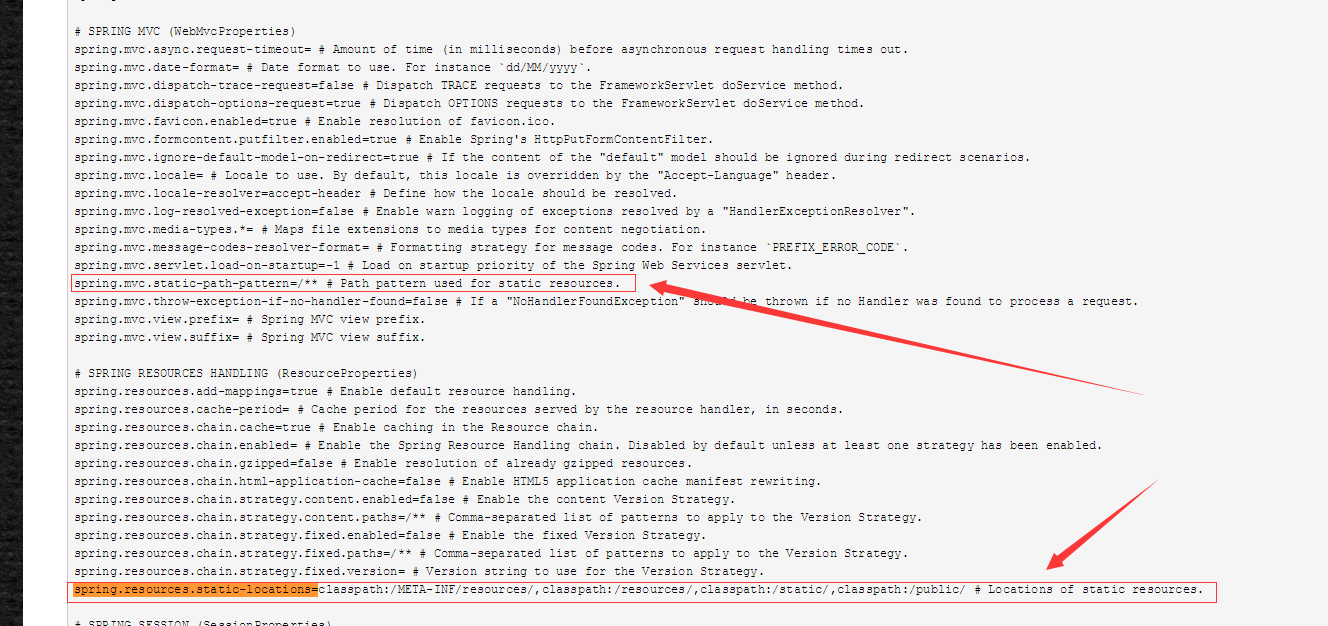
可以看到
spring.mvc.static-path-pattern=/** 静态资源的映射路径模式就是localhost:8080/下面,那比如访问静态资源路径下的图片就是localhost:8080/123.png
如果更改为
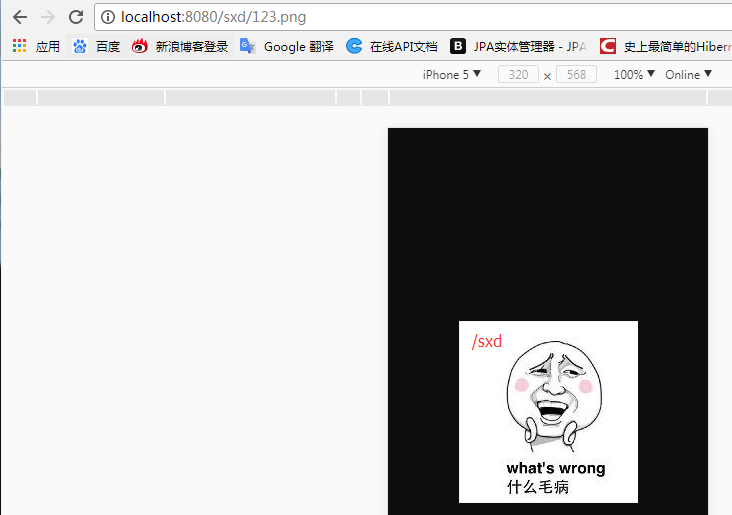
spring.mvc.static-path-pattern=/sxd/** 那访问的时候就需要访问localhost:8080/sxd/123.png
spring.resources.static-locations=classpath:/META-INF/resources/,classpath:/resources/,classpath:/static/,classpath:/public/
规定 静态资源映射路径就是根目录下的这几个,如果想要配置更多,请再以,逗号分隔跟在后面写就好了
2.继承WebMvcConfigurerAdapter类,在保留spring boot的配置情况下,添加自定义的额外配置
实现自定义的额外配置的前提,是自定义一个配置类,并使用注解@Configuration
package com.sxd.util;

import org.springframework.context.annotation.Configuration;
import org.springframework.web.servlet.config.annotation.WebMvcConfigurerAdapter;

@Configuration
public class MyConfig extends WebMvcConfigurerAdapter {

}
2.1通过重写 WebMvcConfigurerAdapter 类的addResourceHandlers()方法,实现添加自定义的静态资源映射地址
实现方式如下:


package com.sxd.util;


import org.springframework.context.annotation.Configuration;
import org.springframework.web.servlet.config.annotation.ResourceHandlerRegistry;
import org.springframework.web.servlet.config.annotation.WebMvcConfigurerAdapter;

@Configuration
public class MyConfig extends WebMvcConfigurerAdapter {

    @Override
    public void addResourceHandlers(ResourceHandlerRegistry registry) {
        registry.addResourceHandler("/**").addResourceLocations("classpath:/sxd/");
        super.addResourceHandlers(registry);
    }


}
registry.addResourceHandler("/**")代表根访问路径,也就是localhost:8080/
addResourceLocations("classpath:/sxd/");代表规定classpath下的/sxd/为静态资源的映射地址
组合到一起就是localhost:8080/123.png就能访问到   resources文件夹下的sxd下的文件
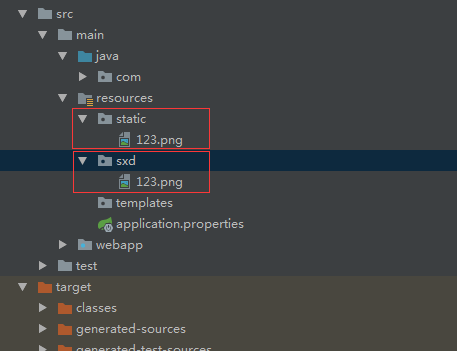
这个图片就是放在项目中,新建的sxd目录下
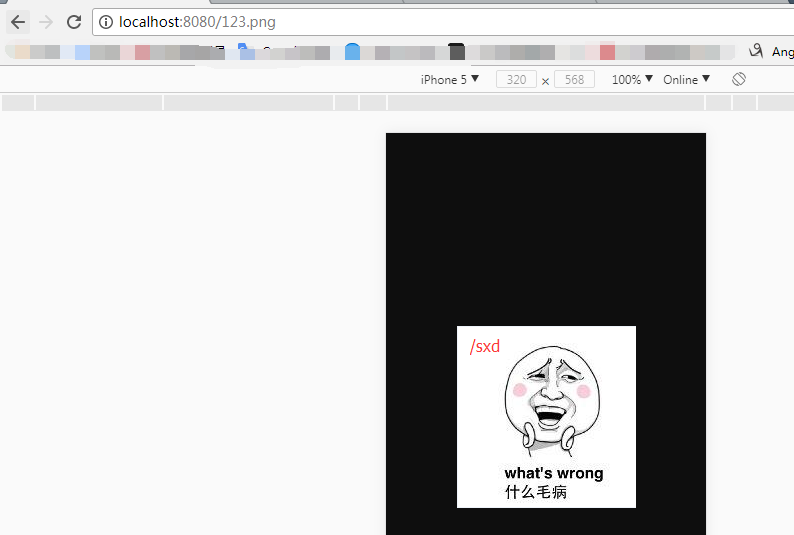
然后检测一下是否自定义的配置可以成功,同时可以检测到 自定义的静态资源映射地址和默认的映射地址哪个的优先级更高
访问之后发现,访问到的是自定义的映射文件地址下的图片。
那我们修改一下上面的代码:
package com.sxd.util;


import org.springframework.context.annotation.Configuration;
import org.springframework.web.servlet.config.annotation.ResourceHandlerRegistry;
import org.springframework.web.servlet.config.annotation.WebMvcConfigurerAdapter;

@Configuration
public class MyConfig extends WebMvcConfigurerAdapter {

    @Override
    public void addResourceHandlers(ResourceHandlerRegistry registry) {
        registry.addResourceHandler("/sxd/**").addResourceLocations("classpath:/sxd/");
        super.addResourceHandlers(registry);
    }


}
访问地址:http://localhost:8080/123.png
访问地址:http://localhost:8080/sxd/123.png
可以看出,即使是添加了自定义的静态资源映射地址,原本默认的地址依旧可以起作用。
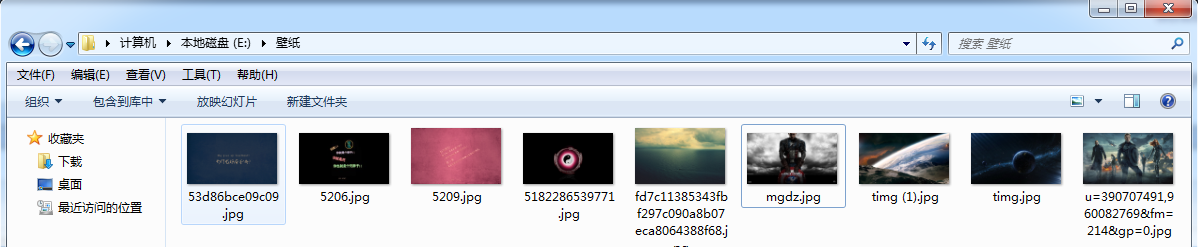
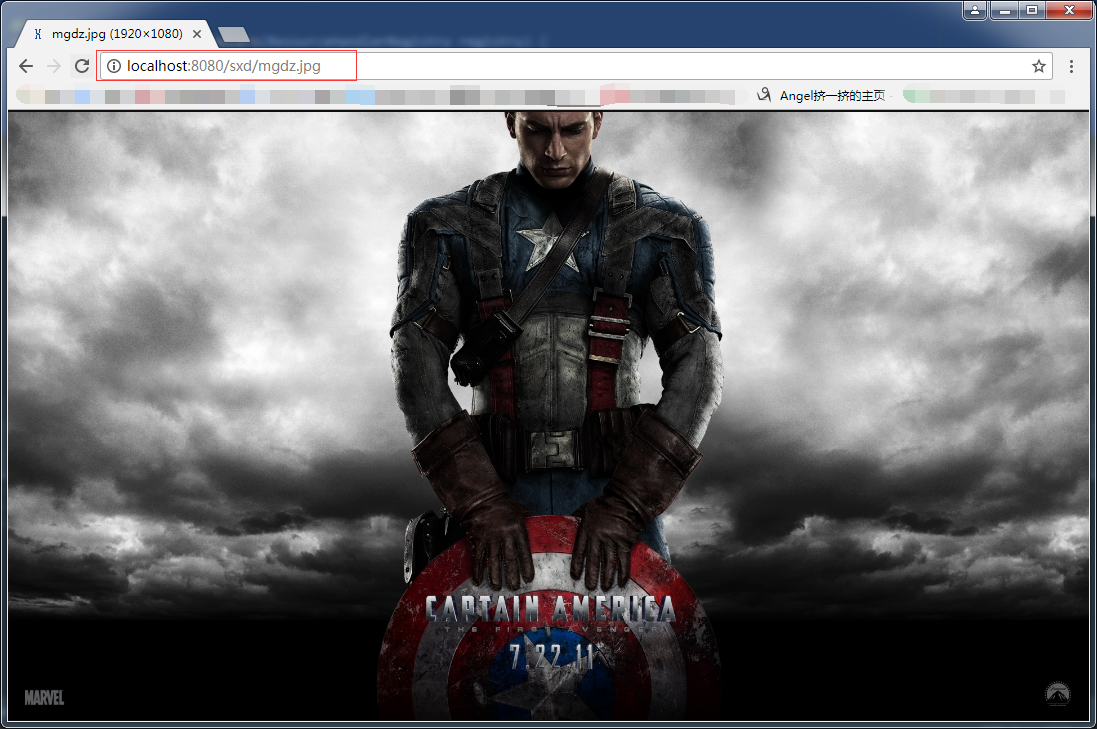
同样的,修改【addResourceLocations("file:E:/壁纸/");】可以指定本地磁盘目录为静态资源访问路径
本地磁盘目录如下:
package com.sxd.util;


        import org.springframework.context.annotation.Configuration;
        import org.springframework.web.servlet.config.annotation.ResourceHandlerRegistry;
        import org.springframework.web.servlet.config.annotation.WebMvcConfigurerAdapter;

@Configuration
public class MyConfig extends WebMvcConfigurerAdapter {

    @Override
    public void addResourceHandlers(ResourceHandlerRegistry registry) {
        registry.addResourceHandler("/sxd/**").addResourceLocations("file:E:/壁纸/");
        super.addResourceHandlers(registry);
    }


}
然后重启访问:
最后,再次申明一点:
addResourceHandler("/**") 代表根访问路径,也就是localhost:8080/,就是对外暴露的地址
addResourceLocations("classpath:/sxd/"); 代表规定classpath下的/sxd/为静态资源的映射地址,就是文件存放的目录
==============================================================================================================
2.2 重写addViewControllers()方法,实现页面跳转的简便化
前面有spring boot项目访问jsp页面:http://www.cnblogs.com/sxdcgaq8080/p/7712874.html
要访问页面,还得创建一个controller,然后controller中还得写一个页面跳转的方法,才能访问跳转成功。
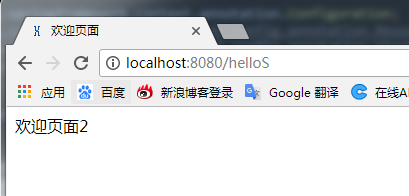
好现在创建一个hello2页面
现在
package com.sxd.util;


        import org.springframework.context.annotation.Configuration;
        import org.springframework.web.servlet.config.annotation.ResourceHandlerRegistry;
        import org.springframework.web.servlet.config.annotation.ViewControllerRegistry;
        import org.springframework.web.servlet.config.annotation.WebMvcConfigurerAdapter;

@Configuration
public class MyConfig extends WebMvcConfigurerAdapter {

    @Override
    public void addViewControllers(ViewControllerRegistry registry) {
        registry.addViewController("/helloS").setViewName("hello2");
        super.addViewControllers(registry);
    }
}
同时咱们原来的controller中原来的访问方式依旧是可以访问到的。
package com.sxd.controller;

import org.springframework.stereotype.Controller;
import org.springframework.web.bind.annotation.RequestMapping;

@Controller
public class ViewController {

    @RequestMapping("/hello")
    public String hello(){
        return  "hello";
    }
}
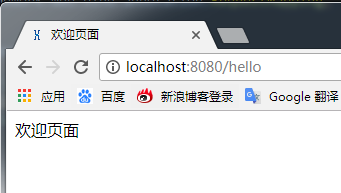
现在把controller中的访问地址和自定义配置中的这个访问地址设置为一样的,
controller:
@Controller
public class ViewController {

    @RequestMapping("/hello")
    public String hello(){
        return  "hello";
    }
}
配置类:
@Override
    public void addViewControllers(ViewControllerRegistry registry) {
        registry.addViewController("/hello").setViewName("hello2");
        super.addViewControllers(registry);
    }
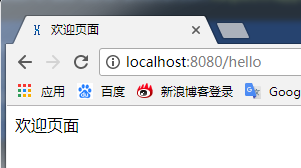
然后重启,访问:
contrller和自定义配置类的页面跳转相比较,controller中优先有效。
最后,如果想添加多个页面跳转,怎么办 ?
看下面代码:
@Configuration
public class MyConfig extends WebMvcConfigurerAdapter {

    @Override
    public void addViewControllers(ViewControllerRegistry registry) {
        registry.addViewController("/hello2").setViewName("hello2");
        registry.addViewController("/hello3").setViewName("hello3");
        super.addViewControllers(registry);
    }
}
重启,访问

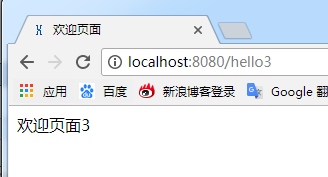
如此,甚好!!!!
===================================================================================================================
3.实现HandlerInterceptor 接口,重写addInterceptors方法实现自定义拦截器
好了,现在要实现自定义拦截器,在此之前我们需要做一些工作:
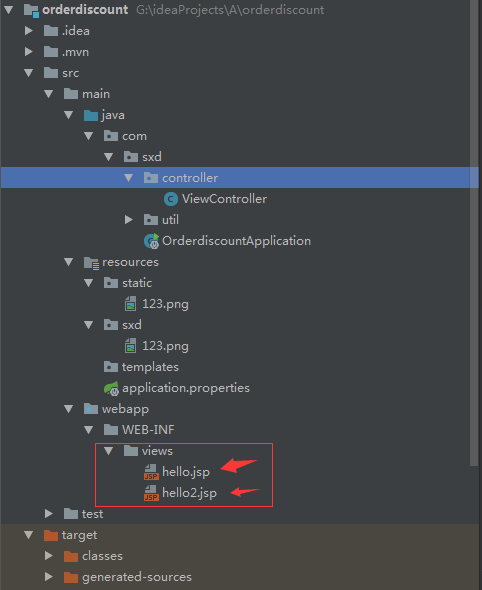
整个项目目录如下:
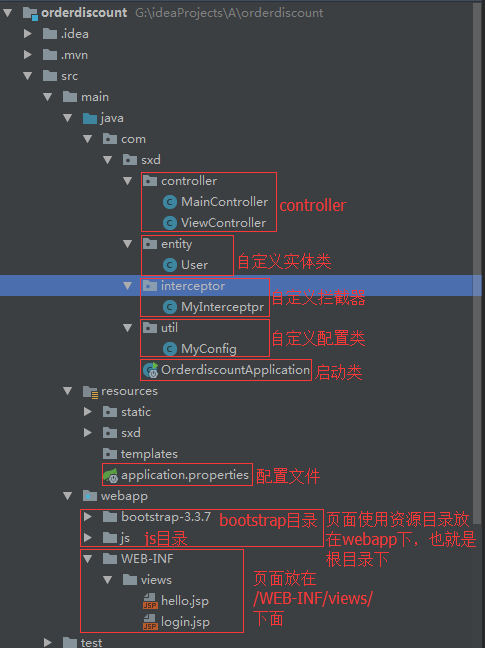
pom.xml文件如下:
<?xml version="1.0" encoding="UTF-8"?>
<project xmlns="http://maven.apache.org/POM/4.0.0" xmlns:xsi="http://www.w3.org/2001/XMLSchema-instance"
    xsi:schemaLocation="http://maven.apache.org/POM/4.0.0 http://maven.apache.org/xsd/maven-4.0.0.xsd">
    <modelVersion>4.0.0</modelVersion>

    <groupId>com.sxd</groupId>
    <artifactId>orderdiscount</artifactId>
    <version>0.0.1-SNAPSHOT</version>
    <packaging>jar</packaging>

    <name>orderdiscount</name>
    <description>orderdiscount for Spring Boot</description>

    <parent>
        <groupId>org.springframework.boot</groupId>
        <artifactId>spring-boot-starter-parent</artifactId>
        <version>1.5.8.RELEASE</version>
        <relativePath/> <!-- lookup parent from repository -->
    </parent>

    <properties>
        <project.build.sourceEncoding>UTF-8</project.build.sourceEncoding>
        <project.reporting.outputEncoding>UTF-8</project.reporting.outputEncoding>
        <java.version>1.8</java.version>
    </properties>

    <dependencies>
        <!--web 支持-->
        <dependency>
            <groupId>org.springframework.boot</groupId>
            <artifactId>spring-boot-starter-web</artifactId>
        </dependency>

        <!--jsp页面使用jstl标签-->
        <dependency>
            <groupId>javax.servlet</groupId>
            <artifactId>jstl</artifactId>
        </dependency>

        <!--用于编译jsp-->
        <dependency>
            <groupId>org.apache.tomcat.embed</groupId>
            <artifactId>tomcat-embed-jasper</artifactId>
            <!--<scope>provided</scope>-->
        </dependency>
        <!--spring boot热部署插件-->
        <dependency>
            <groupId>org.springframework.boot</groupId>
            <artifactId>spring-boot-devtools</artifactId>
            <optional>true</optional>
        </dependency>

        <dependency>
            <groupId>org.springframework.boot</groupId>
            <artifactId>spring-boot-starter-test</artifactId>
            <scope>test</scope>
        </dependency>
    </dependencies>

    <!--开启热部署-->
    <build>
        <plugins>
            <plugin>
                <groupId>org.springframework.boot</groupId>
                <artifactId>spring-boot-maven-plugin</artifactId>
                <configuration>
                    <fork>true</fork><!--这个必须加上-->
                </configuration>
            </plugin>
        </plugins>
    </build>


</project>
application.properties 配置文件:
spring.mvc.view.prefix = /WEB-INF/views/
spring.mvc.view.suffix = .jsp
User实体:

启动类:
package com.sxd;

import org.springframework.boot.SpringApplication;
import org.springframework.boot.autoconfigure.SpringBootApplication;

@SpringBootApplication
public class OrderdiscountApplication {

    public static void main(String[] args) {
        SpringApplication.run(OrderdiscountApplication.class, args);
    }
}
登录页面跳转控制器--MainController跳转登录:
【访问localhost:8080/toLogin】就去找了根路径下的login.jsp页面,也就是classpath:/WEB-INF/views/login.jsp
package com.sxd.controller;

import org.springframework.stereotype.Controller;
import org.springframework.web.bind.annotation.RequestMapping;

@Controller
public class MainController {

    @RequestMapping("/toLogin")
    public String hello(){
        return  "login";
    }
}
登录时验证用户信息控制器--ViewController验证控制:
【如果用户名和密码都不为null,返回1,代表登录成功,并且放入session;否则返回2】
package com.sxd.controller;

import com.sxd.entity.User;
import org.springframework.stereotype.Controller;
import org.springframework.web.bind.annotation.RequestMapping;
import org.springframework.web.bind.annotation.ResponseBody;

import javax.servlet.http.HttpServletRequest;
import javax.servlet.http.HttpServletResponse;

@Controller
public class ViewController {

    @RequestMapping("/login")
    @ResponseBody
    public String hello(HttpServletRequest request, HttpServletResponse response, User user){
        System.out.println(user);
        if(!"".equals(user.getUsername()) && !"".equals(user.getPassword())){
            request.getSession().setAttribute("user",user);
            return  "1";
        }else{
            return  "2";
        }

    }
}
登录页面login.jsp:
<%--
  Created by IntelliJ IDEA.
  User: SXD
  Date: 2017/11/15
  Time: 13:51
  To change this template use File | Settings | File Templates.
--%>
<%@ page contentType="text/html;charset=UTF-8" language="java" %>
<!DOCTYPE html>
<html lang="zh-CN">
<head>
    <title>登录页面</title>
    <link href="/bootstrap-3.3.7/css/bootstrap.min.css" rel="stylesheet">
</head>
<body>
    <div class="container">
        <h1 class="text-center">测试登录页面</h1>

        <form class="form-horizontal loginForm">
            <div class="form-group-lg">
                <label class="col-lg-2 control-label">用户名</label>
                <div class="col-lg-10">
                    <div class="input-group">
                        <span class="input-group-addon"><span class="glyphicon glyphicon-user"></span></span>
                        <input class="form-control" name="username" type="text" placeholder="输入用户名">
                    </div>
                </div>
            </div>
            <div class="form-group-lg ">
                <label class="col-lg-2 control-label">密码</label>
                <div class="col-lg-10">
                    <div class="input-group">
                        <span class="input-group-addon"><span class="glyphicon glyphicon-lock"></span></span>
                        <input class="form-control" name="password" type="password" placeholder="输入密码">
                    </div>
                </div>
            </div>

            <div class="form-group-lg">
                <div class="col-lg-4 col-lg-offset-4">
                    <button class="btn btn-lg btn-primary btn-block" name="userLogin"><span class="glyphicon glyphicon-off"></span>登录</button>
                </div>
            </div>
        </form>
    </div>

    <script src="/js/jquery-3.2.1.min.js"></script>
    <script src="/js/login.js"></script>
</body>
</html>
登陆成功页面hello.jsp
<%--
  Created by IntelliJ IDEA.
  User: SXD
  Date: 2017/11/14
  Time: 14:59
  To change this template use File | Settings | File Templates.
--%>
<%@ page contentType="text/html;charset=UTF-8" language="java" %>
<html>
<head>
    <title>欢迎页面</title>
</head>
<body>
        登陆成功的欢迎页面!!
</body>
</html>
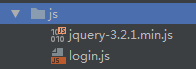
login.js
$(document).ready(function(){

    /**
     * 登录
     */
    $("button[name='userLogin']").click(function(){
        var user = $(".loginForm").serialize();

        $.post("/login?"+user,function(data){
            if(data == "1"){
                location.href = "/toHello";
            }else{
                alert("登录失败");
            }
        });


    });
});
和题目描述一致,要实现拦截器功能,需要下面两个步骤:
1》》创建自己的拦截器类实现HandlerInterceptor接口,并重写对应的拦截方法
2》》重写WebMvcConfigurerAdapter中的addInterceptors方法,将自定义的拦截器类添加进来,并且规定拦截哪些,放过哪些地址
创建拦截器 MyInterceptpr.java
【需要实现HandlerInterceptor接口,重写preHandle()方法,判断session中是否有用户信息,若有则返回true并继续执行接下来的程序,否则返回false并重定向到登录页面】
package com.sxd.interceptor;

import com.sxd.entity.User;
import org.springframework.web.servlet.HandlerInterceptor;
import org.springframework.web.servlet.ModelAndView;

import javax.servlet.http.HttpServletRequest;
import javax.servlet.http.HttpServletResponse;

public class MyInterceptpr  implements HandlerInterceptor{

    /**
     * 预处理方法,handler执行之前调用
     * @param httpServletRequest
     * @param httpServletResponse
     * @param o
     * @return  true/false  true即可执行之后的方法 否则 中断
     * @throws Exception
     */
    @Override
    public boolean preHandle(HttpServletRequest httpServletRequest, HttpServletResponse httpServletResponse, Object o) throws Exception {
        User user = (User) httpServletRequest.getSession().getAttribute("user");
        boolean flag = false;
        if(user != null){
            flag = true;
        }else{
            flag = false;
            httpServletResponse.sendRedirect("/toLogin");
        }

        return flag;
    }

    /**
     *handler执行之后调用
     * @param httpServletRequest
     * @param httpServletResponse
     * @param o
     * @param modelAndView
     * @throws Exception
     */
    @Override
    public void postHandle(HttpServletRequest httpServletRequest, HttpServletResponse httpServletResponse, Object o, ModelAndView modelAndView) throws Exception {

    }

    /**
     *本次request完成后调用
     * @param httpServletRequest
     * @param httpServletResponse
     * @param o
     * @param e
     * @throws Exception
     */
    @Override
    public void afterCompletion(HttpServletRequest httpServletRequest, HttpServletResponse httpServletResponse, Object o, Exception e) throws Exception {

    }
}
创建拦截器之后,需要将自定义的拦截器添加到自定义配置类MyConfig.java中:
package com.sxd.util;


        import com.sxd.interceptor.MyInterceptpr;
        import org.springframework.context.annotation.Configuration;
        import org.springframework.web.servlet.config.annotation.InterceptorRegistry;
        import org.springframework.web.servlet.config.annotation.ViewControllerRegistry;
        import org.springframework.web.servlet.config.annotation.WebMvcConfigurerAdapter;

@Configuration
public class MyConfig extends WebMvcConfigurerAdapter {


        /**
         * 添加自定义拦截器
         * @param registry
         */
        @Override
        public void addInterceptors(InterceptorRegistry registry) {
                registry.addInterceptor(new MyInterceptpr()).addPathPatterns("/**").excludePathPatterns("/toLogin","/login","/js/**","/bootstrap-3.3.7/**");
                super.addInterceptors(registry);
        }

        /**
         * 添加自定义页面跳转
         * @param registry
         */
        @Override
        public void addViewControllers(ViewControllerRegistry registry) {
                registry.addViewController("/toHello").setViewName("hello");
                super.addViewControllers(registry);
        }
}
.addPathPatterns("/**")要拦截的路径
.excludePathPatterns("/toLogin","/login","/js/**","/bootstrap-3.3.7/**")要放过的路径
/js/* 代表js下的子一级目录
/js/** 代表js下的所有子级
这样访问的时候,如果未登录就会跳转到login.html页面,而访问http://localhost:8080/toLogin 和http://localhost:8080/login 不会被拦截。
=========================================================================================================================================
注意就是:
1.js和css的目录都放置在webapp下,与/WEB-INF/同级而不是再其里面
2.资源如果放在静态资源的映射文件下,是可以直接引用到的。。。
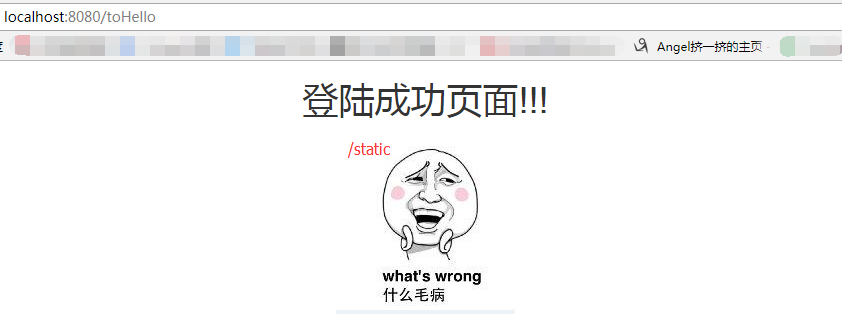
如下,123.png放在static目录下
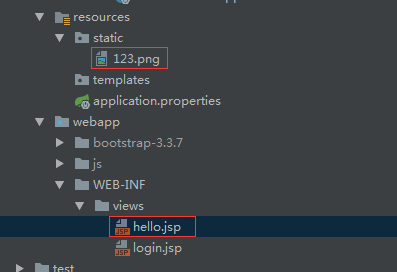
在页面上引用一下:
<%@ page contentType="text/html;charset=UTF-8" language="java" %>
<html>
<head>
    <title>欢迎页面</title>
    <link rel="stylesheet" href="/bootstrap-3.3.7/css/bootstrap.min.css">
</head>
<body>
        <div class="container">
            <div class="row">
                <h1 class="text-center">
                    登陆成功页面!!!
                </h1>
            </div>
            <div class="row text-center">
                <img class="img-thumbnai" src="/123.png">
            </div>

        </div>

</body>
</html>
效果如下:
=========================================================================================================================================
更多配置可以查看WebMvcConfigurerAdapter的类的API。因其是WebMvcConfigurer接口的实现,所以WebMvcConfigurer的API方法也可以用来配置MVC。
只是实现这个接口的话,要实现所有的方法,这样还是很不方便的唉。
所以还是推荐使用继承WebMvcConfigurerAdapter类来处理。
=========================================================================================================================================
暂时就这样吧 !!!!