1 Preliminary Note
Partimage is part of the system rescue CD found on http://www.sysresccd.org which is a multi-functional rescue CD useful for both Linux and Windows operating systems. It boots into a live environment with a lot of tools for partitioning, editing, etc. Download the SystemRescueCD here: http://sourceforge.net/projects/systemrescuecd/files/sysresccd-x86/2.6.0/systemrescuecd-x86-2.6.0.iso/download and burn it.
Partimage does not work on ext4 file systems and is experimental for ntfs file systems. The complete list of supported file systems can be found onhttp://www.partimage.org/Supported-Filesystems.
In this tutorial, I will use a hard disk partitioned into three parts: sda1 which is my swap partition, sda2 that I have Ubuntu Linux 12.04 installed on, and sda3 that has nothing on it but enough space to carry an image of sda2.
2 Boot SystemRescueCd
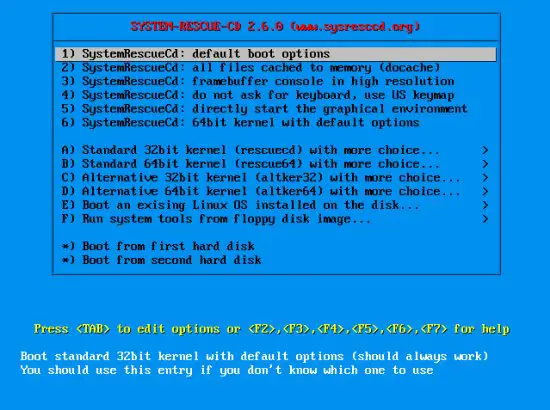
Insert your burnt CD into your CD tray and boot into the start screen. This is what it looks like:
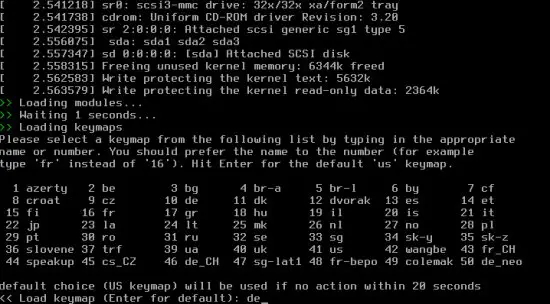
Since I like graphical environments and this one loads really fast, I go down to 5) and start the graphical environment. While loading, the system will ask you for your keymap. Within 20 seconds, type in the name or the appropriate number from the table above:
The environment looks as follows. A root terminal will be opened by default:

3 Create A Partition Image
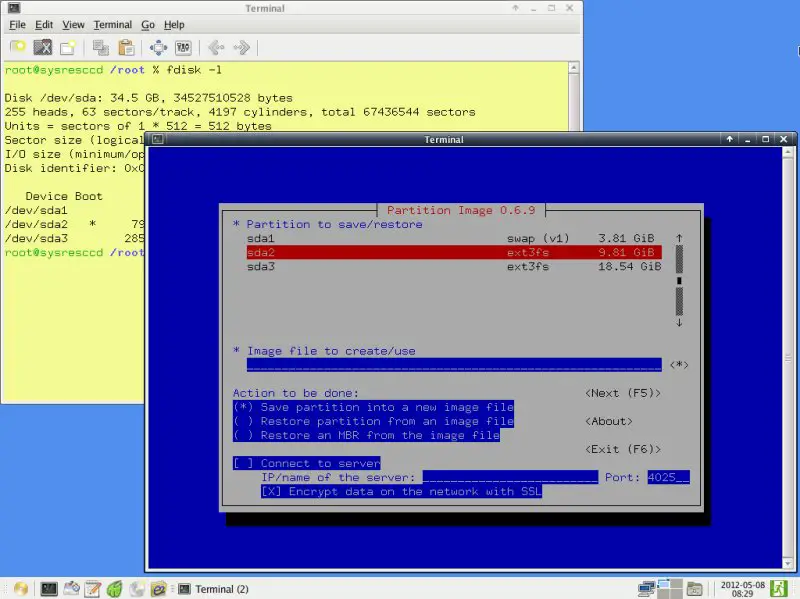
I will create an image of my Linux partition, sda2, on my empty partition sda3. If you don't know what partitions you have, go to the terminal and enter:
fdisk -l
The output will look like this (the bottom three rows are my partitions):
root@sysresccd /root % fdisk -l
Disk /dev/sda: 34.5 GB, 34527510528 bytes
255 heads, 63 sectors/track, 4197 cylinders, total 67436544 sectors
Units = sectors of 1 * 512 = 512 bytes
Sector size (logical/physical): 512 bytes / 512 bytes
I/O size (minimum/optimal): 512 bytes / 512 bytes
Disk identifier: 0x0001b9b7
Device Boot Start End Blocks Id System
/dev/sda1 2048 7999487 3998720 82 Linux swap / Solaris
/dev/sda2 * 7999488 28565503 10283008 83 Linux
/dev/sda3 28565504 67436543 19435520 83 Linux
To start Partimage, open the main menu on the bottom left of the desktop and go to System > Partimage. It will open in a new terminal window:
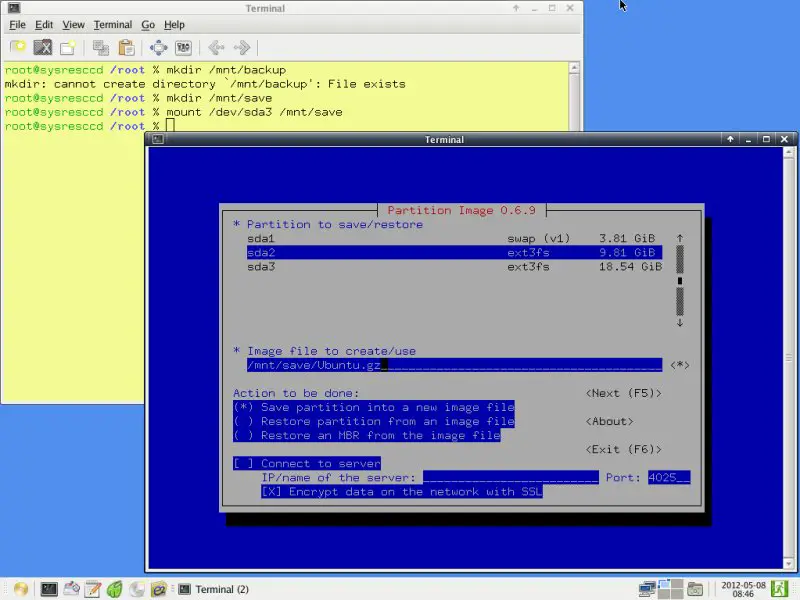
But before we can begin to back up, we first have to mount the partition we want to save the backup on. Create a folder within /mnt and mount the partition on that point. I will use sda3 for saving, replace it with the appropriate partition on your system:
mkdir /mnt/save
mount /dev/sda3 /mnt/save
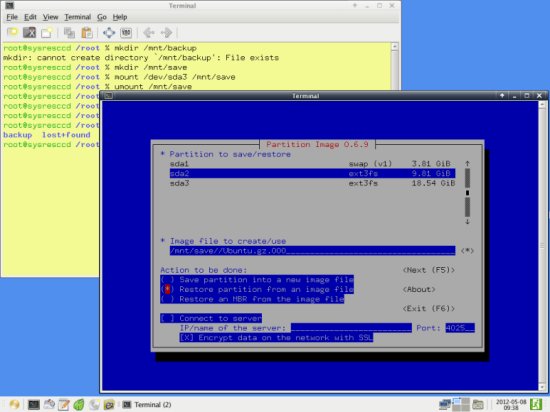
Now go to the Partimage terminal again. Navigate through it using the TAB, ENTER, SPACE and arrow keys. First select the partition to back up and go to the next field with TAB. In the next line, enter the full path of the backup, including the name. You can select the path by using the asterisk on the next field. I will save my backup as /mnt/save/Ubuntu.gz (I will choose gzip as compression level which is why the file extension is gz. You can also choose bz2):
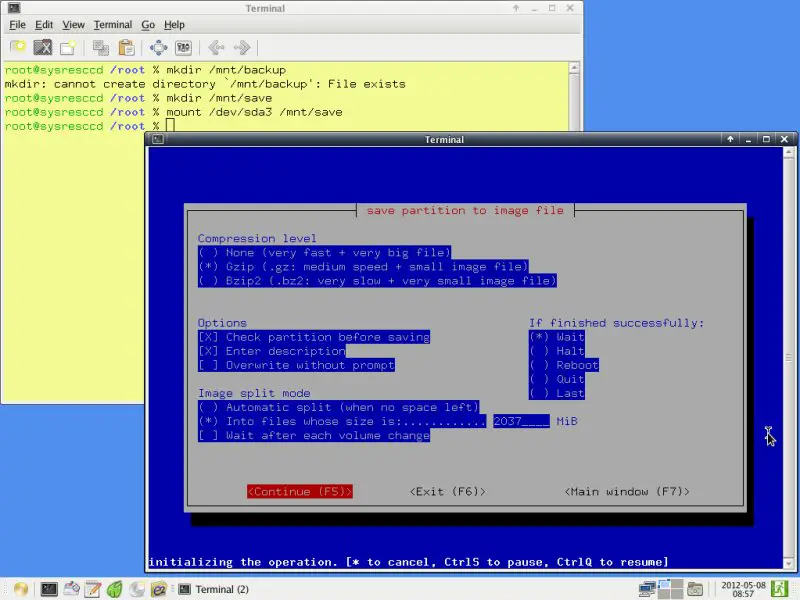
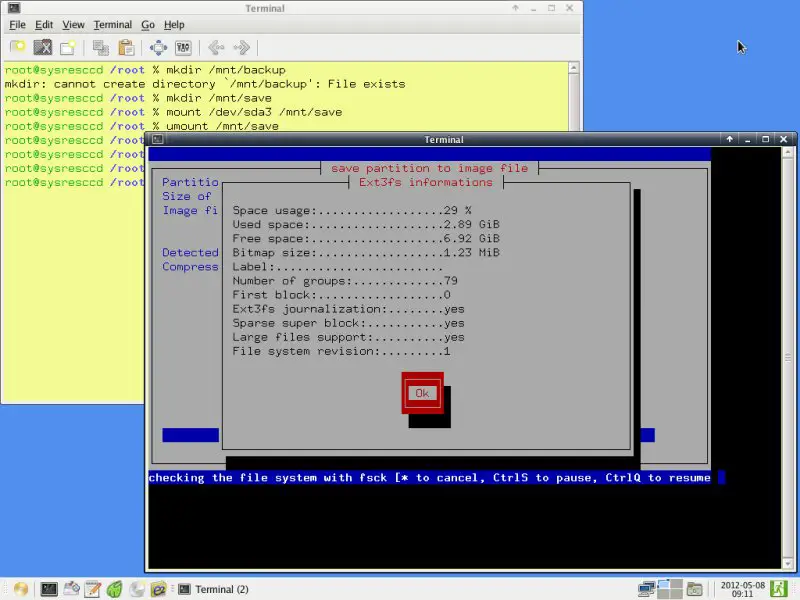
All settings on this page should now be complete if you want a usual backup, so press F5 to go to the next page. The predefined settings on that page should also be okay, but take a look on all of them:
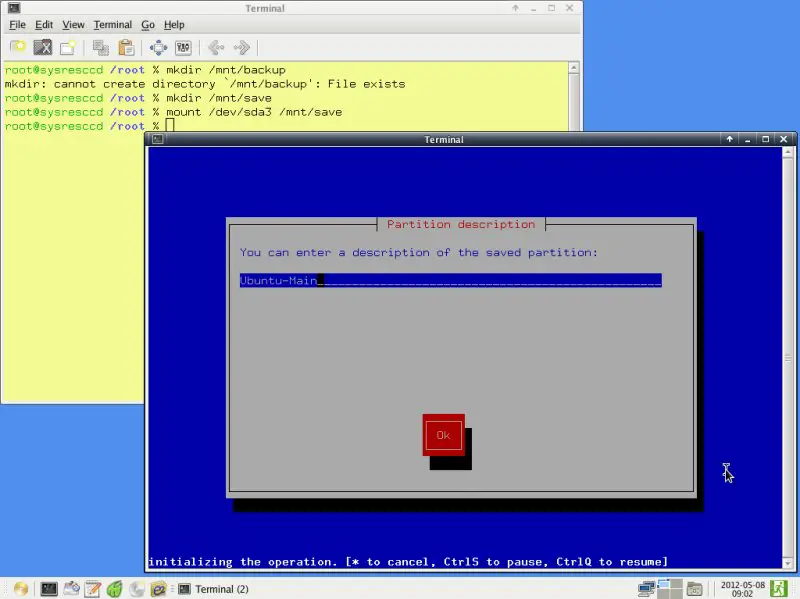
Again, continue with F5. Enter a description for the backup. This description will be shown upon restoring it, to make sure that you picked the right one. To be on the safe side, enter some representable name and the date the backup was made. For demonstrational purposes I'll use a simple one:
Upon going to the next page, Partimage will prepare the backup. For some reason you may now get an error - this may be caused by choosing a partition for backup that does not have a supported file system or some other strange reason - with the message Can't read bitmap block 0 from image. If you are certain that you have a supported file system, try remounting your destination partition, then creating a new mount directory and mounting your partition to back up and unmounting that again. In my case, the steps would be following:
umount /mnt/save
mount /dev/sda3 /mnt/save
mkdir /mnt/tmp
mount /dev/sda2 /mnt/tmp
umount /mnt/tmp
For some reason, that worked for me. If everything worked, you will see the following window:
Partimage will then create a backup of your partition in the specified location:

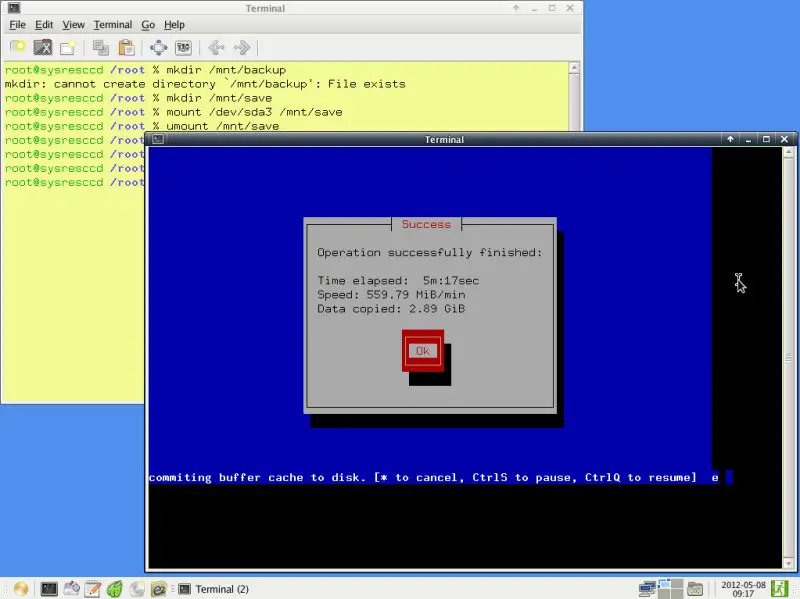
If everything went well, you will see this message. Partimage will close itself after confirming:
4 Restore A Partition Image
To restore an image you basically do the same as before but choose the appropriate options in Partimage. Open it up again and select the partition to restore on the first field (chose the partition that will be overwritten by the image here, not the one where the image is located), the location of the image file on the second field (notice the name extension - .000 was appended to the name. If you are not sure what your backup image is called use the next asterisk field to browse for the correct one. The partition where your image is located has to be mounted. Just like for creating an image, this can be done with:
mount /dev/sda3 /mnt/save
Replace my partition identifier with yours and choose an existing folder.) and use the SPACE bar to select Restore partition from an image file on the next field. Press F5 to move on:
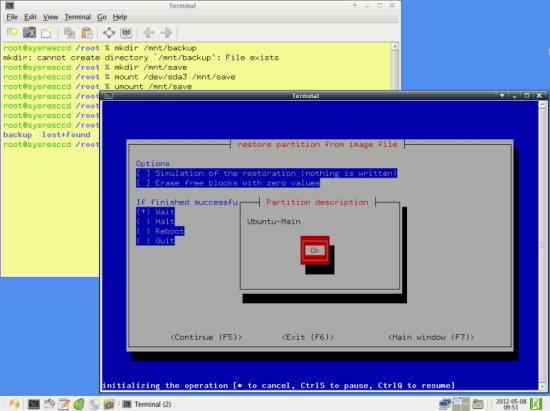
You will now be shown the description of the image file, if you entered one while creating the backup:
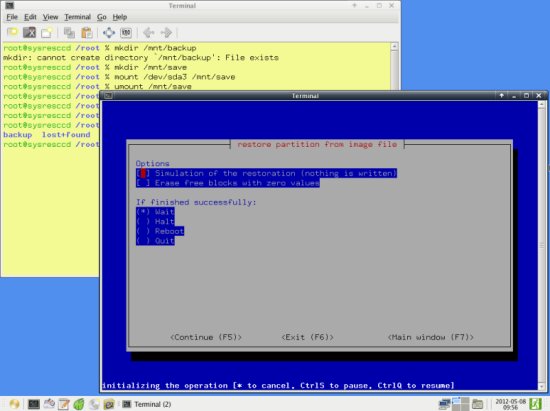
If you want to make sure nothing goes wrong, you can do a simulation of the restoration process first. Erasing blocks will only wear out your hard drive and is no necessity. Continue with F5:
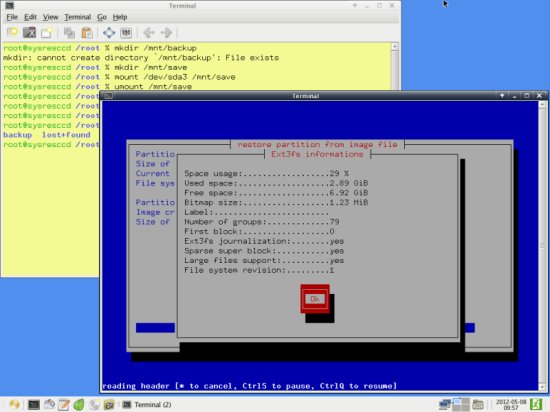
The general information is then shown once more...
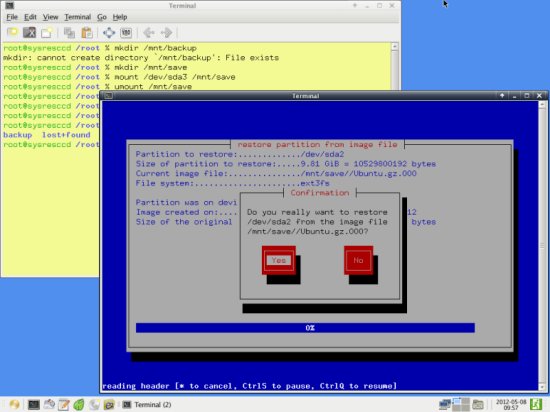
... and you are asked to confirm your choice to restore your backup image. Keep in mind that data on the destination partition will be overwritten by the image:
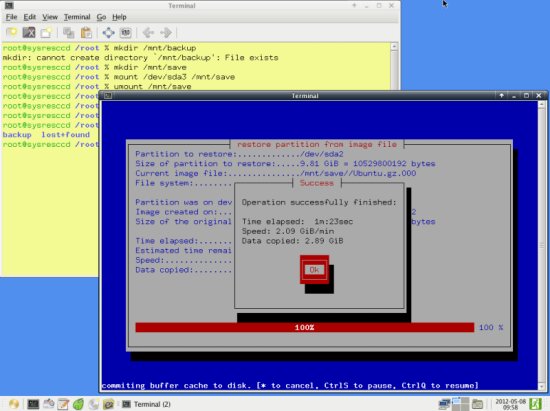
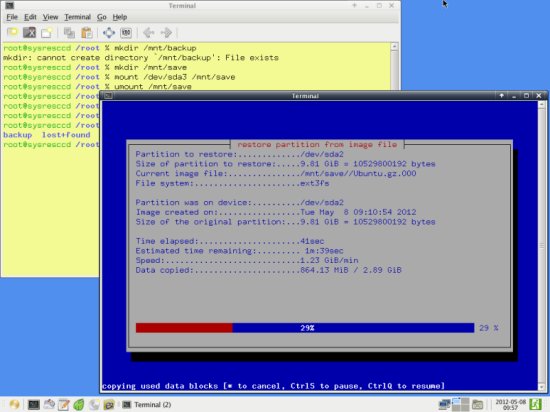
The image is then restored to the specified partition:
Following message is shown on success: