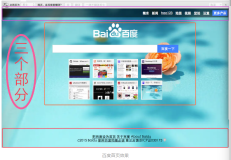
最近开始研究Duilib,并逐个分析Duilib的demo例子,记录下来方便更多的人学习 。界面运行起来如下图所示,该Demo主要包含 BaseDialog.h和BaseDialog.cpp,以及界面布局文件的详细解释,每行注释已经添加。

BaseDialog头文件源文件 以及布局文件如下,可自行下载Duilib 根据注释学习该例子 只针对新手~~~
#ifndef BaseDialog_H
#define BaseDialog_H

#include "UIlib.h"

#include <map>
using namespace DuiLib;

//继承自CWindowWnd  INotifyUI
//拥有创建窗口和接受窗口事件通知的能力
class BaseDialog : public CWindowWnd, public INotifyUI
{

public:
	BaseDialog(){};
protected:
	//虚函数 用于设置窗口的CLASS NAME
	virtual LPCTSTR GetWindowClassName() const { return _T("USHER TEST DLG"); }
	//用于时间通告消息回调
	virtual void Notify(TNotifyUI& msg);
	//处理
	virtual LRESULT HandleMessage(UINT uMsg, WPARAM wParam, LPARAM lParam);
	// 自定义消息映射
	typedef HRESULT (BaseDialog::*CustomMsgHandler)(WPARAM, LPARAM, BOOL&);
	typedef std::map<UINT, CustomMsgHandler> MessageMap;
	virtual MessageMap* InitMessageMap();
	// 自定义消息处理 在窗口创建的时候
	HRESULT OnCreate(WPARAM wParam, LPARAM lParam, BOOL& bHandled);
	//在窗口销毁的时候
	HRESULT OnDestory(WPARAM wParam, LPARAM lParam, BOOL& bHandled);
	//擦除窗口背景
	HRESULT OnErasebkgnd(WPARAM wParam, LPARAM lParam, BOOL& bHandled);
	//尺寸改变的时候
	HRESULT OnSize(WPARAM wParam, LPARAM lParam, BOOL& bHandled);
	//非客户区重绘
	HRESULT OnNcPaint(WPARAM wParam, LPARAM lParam, BOOL& bHandled);
	//非客户区激活
	HRESULT OnNcActive(WPARAM wParam, LPARAM lParam, BOOL& bHandled);
	//非客户区计算大小
	HRESULT OnNcCalSize(WPARAM wParam, LPARAM lParam, BOOL& bHandled);
	//非客户区点击测试
	HRESULT OnNcHitTest(WPARAM wParam, LPARAM lParam, BOOL& bHandled);
	//系统命令处理
	LRESULT OnSysCommand(WPARAM wParam, LPARAM lParam, BOOL& bHandled);
	//最大最小化信息
	LRESULT OnGetMinMaxInfo(WPARAM wParam, LPARAM lParam, BOOL& bHandled);

private:
	CPaintManagerUI m_pm;
};
#endif // BaseDialog_H
#include "StdAfx.h"
#include "BaseDialog.h"

#include <memory>


//消息通告
void BaseDialog::Notify(TNotifyUI& msg)
{
	 //如果是点击消息那么通过控件名字判断是哪个控件
	if ( msg.sType == _T("click"))
	{
		if( msg.pSender == static_cast<CButtonUI*>(m_pm.FindControl(_T("minbtn"))) )
			SendMessage(WM_SYSCOMMAND, SC_MINIMIZE, 0);

		if( msg.pSender == static_cast<CButtonUI*>(m_pm.FindControl(_T("closebtn"))) )
			PostQuitMessage(0);

		if( msg.pSender == static_cast<CButtonUI*>(m_pm.FindControl(_T("maxbtn"))) )
			::IsZoomed(*this) ? SendMessage(WM_SYSCOMMAND, SC_RESTORE, 0) : SendMessage(WM_SYSCOMMAND, SC_MAXIMIZE, 0);
		if (msg.pSender == static_cast<CButtonUI*>(m_pm.FindControl(_T("check_normal")))) {
			::MessageBox(NULL, L"开始扫描", L"提示", MB_OK);
		}
	}
}

//首先启动消息循环会进入此虚函数进行消息处理
LRESULT BaseDialog::HandleMessage(UINT uMsg, WPARAM wParam, LPARAM lParam)
{

	//初始化消息映射MAP  利用auto_ptr维护指针 static保证只创建一次
	static std::auto_ptr<MessageMap> customMessageMap(InitMessageMap());

	BOOL bHandled = TRUE;
	LRESULT lRes = 0;

	//将消息在消息映射map中进行查找 找到响应的消息处理函数
	if ( customMessageMap->find(uMsg) != customMessageMap->end() )
	{
		//typedef HRESULT (BaseDialog::*CustomMsgHandler)(WPARAM, LPARAM, BOOL&);
		//如果找到 查找响应的消息响应函数
		CustomMsgHandler handler = (*customMessageMap)[uMsg];
		//通过this->(*handler)进行消息响应函数的调用
		lRes = (this->*handler)(wParam, lParam, bHandled);
		//如果 bHandled返回True没有被修改那么说明消息已经被处理 返回
		if ( bHandled ) return lRes;
	}
	//CPaintManagerUI丢给PaintManagerUI进行处理 如果处理了 那么会返回True 否则返回false继续走
	if( m_pm.MessageHandler(uMsg, wParam, lParam, lRes) ) return lRes;
	//最后丢给默认的windows消息处理函数

	return CWindowWnd::HandleMessage(uMsg, wParam, lParam);
}

//初始化消息循环对应的消息响应函数
BaseDialog::MessageMap* BaseDialog::InitMessageMap()
{
	MessageMap* map = new MessageMap;
	(*map)[WM_CREATE] = &BaseDialog::OnCreate;
	(*map)[WM_DESTROY] = &BaseDialog::OnDestory;
	(*map)[WM_ERASEBKGND] = &BaseDialog::OnErasebkgnd;
	(*map)[WM_SIZE] = &BaseDialog::OnSize;
	(*map)[WM_NCPAINT] = &BaseDialog::OnNcPaint;
	//以下三个消息用于屏蔽系统标题栏
	(*map)[WM_NCACTIVATE] = &BaseDialog::OnNcActive;
	(*map)[WM_NCCALCSIZE] = &BaseDialog::OnNcCalSize;
	(*map)[WM_NCHITTEST] = &BaseDialog::OnNcHitTest;
	(*map)[WM_SYSCOMMAND] = &BaseDialog::OnSysCommand;
	(*map)[WM_GETMINMAXINFO] = &BaseDialog::OnGetMinMaxInfo;
	return map;
}

//窗口创建时候
HRESULT BaseDialog::OnCreate( WPARAM wParam, LPARAM lParam, BOOL& bHandled )
{
	//获取当前窗口风格
	LONG styleValue = ::GetWindowLong(*this, GWL_STYLE);
	styleValue &= ~WS_CAPTION;
	//设置STYLE
	::SetWindowLong(*this, GWL_STYLE, styleValue | WS_CLIPSIBLINGS | WS_CLIPCHILDREN);
	//初始化界面渲染器
	m_pm.Init(m_hWnd);
	//D
	CDialogBuilder builder;
	//通过xml 以及渲染器渲染界面UI
	CControlUI* pRoot = builder.Create(_T("main_dlg.xml"), (UINT)0, NULL, &m_pm);
	//附加界面UI到对话框容器
	m_pm.AttachDialog(pRoot);
	//增加消息处理  因为实现了 INotifyUI接口
	m_pm.AddNotifier(this);
	return 0;
}


HRESULT BaseDialog::OnDestory( WPARAM wParam, LPARAM lParam, BOOL& bHandled )
{
    //发送退出消息
	::PostQuitMessage(0L);
	return 0;
}

//擦除背景
HRESULT BaseDialog::OnErasebkgnd( WPARAM wParam, LPARAM lParam, BOOL& bHandled )
{
	return 1;
}

//当窗口的尺寸发生改编的时候
HRESULT BaseDialog::OnSize( WPARAM wParam, LPARAM lParam, BOOL& bHandled )
{
	//在窗口大小改变的时候设置圆角
	SIZE szRoundCorner = m_pm.GetRoundCorner();
	if( !::IsIconic(*this) && (szRoundCorner.cx != 0 || szRoundCorner.cy != 0) )
	{
		CRect rcWnd;
		::GetWindowRect(*this, &rcWnd);
		rcWnd.Offset(-rcWnd.left, -rcWnd.top);
		rcWnd.right++;
		rcWnd.bottom++;
		HRGN hRgn = ::CreateRoundRectRgn(rcWnd.left, rcWnd.top, rcWnd.right,
			rcWnd.bottom, szRoundCorner.cx, szRoundCorner.cy);
		::SetWindowRgn(*this, hRgn, TRUE);
		::DeleteObject(hRgn);
		return 0;
	}
	bHandled = FALSE;
	return 0;
}

HRESULT BaseDialog::OnNcPaint( WPARAM wParam, LPARAM lParam, BOOL& bHandled )
{
	return 0;
}

HRESULT BaseDialog::OnNcActive( WPARAM wParam, LPARAM lParam, BOOL& bHandled )
{
	if( ::IsIconic(*this) ) bHandled = FALSE;
	return (wParam == 0) ? TRUE : FALSE;
}


//如果不处理那么就会导致DUILIB 不停调用系统消息进行处理
// 屏蔽系统标题栏 似乎不屏蔽一定会出问题
HRESULT BaseDialog::OnNcCalSize( WPARAM wParam, LPARAM lParam, BOOL& bHandled )
{
	return 0;
}

HRESULT BaseDialog::OnNcHitTest( WPARAM wParam, LPARAM lParam, BOOL& bHandled )
{
	//获取客户区相对坐标
	POINT pt;
	pt.x = GET_X_LPARAM(lParam);
	pt.y = GET_Y_LPARAM(lParam);
	::ScreenToClient(*this, &pt);

	//获取客户区域
	RECT rcClient;
	::GetClientRect(*this, &rcClient);

	//如果窗口没有最大化
	if( !::IsZoomed(*this) )
	{
		//获取非客户区域sizebox
		RECT rcSizeBox = m_pm.GetSizeBox();
		//如果y<窗口区域top+sizebox.top 算上非客户区
		if( pt.y < rcClient.top + rcSizeBox.top )
		{
			//判断是否在左上边
			if( pt.x < rcClient.left + rcSizeBox.left ) return HTTOPLEFT;
			//判断是否在右上边
			if( pt.x > rcClient.right - rcSizeBox.right ) return HTTOPRIGHT;
			//返回顶端测试
			return HTTOP;
		}
		//否则在bottom
		else if( pt.y > rcClient.bottom - rcSizeBox.bottom )
		{
			//左下
			if( pt.x < rcClient.left + rcSizeBox.left ) return HTBOTTOMLEFT;
			//右下
			if( pt.x > rcClient.right - rcSizeBox.right ) return HTBOTTOMRIGHT;
			//默认下边
			return HTBOTTOM;
		}
		//如果不再 top 或者bottom 那么就是在左边 右边的非客户区
		if( pt.x < rcClient.left + rcSizeBox.left ) return HTLEFT;
		if( pt.x > rcClient.right - rcSizeBox.right ) return HTRIGHT;
	}

	//获取标题栏的矩形区域
	//并且判断鼠标是否在该区域中 如果在返回
	RECT rcCaption = m_pm.GetCaptionRect();
	if( pt.x >= rcClient.left + rcCaption.left
		&& pt.x < rcClient.right - rcCaption.right
		&& pt.y >= rcCaption.top
		&& pt.y < rcCaption.bottom )
	{
		  //ButtonUI OptionUI 只有这两种类型当作标题栏
			CControlUI* pControl = static_cast<CControlUI*>(m_pm.FindControl(pt));
			if( pControl
				&& _tcscmp(pControl->GetClass(), _T("ButtonUI")) != 0
				&& _tcscmp(pControl->GetClass(), _T("OptionUI")) != 0 )
			{
				return HTCAPTION;
			}
	}
	//其余部分是客户区
	return HTCLIENT;
}


//系统命令处理
LRESULT BaseDialog::OnSysCommand(WPARAM wParam, LPARAM lParam, BOOL& bHandled)
{
	if( wParam == SC_CLOSE )
	{
		::PostQuitMessage(0L);
		bHandled = TRUE;
		return 0;
	}

	BOOL bZoomed = ::IsZoomed(*this);
	LRESULT lRes = CWindowWnd::HandleMessage(WM_SYSCOMMAND, wParam, lParam);

	return 1L;
}

LRESULT BaseDialog::OnGetMinMaxInfo(WPARAM wParam, LPARAM lParam, BOOL& bHandled)
{
	MONITORINFO oMonitor = {};
	oMonitor.cbSize = sizeof(oMonitor);
	::GetMonitorInfo(::MonitorFromWindow(*this, MONITOR_DEFAULTTOPRIMARY), &oMonitor);
	CRect rcWork = oMonitor.rcWork;
	rcWork.Offset(-rcWork.left, -rcWork.top);

	/// 窗口最大化时裁剪阴影所占区域
	LPMINMAXINFO lpMMI = (LPMINMAXINFO) lParam;
	lpMMI->ptMaxPosition.x	= rcWork.left-5;
	lpMMI->ptMaxPosition.y	= rcWork.top-3;
	lpMMI->ptMaxSize.x		= rcWork.right+10;
	lpMMI->ptMaxSize.y		= rcWork.bottom+10;

	bHandled = FALSE;
	return 0;
}
<?xml version="1.0" encoding="utf-8"?>
<Window size="910,610" sizebox="10,10,12,12" roundcorner="0,0" caption="0,0,0,90" mininfo="910,610" bktrans="true" shadow="true" shadowimage="shadow.png" shadowtopleft="0,0,5,3" shadowtopright="205,0,5,3" shadowbottomleft="0,136,5,7" shadowbottomright="205,136,5,7">
 <!--根据顺序记录字体可通过int 索引引用-->
  <Font name="微软雅黑" size="12" />
  <Font name="微软雅黑" size="16" />
  <Font name="微软雅黑" size="22" />
  <Font name="宋体" size="15" />
  <!--整体垂直布局-->
  <VerticalLayout   bkimage="file='bg.png'">
    <!--容器的内边距放置到一行  水平占满-->
    <HorizontalLayout height="40" inset="0,3,0,0">
      <!--titile标题的位置占位 根据内容决定大小  在一个水平布局中没有设置宽度的布局会默认填充所有内容-->
      <HorizontalLayout>
        <!--float true使用绝对定位  设置位置 文本颜色 字体索引0-->
        <Text text="360安全卫士9.2" pos="15, 10, 200, 50" float="true" textcolor="#FFFFFF" font="0" />
      </HorizontalLayout>
      <!--徽章位置宽度40 height 30-->
	    <HorizontalLayout width="40" height="30">
		   <Button maxwidth="26" inset="200,10,0,0" normalimage="medal.png"/>
	    </HorizontalLayout>
      <!---宽度是150的菜单栏-->
      <HorizontalLayout width="150">
        <!--设置按钮的 宽度 高度  普通图片  hover图片 按钮按下的图片-->
		   <Button name="skinbtn" maxwidth="27" maxheight="22" normalimage="skin_normal.png" hotimage="skin_hover.png" pushedimage="skin_pressed.png"/>
		   <Button name="feedbackbtn" maxwidth="27" maxheight="22" normalimage="feedback_normal.png" hotimage="feedback_hover.png" pushedimage="feedback_pressed.png"/>
		   <Button name="maxbtn" maxwidth="27" maxheight="22" normalimage="menu_normal.png" hotimage="menu_hover.png" pushedimage="menu_pressed.png"/>
		   <Button name="minbtn" maxwidth="27" maxheight="22" normalimage="min_normal.png" hotimage="min_hover.png" pushedimage="min_pressed.png"/>
       <Button name="closebtn" maxwidth="27" maxheight="22" normalimage="close_normal.png" hotimage="close_hover.png" pushedimage="close_pressed.png"/>
      </HorizontalLayout>
    </HorizontalLayout>
   <!--第二行工具按钮 -->
	<HorizontalLayout height="85">
		<HorizontalLayout>
      <!---前景背景图片都是相对坐标除非 float会变成绝对zu-->
			<Option pos="15,10,85,85" float="true" align="bottom" text="电脑体检"   textpadding="11,55,0,0" font="0" textcolor="#FFFFFF" selected="true" foreimage="file='ico_Examine.png' dest='11,5,59,53'" normalimage="toolbar_normal.png" hotimage="file='toolbar_hover.png' source='80,0,160,75'" pushedimage="file='toolbar_hover.png' source='80,0,160,75'" selectedimage="file='toolbar_hover.png' source='80,0,160,75'" group="main_toolbar" selected="true"/>
			<Option pos="97,10,167,85" float="true" align="bottom" text="木马查杀" textpadding="11,55,0,0" font="0" textcolor="#FFFFFF" selected="true" foreimage="file='ico_dsmain.png' dest='11,5,59,53'" normalimage="toolbar_normal.png" hotimage="file='toolbar_hover.png' source='80,0,160,75'" pushedimage="file='toolbar_hover.png' source='80,0,160,75'"  selectedimage="file='toolbar_hover.png' source='80,0,160,75'" group="main_toolbar" selected="false"/>
			<Option pos="179,10,249,85" float="true" align="bottom" text="系统修复" textpadding="11,55,0,0" font="0" textcolor="#FFFFFF" selected="true" foreimage="file='ico_SysRepair.png' dest='11,5,59,53'" normalimage="toolbar_normal.png" hotimage="file='toolbar_hover.png' source='80,0,160,75'" pushedimage="file='toolbar_hover.png' source='80,0,160,75'"  selectedimage="file='toolbar_hover.png' source='80,0,160,75'" group="main_toolbar" selected="false"/>
			<Option pos="261,10,331,85" float="true" align="bottom" text="电脑清理" textpadding="11,55,0,0" font="0" textcolor="#FFFFFF" selected="true" foreimage="file='ico_TraceCleaner.png' dest='11,5,59,53'" normalimage="toolbar_normal.png" hotimage="file='toolbar_hover.png' source='80,0,160,75'" pushedimage="file='toolbar_hover.png' source='80,0,160,75'"  selectedimage="file='toolbar_hover.png' source='80,0,160,75'" group="main_toolbar" selected="false"/>
			<Option pos="343,10,413,85" float="true" align="bottom" text="优化加速" textpadding="11,55,0,0" font="0" textcolor="#FFFFFF" selected="true" foreimage="file='ico_SpeedupOpt.png' dest='11,5,59,53'" normalimage="toolbar_normal.png" hotimage="file='toolbar_hover.png' source='80,0,160,75'" pushedimage="file='toolbar_hover.png' source='80,0,160,75'"  selectedimage="file='toolbar_hover.png' source='80,0,160,75'" group="main_toolbar" selected="false"/>
			<Option pos="425,10,495,85" float="true" align="bottom" text="电脑专家" textpadding="11,55,0,0" font="0" textcolor="#FFFFFF" selected="true" foreimage="file='ico_expert.png' dest='11,5,59,53'" normalimage="toolbar_normal.png" hotimage="file='toolbar_hover.png' source='80,0,160,75'" pushedimage="file='toolbar_hover.png' source='80,0,160,75'"  selectedimage="file='toolbar_hover.png' source='80,0,160,75'" group="main_toolbar" selected="false"/>
			<Option pos="507,10,577,85" float="true" align="bottom" text="电脑门诊" textpadding="11,55,0,0" font="0" textcolor="#FFFFFF" selected="true" foreimage="file='ico_diannaomenzhen.png' dest='11,5,59,53'" normalimage="toolbar_normal.png" hotimage="file='toolbar_hover.png' source='80,0,160,75'" pushedimage="file='toolbar_hover.png' source='80,0,160,75'"  selectedimage="file='toolbar_hover.png' source='80,0,160,75'" group="main_toolbar" selected="false"/>
			<Option pos="589,10,659,85" float="true" align="bottom" text="软件管家" textpadding="11,55,0,0" font="0" textcolor="#FFFFFF" selected="true" foreimage="file='ico_softmgr.png' dest='11,5,59,53'" normalimage="toolbar_normal.png" hotimage="file='toolbar_hover.png' source='80,0,160,75'" pushedimage="file='toolbar_hover.png' source='80,0,160,75'"  selectedimage="file='toolbar_hover.png' source='80,0,160,75'" group="main_toolbar" selected="false"/>
		</HorizontalLayout>
    <!---LOGO insert位置 相对位置  -->
    <!--bkcolor="0xFFFF0000" insert是内部内容的相对位置  LayOut布局默认是从右边开始-->
    <HorizontalLayout width="180" inset="10,15,1,0">
			<Button maxwidth="148" maxheight="62" bkimage="file='logo.png'"/>
		</HorizontalLayout>
	</HorizontalLayout>
    <!--窗体内容背景-->
	<HorizontalLayout bkimage="1.bmp" bordercolor="0xFFFF0000" >
    <!--垂直布局-->
		<VerticalLayout bordercolor="0xFFFF0000">
      <!---pos如果是float=true,那么是绝对布局。控件那么 指定位置和大小 如何不是那么 只指定大小-->
      <!---relativepos跟最大化后剧中显示有关 前两个是位移值  后两个是缩放一般不写 属性列表没有给出这个 前两个是大小改变的时候横纵向位移 默认单位50表示一个单位,  后两个是缩放 x,y,scaleX,scaleY-->
      <!---常用50,50,0,0 让绝对定位拥有相对定位布局的特性-->
			<Button pos="50, 50, 196, 168"  bordercolor="0xFFFF0000" relativepos="50,50,0,0"  float="true" normalimage="error.png" />
			<Text pos="250, 60, 350, 160" bordercolor="0xFFFF0000" relativepos="50,50,0,0"  float="true" text="您的电脑已经" font="1" textcolor="#1C1C1C" />
			<Text pos="360, 55, 400, 160" bordercolor="0xFFFF0000" relativepos="50,50,0,0"  float="true" text="24" font="2" textcolor="#0000FF" />
			<Text pos="400, 60, 500, 160" bordercolor="0xFFFF0000" relativepos="50,50,0,0"  float="true" text="天没有体检,建议立即体检!" font="1" textcolor="#1C1C1C" />
			<Text pos="250, 100, 350, 150" bordercolor="0xFFFF0000" relativepos="50,50,0,0"  float="true" text="系统可能已经存在大量风险,安全性和性能都在急速下降," font="0" textcolor="#555555" />
			<Text pos="250, 120, 350, 150" bordercolor="0xFFFF0000" relativepos="50,50,0,0"  float="true" text="建议您每天坚持电脑体检,提高电脑的安全和性能" font="0" textcolor="#555555" />
			<Button pos="230, 250, 396, 316" name="check_normal" bordercolor="0xFFFF0000" relativepos="50,50,0,0"  float="true" normalimage="check_normal.png" hotimage="check_hover.png" pushedimage="check_pressed.png" />
		</VerticalLayout>
		<VerticalLayout width="250">
      <!---对于此处来说50代表水平位置自动适应 垂直位置不变-->
			<Button maxwidth="1"   bordercolor="0xFFFF0000"  minheight="1000" normalimage="fenge_line.png" />
			<Button pos="10, 15, 230, 126"    bordercolor="0xFFFF0000" relativepos="50,0,0,0"  float="true" minheight="1000" normalimage="register_bg.png" />
			<Button pos="0, 140, 245, 141"    bordercolor="0xFFFF0000" relativepos="50,0,0,0"  float="true" normalimage="rp_line.png" />
			<Button pos="80, 140, 81, 225"    bordercolor="0xFFFF0000" relativepos="50,0,0,0"  float="true" normalimage="fenge_line.png" />
			<Button pos="160, 140, 161, 225"  bordercolor="0xFFFF0000"  relativepos="50,0,0,0"  float="true" normalimage="fenge_line.png" />
			<Button pos="15, 150, 65, 195"    bordercolor="0xFFFF0000" relativepos="50,0,0,0"  float="true" normalimage="firewall_open_normal.png" hotimage="firewall_open_hover.png"/>
			<Text pos="10, 200, 65, 210"      bordercolor="0xFFFF0000" relativepos="50,0,0,0"  float="true" text="木马防火墙" font="0" textcolor="#1C1C1C" />
			<Button pos="95, 150, 145, 195"   bordercolor="0xFFFF0000"  relativepos="50,0,0,0"  float="true" normalimage="guard_open_normal.png" hotimage="guard_open_hover.png"/>
			<Text pos="95, 200, 105, 210"     bordercolor="0xFFFF0000" relativepos="50,0,0,0"  float="true" text="360保镖" font="0" textcolor="#1C1C1C" />
			<Button pos="175, 150, 225, 195"  bordercolor="0xFFFF0000"  relativepos="50,0,0,0"  float="true" normalimage="payinsure_close_normal.png" hotimage="payinsure_close_hover.png"/>
			<Text pos="175, 200, 185, 210"    bordercolor="0xFFFF0000" relativepos="50,0,0,0"  float="true" text="网购先赔" font="0" textcolor="#1C1C1C" />
			<Button pos="0, 225, 245, 226"    bordercolor="0xFFFF0000"  relativepos="50,0,0,0"  float="true" normalimage="rp_line.png" />
		</VerticalLayout>
	</HorizontalLayout>
  </VerticalLayout>
</Window>
代码加注释下载地址.......
http://download.csdn.net/detail/yue7603835/9185031