摘要:本文采用了Spring+SpringMVC+Mybatis+Shiro+Msql来写了一个登陆验证的实例,下面来看看过程吧!整个工程基于Mavevn来创建,运行环境为JDK1.6+WIN7+tomcat7.
这里主要说了Shiro的搭建过程,Spring+SpringMVC+Mybatis的搭建过可以看这里Spring+Mybatis+SpringMVC+Maven+MySql搭建实例
整体工程免费下载:http://download.csdn.net/detail/evankaka/9331135
最终效果如下:

工程整体的目录如下:
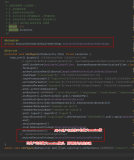
java代码如下:

配置文件如下:

页面资源如下:

好了,下面来简单说下过程吧!
准备工作:
先建表:
- drop table if exists user;
- CREATE TABLE `user` (
- `id` int(11) primary key auto_increment,
- `name` varchar(20) NOT NULL,
- `age` int(11) DEFAULT NULL,
- `birthday` date DEFAULT NULL,
- `password` varchar(20) NOT NULL
- ) ENGINE=InnoDB DEFAULT CHARSET=utf8;
- insert into user values(1,'lin',12,'2013-12-01','123456');
- insert into user values(2,'apple',34,'1999-12-01','123456');
- insert into user values(3,'evankaka',23,'2017-12-01','123456');
建好后,新建一个Maven的webApp的工程,记得把结构设置成上面的那样!
下面来看看一些代码和配置
1、POM文件
注意不要少导包了,如果项目出现红叉,一般都是JDK版本的设置问题,自己百度一下就可以解决
- <project xmlns="http://maven.apache.org/POM/4.0.0" xmlns:xsi="http://www.w3.org/2001/XMLSchema-instance"
- xsi:schemaLocation="http://maven.apache.org/POM/4.0.0 http://maven.apache.org/maven-v4_0_0.xsd">
- <modelVersion>4.0.0</modelVersion>
- <groupId>com.lin</groupId>
- <artifactId>ShiroLearn1</artifactId>
- <packaging>war</packaging>
- <version>0.0.1-SNAPSHOT</version>
- <name>ShiroLearn1 Maven Webapp</name>
- <url>http://maven.apache.org</url>
- <properties>
- <!-- spring版本号 -->
- <spring.version>3.2.8.RELEASE</spring.version>
- <!-- log4j日志文件管理包版本 -->
- <slf4j.version>1.6.6</slf4j.version>
- <log4j.version>1.2.12</log4j.version>
- <!-- junit版本号 -->
- <junit.version>4.10</junit.version>
- <!-- mybatis版本号 -->
- <mybatis.version>3.2.1</mybatis.version>
- </properties>
- <dependencies>
- <!-- 添加Spring依赖 -->
- <dependency>
- <groupId>org.springframework</groupId>
- <artifactId>spring-core</artifactId>
- <version>${spring.version}</version>
- </dependency>
- <dependency>
- <groupId>org.springframework</groupId>
- <artifactId>spring-webmvc</artifactId>
- <version>${spring.version}</version>
- </dependency>
- <dependency>
- <groupId>org.springframework</groupId>
- <artifactId>spring-context</artifactId>
- <version>${spring.version}</version>
- </dependency>
- <dependency>
- <groupId>org.springframework</groupId>
- <artifactId>spring-context-support</artifactId>
- <version>${spring.version}</version>
- </dependency>
- <dependency>
- <groupId>org.springframework</groupId>
- <artifactId>spring-aop</artifactId>
- <version>${spring.version}</version>
- </dependency>
- <dependency>
- <groupId>org.springframework</groupId>
- <artifactId>spring-aspects</artifactId>
- <version>${spring.version}</version>
- </dependency>
- <dependency>
- <groupId>org.springframework</groupId>
- <artifactId>spring-tx</artifactId>
- <version>${spring.version}</version>
- </dependency>
- <dependency>
- <groupId>org.springframework</groupId>
- <artifactId>spring-jdbc</artifactId>
- <version>${spring.version}</version>
- </dependency>
- <dependency>
- <groupId>org.springframework</groupId>
- <artifactId>spring-web</artifactId>
- <version>${spring.version}</version>
- </dependency>
- <!--单元测试依赖 -->
- <dependency>
- <groupId>junit</groupId>
- <artifactId>junit</artifactId>
- <version>${junit.version}</version>
- <scope>test</scope>
- </dependency>
- <!-- 日志文件管理包 -->
- <!-- log start -->
- <dependency>
- <groupId>log4j</groupId>
- <artifactId>log4j</artifactId>
- <version>${log4j.version}</version>
- </dependency>
- <dependency>
- <groupId>org.slf4j</groupId>
- <artifactId>slf4j-api</artifactId>
- <version>${slf4j.version}</version>
- </dependency>
- <dependency>
- <groupId>org.slf4j</groupId>
- <artifactId>slf4j-log4j12</artifactId>
- <version>${slf4j.version}</version>
- </dependency>
- <!-- log end -->
- <!--spring单元测试依赖 -->
- <dependency>
- <groupId>org.springframework</groupId>
- <artifactId>spring-test</artifactId>
- <version>${spring.version}</version>
- <scope>test</scope>
- </dependency>
- <!--mybatis依赖 -->
- <dependency>
- <groupId>org.mybatis</groupId>
- <artifactId>mybatis</artifactId>
- <version>${mybatis.version}</version>
- </dependency>
- <!-- mybatis/spring包 -->
- <dependency>
- <groupId>org.mybatis</groupId>
- <artifactId>mybatis-spring</artifactId>
- <version>1.2.0</version>
- </dependency>
- <!-- mysql驱动包 -->
- <dependency>
- <groupId>mysql</groupId>
- <artifactId>mysql-connector-java</artifactId>
- <version>5.1.29</version>
- </dependency>
- <!-- servlet驱动包 -->
- <dependency>
- <groupId>javax.servlet</groupId>
- <artifactId>servlet-api</artifactId>
- <version>3.0-alpha-1</version>
- </dependency>
- <!-- Spring 整合Shiro需要的依赖 -->
- <dependency>
- <groupId>org.apache.shiro</groupId>
- <artifactId>shiro-core</artifactId>
- <version>1.2.1</version>
- </dependency>
- <dependency>
- <groupId>org.apache.shiro</groupId>
- <artifactId>shiro-web</artifactId>
- <version>1.2.1</version>
- </dependency>
- <dependency>
- <groupId>org.apache.shiro</groupId>
- <artifactId>shiro-ehcache</artifactId>
- <version>1.2.1</version>
- </dependency>
- <dependency>
- <groupId>org.apache.shiro</groupId>
- <artifactId>shiro-spring</artifactId>
- <version>1.2.1</version>
- </dependency>
- <!-- Spring 整合Shiro需要的依赖 -->
- </dependencies>
- <build>
- <finalName>ShiroLearn1</finalName>
- <plugins>
- <!-- 指定web项目 版本 -->
- <plugin>
- <artifactId>maven-war-plugin</artifactId>
- <configuration>
- <version>2.4</version>
- </configuration>
- </plugin>
- <!-- 指定编译使用 -->
- <plugin>
- <groupId>org.apache.maven.plugins</groupId>
- <artifactId>maven-compiler-plugin</artifactId>
- <version>2.3.2</version>
- <configuration>
- <source>1.6</source>
- <target>1.6</target>
- </configuration>
- </plugin>
- </plugins>
- </build>
- </project>
2、自定义Shiro拦截器
这里这个拦截器完成了用户名和密码的验证,验证成功后又给用赋角色和权限(注意,这里赋角色和权限我直接写进去了,没有使用数据库,一般都是要通过service层找到用户名后,再去数据库查该用户对应的角色以及权限,然后再加入到shiro中去)

代码如下:
- package com.lin.realm;
- import java.util.HashSet;
- import java.util.Set;
- import org.apache.shiro.authc.AuthenticationException;
- import org.apache.shiro.authc.AuthenticationInfo;
- import org.apache.shiro.authc.AuthenticationToken;
- import org.apache.shiro.authc.SimpleAuthenticationInfo;
- import org.apache.shiro.authc.UsernamePasswordToken;
- import org.apache.shiro.authz.AuthorizationInfo;
- import org.apache.shiro.authz.SimpleAuthorizationInfo;
- import org.apache.shiro.cache.Cache;
- import org.apache.shiro.realm.AuthorizingRealm;
- import org.apache.shiro.subject.PrincipalCollection;
- import org.apache.shiro.subject.SimplePrincipalCollection;
- import org.slf4j.Logger;
- import org.slf4j.LoggerFactory;
- import org.springframework.beans.factory.annotation.Autowired;
- import com.lin.domain.User;
- import com.lin.service.UserService;
- import com.lin.utils.CipherUtil;
- public class ShiroDbRealm extends AuthorizingRealm {
- private static Logger logger = LoggerFactory.getLogger(ShiroDbRealm.class);
- private static final String ALGORITHM = "MD5";
- @Autowired
- private UserService userService;
- public ShiroDbRealm() {
- super();
- }
- /**
- * 验证登陆
- */
- @Override
- protected AuthenticationInfo doGetAuthenticationInfo(
- AuthenticationToken authcToken) throws AuthenticationException {
- UsernamePasswordToken token = (UsernamePasswordToken) authcToken;
- System.out.println(token.getUsername());
- User user = userService.findUserByLoginName(token.getUsername());
- System.out.println(user);
- CipherUtil cipher = new CipherUtil();//MD5加密
- if (user != null) {
- return new SimpleAuthenticationInfo(user.getName(), cipher.generatePassword(user.getPassword()), getName());
- }else{
- throw new AuthenticationException();
- }
- }
- /**
- * 登陆成功之后,进行角色和权限验证
- */
- @Override
- protected AuthorizationInfo doGetAuthorizationInfo(PrincipalCollection principals) {
- /*这里应该根据userName使用role和permission 的serive层来做判断,并将对应 的权限加进来,下面简化了这一步*/
- Set<String> roleNames = new HashSet<String>();
- Set<String> permissions = new HashSet<String>();
- roleNames.add("admin");//添加角色。对应到index.jsp
- roleNames.add("administrator");
- permissions.add("create");//添加权限,对应到index.jsp
- permissions.add("login.do?main");
- permissions.add("login.do?logout");
- SimpleAuthorizationInfo info = new SimpleAuthorizationInfo(roleNames);
- info.setStringPermissions(permissions);
- return info;
- }
- /**
- * 清除所有用户授权信息缓存.
- */
- public void clearCachedAuthorizationInfo(String principal) {
- SimplePrincipalCollection principals = new SimplePrincipalCollection(principal, getName());
- clearCachedAuthorizationInfo(principals);
- }
- /**
- * 清除所有用户授权信息缓存.
- */
- public void clearAllCachedAuthorizationInfo() {
- Cache<Object, AuthorizationInfo> cache = getAuthorizationCache();
- if (cache != null) {
- for (Object key : cache.keys()) {
- cache.remove(key);
- }
- }
- }
- // @PostConstruct
- // public void initCredentialsMatcher() {//MD5鍔犲瘑
- // HashedCredentialsMatcher matcher = new HashedCredentialsMatcher(ALGORITHM);
- // setCredentialsMatcher(matcher);
- // }
- }
3、shiro的配置文件 :spring-shiro.xml
内容如下:
- <?xml version="1.0" encoding="UTF-8"?>
- <beans xmlns="http://www.springframework.org/schema/beans"
- xmlns:xsi="http://www.w3.org/2001/XMLSchema-instance"
- xsi:schemaLocation="http://www.springframework.org/schema/beans
- http://www.springframework.org/schema/beans/spring-beans-3.0.xsd"
- default-lazy-init="true">
- <description>Shiro Configuration</description>
- <!-- Shiro's main business-tier object for web-enabled applications -->
- <bean id="securityManager" class="org.apache.shiro.web.mgt.DefaultWebSecurityManager">
- <property name="realm" ref="shiroDbRealm" />
- <property name="cacheManager" ref="cacheManager" />
- </bean>
- <!-- 項目自定义的Realm -->
- <bean id="shiroDbRealm" class="com.lin.realm.ShiroDbRealm">
- <property name="cacheManager" ref="cacheManager" />
- </bean>
- <!-- Shiro Filter -->
- <bean id="shiroFilter" class="org.apache.shiro.spring.web.ShiroFilterFactoryBean">
- <property name="securityManager" ref="securityManager" />
- <property name="loginUrl" value="/login.do" />
- <property name="successUrl" value="/view/index.html" />
- <property name="unauthorizedUrl" value="/error/noperms.jsp" />
- <property name="filterChainDefinitions">
- <value>
- /index.html = authc
- /checkLogin.do = anon
- /login.do = anon
- /logout.html = anon
- /** = authc
- </value>
- </property>
- </bean>
- <!-- 用户授权信息Cache -->
- <bean id="cacheManager" class="org.apache.shiro.cache.MemoryConstrainedCacheManager" />
- <!-- 保证实现了Shiro内部lifecycle函数的bean执行 -->
- <bean id="lifecycleBeanPostProcessor" class="org.apache.shiro.spring.LifecycleBeanPostProcessor" />
- <!-- AOP式方法级权限检查 -->
- <bean class="org.springframework.aop.framework.autoproxy.DefaultAdvisorAutoProxyCreator"
- depends-on="lifecycleBeanPostProcessor">
- <property name="proxyTargetClass" value="true" />
- </bean>
- <bean class="org.apache.shiro.spring.security.interceptor.AuthorizationAttributeSourceAdvisor">
- <property name="securityManager" ref="securityManager" />
- </bean>
- </beans>
这里简要说明下:
(1)
securityManager:这个属性是必须的。
loginUrl:没有登录的用户请求需要登录的页面时自动跳转到登录页面,不是必须的属性,不输入地址的话会自动寻找项目web项目的根目录下的”/login.jsp”页面。
successUrl:登录成功默认跳转页面,不配置则跳转至”/”。如果登陆前点击的一个需要登录的页面,则在登录自动跳转到那个需要登录的页面。不跳转到此。
unauthorizedUrl:没有权限默认跳转的页面。
(2)
anon:例子/admins/**=anon 没有参数,表示可以匿名使用。
authc:例如/admins/user/**=authc表示需要认证(登录)才能使用,没有参数
roles:例子/admins/user/**=roles[admin],参数可以写多个,多个时必须加上引号,并且参数之间用逗号分割,当有多个参数时,例如admins/user/**=roles["admin,guest"],每个参数通过才算通过,相当于hasAllRoles()方法。
perms:例子/admins/user/**=perms[user:add:*],参数可以写多个,多个时必须加上引号,并且参数之间用逗号分割,例如/admins/user/**=perms["user:add:*,user:modify:*"],当有多个参数时必须每个参数都通过才通过,想当于isPermitedAll()方法。
rest:例子/admins/user/**=rest[user],根据请求的方法,相当于/admins/user/**=perms[user:method] ,其中method为post,get,delete等。
port:例子/admins/user/**=port[8081],当请求的url的端口不是8081是跳转到schemal://serverName:8081?queryString,其中schmal是协议http或https等,serverName是你访问的host,8081是url配置里port的端口,queryString
是你访问的url里的?后面的参数。
authcBasic:例如/admins/user/**=authcBasic没有参数表示httpBasic认证
ssl:例子/admins/user/**=ssl没有参数,表示安全的url请求,协议为https
user:例如/admins/user/**=user没有参数表示必须存在用户,当登入操作时不做检查
注:anon,authcBasic,auchc,user是认证过滤器,
perms,roles,ssl,rest,port是授权过滤器
4、web.xml配置解读shiro的配置文件(上面的)
- <?xml version="1.0" encoding="UTF-8"?>
- <web-app xmlns:xsi="http://www.w3.org/2001/XMLSchema-instance"
- xmlns="http://java.sun.com/xml/ns/javaee" xmlns:web="http://java.sun.com/xml/ns/javaee/web-app_2_5.xsd"
- xsi:schemaLocation="http://java.sun.com/xml/ns/javaee http://java.sun.com/xml/ns/javaee/web-app_2_5.xsd"
- id="WebApp_ID" version="2.5">
- <display-name>Archetype Created Web Application</display-name>
- <!-- 起始欢迎界面 -->
- <welcome-file-list>
- <welcome-file>/login.do</welcome-file>
- </welcome-file-list>
- <!-- 读取spring配置文件 -->
- <context-param>
- <param-name>contextConfigLocation</param-name>
- <param-value>classpath:application.xml,classpath:shiro/spring-shiro.xml</param-value>
- </context-param>
- <!-- 设计路径变量值 -->
- <context-param>
- <param-name>webAppRootKey</param-name>
- <param-value>springmvc.root</param-value>
- </context-param>
- <!-- Spring字符集过滤器 -->
- <filter>
- <filter-name>SpringEncodingFilter</filter-name>
- <filter-class>org.springframework.web.filter.CharacterEncodingFilter</filter-class>
- <init-param>
- <param-name>encoding</param-name>
- <param-value>UTF-8</param-value>
- </init-param>
- <init-param>
- <param-name>forceEncoding</param-name>
- <param-value>true</param-value>
- </init-param>
- </filter>
- <filter-mapping>
- <filter-name>SpringEncodingFilter</filter-name>
- <url-pattern>/*</url-pattern>
- </filter-mapping>
- <filter>
- <filter-name>shiroFilter</filter-name>
- <filter-class>org.springframework.web.filter.DelegatingFilterProxy</filter-class>
- <init-param>
- <param-name>targetFilterLifecycle</param-name>
- <param-value>true</param-value>
- </init-param>
- </filter>
- <filter-mapping>
- <filter-name>shiroFilter</filter-name>
- <url-pattern>/*</url-pattern>
- </filter-mapping>
- <!-- 日志记录 -->
- <context-param>
- <!-- 日志配置文件路径 -->
- <param-name>log4jConfigLocation</param-name>
- <param-value>classpath:log4j.properties</param-value>
- </context-param>
- <context-param>
- <!-- 日志页面的刷新间隔 -->
- <param-name>log4jRefreshInterval</param-name>
- <param-value>6000</param-value>
- </context-param>
- <listener>
- <listener-class>org.springframework.web.util.Log4jConfigListener</listener-class>
- </listener>
- <listener>
- <listener-class>org.springframework.web.context.ContextLoaderListener</listener-class>
- </listener>
- <!-- 防止spring内存溢出监听器 -->
- <listener>
- <listener-class>org.springframework.web.util.IntrospectorCleanupListener</listener-class>
- </listener>
- <!-- springMVC核心配置 -->
- <servlet>
- <servlet-name>dispatcherServlet</servlet-name>
- <servlet-class>org.springframework.web.servlet.DispatcherServlet</servlet-class>
- <init-param>
- <param-name>contextConfigLocation</param-name>
- <!--spingMVC的配置路径 -->
- <param-value>classpath:springmvc/spring-mvc.xml</param-value>
- </init-param>
- <load-on-startup>1</load-on-startup>
- </servlet>
- <!-- 拦截设置 -->
- <servlet-mapping>
- <servlet-name>dispatcherServlet</servlet-name>
- <url-pattern>/</url-pattern>
- </servlet-mapping>
- <!-- 配置session超时时间,单位分钟 -->
- <session-config>
- <session-timeout>15</session-timeout>
- </session-config>
- <error-page>
- <error-code>404</error-code>
- <location>/WEB-INF/views/error/404.jsp</location>
- </error-page>
- <error-page>
- <error-code>401</error-code>
- <location>/WEB-INF/views/error/401.jsp</location>
- </error-page>
- </web-app>
这里不仅配置了SpringMVC还要配置Shiro!
5、登陆页面login.jsp
以下是默认登陆的界面

- <%@ page language="java" contentType="text/html; charset=UTF-8" pageEncoding="UTF-8"%>
- <%
- String url = request.getRequestURL().toString();
- url = url.substring(0, url.indexOf('/', url.indexOf("//") + 2));
- String context = request.getContextPath();
- url += context;
- application.setAttribute("ctx", url);
- %>
- <!DOCTYPE html PUBLIC "-//W3C//DTD HTML 4.01 Transitional//EN" "http://www.w3.org/TR/html4/loose.dtd">
- <html>
- <head>
- <meta http-equiv="Content-Type" content="text/html; charset=UTF-8">
- <title>Insert title here</title>
- </head>
- <body>
- <form action="${ctx}/checkLogin.do" method="post">
- username: <input type="text" name="username"><br>
- password: <input type="password" name="password"><br>
- <input type="submit" value="登录">
- </form>
- </body>
- </html>
6、验证成功页面index.jsp
如果用户名和密码正确后,跳转到的页面
- <%@ page language="java" contentType="text/html; charset=UTF-8"
- pageEncoding="UTF-8"%>
- <%@ taglib prefix="shiro" uri="http://shiro.apache.org/tags"%>
- <%
- String url = request.getRequestURL().toString();
- url = url.substring(0, url.indexOf('/', url.indexOf("//") + 2));
- String context = request.getContextPath();
- url += context;
- application.setAttribute("ctx", url);
- %>
- <!DOCTYPE html PUBLIC "-//W3C//DTD HTML 4.01 Transitional//EN" "http://www.w3.org/TR/html4/loose.dtd">
- <html>
- <head>
- <meta http-equiv="Content-Type" content="text/html; charset=UTF-8">
- <title>Shiro登陆实例</title>
- </head>
- <body>
- <h1>Shiro登陆实例</h1><a href="${ctx}/logout.html">退出</a>
- <p>一、验证当前用户是否为"访客",即未认证(包含未记住)的用户</p>
- <shiro:guest>
- Hi there! Please <a href="login.jsp">Login</a> or <a href="signup.jsp">Signup</a> today!
- </shiro:guest>
- <p>二、认证通过或已记住的用户</p>
- <shiro:user>
- Welcome back John! Not John? Click <a href="login.jsp">here<a> to login.
- </shiro:user>
- <p>三、已认证通过的用户。不包含已记住的用户,这是与user标签的区别所在。</p>
- <shiro:authenticated>
- <a href="updateAccount.jsp">Update your contact information</a>.
- </shiro:authenticated>
- <p>四、未认证通过用户,与authenticated标签相对应。与guest标签的区别是,该标签包含已记住用户。</p>
- <shiro:notAuthenticated>
- Please <a href="login.jsp">login</a> in order to update your credit card information.
- </shiro:notAuthenticated>
- <p>五、输出当前用户信息,通常为登录帐号信息</p>
- Hello, <shiro:principal/>, how are you today?
- <p>六、验证当前用户是否属于该角色</p>
- <shiro:hasRole name="administrator">
- <a href="admin.jsp">Administer the system</a>
- </shiro:hasRole>
- <p>七、与hasRole标签逻辑相反,当用户不属于该角色时验证通过</p>
- <shiro:lacksRole name="administrator">
- Sorry, you are not allowed to administer the system.
- </shiro:lacksRole>
- <p>八、验证当前用户是否属于以下任意一个角色。</p>
- <shiro:hasAnyRoles name="developer,manager,administrator">
- You are either a developer,manager, or administrator.
- </shiro:hasAnyRoles>
- <p>九、验证当前用户权限。</p>
- <shiro:hasPermission name="create">
- <p>当前用户拥有增加的权限!!!!!!!!!!!!!</p>
- </shiro:hasPermission>
- <shiro:hasPermission name="delete">
- <p>当前用户拥有删除的权限!!!!!!!!!!!!!</p>
- </shiro:hasPermission>
- </body>
- </html>
其它页面就不说了,具体看工程吧!
7、controller层来看看
这里/{id}/showUser主要是来验证是否连接成功(现在无法测试了),当然在工程里你也可以到src/test/java里的包com.lin.service下的UserServiceTest.java,那里我也写了一个单元测试的类。
- package com.lin.controller;
- import javax.servlet.http.HttpServletRequest;
- import javax.servlet.http.HttpServletResponse;
- import org.apache.shiro.SecurityUtils;
- import org.apache.shiro.authc.UsernamePasswordToken;
- import org.apache.shiro.subject.Subject;
- import org.slf4j.Logger;
- import org.slf4j.LoggerFactory;
- import org.springframework.beans.factory.annotation.Autowired;
- import org.springframework.stereotype.Controller;
- import org.springframework.ui.Model;
- import org.springframework.web.bind.annotation.PathVariable;
- import org.springframework.web.bind.annotation.RequestMapping;
- import org.springframework.web.bind.annotation.RequestMethod;
- import org.springframework.web.bind.annotation.ResponseBody;
- import com.lin.domain.User;
- import com.lin.realm.ShiroDbRealm;
- import com.lin.service.UserService;
- import com.lin.utils.CipherUtil;
- @Controller
- public class UserControler {
- private static Logger logger = LoggerFactory.getLogger(ShiroDbRealm.class);
- @Autowired
- private UserService userService;
- /**
- * 验证springmvc与batis连接成功
- * @param id
- * @param request
- * @return
- */
- @RequestMapping("/{id}/showUser")
- public String showUser(@PathVariable int id, HttpServletRequest request) {
- User user = userService.getUserById(id);
- System.out.println(user.getName());
- request.setAttribute("user", user);
- return "showUser";
- }
- /**
- * 初始登陆界面
- * @param request
- * @return
- */
- @RequestMapping("/login.do")
- public String tologin(HttpServletRequest request, HttpServletResponse response, Model model){
- logger.debug("来自IP[" + request.getRemoteHost() + "]的访问");
- return "login";
- }
- /**
- * 验证用户名和密码
- * @param request
- * @return
- */
- @RequestMapping("/checkLogin.do")
- public String login(HttpServletRequest request) {
- String result = "login.do";
- // 取得用户名
- String username = request.getParameter("username");
- //取得 密码,并用MD5加密
- String password = CipherUtil.generatePassword(request.getParameter("password"));
- //String password = request.getParameter("password");
- UsernamePasswordToken token = new UsernamePasswordToken(username, password);
- Subject currentUser = SecurityUtils.getSubject();
- try {
- System.out.println("----------------------------");
- if (!currentUser.isAuthenticated()){//使用shiro来验证
- token.setRememberMe(true);
- currentUser.login(token);//验证角色和权限
- }
- System.out.println("result: " + result);
- result = "index";//验证成功
- } catch (Exception e) {
- logger.error(e.getMessage());
- result = "login。do";//验证失败
- }
- return result;
- }
- /**
- * 退出
- * @return
- */
- @RequestMapping(value = "/logout")
- @ResponseBody
- public String logout() {
- Subject currentUser = SecurityUtils.getSubject();
- String result = "logout";
- currentUser.logout();
- return result;
- }
- }
再来看看效果吧!

整体工程免费下载:http://download.csdn.net/detail/evankaka/9331135
http://blog.csdn.net/evankaka/article/details/50196003