在上篇文章中,我有提到过WndProc中可以处理所有经过窗体的事件,但是没有具体的来说怎么可以处理的。
其实,在WPF中,要想利用WndProc来处理所有的事件,需要利用到SourceInitialized Event,首先需要创建一个HwndSource对象,然后利用其AddHook方法来将所有的windows消息附加到一个现有的事件中,这个就是WndProc。
 void WSInitialized(object sender, EventArgs e)
        {
            hs = PresentationSource.FromVisual(this) as HwndSource;
            hs.AddHook(new HwndSourceHook(WndProc));
        }
这样,我们就成功地添加了一个可以接收所有windows消息的函数,那么有了它,就让我们用它来做一些有意义的事情吧。
在WPF设计过程中,我是利用一个无边框窗体进行了重绘。所以当我设置其最大化时,肯定是要遮蔽任务栏的:
this.WindowState = (this.WindowState == WindowState.Normal ? WindowState.Maximized : WindowState.Normal);
下面就让我们来实现不遮蔽任务栏(参考文章:Maximizing window (with WindowStyle=None) considering Taskbar)。
#region 这一部分用于最大化时不遮蔽任务栏
        private static void WmGetMinMaxInfo(System.IntPtr hwnd, System.IntPtr lParam)
        {

            MINMAXINFO mmi = (MINMAXINFO)Marshal.PtrToStructure(lParam, typeof(MINMAXINFO));

            // Adjust the maximized size and position to fit the work area of the correct monitor
            int MONITOR_DEFAULTTONEAREST = 0x00000002;
            System.IntPtr monitor = MonitorFromWindow(hwnd, MONITOR_DEFAULTTONEAREST);

            if (monitor != System.IntPtr.Zero)
            {

                MONITORINFO monitorInfo = new MONITORINFO();
                GetMonitorInfo(monitor, monitorInfo);
                RECT rcWorkArea = monitorInfo.rcWork;
                RECT rcMonitorArea = monitorInfo.rcMonitor;
                mmi.ptMaxPosition.x = Math.Abs(rcWorkArea.left - rcMonitorArea.left);
                mmi.ptMaxPosition.y = Math.Abs(rcWorkArea.top - rcMonitorArea.top);
                mmi.ptMaxSize.x = Math.Abs(rcWorkArea.right - rcWorkArea.left);
                mmi.ptMaxSize.y = Math.Abs(rcWorkArea.bottom - rcWorkArea.top);
            }

            Marshal.StructureToPtr(mmi, lParam, true);
        }

        /// <summary>
        /// POINT aka POINTAPI
        /// </summary>
        [StructLayout(LayoutKind.Sequential)]
        public struct POINT
        {
            /// <summary>
            /// x coordinate of point.
            /// </summary>
            public int x;
            /// <summary>
            /// y coordinate of point.
            /// </summary>
            public int y;

            /// <summary>
            /// Construct a point of coordinates (x,y).
            /// </summary>
            public POINT(int x, int y)
            {
                this.x = x;
                this.y = y;
            }
        }

        [StructLayout(LayoutKind.Sequential)]
        public struct MINMAXINFO
        {
            public POINT ptReserved;
            public POINT ptMaxSize;
            public POINT ptMaxPosition;
            public POINT ptMinTrackSize;
            public POINT ptMaxTrackSize;
        };
        /// <summary> Win32 </summary>
        [StructLayout(LayoutKind.Sequential, Pack = 0)]
        public struct RECT
        {
            /// <summary> Win32 </summary>
            public int left;
            /// <summary> Win32 </summary>
            public int top;
            /// <summary> Win32 </summary>
            public int right;
            /// <summary> Win32 </summary>
            public int bottom;

            /// <summary> Win32 </summary>
            public static readonly RECT Empty = new RECT();

            /// <summary> Win32 </summary>
            public int Width
            {
                get { return Math.Abs(right - left); }  // Abs needed for BIDI OS
            }
            /// <summary> Win32 </summary>
            public int Height
            {
                get { return bottom - top; }
            }

            /// <summary> Win32 </summary>
            public RECT(int left, int top, int right, int bottom)
            {
                this.left = left;
                this.top = top;
                this.right = right;
                this.bottom = bottom;
            }


            /// <summary> Win32 </summary>
            public RECT(RECT rcSrc)
            {
                this.left = rcSrc.left;
                this.top = rcSrc.top;
                this.right = rcSrc.right;
                this.bottom = rcSrc.bottom;
            }

            /// <summary> Win32 </summary>
            public bool IsEmpty
            {
                get
                {
                    // BUGBUG : On Bidi OS (hebrew arabic) left > right
                    return left >= right || top >= bottom;
                }
            }
            /// <summary> Return a user friendly representation of this struct </summary>
            public override string ToString()
            {
                if (this == RECT.Empty) { return "RECT {Empty}"; }
                return "RECT { left : " + left + " / top : " + top + " / right : " + right + " / bottom : " + bottom + " }";
            }

            /// <summary> Determine if 2 RECT are equal (deep compare) </summary>
            public override bool Equals(object obj)
            {
                if (!(obj is Rect)) { return false; }
                return (this == (RECT)obj);
            }

            /// <summary>Return the HashCode for this struct (not garanteed to be unique)</summary>
            public override int GetHashCode()
            {
                return left.GetHashCode() + top.GetHashCode() + right.GetHashCode() + bottom.GetHashCode();
            }


            /// <summary> Determine if 2 RECT are equal (deep compare)</summary>
            public static bool operator ==(RECT rect1, RECT rect2)
            {
                return (rect1.left == rect2.left && rect1.top == rect2.top && rect1.right == rect2.right && rect1.bottom == rect2.bottom);
            }

            /// <summary> Determine if 2 RECT are different(deep compare)</summary>
            public static bool operator !=(RECT rect1, RECT rect2)
            {
                return !(rect1 == rect2);
            }
        }

        [StructLayout(LayoutKind.Sequential, CharSet = CharSet.Auto)]
        public class MONITORINFO
        {
            /// <summary>
            /// </summary>
            public int cbSize = Marshal.SizeOf(typeof(MONITORINFO));

            /// <summary>
            /// </summary>
            public RECT rcMonitor = new RECT();

            /// <summary>
            /// </summary>
            public RECT rcWork = new RECT();

            /// <summary>
            /// </summary>
            public int dwFlags = 0;
        }

        [DllImport("user32")]
        internal static extern bool GetMonitorInfo(IntPtr hMonitor, MONITORINFO lpmi);

        [DllImport("User32")]
        internal static extern IntPtr MonitorFromWindow(IntPtr handle, int flags);
        #endregion
上面这部分主要就是通过显示器信息来确定窗体显示的WorkArea和MonitorArea。
上面的函数准备好以后,下面就开始处理最大化按钮事件:
首先,让我们来看一个常量:
| WM_GETMINMAXINFO |
0x24 |
The WM_GETMINMAXINFO message is sent to a window when the size or position of the window is about to change. An application can use this message to override the window's default maximized size and position, or its default minimum or maximum tracking size. |
从字面意思看来就是这个消息是用来处理窗体大小或者是位置变化的。程序可以使用这个消息来重载原本存在的最大化信息,位置信息等等。
 private IntPtr WndProc(IntPtr hwnd, int msg, IntPtr wParam, IntPtr lParam, ref bool handled)
        {
            switch (msg)
            {
                case 0x0024:/* WM_GETMINMAXINFO */
                    WmGetMinMaxInfo(hwnd, lParam);
                    handled = true;
                    break;
default: break;
            }
            return (System.IntPtr)0;
        }
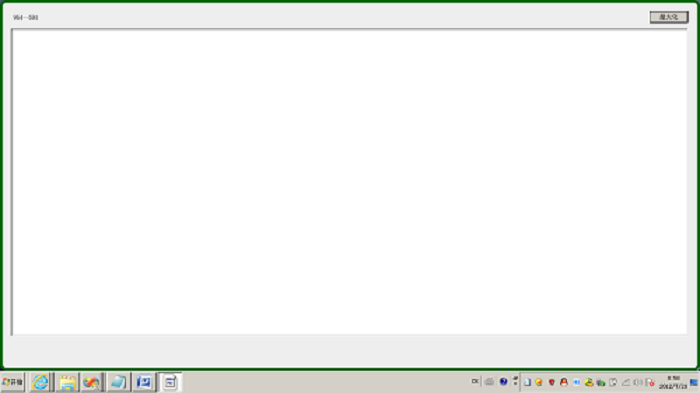
上面的代码就是通过处理WM_GETMINMAXINFO消息来实现最大化时不遮蔽任务栏。 我们来看看效果:
需要补充一点的是,在WindowForm中,我们可以通过Point p = new Point(lParam.ToInt32())来确定我们的鼠标坐标在窗体的哪个位置上,但是在WPF中,Point没有带有单个参数的方法,这里只能通过
                    int x = lParam.ToInt32() & 0xffff;
                    int y = lParam.ToInt32() >> 16;
来获取。
希望这篇文章对你有用。


