由于工作需要,经常要查看到不同地区的 当前时间,以前总是对照着时区表来进行加减运算,现在有了这个小工具以后,感觉省心了不少.下面是软件的截图:
效果图赏析
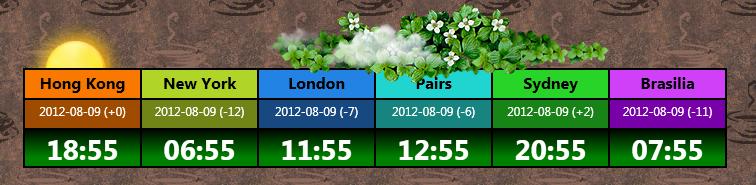
在界面上,有能够冉冉升起的太阳或者月亮,有缓慢飘动的浮云,有青葱翠绿的花叶, 当然,也有显目的时区显示.如果要是放在WinForm时代,要实现这样的界面,真的是繁琐和复杂,但是在WPF中,利用XAML控制前台界面,利用CodeBehind控制窗口拖动,日月变换等等逻辑,真的是简便而且效果强大.其基于DX渲染的界面,流畅而且逼真.
实现原理
首先,参照前面几章的讲解,我们知道要想实现窗体自绘,我们需要进行以下几项设置:

 View Code
AllowTransparency = “True”
WindowStyle = “None”
Background = “Transparent”
OpacityMask = “White”
这样之后,我们需要做的是放置一个Grid容器,设置Grid容器行和列,这个我不消多说,因为和设置ASP.NET中的网格类似.
View Code
<Grid.ColumnDefinitions>
  <ColumnDefinition/>
  <ColumnDefinition/>
  <ColumnDefinition/>
  <ColumnDefinition/>
  <ColumnDefinition/>
  <ColumnDefinition/>
</Grid.ColumnDefinitions>

<Grid.RowDefinitions>
  <RowDefinition Height="30"/>
  <RowDefinition Height="30"/>
  <RowDefinition/>
</Grid.RowDefinitions>
上面的代码就是声明了一个3行6列的Grid容器,其中第一行和第二行的高度均为30.容器有了,下面我们开始往容器里面放东西.
View Code
<Border Grid.Column="0" Grid.Row="1">
<TextBlock x:Name="HK" Padding="0,5,0,0" Background="#FFA04C00" FontFamily="@微软雅黑" FontSize="12" Foreground="White"   TextAlignment="Center" TextWrapping="NoWrap" TextTrimming="None"><Run Text="Hong Kong"/></TextBlock>
</Border>
上面的就是往容器放置的东西,其中Border是用于画边线(Grid自带的边线太难看), Grid.Column="0" Grid.Row="1" 是指将这个内容放置在第1列,第二行的位置上,依次类推,然后填充即可.
View Code
<Border Grid.Column="0">
<TextBlock FontFamily="@微软雅黑" Padding="0,5,0,0" FontSize="12pt" Foreground="Black" FontWeight="bold" Background="#FFF87800"  TextAlignment="Center"><Run Text="Hong Kong"/></TextBlock></Border>
<Border Grid.Column="1">
<TextBlock Background="#FFB0D428" Padding="0,5,0,0" FontFamily="@微软雅黑" FontSize="16" FontWeight="Bold" Foreground="Black"    Text="New York" TextAlignment="Center"/></Border>
<Border Grid.Column="2">
<TextBlock Background="#FF2283E4" Padding="0,5,0,0" FontFamily="@微软雅黑" FontSize="16" FontWeight="Bold" Foreground="Black"    Text="London" TextAlignment="Center"/></Border>
<Border Grid.Column="3">
<TextBlock Background="#FF20D4D0" Padding="0,5,0,0" FontFamily="@微软雅黑" FontSize="16" FontWeight="Bold" Foreground="Black"    Text="Pairs" TextAlignment="Center"/></Border>
<Border Grid.Column="4">
<TextBlock Background="#FF28D428" Padding="0,5,0,0" FontFamily="@微软雅黑" FontSize="16" FontWeight="Bold" Foreground="Black"    Text="Sydney" TextAlignment="Center"/></Border>
<Border Grid.Column="5">
<TextBlock Background="#FFD040F8" Padding="0,5,0,0" FontFamily="@微软雅黑" FontSize="16" FontWeight="Bold" Foreground="Black"    Text="Brasilia" TextAlignment="Center"/></Border>
<Border Grid.Column="0" Grid.Row="1">
<TextBlock x:Name="HK" Padding="0,5,0,0" Background="#FFA04C00" FontFamily="@微软雅黑" FontSize="12" Foreground="White"   TextAlignment="Center" TextWrapping="NoWrap" TextTrimming="None"><Run Text="Hong Kong"/></TextBlock></Border>
<Border Grid.Column="1" Grid.Row="1">
<TextBlock x:Name="NY" Padding="0,5,0,0" Background="#FF708418" FontFamily="@微软雅黑" FontSize="12" Foreground="White"   TextAlignment="Center" TextWrapping="NoWrap" TextTrimming="None"><Run Text="Hong Kong"/></TextBlock></Border>
<Border Grid.Column="2" Grid.Row="1">
<TextBlock x:Name="UK" Padding="0,5,0,0" Background="#FF184880" FontFamily="@微软雅黑" FontSize="12" Foreground="White"   TextAlignment="Center" TextWrapping="NoWrap" TextTrimming="None"><Run Text="Hong Kong"/></TextBlock></Border>
<Border Grid.Column="3" Grid.Row="1">
<TextBlock x:Name="PS" Padding="0,5,0,0" Background="#FF188480" FontFamily="@微软雅黑" FontSize="12" Foreground="White"   TextAlignment="Center" TextWrapping="NoWrap" TextTrimming="None"><Run Text="Hong Kong"/></TextBlock></Border>
<Border Grid.Column="4" Grid.Row="1">
<TextBlock x:Name="SD" Padding="0,5,0,0" Background="#FF188418" FontFamily="@微软雅黑" FontSize="12" Foreground="White"   TextAlignment="Center" TextWrapping="NoWrap" TextTrimming="None"><Run Text="Hong Kong"/></TextBlock></Border>
<Border Grid.Column="5" Grid.Row="1">
<TextBlock x:Name="BR" Padding="0,5,0,0" Background="#FF7800A8" FontFamily="@微软雅黑" FontSize="12" Foreground="White"   TextAlignment="Center" TextWrapping="NoWrap" TextTrimming="None"><Run Text="Hong Kong"/></TextBlock></Border>
<Border Grid.Column="0" Grid.Row="2">
<TextBlock x:Name="HKT" Padding="0,5,0,0" FontFamily="@Gill Sans MT" FontSize="21pt" Foreground="White"   TextAlignment="Center" FontWeight="Bold"><Run Text="Load"/></TextBlock></Border>
<Border Grid.Column="1" Grid.Row="2">
<TextBlock x:Name="NYT" Padding="0,5,0,0" FontFamily="@Gill Sans MT" FontSize="21pt" Foreground="White"   TextAlignment="Center" FontWeight="Bold"><Run Text="Load"/></TextBlock></Border>
<Border Grid.Column="2" Grid.Row="2">
<TextBlock x:Name="UKT" Padding="0,5,0,0" FontFamily="@Gill Sans MT" FontSize="21pt" Foreground="White"   TextAlignment="Center" FontWeight="Bold"><Run Text="Load"/></TextBlock></Border>
<Border Grid.Column="3" Grid.Row="2">
<TextBlock x:Name="PST" Padding="0,5,0,0" FontFamily="@Gill Sans MT" FontSize="21pt" Foreground="White"   TextAlignment="Center" FontWeight="Bold"><Run Text="Load"/></TextBlock></Border>
<Border Grid.Column="4" Grid.Row="2">
<TextBlock x:Name="SDT" Padding="0,5,0,0" FontFamily="@Gill Sans MT" FontSize="21pt" Foreground="White"   TextAlignment="Center" FontWeight="Bold"><Run Text="Load"/></TextBlock></Border>
<Border Grid.Column="5" Grid.Row="2">
<TextBlock x:Name="BRT" Padding="0,5,0,0" FontFamily="@Gill Sans MT" FontSize="21pt" Foreground="White"   TextAlignment="Center" TextDecorations="None" FontWeight="Bold" Background="Transparent"><Run Text="Load"/></TextBlock></Border>
这样填充完成后,就能看见上面的图片了,是不是开始有型了?

然后我们还需要控制其能够计算时间,这个需要用到WPF中的DispatcherTimer对象,具体的用法如下:
首先设置DispatcherTimer对象的各种属性和事件:
View Code
timer = new DispatcherTimer();
timer.Interval = TimeSpan.Parse("00:00:01");
timer.IsEnabled = true;
timer.Tick+=new EventHandler(timer_Tick);
这里我设置的是一秒钟跳动一次,然后注册了其Tick事件,在这个事件中,我们控制界面上时间的显示:
View Code
private void timer_Tick(object sender, EventArgs e)
{
HKT.Text = DateTime.Now.ToString("HH:mm");
NYT.Text = DateTime.Now.AddHours(-12).ToString("HH:mm");
UKT.Text = DateTime.Now.AddHours(-7).ToString("HH:mm");
PST.Text = DateTime.Now.AddHours(-6).ToString("HH:mm");
SDT.Text = DateTime.Now.AddHours(2).ToString("HH:mm");
BRT.Text = DateTime.Now.AddHours(-11).ToString("HH:mm");
}
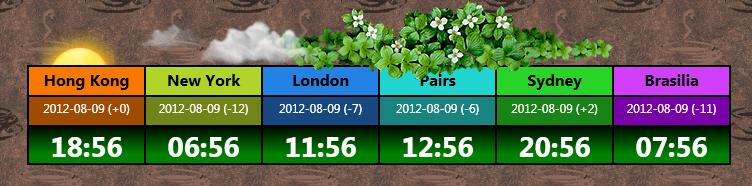
这样每隔一分钟,时间就改变一次.
这部分介绍完之后,看上去都已经有模有样了,下面开始添加特效图片了,首先我们需要添加的是花叶效果: 将花叶的图片放到项目中,设置其Build Action为Resource模式,然后在代码中将花叶翻转180度居中放置,XAML代码如下:
View Code
<Image Height="82" Margin="248,0,118,0" Source="Images/yezi2.png" Stretch="Fill" VerticalAlignment="Top"  RenderTransformOrigin="0.5,0.5">
<Image.RenderTransform>
<TransformGroup>
<ScaleTransform/>
<SkewTransform/>
<RotateTransform Angle="-180"/>
<TranslateTransform/>
</TransformGroup>
</Image.RenderTransform>
</Image>
之后是添加飘动的白云,这个稍微复杂点,我们得先添加一个Canvas画板,以便能够附加其Left属性,然后利用StoryBoard来控制其左右移动效果:
View Code
<Canvas x:Name="MyCanvas">
<Canvas.Triggers>
<EventTrigger RoutedEvent="FrameworkElement.Loaded">
<BeginStoryboard >
<Storyboard Storyboard.TargetName="img1" Storyboard.TargetProperty="(Canvas.Left)">
<DoubleAnimation From="0" To="514" Duration="0:0:20" RepeatBehavior="23:59:59" AutoReverse="True"/>
</Storyboard>
</BeginStoryboard>
</EventTrigger>
</Canvas.Triggers>
其中需要注意的是, Duration代表动画时间, AutoReverse为True代表按照原路径返回.这样设置之后,就可以看见白云飘飘了.
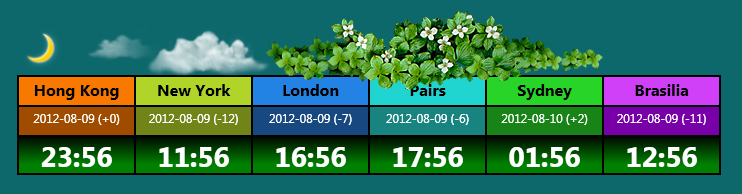
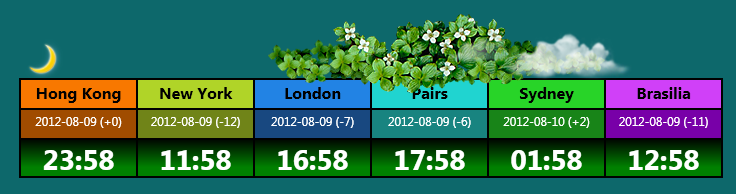
最后的就是那个太阳和月亮的标记,当移动上面去,能够缓慢下降和升起的效果,这个利用Code来完成.
对应的XAML代码:
View Code
<Image x:Name="DayMark" HorizontalAlignment="Left" Height="53" Source="Images/sun2.png" Stretch="Fill" VerticalAlignment="Top" Width="105" Margin="0,15,0,0" MouseEnter="DayMark_MouseEnter" />
对应的后台事件:
View Code
  private void DayMark_MouseEnter(object sender, MouseEventArgs e)
{
    TranslateTransform trans = new TranslateTransform();
    DayMark.RenderTransform = trans;
    DoubleAnimation animation = new DoubleAnimation(10,TimeSpan.FromSeconds(1));
    animation.AutoReverse = true;
    trans.BeginAnimation(TranslateTransform.YProperty,animation);
}
好了,这样之后,我们的主要设计完成,接下来是调调位置,调调大小,添加鼠标拖拽事件,鼠标关闭事件等等. 希望对你有用哦.
源代码下载
