1. 问题描述
最近一直在使用React + React Router(v4.1.1) + Mobx做项目开发,相比繁琐的React + React Rotuer + Redux方案,爽的不要不要的,当然前提你得忍受Object.defineProperty拦截getter/setter带来的各种黑魔法问题。咳咳,这里不是Mobx大战Redux,就此打住。想了解的人可以去看一下女神Preethi Kasireddy在React Conf 2017上的演讲。
最近开发过程中确遇到一个问题,这里跟大家分享一下。
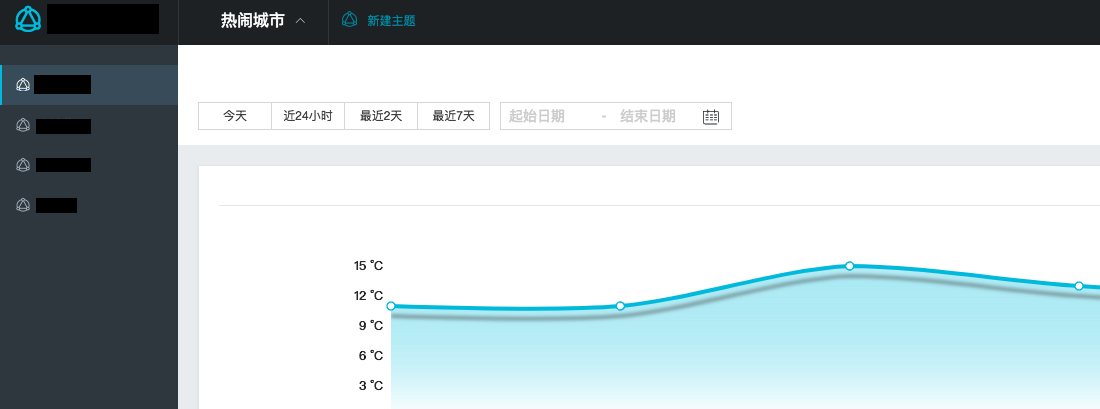
问题页面如上,整个页面利用React Router做路由切换。当用户点击左边菜单栏进行进行路由切换的时候,虽然浏览器地址栏里URL信息已经发生变更, 但是页面并没有进行刷新。路由配置代码如下:
export default function RouterConfig() {
  const homePath = '/home';
  const getComponentRoutes = () => {
    const routeArr = [];
    const pushRoute = path => {
      routeArr.push(<Route key={path} path={path} component={PastyContainer} />);
    };
    for (const item of sideData.common) {
      if (!_.isEmpty(item.children)) {
        for (const childrenItem of item.children) {
          pushRoute(childrenItem.path);
        }
      } else {
        pushRoute(item.path);
      }
    }
    return routeArr;
  };
  return (
    <Router history={history}>
      <TopBar>
        <Switch>
          <Route exact path={homePath} component={Home} />
          <Route path="*">
            <SideBar theme="dark" data={sideData.common}>
              <Switch>
                {getComponentRoutes()}
              </Switch>
            </SideBar>
          </Route>
        </Switch>
      </TopBar>
    </Router>
  );
}
2. React Route v4.0路由原理
想最终问题根源,想来了解一下React Route原理是不可避免的了。
2.1 React Route 的核心依赖History
history is a JavaScript library that lets you easily manage session history anywhere JavaScript runs. history abstracts away the differences in various environments and provides a minimal API that lets you manage the history stack, navigate, confirm navigation, and persist state between sessions.
简而言之,React Route核心就是利用History的replace/push和listen的能力在前端完成路由的切换。这里不做详细介绍,更多关于History的介绍,可以参考其官方文档。
2.2 Link、Router、 Switch、 Route
Link, Router, Switch, Route是React-Route中最核心的几个API了。
2.2.1 Link
其中Link能力类比html中的<a>标签, 利用Link可以实现页面跳转。上图中侧边栏中所有可尽心页面跳转都利用了该组件,其实现原理想必所有做过前端开发的人应该都能想到:通过监听onClick事件,在listener中执行history.replace/push完成页面跳转。
2.2.2 Router
Router组件的是整个路由结构中顶层组件,其主要作用是通过监听history.listen,捕获路由变换,并将其置于React Context中,其核心代码如下:
class Router extends React.Component {
  getChildContext() {
    return {
      router: {
        ...this.context.router,
        history: this.props.history,
        route: {
          location: this.props.history.location,
          match: this.state.match
        }
      }
    }
  }
  computeMatch(pathname) {
    return {
      path: '/',
      url: '/',
      params: {},
      isExact: pathname === '/'
    }
  }
  componentWillMount() {
    this.unlisten = history.listen(() => {
      this.setState({
        match: this.computeMatch(history.location.pathname)
      })
    })
  }
  componentWillUnmount() {
    this.unlisten()
  }
  render() {
    const { children } = this.props
    return children ? React.Children.only(children) : null
  }
}
2.2.3 Route
这应该是整个React Router中最核心的功能了。基本作用就是从context中捞取pathname并与用户定义的path进行匹配,如果匹配成功,则渲染响应组件。
class Route extends React.Component {
  getChildContext() {
    return {
      router: {
        ...this.context.router,
        route: {
          location: this.props.location || this.context.router.route.location,
          match: this.state.match
        }
      }
    }
  }
  computeMatch({ computedMatch, location, path, strict, exact }, router) {
  }

  componentWillReceiveProps(nextProps, nextContext) {
    this.setState({
      match: this.computeMatch(nextProps, nextContext.router)
    })
  }

  render() {
    const props = { match, location, history, staticContext }
    return (
      component ? ( // component prop gets first priority, only called if there's a match
        match ? React.createElement(component, props) : null
      ) : render ? ( // render prop is next, only called if there's a match
        match ? render(props) : null
      ) : children ? ( // children come last, always called
        typeof children === 'function' ? (
          children(props)
        ) : !isEmptyChildren(children) ? (
          React.Children.only(children)
        ) : (
          null
        )
      ) : (
        null
      )
    )
  }
}

export default Route
2.2.3 Switch
这里还用到了Switch方法,Switch的作用是渲染第一个子组件(<Route>, <Redirect>)
class Switch extends React.Component {
  render() {
    React.Children.forEach(children, element => {
      // 遍历子组件的props, 只渲染低一个匹配到pathname的Route
      const { path: pathProp, exact, strict, from } = element.props
      const path = pathProp || from
      if (match == null) {
        child = element
        match = path ? matchPath(location.pathname, { path, exact, strict }) : route.match
      }
    })
    return match ? React.cloneElement(child, { location, computedMatch: match }) : null
  }
}
3. Mobx-React中的observer
The observer function / decorator can be used to turn ReactJS components into reactive components. It wraps the component's render function in mobx.autorun to make sure that any data that is used during the rendering of a component forces a re-rendering upon change.
从代码层面来看, 主要针对ComponentDidMount, componentWillUnmount, componentDidUpdate(mixinLifecicleEvents)三个接口进行修改。同时如果用户没有重写shouldComponentUpdate, 也会优化shouldeComponentUpdate
export function observer(arg1, arg2) {
  const target = componentClass.prototype || componentClass;
  mixinLifecycleEvents(target)
  componentClass.isMobXReactObserver = true;
  return componentClass;
}
function mixinLifecycleEvents(target) {
  patch(target, "componentWillMount", true);
  [
    "componentDidMount",
    "componentWillUnmount",
    "componentDidUpdate"
  ].forEach(function(funcName) {
    patch(target, funcName)
  });
  if (!target.shouldComponentUpdate) {
    // 如果没有重写, 则利用覆盖
    target.shouldComponentUpdate = reactiveMixin.shouldComponentUpdate;
  }
}
那在详细看一下,Mobx针对这几个接口都做了哪些事情:
function patch(target, funcName, runMixinFirst = false) {
  const base = target[funcName];
  const mixinFunc = reactiveMixin[funcName];
  const f = !base
    ? mixinFunc
    : runMixinFirst === true
        ? function() {
          mixinFunc.apply(this, arguments);
          base.apply(this, arguments);
        }
        : function() {
          base.apply(this, arguments);
          mixinFunc.apply(this, arguments);
        }
  ;
  target[funcName] = f;
}

const reactiveMixin = {
  componentWillMount: function() {
    makePropertyObservableReference.call(this, "props")
    makePropertyObservableReference.call(this, "state")
    const initialRender = () => {
      reaction = new Reaction(`${initialName}#${rootNodeID}.render()`, () => {});
      reactiveRender.$mobx = reaction;
      this.render = reactiveRender;
      return reactiveRender();
    };
    const reactiveRender = () => {
      reaction.track(() => {
        rendering = extras.allowStateChanges(false, baseRender);
        return rendering;
    };
    this.render = initialRender;
  },

  componentWillUnmount: function() {
    this.render.$mobx && this.render.$mobx.dispose();
    this.__$mobxIsUnmounted = true;
  },

  componentDidMount: function() {
    if (isDevtoolsEnabled) {
      reportRendering(this);
    }
  },

  componentDidUpdate: function() {
    if (isDevtoolsEnabled) {
      reportRendering(this);
    }
  },

  shouldComponentUpdate: function(nextProps, nextState) {
    if (this.state !== nextState) {
      return true;
    }
    return isObjectShallowModified(this.props, nextProps);
  }
};- componentDidMount, componentDidUpdate里面只是提供debug相关的report。
-
componentWillMount里做两件事情
- 首先会拦截pros/state的get/set, 通过mobx的Atom赋予state, props Observable的能力。
- 重写render方法(this.render = initRender)
-
render
-
第一次 render 时:
- 初始化一个 Reaction
- 在 reaction.track 里执行 baseRender,建立依赖关系
-
有数据修改时:
- 触发 render 的执行 (由于在 reaction.track 里执行,所以会重新建立依赖关系)
-
- shouldComponentUpdate类似PureRenderMixin, 只做shadow比对,若数据不发生变化,则不进行重新渲染。
4. 问题分析
了解了这些背景知识后,我们再来看一下当前这个问题:
首先我们通过history.listen(()=>{})观察发现,用户触发Link点击事件时,路由变化被我们的回调函数所捕获。问题并不可能出现在Link 和 listen过程。
那么React Router是在Router这个组件中创建history.listen回调的。当Url发生变化,触发history.listen注册的回调后,会通过修改state, 触发Router Render过程,默认情况下,会触发他的子组件Render过程。而当Route发生componentWillReceiveProps时,会通过Router的getChildContext方法,拿到变化的URL。
通过Debug我们发现,TopBar的render,Switch, Route的render过程都没有触发。而TopBar中有部分状态托管在mobx model中,所有问题差不多可以定位到:因为TopBar外层封装了observer,而observer又会重写shouldComponentUpdate,shouldComponentUpdate拦截了后续render过程,导致没有触发到后续Route组件的shouldComponentUpdate过程。
5. 问题解决
其实,用户在使用connect, observer这样会重写shouldComponentUpdate或者PureComponent都会遇到相同的问题,React Router Guide针对此问题做了详细描述。总体解法思路:通过传入props绕过shouldComponentUpdate触发render。
对于Router来说,路由的变化会反应在location的变化,所有将location传入props中,会是不错的绕过shouldComponentUpdate触发render的方式。那获取location的方法目前有两种:
-
Route如果匹配到路由,会注入location到待渲染组件的props中。所以我们可以直接将TopBar封装到Route中:
const TopBarWithRoute = () => ( <TopBar> <Switch> <Route exact path={homePath} component={Home} /> <Route path="*"> <SideBar theme="dark" data={sideData.common}> <Switch> {componentRoutes()} </Switch> </SideBar> </Route> </Switch> </TopBar> ); return ( <Router history={history}> <Route component={TopBarWithRoute} /> </Router> ); -
React Router提供了一个Hoc组件withRouter,利用此组件可以将location注入到TopBar中:
const TopBarWithRouter = withRouter(TopBar);
return (
  <Router history={history}>
    <TopBarWithRouter>
      <Switch>
        <Route exact path={homePath} component={Home} />
        <Route path="*">
          <SideBar theme="dark" data={sideData.common}>
            <Switch>
              {componentRoutes()}
            </Switch>
          </SideBar>
        </Route>
      </Switch>
    </TopBarWithRouter>
  </Router>
);