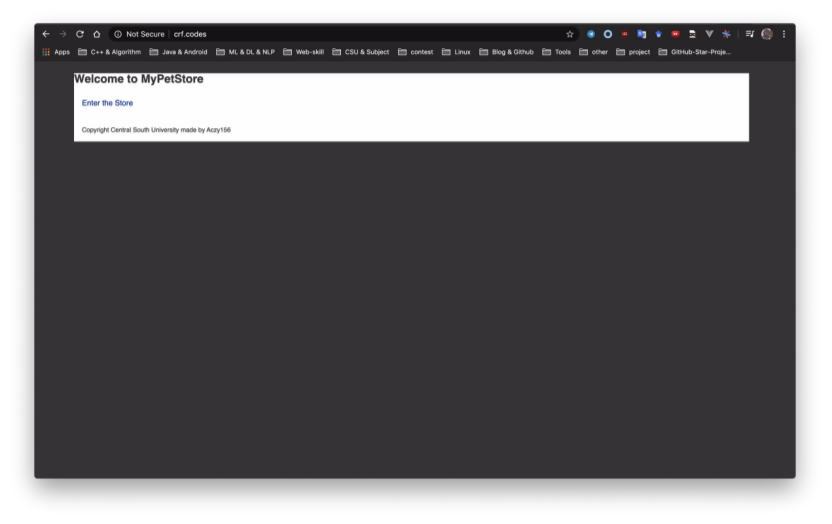
(一)第一部分:最基本的jar包运行(无需配置tomcat)
- 1、配置阿里云(Esc学生服务器、镜像Centos7.7),并远程连接进入终端。
- 2、安装并配置JDK(参考https://www.jianshu.com/p/093413f2a04f)
a)安装jdk。
b)寻找jdk路径配置环境变量。
c)简单的Java hello world测试确保安装成功。
- 3、安装并配置mysql(mariadb)(参考https://blog.csdn.net/DaSo_CSDN/article/details/54754936)
a)安装mysql、mariadb server。
b)systemctl 开启服务。
c) 打开端口。(阿里云要在控制台打开,参考https://yq.aliyun.com/articles/701181)
d) 更改mysql 的root密码,对应于项目配置文件中的密码。
- 4、利用scp进行文件传输(参考https://www.cnblogs.com/tugenhua0707/p/8278772.html)
a)传输spring maven 的快照版本用于测试。
b)传输数据库sql文件。
- 5、导入数据库
a)创建sql文件对应的数据库。
b)利用文件重定向运行sql文件。
c)检查数据库是否导入成功
- 6、运行jar文件,控制台获取公网IP,本机输入IP:8081测试。
- 7、设置后台运行(已设置:http://60.205.183.114:8081/)
a)contrl+c中止。
b)然后通过nohup 和 & 来后台运行。
c)ps通过pid来停止后台运行进程。
运行结果
整体过程:
[root@iZ2ze4r3b4xcztbcsey08cZ ~]# history
    1   MAKRER=SHOW_LOCALE;printf $MAKRER""; locale; MAKRER=SHOW_LOCALE;printf $MAKRER"";
    2  yum install -y mysql
    3  yum install -y mariadb-server mariadb
    4  systemctl start mariadb
    5  systemctl enable mariadb
    6  yum install -y mysql-devel
    7  firewall-cmd --zone=public --add-port=3306/tcp --permanent
    8   CHECK_TYPE=SHELL; echo "INFO=${CHECK_TYPE} PID=$$ PPID=$PPID TTY=$(tty) SHELL=$0 HOME=$HOME PWD=$PWD| CHECK_SHELL_END"
    9  ls
   10  ifconfig
   11  ls
   12  yum list
   13  java -version
   14  ls
   15  yum search java-1.8
   16  yum -y install java-1.8.0-openjdk-devel.x86_64
   17  java -version
   18  cd /usr/lib/jvm/java-1.8.0-openjdk-1.8.0.252.b09-2.el7_8.x86_64/
   19  pwd
   20  vim /etc/profile
   21  . /etc/profile
   22  vim Demo.java
   23  javac  Demo.java
   24  java Demo
   25  su
   26   MAKRER=SHOW_LOCALE;printf $MAKRER""; locale; MAKRER=SHOW_LOCALE;printf $MAKRER"";
   27   CHECK_TYPE=SHELL; echo "INFO=${CHECK_TYPE} PID=$$ PPID=$PPID TTY=$(tty) SHELL=$0 HOME=$HOME PWD=$PWD| CHECK_SHELL_END"
   28  mysql -u root
   29  ls
   30  pwd
   31  ifconfig
   32  ls
   33  mysql
   34  mysql -u root jpetstore < jpetstore.sql
   35  mariadb
   36  mysql
   37  java -jar mypetstore-0.0.3-SNAPSHOT.jar
   38  nohup java -jar mypetstore-0.0.3-SNAPSHOT.jar &
   39  ps
   40  history
[root@iZ2ze4r3b4xcztbcsey08cZ ~]#
控制台开端口
利用scp传文件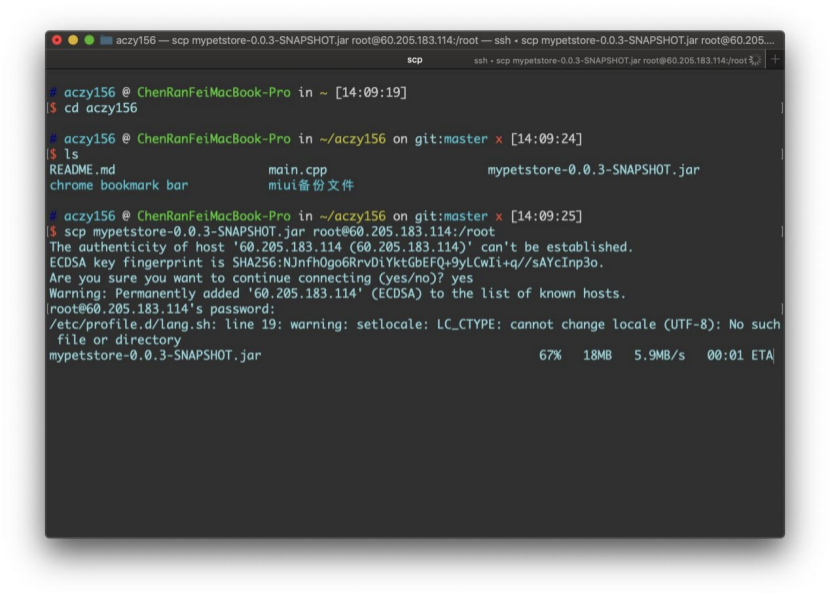
运行mysql 文件
[root@iZ2ze4r3b4xcztbcsey08cZ ~]# mysql
Welcome to the MariaDB monitor.  Commands end with ; or \g.
Your MariaDB connection id is 3
Server version: 5.5.65-MariaDB MariaDB Server

Copyright (c) 2000, 2018, Oracle, MariaDB Corporation Ab and others.

Type 'help;' or '\h' for help. Type '\c' to clear the current input statement.

MariaDB [(none)]> create database jpetstore;
Query OK, 1 row affected (0.00 sec)

MariaDB [(none)]> quit
Bye
[root@iZ2ze4r3b4xcztbcsey08cZ ~]# mysql -u root jpetstore < jpetstore.sql
[root@iZ2ze4r3b4xcztbcsey08cZ ~]# mariadb
-bash: mariadb: command not found
[root@iZ2ze4r3b4xcztbcsey08cZ ~]# mysql
Welcome to the MariaDB monitor.  Commands end with ; or \g.
Your MariaDB connection id is 5
Server version: 5.5.65-MariaDB MariaDB Server

Copyright (c) 2000, 2018, Oracle, MariaDB Corporation Ab and others.

Type 'help;' or '\h' for help. Type '\c' to clear the current input statement.

MariaDB [(none)]> show databases;
+--------------------+
| Database           |
+--------------------+
| information_schema |
| jpetstore          |
| mysql              |
| performance_schema |
| test               |
+--------------------+
5 rows in set (0.00 sec)

MariaDB [(none)]> use jpetstore;
Reading table information for completion of table and column names
You can turn off this feature to get a quicker startup with -A

Database changed
MariaDB [jpetstore]> show tables;
+---------------------+
| Tables_in_jpetstore |
+---------------------+
| account             |
| addlog              |
| bannerdata          |
| browselog           |
| cart                |
| cartitem            |
| category            |
| inventory           |
| item                |
| lineitem            |
| orders              |
| orderstatus         |
| product             |
| profile             |
| sequence            |
| signon              |
| supplier            |
+---------------------+
17 rows in set (0.00 sec)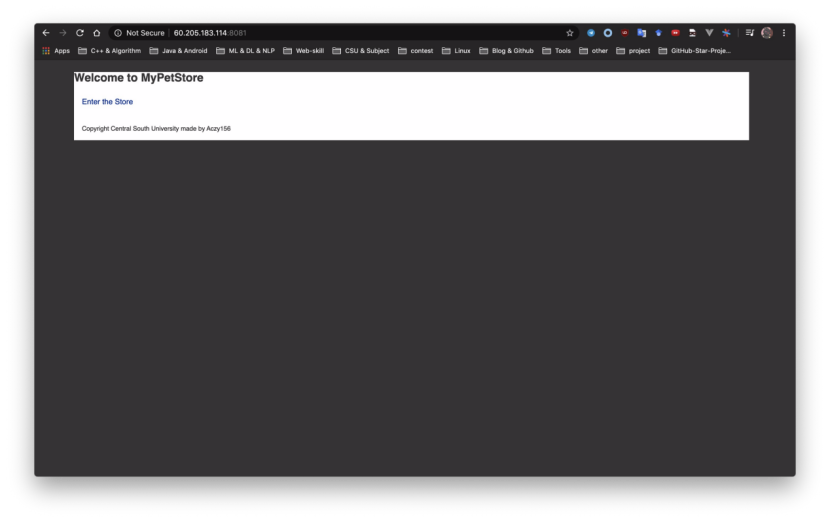
(二)第二部分:利用Tomcat容器对war包进行处理(需要Tomcat)
[http://60.205.183.114:8080/myJPetStore_war/index.jsp]
- 1、安装Tomcat(参考https://www.digitalocean.com/community/tutorials/how-to-install-apache-tomcat-8-on-centos-7)
a)本地下载tomcat,然后利用scp文件传输
b)设置访问权限
c)设置服务配置
d)输入IP:8080测试是否已经开启服务
- 2、数据库/端口配置
a)数据库root 密码 和服务器对应
b)端口配置,在上面已经开启了8080端口
- 3、利用scp传输war包,放到webapp里边(直接会解析出文件)
- 4、重启tomcat服务
a)bin下的shutdown.sh
b)bin下的startup.sh
- 5、本机测试访问
a)注意要添加访问的资源的路径/myJPetStore_war/index.jsp,然后tomcat容器会自动到webapp下去寻找
b) 已设置tomcat容器:http://60.205.183.114:8080/myJPetStore_war/index.jsp
运行结果
整体过程
   52  ls
   53  sudo mkdir /opt/tomcat
   54  sudo tar xvf apache-tomcat-8*tar.gz -C /opt/tomcat --strip-components=1
   55  cd /opt/tomcat
   56  sudo chgrp -R tomcat /opt/tomcat
   57  sudo chmod -R g+r conf
   58  sudo chmod g+x conf
   59  sudo chown -R tomcat webapps/ work/ temp/ logs/
   60  sudo vi /etc/systemd/system/tomcat.service
   61  sudo systemctl daemon-reload
   62  sudo systemctl start tomcat
   63  sudo systemctl status tomcat
   64  sudo systemctl enable tomcat
   65  ls
   66  cd webapps/
   67  pwd
   68  ls
   69  sudo systemctl restart tomcat
   70  cd ../bin/
   71  ls
   72  sh shutdown.sh
   73  sh startup.sh
   74  history
[root@iZ2ze4r3b4xcztbcsey08cZ bin]#
利用systemctl查看tomcat的状态
验证是否开启tomcat服务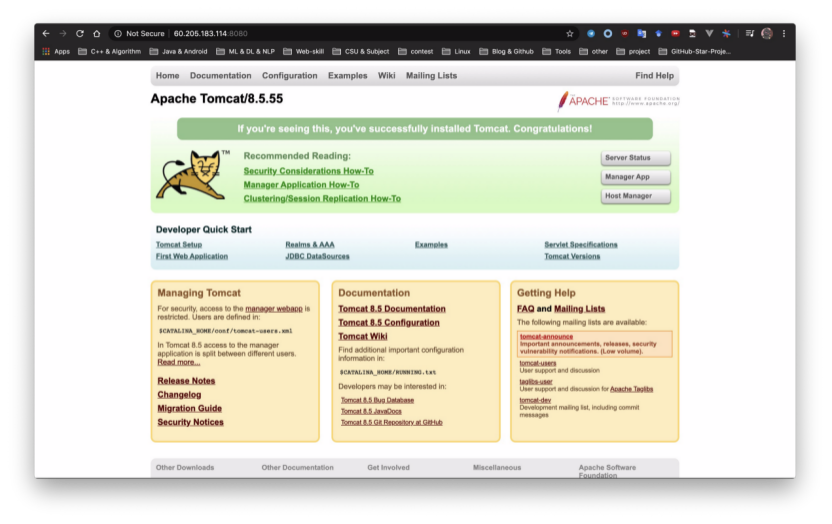
将war包直接传入webapp中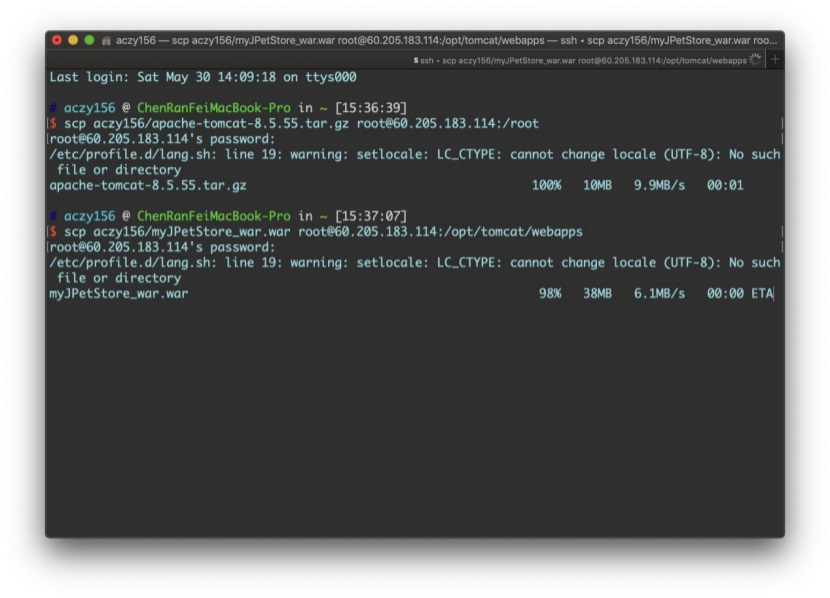
然后webapp会自动解析war包(即myJPetStore_war)
[root@iZ2ze4r3b4xcztbcsey08cZ webapps]# pwd
/opt/tomcat/webapps
[root@iZ2ze4r3b4xcztbcsey08cZ webapps]# ls
docs examples host-manager manager myJPetStore_war myJPetStore_war.war ROOT访问http://60.205.183.114:8080/myJPetStore_war/index.jsp
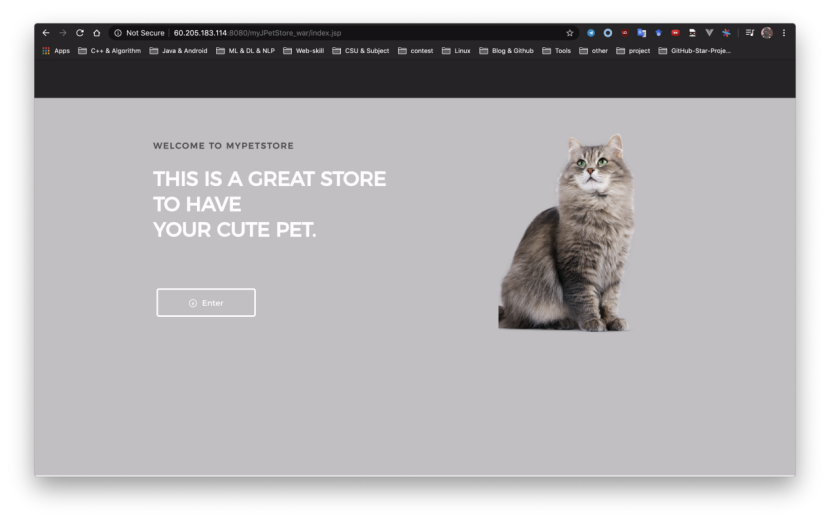
(三)第三部分:指定域名进行访问
- 1、配置virmach vps,达到可以通过IP进行访问
a)过程同第一步,最后设置为后台运行。
b) 已配置:http://198.12.120.212:8081/
- 2、服务器安装web server (安装nginx,参考http://blog.kenyang.net/2019/02/26/upgrade-nginx-to-latest-version-on-centos)
- 3、在域名提供商 name(或者cloudflare)进行DNS域名解析,进行请求中转。
a)ping 域名(ping crf.codes)查看是否绑定成功。 - 4、修改nginx 配置文件
a)Web server 设定域名
b)Location 配置index界面
c)开放Linux系统防火墙
d)访问crf.code http://crf.codes/
运行结果
域名提供商(name)配置dns
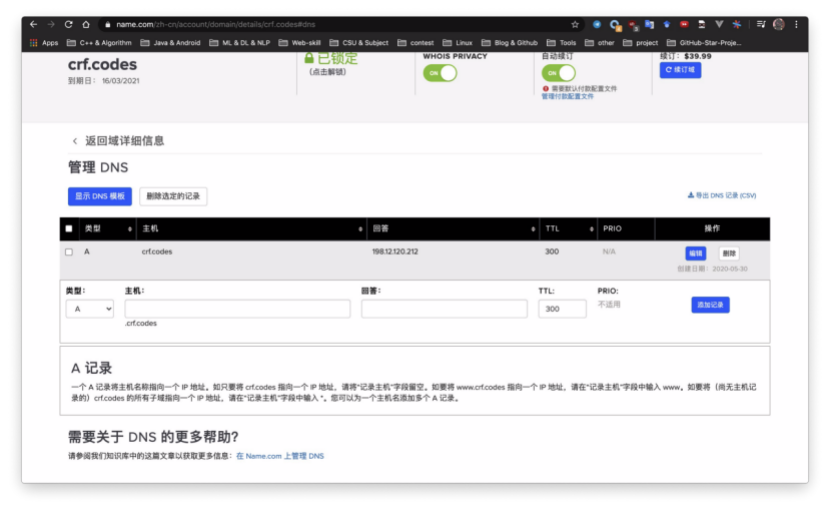
验证dns是否配置成功ping crf.codes,可以看到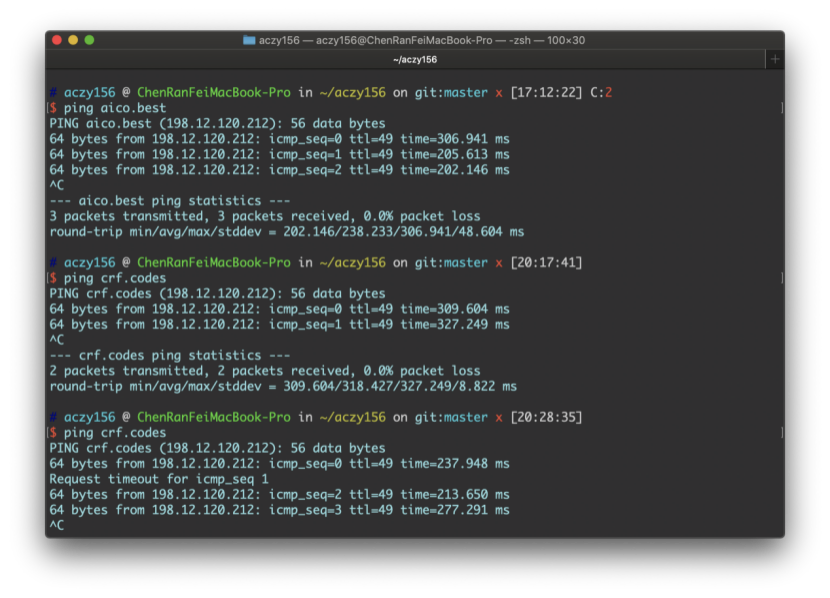
修改nginx配置文件
server {
    listen       80;
    server_name   crf.codes;

    #charset koi8-r;
    access_log  /var/log/nginx/host.access.log  main;

    location / {
        # root   /usr/share/nginx/html;
        index  index.html index.htm;
        proxy_pass http://127.0.0.1:8081/;
        # proxy_set_header X-Forwarded-For $proxy_add_x_forwarded_for;
        }

    #error_page  404              /404.html;

    # redirect server error pages to the static page /50x.html
    #
    error_page   500 502 503 504  /50x.html;
    location = /50x.html {
        root   /usr/share/nginx/html;
    }

    # proxy the PHP scripts to Apache listening on 127.0.0.1:80
    #
    #location ~ \.php$ {
    #    proxy_pass   http://127.0.0.1;
    #}

    # pass the PHP scripts to FastCGI server listening on 127.0.0.1:9000
    #
    #location ~ \.php$ {
    #    root           html;
    #    fastcgi_pass   127.0.0.1:9000;
    #    fastcgi_index  index.php;
    #    fastcgi_param  SCRIPT_FILENAME  /scripts$fastcgi_script_name;
    #    include        fastcgi_params;
    #}

    # deny access to .htaccess files, if Apache's document root
    # concurs with nginx's one
    #
    #location ~ /\.ht {
    #    deny  all;
    #}
}
访问crf.codes
