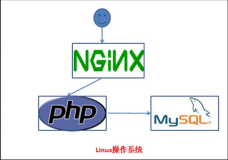
实验环境及软件版本:
CentOS版本: 6.6(2.6.32.-504.el6.x86_64)
nginx版本: nginx-1.6.2
mysql版本: Mysql-5.6.23
php版本: php-5.6.3
一、关闭防火墙:service iptables stop
chkconfig iptables off
二、关闭selinux: sed -i 's/SELINUX=enforcing/SELINUX=disabled/g' /etc/selinux/config
init 6 重启系统一定要!
三、nginx安装
1.安装准备
a.mv /etc/yum.repos.d/CentOS-Base.repo /etc/yum.repos.d/CentOS-Base.repo.backup
b.wget -O /etc/yum.repos.d/CentOS-Base.repo http://mirrors.aliyun.com/repo/Centos-6.repo
c. pcre:yum -y install pcre pcre-devel
d. openssl:yum -y install openssl openssl-devel
2.安装nginx
a.tar xf nginx-1.6.2.tar.gz
b.cd nginx-1.6.2, useradd nginx -s /sbin/nologin -M
c. ./configure --prefix=/application/nginx-1.6.2 --with-http_stub_status_module --with-http_ssl_module --user=nginx --group=nginx
d.[root@LNMP nginx-1.6.2]# echo $?
0 代表编译没有任何错误
e.make
f.make install
g.[root@LNMP nginx-1.6.2]# echo $?
0 代表编译没有任何错误
h.cd -,ln -s /application/nginx-1.6.2 /application/nginx
i.编辑nginx.conf
cd /application/nginx/conf
vi nginx.conf
修改第2行的用户名,用户组名为:nginx nginx,保存退出.
3.启动nginx
[root@LNMP tools]# /application/nginx/sbin/nginx -t
nginx: the configuration file /application/nginx-1.6.2/conf/nginx.conf syntax is ok
nginx: configuration file /application/nginx-1.6.2/conf/nginx.conf test is successful
出现以上提示,代表nginx安装配置,语法等没错!
[root@LNMP tools]# /application/nginx/sbin/nginx
[root@LNMP tools]# netstat -lntup|grep nginx
tcp 0 0 0.0.0.0:80 0.0.0.0:* LISTEN 3685/nginx
[root@LNMP tools]# lsof -i:80
COMMAND PID USER FD TYPE DEVICE SIZE/OFF NODE NAME
nginx 3685 root 6u IPv4 13603 0t0 TCP *:http (LISTEN)
nginx 3686 nginx 6u IPv4 13603 0t0 TCP *:http (LISTEN)
出现以上提示,代表nginx已成功运行!
[root@LNMP tools]# curl 192.168.0.111
curl后如果有内容,就代表nginx运行正常!
四、源码安装Mysql-5.6.23
请移步:http://linuxzkq.blog.51cto.com/9379412/1584642,这里不在描述
五、php安装
1.安装依赖:
yum install zlib libxml libjpeg freetype libpng gd curl libiconv zlib-devel libxml2-devel libjpeg-devel freetype-devel libpng-devel gd-devel curl-devel -y
#确保devel安装上X software development
2.tar zxf libiconv-1.14.tar.gz
cd libiconv-1.14
./configure --prefix=/usr/local/libiconv
make
make install
3.libmcrypt
wget http://downloads.sourceforge.net/mcrypt/libmcrypt-2.5.8.tar.gz
tar zxf libmcrypt-2.5.8.tar.gz
cd libmcrypt-2.5.8
./configure
make
make install
4. libltdl
cd libltdl/
./configure --enable-ltdl-install
make
make install
5.mhash
wget http://downloads.sourceforge.net/mhash/mhash-0.9.9.9.tar.gz
tar zxf mhash-0.9.9.9.tar.gz
cd mhash-0.9.9.9/
./configure
make
make install
rm -f /usr/lib64/libmcrypt.*
rm -f /usr/lib64/libmhash*
ln -s /usr/local/lib64/libmcrypt.la /usr/lib64/libmcrypt.la
ln -s /usr/local/lib64/libmcrypt.so /usr/lib64/libmcrypt.so
ln -s /usr/local/lib64/libmcrypt.so.4 /usr/lib64/libmcrypt.so.4
ln -s /usr/local/lib64/libmcrypt.so.4.4.8 /usr/lib64/libmcrypt.so.4.4.8
ln -s /usr/local/lib64/libmhash.a /usr/lib64/libmhash.a
ln -s /usr/local/lib64/libmhash.la /usr/lib64/libmhash.la
ln -s /usr/local/lib64/libmhash.so /usr/lib64/libmhash.so
ln -s /usr/local/lib64/libmhash.so.2 /usr/lib64/libmhash.so.2
ln -s /usr/local/lib64/libmhash.so.2.0.1 /usr/lib64/libmhash.so.2.0.1
ln -s /usr/local/bin/libmcrypt-config /usr/bin/libmcrypt-config
6.mcrypt
centos6.5/6.6 x86_64
wget http://downloads.sourceforge.net/mcrypt/mcrypt-2.6.8.tar.gz
tar zxf mcrypt-2.6.8.tar.gz
cd mcrypt-2.6.8/
./configure LD_LIBRARY_PATH=/usr/local/lib
make
make install
cd ../
7.php安装
tar xf php-5.6.3.tar.gz
cd php-5.6.3
./configure \
--prefix=/application/php-5.6.3 \
--with-mysql=/application/mysql \
--with-iconv-dir=/usr/local/libiconv \
--with-freetype-dir \
--with-jpeg-dir \
--with-png-dir \
--with-zlib \
--with-libxml-dir=/usr \
--enable-xml \
--disable-rpath \
--enable-safe-mode \
--enable-bcmath \
--enable-shmop \
--enable-sysvsem \
--enable-inline-optimization \
--with-curl \
--with-curlwrappers \
--enable-mbregex \
--enable-fpm \
--enable-mbstring \
--with-mcrypt \
--with-gd \
--enable-gd-native-ttf \
--with-openssl \
--with-mhash \
--enable-pcntl \
--enable-sockets \
--with-xmlrpc \
--enable-zip \
--enable-soap \
--enable-short-tags \
--enable-zend-multibyte \
--enable-static \
--with-xsl \
--with-fpm-user=nginx \
--with-fpm-group=nginx \
--enable-ftp
出现错误:Don't know how to define struct flock on this system, set --enable-opcache=no
这是安装php 5.5时的错误,同样适用5.6.3
解决办法如下:
编辑 /etc/ld.so.conf 加入/usr/local/lib
再执行 ldconfig即可
出现错误:提示没有安装libxslt,请安装libxslt
yum -y install libxslt*
出现警告:configure: WARNING: unrecognized options: --enable-safe-mode, --with-curlwrappers, --enable-zend-multibyte
上面的警告提示是说:上面的参数已经去除了,说明上述这些参数废弃了,php-5.6.3 已经去掉了该选项,编译时可以 #./configure --help | grep “safe-mode” 查看一下,没有信息输出,表示已经不支持!
出现错误:make: *** [sapi/cli/php] Error 1
解决方法:make ZEND_EXTRA_LIBS='-liconv'
ln -s /application/mysql/lib/libmysqlclient.so.18 /usr/lib64/
make install
ln -s /application/php-5.6.3/ /application/php
cp php.ini-production /application/php/lib/php.ini
8.整合nginx和php
cd /application/php/etc/
mv php-fpm.conf.default php-fpm.conf
编辑php-fpm.conf
cd /application/php/etc
vi php-fpm.conf
修改里面的用户名,用户组名为:nginx nginx(user=nobody group=nobody改成user=nginx group=nginx),保存退出.
重点注意:php-fpm.conf文件里面的用户名,用户组名一定要和nginx.conf文件里面的用户名,用户组名统一,否则会出错!
/application/php/sbin/php-fpm -t
/application/php/sbin/php-fpm
[root@LNMP ~]# netstat -lntup|grep php-fpm
tcp 0 0 127.0.0.1:9000 0.0.0.0:* LISTEN 14801/php-fpm ==============成功标志==================
9.加入开机自启动
cat >>/etc/rc.local<<EOF
/etc/init.d/mysqld start
/application/php/sbin/php-fpm
/application/nginx/sbin/nginx
EOF
六.定义虚拟机:
1. cd /application/nginx/conf
mkdir vhost
cd vhost
加入以下内容:
server {
listen 80;
server_name www.etiantian.org;
root /web/www;
index index.php index.html index.htm;
location ~* \.php$ {
fastcgi_index index.php;
fastcgi_pass 127.0.0.1:9000;
include fastcgi_params;
fastcgi_param SCRIPT_FILENAME $document_root$fastcgi_script_name;
fastcgi_param SCRIPT_NAME $fastcgi_script_name;
}
}
保存退出,其他两个虚拟主机定义和以上类同,不再叙述.
编辑nginx.conf:
vi nginx.conf
在http模块里面的第一个server标签前加入include vhost/*.conf开启nginx的虚拟机功能
在根目录创建虚拟机根目录:mkdir /web/{bbs,blog,www}
给nginx授权读取执行虚拟机根目录的权限:chown -R nginx:root /web
2. 测试LNMP是否成功:
cd /web/www
vi phpinfo.php
<?php
phpinfo();
?>
保存退出,给予虚拟机读取运行phpinfo.php文件的权限
chown -R nginx:root /web
在windows客户端的hosts文件里做好IP和域名的映射,访问www.etiantian.org后,如果出现PHP紫色 的配置界面,访问正常;如不正常,现给出以下排障方法 及步骤:
windows浏览器访问:
排错三步曲:
1)ping 192.168.0.111 物理网络通不通
2)telnet 192.168.0.111 80 浏览器到web服务通不通
3)服务器本地curl 192.168.0.111 web服务开没开
希望能给大家有所帮助,通过我分享的笔记,如有遗漏之处欢迎拍砖!
本文转自 linuxzkq 51CTO博客,原文链接:http://blog.51cto.com/linuxzkq/1630217