CoreData数据库虽然可以和tableview或者UITableViewController一起使用将数据显示在表格上,但是在准备数据的时候,这种方式需要用一个可变数组来装从数据库一次性取出来的所有数据,然后通过操作这个数组来显示数据再表格上,从内存的优化和性能上来说并不是很好;这里,介绍一种新的抓取数据的方式,苹果公司为了进一步优化内存,创建了一个从数据库抓取数据的控制器NSFetchedResultsController,它能从CoreData中一批一批的抓取数据并存放起来,然后通过操作它来将数据显示在表格中,极大的优化了内存;与此同时,这个控制器还提供了一个<NSFetchedResultsControllerDelegate>协议,通过该控制器的代理可以实现数据的实时动画更新(删除、插入、修改)。CoreData数据库和UITableViewController以及NSFetchedResultsController一起使用,具有很强大的功能,是一个很不错的方式,推荐掌握这门技术。以下就具体的例子来介绍:
要求:创建一个实体对象Book数据库表,多次设置它的属性,并将它显示在表格中,显示后进行的操作有:(1)仅仅进行删除对象、(2)在删除时同时又插入两条对象信息、(3)删除时修改它的属性并再从新显示该对象
前期的创建数据库表的具体步骤:
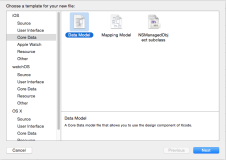
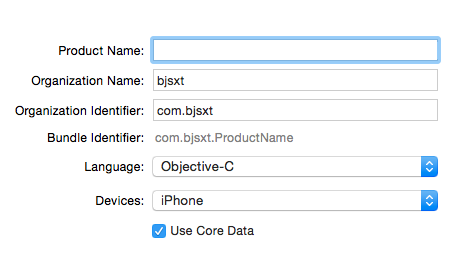
1、创建新项目时,勾选Use Core Data,生成CoreData____NSFetchResultController.xcdatamodel文件,此时AppDelegate类中自动封装了sqlite的大量方法和需要的managedObjectContext、managedObjectModel、persistentStoreCoordinator三个对象等;

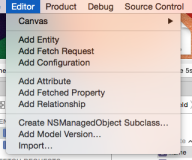
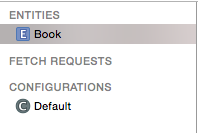
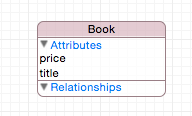
2、点击该文件,进入设置面板,点击左下角的Add Entity,创建实体对象并设置它的类名,同时在Attribute处添加该实体对象的属性;

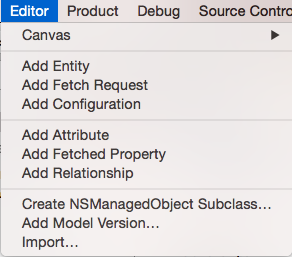
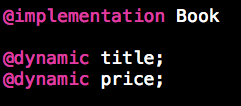
3、选中该实体对象,点击模拟器菜单栏的Editor下的create NSManagedObjectSubclass..,自动生成实体对象的类Book.h和Book.m文件,类中自动生成了实体对象的所有属性;


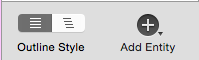
4、再一次进入设置面板,点击右下角的style,可以查看成功创建的数据库表。
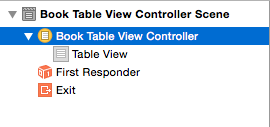
5、进入故事板Storyboard中,删除viewController控制器和它的类,重新拖入一个新的视图控制器和一个表格视图TableView;

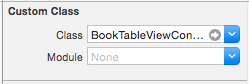
6、新建一个新的类为BookTableViewController继承自UITableViewController,并将上面新拖入的视图控制器关联这个类即可。好了,前期工作完成。

接下来即时具体的代码操作了:
在AppDelegate类的- (BOOL)application:(UIApplication *)application didFinishLaunchingWithOptions:(NSDictionary *)launchOptions方法中奖数据存储到数据库:

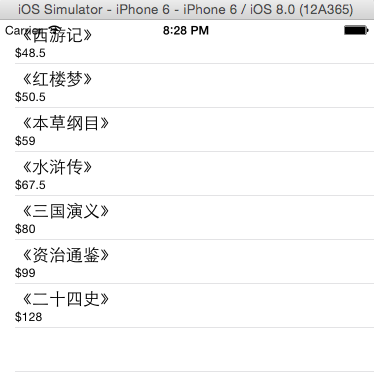
 1 - (BOOL)application:(UIApplication *)application didFinishLaunchingWithOptions:(NSDictionary *)launchOptions {
 2
 3     //读取偏好设置,使测试数据只插入一次
 4     NSUserDefaults *userDefaults = [NSUserDefaults standardUserDefaults];
 5     self.isInserted = [userDefaults boolForKey:@"isInserted"];
 6
 7     if(!self.isInserted)
 8     {
 9         [self addBookWithTitle:@"《红楼梦》" andPrice:@50.5];
10         [self addBookWithTitle:@"《西游记》" andPrice:@48.5];
11         [self addBookWithTitle:@"《水浒传》" andPrice:@67.5];
12         [self addBookWithTitle:@"《三国演义》" andPrice:@70.0];
13         [self addBookWithTitle:@"《资治通鉴》" andPrice:@79.0];
14         [self addBookWithTitle:@"《本草纲目》" andPrice:@59.0];
15         [self addBookWithTitle:@"《二十四史》" andPrice:@98.0];
16
17     }
18
19     //设置偏好设置
20     [userDefaults setBool:YES forKey:@"isInserted"];
21     [userDefaults synchronize];
22
23     return YES;
24 }
//将设置上面对象属性的方法封装起来
 1 -(void)addBookWithTitle:(NSString*)title andPrice:(NSNumber*)price
 2 {
 3     //取出实体对象
 4     Book *book = [NSEntityDescription insertNewObjectForEntityForName:NSStringFromClass([Book class]) inManagedObjectContext:self.managedObjectContext];
 5
 6     //设置属性
 7     book.title = title;
 8     book.price = price;
 9
10     //保存数据到持久层
11     [self saveContext];
12
13 }
在BookTableViewController.m文件中:
//导入头文件,实现协议和定义属性
1 #import "BookTableViewController.h"
2 #import "AppDelegate.h"
3 #import "Book.h"
4
5 @interface BookTableViewController ()<NSFetchedResultsControllerDelegate>
6 @property (strong,nonatomic)NSFetchedResultsController *fetchResultVC;
7 @property (strong,nonatomic)NSManagedObjectContext *managedObjectContext;
//NSFetchedResultsController从数据库抓取数据
 1 - (void)viewDidLoad {
 2     [super viewDidLoad];
 3
 4     //创建应用程序对象
 5     AppDelegate *appDelegate = [[UIApplication sharedApplication]delegate];
 6
 7     self.managedObjectContext = appDelegate.managedObjectContext;
 8
 9     //fetchResultVC获取CoreData中的数据
10     NSError *error = nil;
11     [self.fetchResultVC performFetch:&error];
12     if(error)
13     {
14         NSLog(@"获取数据失败");
15     }
16
17 }
//懒加载创建NSFecthedResultsController控制器对象
 1 -(NSFetchedResultsController*)fetchResultVC
 2 {
 3     if(!_fetchResultVC)
 4     {
 5         //创建请求对象
 6         NSFetchRequest *fetchRequest = [NSFetchRequest fetchRequestWithEntityName:NSStringFromClass([Book class])];
 7
 8         //批处理,每次从数据库中抓取的数量
 9         fetchRequest.fetchBatchSize = 10;
10
11         //设置排序对象
12         NSSortDescriptor *priceSort = [NSSortDescriptor sortDescriptorWithKey:@"price" ascending:YES];
13         [fetchRequest setSortDescriptors:@[priceSort]];
14
15         //创建fetchResultVC
16         _fetchResultVC = [[NSFetchedResultsController alloc]initWithFetchRequest:fetchRequest managedObjectContext:self.managedObjectContext sectionNameKeyPath:nil cacheName:@"book"];
17
18         //设置fetchResultVC的代理
19         _fetchResultVC.delegate = self;
20     }
21     return _fetchResultVC;
22 }
#pragma mark - Table view data source//显示表格内容
//组数
1 - (NSInteger)numberOfSectionsInTableView:(UITableView *)tableView
2 {
3     return self.fetchResultVC.sections.count;
4 }
//行数
1 - (NSInteger)tableView:(UITableView *)tableView numberOfRowsInSection:(NSInteger)section
2 {
3     id<NSFetchedResultsSectionInfo> sectionInfo = [self.fetchResultVC.sections objectAtIndex:section];
4
5     return  [sectionInfo numberOfObjects];
6 }
//将设置行内容的方法封装,调用它设置cell内容
1 -(void)configCell:(UITableViewCell*)cell indexPath:(NSIndexPath*)indexPath
2 {
3     Book *book = [self.fetchResultVC objectAtIndexPath:indexPath];
4     cell.textLabel.text = book.title;
5     cell.detailTextLabel.text = [NSString stringWithFormat:@"$%@",book.price];
6 }
 1 -(UITableViewCell *)tableView:(UITableView *)tableView cellForRowAtIndexPath:(NSIndexPath *)indexPath
 2 {
 3     //1.根据reuseIdentifier,先到对象池中去找重用的单元格对象
 4     static NSString *reuseIdentifier = @"bookCell";
 5     UITableViewCell *cell = [self.tableView dequeueReusableCellWithIdentifier:reuseIdentifier];
 6     //2.如果没有找到,自己创建单元格对象
 7     if(cell == nil)
 8     {
 9         cell = [[UITableViewCell alloc]initWithStyle:UITableViewCellStyleSubtitle reuseIdentifier:reuseIdentifier];
10     }
11     //3.设置单元格对象的内容
12     [self configCell:cell indexPath:indexPath];
13     return cell;
14 }
//设置单元格的编辑与否
1 - (BOOL)tableView:(UITableView *)tableView canEditRowAtIndexPath:(NSIndexPath *)indexPath
2 {
3     return YES;
4 }
//只进行删除数据
1  Book *book = [self.fetchResultVC objectAtIndexPath:indexPath];//获取实体对象
2         NSError *error = nil;
3
4         //删除数据
5         //从CoreData数据库删除数据
6         [self.managedObjectContext deleteObject:book];//从上下文是删除该实体对象
7         [self.managedObjectContext save:&error];//保存上下文
//删除数据时,同时新插入插入数据
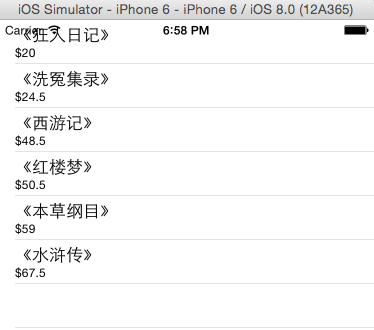
1   AppDelegate *appDelegate = [[UIApplication sharedApplication]delegate];
2         [appDelegate addBookWithTitle:@"《狂人日记》" andPrice:@20.0];
3         [appDelegate addBookWithTitle:@"《洗冤集录》" andPrice:@24.5];
//删除数据时,修改数据并显示
1 //在删除数据时,修改它的数据并更新
2         book.price = @([book.price doubleValue] + 10);
3         [self.managedObjectContext save:&error];
4         if(error)
5         {
6             NSLog(@"删除失败");
7         }
#pragma mark -<NSFetchedResultsControllerDelegate>代理方法,更新变化后的表格信息
 1 //表格开始更新
 2 -(void)controllerWillChangeContent:(NSFetchedResultsController *)controller
 3 {
 4     [self.tableView beginUpdates];
 5 }
 6 //尽心更新处理
 7 -(void)controller:(NSFetchedResultsController *)controller didChangeObject:(id)anObject atIndexPath:(NSIndexPath *)indexPath forChangeType:(NSFetchedResultsChangeType)type newIndexPath:(NSIndexPath *)newIndexPath
 8 {
 9     if(type == NSFetchedResultsChangeDelete)       //删除数据
10     {
11         [self.tableView deleteRowsAtIndexPaths:@[indexPath] withRowAnimation:UITableViewRowAnimationAutomatic];
12     }
13     else if(type == NSFetchedResultsChangeInsert) //插入数据
14     {
15         [self.tableView insertRowsAtIndexPaths:@[newIndexPath] withRowAnimation:UITableViewRowAnimationAutomatic];
16     }
17     else if(type == NSFetchedResultsChangeUpdate) //更新(修改)数据
18     {
19
20         UITableViewCell *cell = [self.tableView cellForRowAtIndexPath:indexPath];
21         [self configCell:cell indexPath:indexPath];
22
23         [self.tableView reloadRowsAtIndexPaths:@[indexPath] withRowAnimation:UITableViewRowAnimationAutomatic];
24     }
25 }
26 //表格更新结束
27 -(void)controllerDidChangeContent:(NSFetchedResultsController *)controller
28 {
29     [self.tableView endUpdates];
30 }
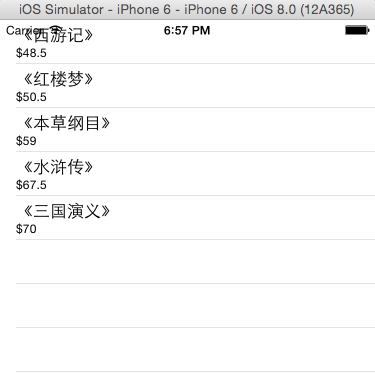
演示结果如下:
没有进行任何操作时: 选中单元格往左滑动,删除数据时

删除数据时,同时新插入两个对象 没删除一次,对象的属性价格就发生了改变