FlashCache呢是Facebook技术团队的又一力作,最初是为加速MySQL设计的。
Flashcache是在Linux层面的,所以任何受磁盘IO困绕的软件或应用都可以方便的使用。
为什么是用于加速MySqL呢,这个就涉及到数据库的专业知识了,传统磁盘的随机写随机读效率都相当低下,需要进行机械化的寻道读取,尽管很多学术论文对数据库优化中都曾经在这些方面大做文章。那么SSD的存在似乎很好的解决了随机读写的问题,因为SSD是固态存储器,即不存在机械寻道和磁化问题,而是通过电位标注01,随机读写效率都相当优秀。
但是SSD有个先天性缺陷,那就是写入数据之前必须先进行擦除,这是为什么呢,这和SSd的原理有关,电位的转化问题,就是先都空间全部置位,在进行加电变化每个cell的正确电位,那么势必会影响SSd的寿命,相当于一次写转化为了两次写。如果SSD的使用没有进过良好的优化,那么会SSD的使用寿命将会受限,因此损耗均衡算法也是SSD研究关注的重点,貌似现在应都有了成熟的解决方案。
尽管SSd设备都具备了良好的损耗均衡,但是使用者都是熟知SSD的缺陷,所以不得不小心应对,因此SSD在存储中的位置,通常作为读缓存,用于提高系统的IO性能。FlashCache便是以此为目的的使用SSd设备。
FlashCache是Linux的一个模块,可以动态地加载在Linux中。
Flashcache通过在文件系统(VFS)和设备驱动之间新增了一次缓存层,来实现对热点数据的缓存。用SSD作为缓存,通过将传统硬盘上的热门数据缓存到SSD上,然后利用SSD优秀的读性能,来加速系统。这个方法较之内存缓存,没有内存快,但是空间可以比内存大很多。(SSd的价格高于磁盘,低于内存)
图示:

/dev/sdb是SSD设备,/dev/sda是传统的磁盘设备,加载了Flashcache之后呢,会将这两个设备虚拟化为一个带有缓存的块设备/dev/mapper/cachedev
好了,废话说完,我们开始实际操作。
1、环境准备和安装所需软件包
# cat /etc/issue
CentOS release 6.4 (Final)
Kernel \r on an \m
yum -y update
rpm -ivh http://dl.fedoraproject.org/pub/epel/6/x86_64/epel-release-6-8.noarch.rpm
yum -y install dkms gcc make yum-utils kernel kernel-devel git make gcc-c++ device-mapper
yum -y install unifdef.x86_64
同时,flashcache需要整个源码树,查看一下
[root@localhost ~]# ll /usr/src/kernels/2.6.32-431.29.2.el6.x86_64/
总用量 3288
drwxr-xr-x. 25 root root    4096 10月 22 15:05 arch
drwxr-xr-x.  2 root root    4096 10月 22 15:05 block
drwxr-xr-x.  5 root root    4096 10月 22 15:05 crypto
drwxr-xr-x. 92 root root    4096 10月 22 15:05 drivers
drwxr-xr-x.  3 root root    4096 10月 22 15:05 firmware
drwxr-xr-x. 71 root root    4096 10月 22 15:05 fs
drwxr-xr-x. 21 root root    4096 10月 22 15:05 include
drwxr-xr-x.  2 root root    4096 10月 22 15:05 init
drwxr-xr-x.  2 root root    4096 10月 22 15:05 ipc
drwxr-xr-x.  8 root root    4096 10月 22 15:05 kernel
drwxr-xr-x.  7 root root    4096 10月 22 15:05 lib
-rw-r--r--.  1 root root   57000 9月  10 06:02 Makefile
-rw-r--r--.  1 root root    1152 9月  10 06:02 Makefile.common
drwxr-xr-x.  2 root root    4096 10月 22 15:05 mm
-rw-r--r--.  1 root root  697350 9月  10 06:02 Module.symvers
drwxr-xr-x. 49 root root    4096 10月 22 15:05 net
drwxr-xr-x.  6 root root    4096 10月 22 15:05 samples
drwxr-xr-x. 12 root root    4096 10月 22 15:05 scripts
drwxr-xr-x.  7 root root    4096 10月 22 15:05 security
drwxr-xr-x. 21 root root    4096 10月 22 15:05 sound
-rw-r--r--.  1 root root 2519815 9月  10 06:02 System.map
drwxr-xr-x.  7 root root    4096 10月 22 15:05 tools
drwxr-xr-x.  2 root root    4096 10月 22 15:05 usr
drwxr-xr-x.  3 root root    4096 10月 22 15:05 virt
如果没有的话下载放到指定位置
wget http://ftp.redhat.com/pub/redhat/linux/enterprise/6Server/en/os/SRPMS/kernel-2.6.32-358.el6.src.rpm
进入flashcache目录编译
# cd flashcache
# make KERNEL_TREE=/usr/src/kernels/2.6.32-431.29.2.el6.x86_64/
没有报错的话继续
make install
出现错误:
[root@localhost flashcache]# make install
make -C src KERNEL_TREE=/lib/modules/2.6.32-358.el6.x86_64/build PWD=/root/flashcache/src install
make[1]: Entering directory `/root/flashcache/src'
make -C /lib/modules/2.6.32-358.el6.x86_64/build M=/root/flashcache/src modules V=0
make: Entering an unknown directory
make: *** /lib/modules/2.6.32-358.el6.x86_64/build: 没有那个文件或目录。 停止。
make: Leaving an unknown directory
make[1]: *** [modules] 错误 2
make[1]: Leaving directory `/root/flashcache/src'
make: *** [install] 错误 2
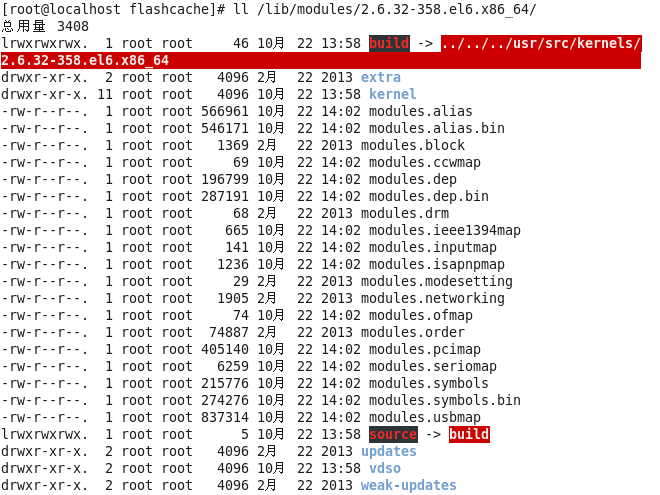
build 是一个链接文件,并且指向的地址不存在。
我发现/usr/src/kernels/目录下面是开始是没有内容的,对于centos来说,内核源码是放在 /usr/src/kernels 目录中;如果通过在线升级内核,也是放在这个目录中;如果您的系统中的 /usr/src/kernels/ 中没有内容,说明没有安装内核的源码包 kernel-devel 软件包;
通过在线安装的内核源码包 ,比如通过 apt+synaptic 或者yum 安装的,内核源码会被放到/usr/src/kernel 下的目录中,您要进入相对应的目录进行编译; 在这里我是通过yum安装的。
yum -y install kernel
yum -y install kernel-devel
因为我已经安装了源码包,所有出现:
[root@localhost ~]# yum -y install kernel-devel
Loaded plugins: fastestmirror, refresh-packagekit, security
Loading mirror speeds from cached hostfile
 * base: mirrors.hustunique.com
 * epel: mirrors.hustunique.com
 * extras: mirrors.hustunique.com
 * updates: mirrors.hustunique.com
Setting up Install Process
Package kernel-devel-2.6.32-431.29.2.el6.x86_64 already installed and latest version
Nothing to do
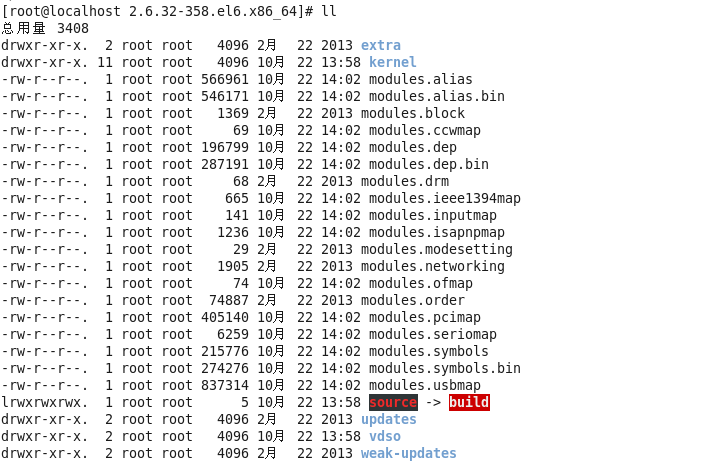
[root@localhost ~]# cd /lib/modules/2.6.32-358.el6.x86_64/
[root@localhost 2.6.32-358.el6.x86_64]# ln -s /usr/src/kernels/2.6.32-431.29.2.el6.x86_64/ build
ln: 创建符号链接 "build": 文件已存在
使build指向刚/usr/src/kernels中刚安装的源码包,出现错误
必须要先删除才能添加新的链接
# rm -rf /lib/modules/2.6.32-358.el6.x86_64/build
重新建立符号链接:
[root@localhost 2.6.32-358.el6.x86_64]# ln -s /usr/src/kernels/2.6.32-431.29.2.el6.x86_64/ /lib/modules/2.6.32-358.el6.x86_64/build
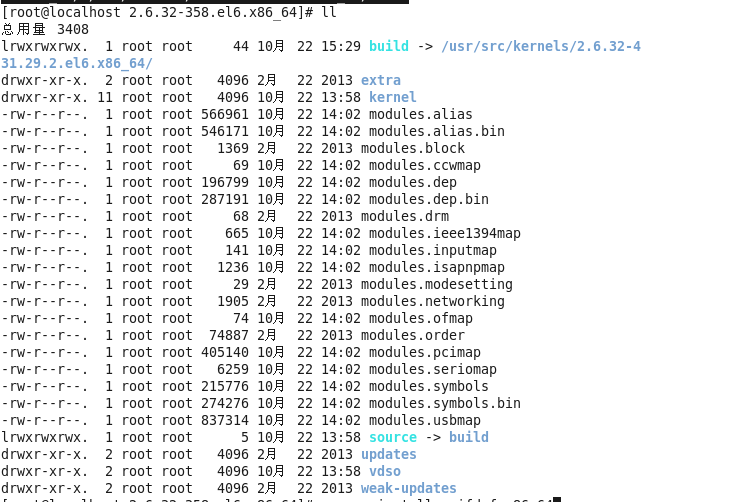
之后就可以进入flashcache目录
[root@localhost flashcache]# make install
[root@localhost flashcache]# make install
make -C src KERNEL_TREE=/lib/modules/2.6.32-358.el6.x86_64/build PWD=/root/flashcache/src install
make[1]: Entering directory `/root/lashcache/src'
make -C /lib/modules/2.6.32-358.el6.x86_64/build M=/root/flashcache/src modules V=0
make[2]: Entering directory `/usr/src/kernels/2.6.32-431.29.2.el6.x86_64'
  CC [M]  /root/flashcache/src/flashcache_conf.o
  CC [M]  /root/flashcache/src/flashcache_main.o
  CC [M]  /root/flashcache/src/flashcache_subr.o
  CC [M]  /root/flashcache/src/flashcache_ioctl.o
  CC [M]  /root/flashcache/src/flashcache_procfs.o
  CC [M]  /root/flashcache/src/flashcache_reclaim.o
  CC [M]  /root/flashcache/src/flashcache_kcopy.o
  LD [M]  /root/flashcache/src/flashcache.o
  Building modules, stage 2.
  MODPOST 1 modules
  CC      /root/flashcache/src/flashcache.mod.o
  LD [M]  /root/flashcache/src/flashcache.ko.unsigned
  NO SIGN [M] /root/flashcache/src/flashcache.ko
make[2]: Leaving directory `/usr/src/kernels/2.6.32-431.29.2.el6.x86_64'
install -o root -g root -m 0755 -d /lib/modules/2.6.32-358.el6.x86_64/extra/flashcache/
install -o root -g root -m 0755 flashcache.ko /lib/modules/2.6.32-358.el6.x86_64/extra/flashcache/
depmod -a 2.6.32-358.el6.x86_64
make -C utils all
make[2]: Entering directory `/root/flashcache/src/utils'
make[2]: Nothing to be done for `all'.
make[2]: Leaving directory `/root/flashcache/src/utils'
make -C utils install
make[2]: Entering directory `/root/flashcache/src/utils'
install -d -m 755 /sbin/
install -m 755 flashcache_create flashcache_destroy flashcache_load flashcache_setioctl get_agsize /sbin/
make[2]: Leaving directory `/root/flashcache/src/utils'
make -C ocf install
make[2]: Entering directory `/root/flashcache/src/ocf'
install -d -m 755 /usr/lib/ocf/resource.d/flashcache
install -m 755 flashcache  /usr/lib/ocf/resource.d/flashcache
make[2]: Leaving directory `/root/flashcache/src/ocf'
make[1]: Leaving directory `/rootflashcache/src'
加载模块
modprobe flashcache
内核一直显示报错:
Oct 22 15:57:49 localhost kernel: flashcache: disagrees about version of symbol dm_kcopyd_client_create
Oct 22 15:57:49 localhost kernel: flashcache: Unknown symbol dm_kcopyd_client_create
Oct 22 15:57:49 localhost kernel: flashcache: disagrees about version of symbol dm_kcopyd_copy
Oct 22 15:57:49 localhost kernel: flashcache: Unknown symbol dm_kcopyd_copy
Oct 22 15:57:49 localhost kernel: flashcache: disagrees about version of symbol dm_kcopyd_client_destroy
Oct 22 15:57:49 localhost kernel: flashcache: Unknown symbol dm_kcopyd_client_destroy
Oct 22 16:02:12 localhost kernel: flashcache: disagrees about version of symbol dm_kcopyd_client_create
Oct 22 16:02:12 localhost kernel: flashcache: Unknown symbol dm_kcopyd_client_create
Oct 22 16:02:12 localhost kernel: flashcache: disagrees about version of symbol dm_kcopyd_copy
Oct 22 16:02:12 localhost kernel: flashcache: Unknown symbol dm_kcopyd_copy
Oct 22 16:02:12 localhost kernel: flashcache: disagrees about version of symbol dm_kcopyd_client_destroy
Oct 22 16:02:12 localhost kernel: flashcache: Unknown symbol dm_kcopyd_client_destroy
最后没解决,重新编译了内核源码linux-2.6.32,重新编译flashcache源码
[root@localhost flashcache]# make KERNEL_TREE=/usr/src/linux-2.6.32/
[root@localhost flashcache]# make install
[root@localhost flashcache]# modprobe flashcache
[root@localhost flashcache]# dmesg | tail
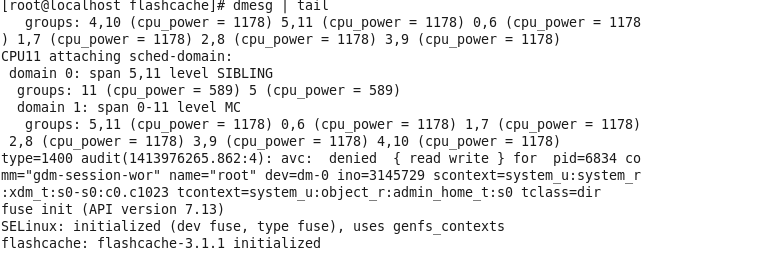
说明成功加载模块
好了,现在我们可以开始做磁盘加速了,哈哈
例如我的ssd硬盘是/dev/sdb1,要对/dev/md127加速,/dev/sdb1是SSD。
注意:flashcache挂载不能写到fstab,不然启动的时候会报错
创建raid5:
[root@localhost flashcache]# mdadm -C /dev/md127 -l5 -n3 /dev/sdc1 /dev/sdd1 /dev/sde1
flashcache配置
1.首次创建Flashcach设备
 请注意,设备上的文件将会被清空
 首先确保hdd的分区没有被挂载,如果挂载了,卸载之

[root@localhost flashcache]# flashcache_create -p back cachedev /dev/sdd1 /dev/md127
cachedev cachedev, ssd_devname /dev/sdd1, disk_devname /dev/md127 cache mode WRITE_BACK
block_size 8, md_block_size 8, cache_size 0
Flashcache metadata will use 549MB of your 15901MB main memory
使用fdisk -l
Disk /dev/mapper/cachedev: 107.4 GB, 107380998144 bytes
255 heads, 63 sectors/track, 13054 cylinders
Units = cylinders of 16065 * 512 = 8225280 bytes
Sector size (logical/physical): 512 bytes / 512 bytes
I/O size (minimum/optimal): 524288 bytes / 1048576 bytes
Disk identifier: 0x00000000
2.使用该设备
[root@localhost flashcache]# mkfs.ext2 /dev/mapper/cachedev
[root@localhost flashcache]# mount /dev/mapper/cachedev /root/test
3.如何重建flashcache
[root@localhost flashcache]# umount /root/test
[root@localhost flashcache]# dmsetup remove cachedev
[root@localhost flashcache]# flashcache_destroy /dev/sdd1
4.开机自动加载
 开机加载flashcache模块,把下述脚本放到/etc/sysconfig/modules/目录中并赋可执行权限
 flashcache.modules
 #!/bin/sh
 MODULES="flashcache"
 for i in $MODULES ; do
        modprobe $1 >/dev/null 2>&1
 done

 开机加载flashcache盘
 在rc.local里添加
 flashcache_load /dev/md127
 mount /dev/mapper/cachedev /root/test
5.查询状态
dmsetup status cachedev
dmsetup table cachedev
dmsetup info cachedev
flashcache测试
使用fio进行测试: